| << . 1 . 2 . 3 . 4 . >> |
| Author |
Message |
jsahara24
Member
|
# Posted: 19 May 2020 07:53am
Reply
I've also left out the headers/jacks until the wall was raised to keep the weight to a minimum.
|
|
gwindhurst
Member
|
# Posted: 19 May 2020 09:39am - Edited by: gwindhurst
Reply
Also, set side walls then front and back or vice versa (hopefully you take a break and see this)...
|
|
Hangblague
Member
|
# Posted: 19 May 2020 08:39pm
Reply
Day 6. First I want you for the excellent wall-raising guidance. I am following the above advice. I got lucky today and ran into my farmer neighbour. He knew what I was up to and volunteered to help with his nephew. I might have managed on my own but I probably would have seriously injured my back.
With this help, wall went up in about 5 minutes, plumb, straight & braced.
The other adventure of the day was hunting down a fellow half an hour away who mills fir telephone poles. I am thinking of getting some big beams for porch framing and a couple interior rafter ties.
Carpentry is a slow process for me, not only because I'm working alone, but also because I have to figure each step painfully and still make mistakes. Camp chores and tool care also take a lot of time.
Beautiful weather. Wind has finally died down. Frogs never stop their racket. No mosquitoes yet, but lots of ticks.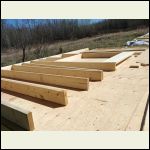
Framing
| 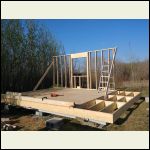
First wall up
| 
Window view
|  |
|
|
Hangblague
Member
|
# Posted: 22 May 2020 08:42pm
Reply
Days 7,8 and 9.
It's laundry day. I met my wife in town and can finally post an update. My data connection at the land is dodgy at best and I finally gave up trying. Today is the first night in a week that I get a break from the tent.
All wall framing is done at last. Much of the time was spent procuring, hauling and shaping 6x6 beams for the porch. They tie into the wall framing and so the critical front overlapping top plate needed to see some of that done.
I got help lifting the long walls but lifted the shorter ones alone. Between that and the beams, my back is less than happy.
Lots of mistakes. Lots of redoes, lots of compromises. Slowly I'm learning how to work more efficiently.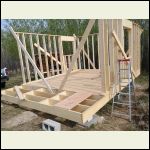
Three walls braced
| 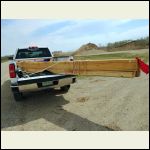
16 foot beams
| 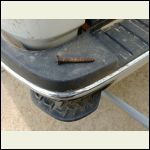
Pulled out of my truck tire
| 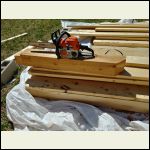
Chainsaw joinery
|
|
|
Hangblague
Member
|
# Posted: 22 May 2020 08:44pm - Edited by: Hangblague
Reply
Here is where I'm at now. All wall framing done. Sheathing is next I guess.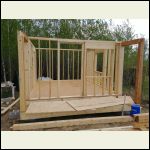
Cabin walls and some porch timbers
|  |  |  |
|
|
Aklogcabin
Member
|
# Posted: 23 May 2020 11:27am
Reply
Looks great man ! I like to put nails in to help hold things when working alone. Such as for your siding. Snap a line or identify where the bottom of your sheet siding will be tack a couple nail in just below the line and bend them up a bit so things don’t slide as easily. And yes I have stood walls alone. On our house the side walls are 40’ . I used 2 wall jacks, you can look them up. To lift them fully sheeted on the second floor. Jeesh was I nervous about that.
And yes measure a bunch of times n still a boo boo. Are you using a power chop saw to cut your lumber ? Having square cuts helps a lot . If you don’t or if others who may read this aren’t using one I would suggest that. Safer also. And for me easier.
I like to think that the extra time I spend in the planning department located on the sofa next to the lazyboy saves me time on the job site. Oh yeah keep the site policed up. Probably the biggest suggestion here. Question, now that you’re building it is it what you expected?
Good luck and thanks for the updates.
|
|
Hangblague
Member
|
# Posted: 24 May 2020 09:05pm
Reply
Thanks for those tips! All valuable. Day 10 was mostly town errands. Then back to the land. My wife came and stained the subfloor. Hopefully this will protect it a bit from the weather while my progress is slow. I got the last porch timber up, the long top one.
Today, day 11, I did some tool maintenance and, with Mrs. Hangblague's help, got a bit more than half of the wall sheathing up. We also took time to relax. She's gone back home now, so I'll carry on with Aklogcabin's advice for shifting on my own.
No pictures yet. Internet too weak.
Is it what I expected? I've been extremely fortunate with the weather. It's downright idyllic here right now. But the mistakes never let up. I think and think and figure and plan and measure and plan and then screw up. Still I'm mostly able to correct or compensate. Also, working alone, things progress way slower than I imagined.
|
|
Hangblague
Member
|
# Posted: 24 May 2020 09:08pm
Reply
Also, my wife and I moved the tiny tent onto the cabin floor for now. So last night was technically the first night in the cabin. Lots of ventilation and great views.
|
|
|
Hangblague
Member
|
# Posted: 24 May 2020 09:13pm
Reply
As for chop saw, I left it at home. It's an old Makita. Good quality, but doesn't slide or quite finish a 2x6. I've been using the little 7 1/4" circular saw. Seems adequate. Yes I use the little carpenter's triangle as a fence.
|
|
Hangblague
Member
|
# Posted: 25 May 2020 02:10pm
Reply
Day 12 Sheathing nearly done. Soon I can start thinking about roofing. Here are some more recent photos.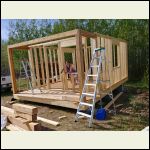
Walls up, stain protecting subfloor
| 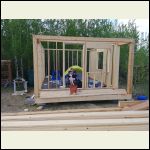
Moving in early
| 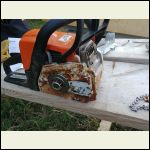
Tool maintenance
| 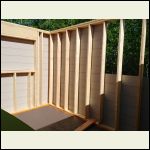
Sheathing underway
|
|
|
Hangblague
Member
|
# Posted: 26 May 2020 03:22pm
Reply
Day 13. Tired. Moving slowly. Finished sheathing at last. Cut the windows with the chainsaw. Now my attention has turned to the roof. I'm ripping the 8x8 with the chainsaw to make 2 jumbo rafter ties. Making a crude job of it I'm afraid. I'll have to say to my wife the words "rustic" "character" and "distressed look".
|
|
Hangblague
Member
|
# Posted: 27 May 2020 08:18pm
Reply
Day 14. Today I found my walls to be spread apart in the middle at the top by half an inch. I was able to solve this with a ratchet strap and a top brace. I put a few coats of polyurethane on the beams.
I made a couple rafters but don't have the confidence to test fit them by myself.
Then I put up 4 2x8 joists across the top, 16" apart. This is to support the loft and act as rafter ties. My toenailing skills are pathetic. I was going to put some plywood on top of the joists for a work surface but the joists seem WAY too unstable on end.
Bit of a dilemma. Any suggestions?
|
|
Hangblague
Member
|
# Posted: 28 May 2020 11:54am
Reply
The answer seems to be temporary blocking between joists. Now I have a stable platform.
|
|
Hangblague
Member
|
# Posted: 28 May 2020 07:27pm
Reply
Day 15.
The early morning came earlier than usual. Temperatures hovered down around 4 degrees celsius (just above freezing for Yanks). The rain on my tent woke me up extra early. So during the wee hours I studied and planned and pored over my plans.
Roofing was something I had a general idea of, but need now to have a thorough strategy. A lot of family are coming up for half a day tomorrow, so I am getting ready to mount my 12 12 rafters with help.
I then got all my loft joists up and secured a platform. Then I wrestled my 2 14' 4x8's up on top of the walls (not easy). My test rafters are cut and rafter spots all marked out on the walls. I'll make marks corresponding on the ridge board before the crew arrives. I decided against cutting the other rafters yet. I want to test one pair with help tomorrow first.
What are people's preferred method for fastening common rafters? The advice I read was an 8" spike angled down through birdsmouth.
|
|
Hangblague
Member
|
# Posted: 28 May 2020 07:30pm
Reply
Tomorrow night will be headed to town to celebrate my 50th birthday, which is on Saturday. I'll post updated photos then.
What I'd REALLY love for a present is a LITTLE more help.
|
|
Hangblague
Member
|
# Posted: 28 May 2020 09:51pm
Reply
Photo update
|
|
jsahara24
Member
|
# Posted: 29 May 2020 06:51am
Reply
Looking good! Make sure your temporary blocking doesn't interfere with the installation of the your rafters. Good luck on raising the roof today, and Happy Birthday!
|
|
Hangblague
Member
|
# Posted: 30 May 2020 01:08am
Reply
Thank you!!
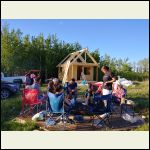
Day 16. Great to get some help, even for just an afternoon. We got most of the rafters up before a key drill bit broke. Into town for shower and laundry. Back tomorrow with my son to keep going.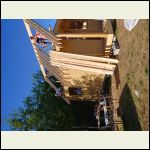
Starting rafters
| 
Supper time with family
|  |  |
|
|
Hangblague
Member
|
# Posted: 30 May 2020 08:41pm - Edited by: Hangblague
Reply
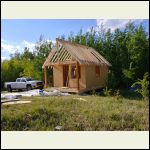
Day 17. Back to the land with my son and worked just the afternoon. 34 rafters up and 6 to go. So glad for the help!
New foreman
| 
Roof taking shape
|  |  |
|
|
Hangblague
Member
|
# Posted: 31 May 2020 08:40pm
Reply
Day 18. My son's gone home now but only after putting in another day helping. What a shot in the arm that's been! We finished installing the rafters and then added blocking between them all at the plate level to fill the gaps between wall and roof. It's all going to need some foam help later.
Next is gable end framing, one end with a window. Sheathing the ends near the peaks will be challenging unless I go and get a long extension ladder or if I think the rafters can bear the weight of me climbing up there. Heights and I are not best friends.
|
|
Hangblague
Member
|
# Posted: 1 Jun 2020 10:03pm
Reply
Day 19. Lost a lot of time with a trip for further supplies. Still, I managed to frame the back gable wall and get a good start on the front gable wall. I have a friend coming up to help for a bit tomorrow.
|
|
Hangblague
Member
|
# Posted: 3 Jun 2020 07:09pm - Edited by: Hangblague
Reply
Days 20 & 21
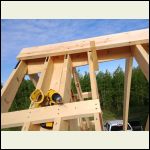
Yesterday I got working by 5 AM to get the gable framing done before my friend arrived. Together, we sheathed both gable ends and cut and installed some of the loft flooring. It was good to have someone smarter than me around. He took over the measuring and geometry from me. We also cut strips of steel lumber binding. I nailed a strip over each rafter peak. This is in lieu of gussets. I need that head room.
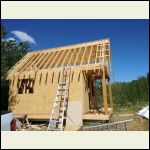
Today, I'm back on my own and have begun the process of roof decking, with 2x8's. Working alone, I'm using wooden cleats and gravity to get it done, working from the top down. I came into town and got more supplies including roof jacks. My roof is a steep 45 degrees.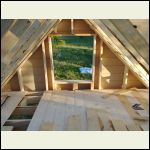
Loft window
| 
Planking begins
| 
Underside of roof
| 
Messy deck
|
|
|
Hangblague
Member
|
# Posted: 4 Jun 2020 09:57pm
Reply
Day 22. Still plodding on with the roof decking. I put in nearly 14 hours today, but still so slow alone. Each course of 2x8's is 22' made up of alternating 8' and 14' lengths.
26 courses done now and 14 more to go. I'm stapling a membrane on top as I go, and nailing some furring strips on top as well.
|
|
Hangblague
Member
|
# Posted: 7 Jun 2020 12:23am
Reply
Days 23 & 24
Yesterday was a 15 hour push interrupted by a tool malfunction I had to deal with. My cousin came in the afternoon and built a very good temporary door out of a sheet of OSB.
This morning I got working before 5 AM and got the rest of the roof decking on as well as the membrane by mid-morning. Then I boarded up the windows.
I say it's officially dried in.
Clean up and pack up took 5 hours. Then I came home. 24 days and mission accomplished.
I'll have to think about a finished roof soon, but for now I need to think about recovery.
Thanks to those following the progress. Over & out for now.
|
|
gwindhurst
Member
|
# Posted: 7 Jun 2020 09:47am
Reply
Looks fantastic! As tired and sore as you must be, I know from experience it's offset by the greater sense of accomplishment. Congratulations!
|
|
Hangblague
Member
|
# Posted: 4 Jul 2020 10:21pm - Edited by: Hangblague
Reply
Thank you! After nearly a month away, I finally was able to complete the roof. This is a big relief to get it truly rain proofed. The membrane alone wasn't enough to keep moisture out after all the staples and nails in it.
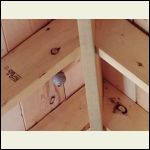
I had expert help from a friend. Along with my dad, t took us two days to get it done. The installation was complicated by the 2" styrofoam insulation we put between the roof decking and the metal sheets. As usual, lots of unexpected challenges, lots of creative solutions.
Now I can finish without worrying about the weather. A very good feeling.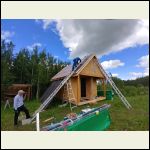
Metal roof going up
| 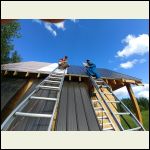
Good help makes all the difference
| 
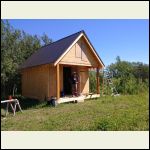
Eviction required
| 
Finally dried in
|
|
|
Brettny
Member
|
# Posted: 5 Jul 2020 06:23am
Reply
Wow you guys got alot done in the Las 20 or so days.
Even with the helper and concrete blocks I would use that ladder layer over like it is. Asking to slip out or even break the ladder.
Did you end up useing telephone poles for beams? I have some I cut to 6x6 but am having second thoughts due to there smell. I cut them 4 months ago and you dont have to be 50ft from them to smell them.
|
|
Hangblague
Member
|
# Posted: 5 Jul 2020 07:01pm
Reply
Good point about the ladders. We had to take great care. Some of the work was done with me straddling the peak.
Power poles: many are laced with creosote pretty bad. The ones I got were already milled so the rounds were gone where the higher concentrations would be. Also, the bottoms might be worse. I slathered 4 coats of polyurethane over my beams just to try to further reduce any smell. I'd say I lucked out with my specimens and my chainsaw performed fine on it. No smell that I notice.
If you get raw poles, you also have to think about embedded sand and dirt as you cut.
|
|
Hangblague
Member
|
# Posted: 9 Aug 2020 10:21am - Edited by: Hangblague
Reply
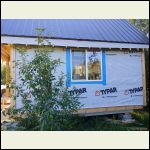
The past three weekends I've been able to carry on a bit. I've installed 1.5" type 2 styrofoam insulation panels to three sides on the outside and added the house wrap. 2x cedar boards are outside of this on the corners. 2 out of 4 windows are installed now.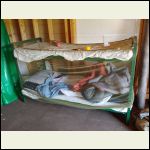
Living in comfort
| 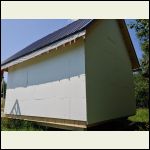
Outside insulation
| 
Interior Detail
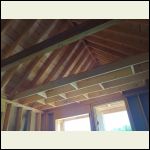
| 
2 windows in
|
|
|
Brettny
Member
|
# Posted: 11 Aug 2020 10:34am
Reply
Very nice. Is the goal to get it mostly insulated by winter? What's your plan for heat?
As for how to attach a common rafter I usualy toe nailed in the side down through the birds mouth. One on each side then one or two up through the wall top plate. This way no super long nails are needed.
I find I use my chop saw less and less. Some times it's just easier to bring the circular saw to the wood. I do find a sliding chop saw very handy for cutting vinyl siding and trim work.
|
|
| << . 1 . 2 . 3 . 4 . >> |

