| << . 1 . 2 . 3 . >> |
| Author |
Message |
Bevis
Member
|
# Posted: 26 Sep 2011 01:09pm
Reply
nice cabin. Besides the notched corners, what else / or how is it held together ?
|
|
outdoorguy
Member
|
# Posted: 27 Sep 2011 04:08pm
Reply
Bevis,
All the 2" pine "logs" are t&g and the interlocking corner notches are tight fit, supporting each other. The bottom row is fastened into the floor joists. The gable "logs" are screwed to each other at the ends. All the windows and door openings have posts that are screwed into the log rows as well as inner and outer frames fastened to the log walls. The roof boards are 1.5" thick t&g pine and are all fastened to the upper log rows, gable logs and roof beams. Loft joists are also screwed into the log walls. It does seem to be solid when it's all together...so far!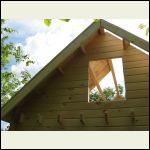
gable/roof
| 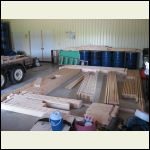
after disassembly
| 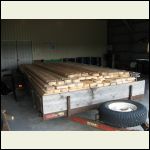
loaded up
|  |
|
|
trollbridge
Member
|
# Posted: 27 Sep 2011 04:42pm
Reply
Wow...reminds me of being a kid and playing with Lincoln Logs!! Very cool!
|
|
beachman
Member
|
# Posted: 5 Oct 2011 08:19pm
Reply
Great lake setting. Looks alot like our lake. Nice cabin - love the loft
|
|
Chickadee
|
# Posted: 12 Oct 2011 08:06pm
Reply
It's good to live small. It's all about enjoying the great outdoors and teaching your children to enjoy life with less stuff. One thing: tell your wife that white lace curtains don't belong in a rustic bunkie cabin! LOL
|
|
mojo43
Member
|
# Posted: 12 Apr 2012 08:27pm
Reply
Hi Outdoorguy, I love the place you built. It looks great! I am starting to plan my cabin and I would pretty much like to build the same thing as you. I had a couple of questions:
Do you know what the height of the cabin is?
Did you get plans for the cabin?
I was also wondering if you had any more pics of the inside?
Thanks in advance!
|
|
outdoorguy
Member
|
# Posted: 16 Apr 2012 11:56am
Reply
Thanks mojo,
The height is 13' overall ,with the walls being a tad under 8', and then with the 12:12 roof pitch adding another 5'.
I just made up my own plans after seeing cabins similarily constructed.
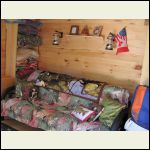
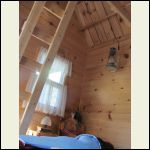
The key was to make an accurate thin metal tracing template for the corner notches and chamfered end. This way all the "log" corner notches meshed together properly. Then all you had to do was accurately cut the log to length , trace the log end template and start jig-sawing.(there was a fair bit of that!) Here are a few extra pics from various times.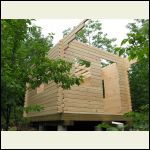
putting it together
| 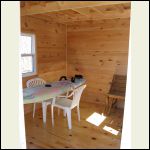
interior
| 
pull out futon
| 
interior front
|
|
|
hattie
Member
|
# Posted: 16 Apr 2012 12:51pm
Reply
Your place is looking great - BUT - Save Winnie the Pooh! Poor guy's gonna suffocate in that bag. *LOL* Keep the photos coming!!!
|
|
|
outdoorguy
Member
|
# Posted: 16 Apr 2012 01:17pm
Reply
Ha!...I was wondering who would pick up on that first! ,way to go Hattie! We usually are'nt that cruel to animals.. but we were packing up and heading home the next day..so in order to keep the ants off Pooh!!
|
|
trollbridge
Member
|
# Posted: 16 Apr 2012 02:44pm
Reply
Is there really any way to keep ants off poo(h)????
|
|
mojo43
Member
|
# Posted: 21 Apr 2012 09:55am
Reply
Thanks for the info outdoorguy. I have one more question. Are you using any type of heating at all? I am wondering if using this technique (notched 2" logs) would insulate enough to heat in the fall and maybe in a mild winter setting if using a small wood stove or something like that??
Thanks again!
|
|
outdoorguy
Member
|
# Posted: 23 Apr 2012 11:05am
Reply
We just bought a small Drolet wood stove(Nordic) and hope to install it soon. It's most likely too much stove for the cabin, but I will just have to go easy with how much wood we feed it. It was on sale at TSC for $280 so I could'nt resist. The t&g "logs" mesh together very tight with little or no air leakage. We are hoping this will extend our use of the cabin into the winter. I will post some pics when we get it set up. I'm thinking of putting the pipe straight up through the roof for better smoke draw.
|
|
mojo43
Member
|
# Posted: 23 Apr 2012 11:09am
Reply
Thanks for the info, so I assume that there is no insulation in the cabin?
|
|
outdoorguy
Member
|
# Posted: 23 Apr 2012 11:29am
Reply
Yes, thats correct. The roof boards are almost 1.5" thick so that helps as well. It was a tad cool up there late October last year and I survived with the help of two Kerosene lanterns! How ever, I am anticipating the new stove.
|
|
fish
|
# Posted: 25 Apr 2012 02:15pm
Reply
outdoorguy: Wow! Just ...WOW. I was about to write "I'm speechless", but as you'll see from the rest of this post, I'm clearly not speechless lol.
I'm sure I speak for a lot of people when I say this, but THAT CABIN is what a lot of people's cabin looks like in their mind. Kudos to you Sir.
Several questions come to mind,
1- Do you have a picture of the metal jig you used or maybe a simple drawing?
2- Drawing of how to the door/windows area are done?
3- You didn't use store bought 2 by's, did you? You used rough sawn 2" lumber? How large are the "beams" (looks like 6", but I could be wrong). Also, the wood looks in very good shape: Did you plane it yourself?
4- I'm assuming you had access to a shaper / router table for the T&G. How big and deep is the tongue and the groove: 1/2 - 3/4" wide by 1/2 - 3/4 deep"?
5- In the pic where you had everything dissassembled, I see in a bucket several silicone/glue tubes: Where did you use those exactly? Did you glue any t&g parts (near windows/doors); I seem to notice a bit of silicone coming out from under the first row of beams?
6- What's the floor? Any plywood under there?
7- How far past the front wall does the roof extends: 4'? And are those 4x4 pressure treated lumber that holds the roof?
8- What type of exterior paint did you use?
9- How much snow do you get usually in your neck of the woods? We're near Quebec City here...we had a record year a couple of years ago with 5+m of snowfall (25ft ish?). Your cabin has held up nicely vs the elements?
10 - Nevermind, found the answer in your comments...
11- What does the foundation look like: a "box" of 2x8's pressure treated 16" OC over 3 6x6 PT beams over 3 sonotubes each: Is that correct?
12- I see you made the sides start with a full beam and you started the front (and back, although I couldn't make that out on the pics) with a half-beam (or even 1/3 beam).
13- When you said the size was 10', is that the total length of the full boards (including the notches and and the extra outer length) or is that 10' interior space (wall to wall measurements)?
I also tip my virtual hat off to your wife: The interior decor is as nice as the rest of the cabin!
Fish
PS: Again,...your cabin is just awesome.
|
|
DaJTCHA
Member
|
# Posted: 26 Apr 2012 12:06am
Reply
I'll second the awesome-ness comment!
Dj
|
|
fish
|
# Posted: 26 Apr 2012 10:14am
Reply
Been thinking about your cabin all night long...
I have a couple more questions if you wouldn't mind, do you recall how many boards you had in the end and how much time did it take you to assemble all of this by yourself?
Fish
|
|
outdoorguy
Member
|
# Posted: 26 Apr 2012 11:13am
Reply
Thanks for your comments. Fish, I'll try to answer some of your questions...
It took~2 weeks to build on site (all the cutting of the log notches and chamfered ends had been done earlier at my home)
The dimensions are from outside edge of wall face to other side.
The roof overhang extends out 6', with 4x4 PT supports.
The pine t&g wood used for the walls was bought from a mill with that profile already cut (it would be the same as any thick floor boards), the tongue measures ~1/2" square.
The base is sonotubes,6x6 PT beams, 2x8 PT floor joists, PT plywood, and red pine floor boards.
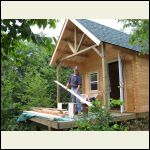
The windows and door have vertical posts on the sides screwed into the log rows plus window trim boards on inside and outside screwed to the logs. (the pics should show this)
Sikkens stain was used and the caulking was used for the interior wall to roof boards intersection area, where there was slight gaps.
Much like others here, I've had a lot of enjoyment planning out and building this little cabin! So far it has held up to the elements, now I just need to find more time to be up there!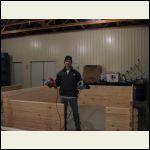
the tools!
| 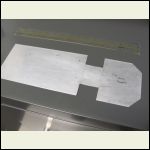
template for notches
| 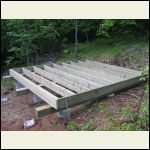
cabin base
| 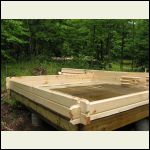
getting started
|
|
|
outdoorguy
Member
|
# Posted: 26 Apr 2012 11:17am
Reply
a few more..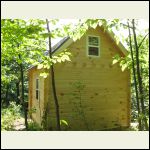
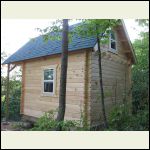
back of cabin
| 
window trim boards on
| 
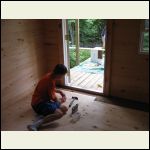
cutting the red pine flooring
| 
My son helping install!
|
|
|
fish
|
# Posted: 27 Apr 2012 01:00pm
Reply
First and foremost, thanks for your reply and for continuing to share about your build experience. It's really appreciated.
I am simply flabergasted at your cabin. I had a similar vision for our hunting camp with laminated 2 by's... I even made a spreadsheet which calculates how many 2 by's you need, depending on cabin height and what size boards you'd use and how much it would cost (2x4's are cheaper, but you need a lot more than if you'd use 2x8's for example). I gave up on the idea of laminating...but buying rough lumber might be a great idea. Especially if they can do the t&g for you. If you don't mind me asking (you could always drop me an email if you'd rather not say directly on the forum, I'll write my email in a future post if you want), how much did the lumber end up costing you? I'm guessing I could get similar prices here in Quebec. We don't even own a piece of land yet, but it would be good to have a approx idea of the price of lumber.
You didn't mention what the size of the "logs" were: 2" by ?
Were you alone for most of the building process? I see you had your son helping you with some of the work (those must be memories you'll cherrish for a LONG time, right?).
Do you feel the design of your cabin could accomodate a larger cabin size? From the people I've spoken to (all of which are not building engineers hehe), all were apprehensive of the notched design, even though, if you ask me, it's a time-proven design. Could you see making a 12x12 or 14x14 or even 16x16 cabin without compromising structural integrity?
|
|
outdoorguy
Member
|
# Posted: 27 Apr 2012 03:03pm
Reply
Fish - I guess one of the most appealing reasons I settled on this type of construction, was the ability to make the main wall structure or shell off site (at home), and then take it apart, and easily transport it on trailer up to the lot. Every piece was not too heavy for 1 person to manage. An earlier photo "log shell up" shows the work done on the first day up there. The base had been done previously. I must say I did work hard for the 2 weeks i was up there, but building something with your own hands is very rewarding!(I think I am stating the obvious for everyone on this small cabin forum!) My wife and kids helped later with the painting and flooring etc. I will cherish those times and hopefully many more to come up there with them!
The "logs" were 2"x6" milled to that profile at the mill with the t&g, V-match on the out-side, and straight on the inside, to make a flat wall inside the cabin. No problem re: the price... a tad over $3k for all the wood (walls, roof and flooring) and total for the cabin ~$6k. I have seen other similar construction up to 16'x16' (limited by the length of wood you can get from the mill). As a side note, if you wanted more insulation factor for the walls you could get thicker wood at the mill, although heavier, harder to cut out notches etc, ...and more $$.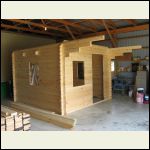
just before taking it apart
|  |  |  |
|
|
fish
|
# Posted: 27 Apr 2012 03:41pm
Reply
The fact that I could slowly built it at home would be a big selling point as well for me.
3k is a little more than what I currently have in mind for a future camp. But, since it's far away in the distance future, things will be different then...it's still nice to have a ballpark figure.
I'd be very curious to see if the same construction could be done with store bought 2x6's (1.5 x 5.5). Obviously, I'd have to machine the t&g myself (argh, on top of the notched and chamfered ends), but slowly and surely, I'd eventually finish. I'd be afraid of them twisting a lot as they dry up...so I'd only buy a few at a time, "process them" and stack them up so they can dry in place.
From what I could quickly calculate, I'd need approx 18 logs per side (there will be waste because of window and door, but didn't calculate those in), times 4. I'm adding another 18 for the loft area and 18 for the frame of the roof and 36 to cover the roof. For a total of 144 2x6.
Length of 2x6's: price for 1 2x6: total lumber price for 144
12': 4,69: 675,36$
14': 5,27: 758,88$
16': 6,59: 948,96$
Keep in mind, those are very very rough estimates hehe, doesn't include foundation or anything else. Insulation would be very minimal, but we don't really go my father-in-law's cabin in the winter right now, so I don't think we'd go in cold weather that often.
Also, another quick question: How big is the loft area's floor space? 10' wide by how deep?
|
|
fish
|
# Posted: 8 May 2012 10:20am
Reply
Well, I revised my numbers, I guess I was WAY wrong.
I figured in pretty much everything needed (including screws, nails, paint, drip edge, you name it) with 2x6 lumber for a 10x10 cabin + loft with 4ft porch on the same kind of foundation as you. I put in good (sanded) plywood as flooring.
I come up with 1054$ for all lumber and a total of 2750$ (not incl. taxes, which are considerably here in Quebec).
Just thought I'd ajust those prices I quoted earlier so to not throw off anyone. My prices include provisions for a 7' deep loft.
Fish
|
|
outdoorguy
Member
|
# Posted: 22 Oct 2012 12:34pm
Reply
Just got back from the cabin. The fall colours were great this year. We had several good weeks as a family up at the lake through out the summer.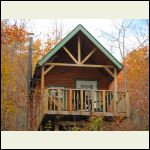
fall time at the cabin
| 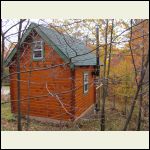
another view
| 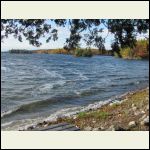
the lake
| 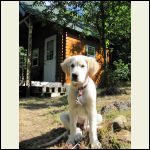
new pup Joey
|
|
|
bluffer
|
# Posted: 22 Oct 2012 11:07pm
Reply
I love your cabin and the method of building. My place is north east of Peterborough. Would you mind telling me where you got your lumber?
Thanks
|
|
jrbarnard
Member
|
# Posted: 23 Oct 2012 06:20am
Reply
picture perfect cabin....thanks for sharing and keep it up!
Also.. those pink shoes on your daughter.. I cannot get MY daughter to buy anything BUT those.. lol
R
|
|
outdoorguy
Member
|
# Posted: 23 Oct 2012 09:07am
Reply
Thanks for your comments. I got the lumber through Century Mill in Stouffville, Ontario, although any mill would probably be able to do the same profile.
jr...I agree..those seem to be the shoes of choice up there..good for around the cabin and lake..easy on easy off!
|
|
pitotshock
Member
|
# Posted: 23 Oct 2012 09:39am
Reply
This is a very interesting style of building that can be very adaptable and great for a DIY'ers. There are some companies around that build kits like these guys: www.coastcabins.net and others. (no affiliation)
If you want more insulation, just build a cabin inside a cabin! Do the same building technique but use another 2x6T&G wall 4 inches inside the outer one. Each board will need 2 notches cut into the end of it instead of one. Fill the gap with insulation
For larger square footage buildings, you can only go so long before the wall looses stability. But, if you design your cabin floor plan to be shaped like an 'L' or 'T' or cross... then the extra corners will strengthen your design.
Nice work outdoorguy
|
|
krusty
|
# Posted: 29 Nov 2012 01:27pm
Reply
Can you provide some insight as to how you milled the 'logs'? Did you buy them that way or make them by hand? Looks awesome BTW! May have missed it above but what is their height? (logs that is)
|
|
outdoorguy
Member
|
# Posted: 30 Nov 2012 09:38am
Reply
Hi Krusty,
I mentioned in some earlier posts that the "logs" are 2"x6" pine boards that have that profile milled already by the mill. All I had to do was cut them to length, then cut out the notch and chamfer the ends.
hope this helps.
|
|
| << . 1 . 2 . 3 . >> |

