| << . 1 . 2 . 3 . 4 . >> |
| Author |
Message |
trollbridge
Member
|
# Posted: 27 Aug 2011 11:29pm
Reply
Your cabin looks fabulous. I don't know how you do all that work yourself. I am just a grunt for a lot of the work we do on our place and even nailing,fetching,holding,lifting,sliding...for my husband is exhausting most the time! I really like your design and I noticed how quaint your driveway looks leading to your cabin. Beautiful!
|
|
BlaineHill
Member
|
# Posted: 17 Sep 2011 08:26am
Reply
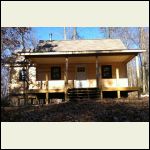
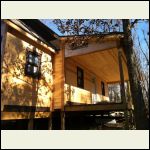
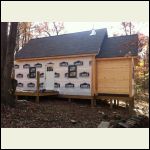
The roof has really been a drag. I think it took me 5 days just to finish the roof on the main cabin. As a base, I used 2 layers of #15 felt on the porch and one layer of #30 on the rest of it. I decided on a shingle-over style ridge vent. This cabin has definitely taken on some rain so I am glad to be getting this done.
The trash and scrap is really starting to pile up out there. I have done a couple of all day burns in the fire pit, but I am still very behind on trash management.
I left out one of the rafters on the bunk room for now so I can access the cabin end-wall from a ladder. Tomorrow, I am planning on building some of the soffit details and start on some of the siding in this area. That small exterior wall section above the bunk room is an awkward spot and I think I am better off working on it now before the rest of the roof goes on. Next weekend, I plan on doing the rest of the roofing.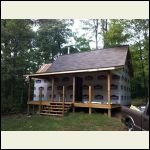
front_done.jpg
| 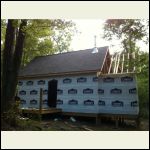
back_done.jpg
| 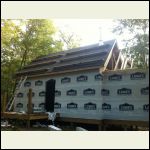
working_on_back_roof.jpg
| 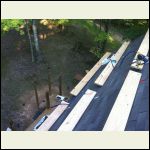
dont_look_down.jpg
|
|
|
BlaineHill
Member
|
# Posted: 11 Oct 2011 08:15pm
Reply
I recently finished the roof. While the roof jacks were in place on the bunk room roof, I figured I better take that opportunity to finish out the siding and painting up there on the main cabin end wall. It was a difficult spot to work and I am glad to be down off that roof.
I have installed 5 out of 8 windows. I undersized the windows just a bit trying to capture the look of a traditional Appalachian cabin. It was a bit of a gamble but I am happy with the result. The doors are from a product line called "Craftsman" from Jeld-Wen. I was glad to find them. Up until last week I wasn't sure what do about doors. This turned out to be the only pre-fab framing mistake. I had to widen each rough opening by 3".
I am painting the entire cabin in one color—dark brown. Thanks to toyota_mdt_tech, a member on this forum, for color inspiration. I contacted my local national forest and tracked down the paint information for the paint they use on their signs [Sherwin Williams, Walnut Brown]. It is extremely dark. I am hoping it gives the cabin the look of a building you might see while visiting a National Forest or State Park.
I started on siding last weekend. I am using 1"x6" cedar for inside and outside corners, and 1"x4" cedar around windows. The rest is filled in with P116 T&G siding. Unfortunately, I will not have time to install and paint all siding before it turns too cold to paint. I also started on the porch ceiling last weekend. I could have gone either way I guess, but I just imagined it with a flat ceiling over the porch. As I said, the whole cabin will be dark brown, but I am going to finish the porch ceiling in some sort of light stain.
I have not had much recreation out at the land this year as I have been spending all my time out there on this project. I am hoping to pull-off a camping trip with a friend very soon. I told myself the only work I will do is clean-up. The rest of the time will be spent shooting guns, riding 4-wheelers, drinking bourbon, and generally raising hell.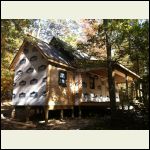
Front of cabin. Current status
| 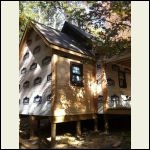
Siding detail
| 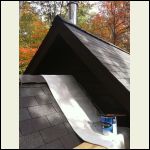
Painting at the top
| 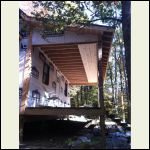
Porch ceiling detail
|
|
|
BlaineHill
Member
|
# Posted: 11 Oct 2011 08:22pm
Reply
Here are a few more photos ...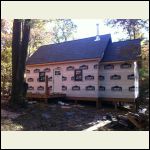
Back of cabin with windows and door installed.
| 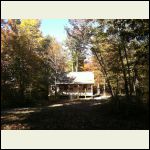
Cabin framed by Fall color.
| 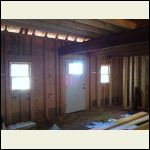
Inside. Future stairwell on right.
|  |
|
|
trollbridge
Member
|
# Posted: 11 Oct 2011 10:44pm - Edited by: trollbridge
Reply
Your cabin is coming along fabulously! I love the style of it and I like your color choice too as I thought toyota's was perfect.
I hope you are able to enjoy your land and cabin with your friend. It is hard not to get work done when you're there-I know cause we have the same problem. We took a break and enjoyed our place over Labor Day weekend w/the "no work" rule and it was so fun! We forgot how fun it was! Hope you have a great time! Enjoy.
|
|
Bevis
Member
|
# Posted: 7 Nov 2011 03:06pm
Reply
any updates on this ?
|
|
BlaineHill
Member
|
# Posted: 7 Nov 2011 09:19pm
Reply
Hello Bevis. I have slowed down a little bit – trying to make it out to work on the cabin about once a week. I have continued on with the siding and will be working on the siding for a long time I think. It is now too cold to paint, but I am pre-painting the lowest board before installation to be sure that the bottom-facing edge has good paint coverage. I am paranoid of long term rot of anything that faces the ground. The rest of it will sit as bare wood until next April when it will be warm enough again to paint.
I installed some copper kick-out flashing where the bunk room roof meets the main cabin end-wall. It was a little tricky cutting the siding around this flashing. I will try to get a picture of that spot for my next post.
I took some careful measurements between the porch posts and I think I can pre-fab some railing panels at home that will install quickly on-site. I have not built any soffit vents yet, but I think I have a way forward on that. Also, the treated lumber used for the foundation has dried so I need to crawl under there with a wrench and tighten all those carriage bolts again.
If you see the picture of the back of the cabin below, there is not a window in the back of the bunk room as I will be building in triple bunks along this back wall. The interior wall is 8'3", then the ceiling follows the 45-degree roof pitch which will provide the space needed for the top bunk. I have been giving a lot of thought as to how I want to design the bunks and ladder.
The winters in southern Ohio are mild and I think that, with the exception of January, I should be able to find random days warm enough for cabin building throughout the winter.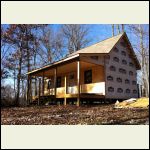
Still have a loft window and a kitchen window to install in the end wall
| 
Front of cabin
| 
Siding and porch ceiling. Bottom boards pre-painted.
| 
Back of cabin
|
|
|
jrbarnard
Member
|
# Posted: 8 Nov 2011 06:57am
Reply
Wow.. this is what I want in Texas.. but I cannot dig holes to make a foundation like that.. lol.
Mine will be started in April (1st week) because I have to wait till deer season is over to get the guys together to help build it. We are going to take 8 days and 8 guys and see if we can build this thing. I expect we will all look like keystone cops compared to this beautiful place :p
Keep the pics coming.
I saw you did the foundation with a drawing, what drawing did you use for the rest? Did you design it all yourself?
Beautiful job!
Russ
|
|
|
BlaineHill
Member
|
# Posted: 11 Nov 2011 08:58am
Reply
Russ,
Thanks for the kind words. I think you will be able to get a lot done in 8 days with 8 guys. I have done everything myself and I think I am in about 65 days so far. I hope to have it pretty much done, inside and out, by next summer.
I designed it myself. Looking back, I guess the only things I really put to paper were the foundation diagram, the "cabin plan drawing" also posted here on 3-20-2011, and the rafter designs. I will post the rafter designs here for completeness, but I doubt they will be much use to anyone.
The cabin plan drawing was used as reference when building the wall sections. If you look close, you can se section numbers on the plan. The only thing really not shown is window height within the walls.
The rafters were designed by knowing a number of measurement constraints – cabin depth, double ridge board thickness, exterior sheathing thickness, desired rafter tail length (12"), rafter tail thickness (3.5" in case I needed filler blocks anywhere I could use dimensional lumber), and roof pitch (45 degrees). Then I just applied a bunch of trigonometry. The decimals were carried through, but when I cut the wood I rounded to the nearest 1/8". I was not confident enough in the math to pre-cut all the rafters, but in the end they fit like a glove.
Best of luck on your build and be sure to post lots of pictures.
|
|
BlaineHill
Member
|
# Posted: 20 Nov 2011 09:52am
Reply
During the last couple of weekends I was able to install the loft window, do some more siding on the back and start on the ceiling in the bunk room.
The rough framing for the loft window was not done as part of the pre-fab process because this is where the 2 pieces for the loft end-wall come together. When I built those panels, I placed the first single stud in each panel so that together they would be integrated into the rough opening (Note "Loft end" posted 31 Jul 2011). Header was installed later.
I am posting a detailed photo of the kick-out flashing. This is where the bunk room roof terminates into the main cabin end wall. Kind of a tricky spot. I had to do some research on this and had a hard time finding solid information. I think I got it right, but no guarantees. Without this, rain water has the potential of running down the roof/step flashing and working its way behind the siding. I pre-painted the ends of the siding that are exposed and face the shingles before installation. I will paint the rest next spring.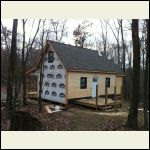
Back of cabin.
| 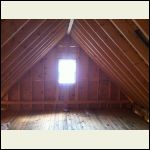
New loft window added some light up there
| 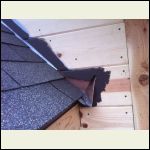
Kick-out flashing detail
| 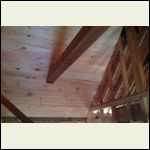
started bunk room ceiling
|
|
|
BlaineHill
Member
|
# Posted: 26 Dec 2011 07:42pm
Reply
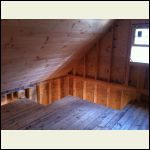
I recently finished the ceiling, some of the porch railings, and cut the opening for the stairwell.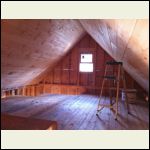
loft.jpg
| 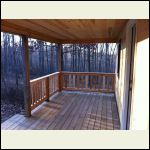
porch.jpg
| 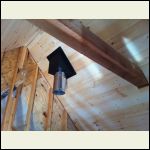
stove.jpg
| 
stair.jpg
|
|
|
trollbridge
Member
|
# Posted: 26 Dec 2011 07:45pm
Reply
Wow, you have gotten a ton of work done! I always enjoy your updates. That porch is incredible...bet you will be spending many evenings out there! Thanks for updating.
|
|
Erins#1Mom
|
# Posted: 26 Dec 2011 08:52pm
Reply
BlaineHill,
I am very impressed and can only hope my build will turn out half as nice.
|
|
BlaineHill
Member
|
# Posted: 27 Dec 2011 08:51am
Reply
Thanks for the encouragement trollbridge and Erins#1Mom. Sometimes I wish I had decided on a 14x20 -- I would be done by now and spending half as much. I will get it done eventually.
|
|
turkeyhunter
Member
|
# Posted: 27 Dec 2011 09:07am
Reply
great progress--beautiful cabin
|
|
BlaineHill
Member
|
# Posted: 28 Jan 2012 07:21pm
Reply
Winter hasn't yet come to Southern Ohio. I think the snow shown in the exterior picture might be the only snow we have received this winter season. During January, I was able to get out to the cabin about once a week to work on the interior finish.
Shortly after I finished installing the T&G on the ceiling, I removed the temporary platforms that were built last summer while framing the cabin. I built the framing for the hearth and heat shield. I am cutting the recommended clearance a little close at the back of the stove, so I built the back shield out of non-combustibles (heavy gauge metal studs and cement board). I am also passively venting the entire assembly. Cold air inlets are at the front of the hearth. The warm air outlets are near the mantle, but vented out the back into the bunk room. I was planning to install the StoneCraft stone veneer directly over the cement board, but after calling tech support, that is not recommended. So, I will be doing tar paper, metal lath and scratch-coat to prepare that surface.
I got an insurance quote for the cabin. I had fun explaining to the agent all the reasons why I thought this cabin is un-insurable: 1) Built without permits or inspections of any kind 2) only source of heat is wood heat 3) wood stove not installed by a professional 4) no fire hydrants or fire station, etc, etc. In the end they wanted to sell me a lot of insurance, but I think I have decided on a minimal policy to cover wind or fire damage in the amount of the cost of materials (20k USD). Monthly premiums are $31.66 USD
I found a great deal on a wood stove. It was on clearance so I went ahead and got it. I now have it sitting in my garage. I also found a great deal on some hardwood flooring. It is 4" wide, hand-sculpted hickory in a dark stain. I think it will look nice with the natural pine walls. I went ahead and bought 480 sqft, and now have the boxes stacked in my house. I probably won't install the floor until next summer.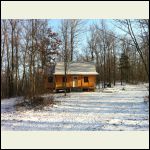
Winter morning
| 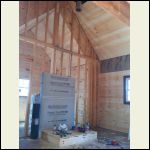
View from front door
| 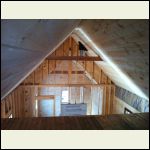
View from back of loft
| 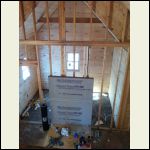
View from edge of loft
|
|
|
turkeyhunter
Member
|
# Posted: 28 Jan 2012 07:58pm
Reply
looks great----got to have insurance for sure----i got mine when i got it framed up----make you rest better at night!!!!!
got any pic's of the wood stove????
your loft pic looks a a lot like mine!!!!!
lots of work---fine job Sir!!!!
|
|
BlaineHill
Member
|
# Posted: 29 Jan 2012 08:00am
Reply
turkeyhunter,
I have been enjoying following your build on this site. It looks like you and I have been working on our cabins for almost a year now.
Below is a screen capture from the TSC website. I could have posted a link, but these stoves are on clearance for $299USD and when they are gone I am sure the link will break.
The stove I bought from Tractor Supply Co.
|  |  |  |
|
|
neb
Member
|
# Posted: 29 Jan 2012 08:05am
Reply
Looks very nice and a lot of hard work.
|
|
trollbridge
Member
|
# Posted: 15 Mar 2012 01:11pm
Reply
Wondering if you got all your stone work completed and how it turned out.....hopefully you are pleased with the end result! Anticipating seeing the pictures when you get a chance.
|
|
BlaineHill
Member
|
# Posted: 15 Mar 2012 09:43pm
Reply
Hi trollbridge. Here are a few pictures of my recent work out at Blaine Hill. I have not been able to get out there as often as I would have liked.
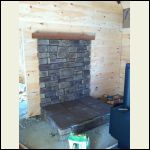
I finished the stone installation on the hearth, but I have not yet finished the grout. I think I might have spent too much time on stone lay-out and pattern planning. In the end I am sure there are a million different layouts that would have worked just fine.
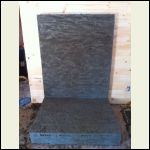
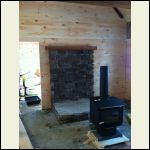
This project required 3 boxes of "flats" and 2 boxes of "corners" along with 6 hearth stones. This installation is obviously bigger than it needs to be, but I really wanted the hearth to be the centerpiece of the cabin. The mantel is a chunk of 4"x8" rough sawn cedar and sits about 6 ½ feet off the floor. It matches the other beams in the cabin and I think it looks pretty cool. The most challenging part has been getting the grout to look right and I still need to spend some real time on that.
I was amazed at how well the mortar held the stone to the vertical surface. Press hard for 10 seconds and slowly let go and the stone veneer just stuck there. There were a couple of stones that fell shortly after I let go. These failed because I buttered the backs too thick and the mortar fractured through the center, but never failed at the contact surfaces.
The amount of 1x8 T&G required to cover this project inside and out has been absolutely staggering. I think I have covered about 75% of the interior so far and I am starting to see the light at the end of the tunnel. I am using a dark stained 1x4 cedar to trim all inside corners, window and door surrounds, and eventually baseboards. It's a look that sets-off the geometry of the cabin and kind of gives it a toy-like appearance. Here are a few pictures of the stone installation process.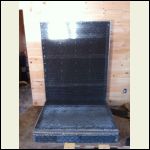
Tar paper and lath
| 
Scratch coat
| 
Stone Installation
| 
Installation of hearth stones
|
|
|
BlaineHill
Member
|
# Posted: 15 Mar 2012 09:45pm
Reply
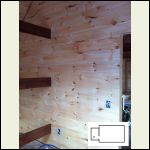
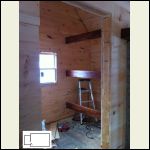
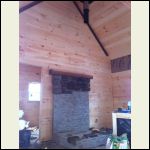
Here are a couple of more pictures. I pre-stained and polyurethaned some 2x8's prior to installation as triple bunk bed fronts.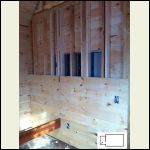
Bunk room 1
| 
Bunk room 2
| 
Bunk room 3
| 
Just starting the stone work
|
|
|
trollbridge
Member
|
# Posted: 15 Mar 2012 11:06pm - Edited by: trollbridge
Reply
Wow...Super wow....seriously.....you have done so much work!!! Just look back at your pictures from the end of January-it is amazing how far you have come! Are you sure you are still doing all the work yourself????
Your stone work looks awesome and you are right...it will definitely be your focal point! I love the stone you chose and the placement of them is dead on-especially those 2 large ones in the middle and the small tan colored one standing up vertically-yes! You have got to be pleased with it! Are you doing the grout with basically a pastry bag?? It looks very neat and tidy-you sure you're not a stone mason by trade? Well if you weren't before you could be now huh?!? Amazing job!
Your walls and ceiling are beautiful too. I still can't believe how far you have gotten. Do you work on the cabin nearly every weekend? I wish we could get to ours more frequently...seeing yours makes me want to kick it up a notch!!!! I'm reasonably certain that we will also be doing our ceiling in t&g pine. Tell me honestly...how bad was it cause we used that in our family room at home on a flat ceiling and just about killed each other! Course we were 20some years younger then and WAY less experienced. The thing I remember about it is getting one side in the groove and just about the time the opposite end would go in the original end would pop out!!!!!! Was this a problem for you? I like your dark stained cedar for trim too. I agree it does set the wood off nicely-it also happens to be what we are doing too! Good taste I guess! LOL!
Wow...can you tell how impressed I am? I have always really liked your cabin and seeing the inside come along is so inspiring! I can't wait to watch what you do with the rest of it. I hope you are bursting at the seams with pride because you should be! Congratulations and thank you so much for your advice and sharing your pictures.
|
|
BlaineHill
Member
|
# Posted: 17 Mar 2012 08:17am
Reply
Thanks for all your nice comments about my project. Yes, I am still working entirely alone on it. I think I average about 1 day a week out there. I have had offers of help from friends, but I would feel responsible for their safety in an unsafe environment, there is no bathroom facility, and just between you and me, quality control might break down. I am in about 85 or 90 individual days of work so far and I am estimating another 30 or 35 days might wrap it up. I am thinking about taking another week off work this summer to spend time on the cabin.
I am using a grout bag for the grout. My big box store sells 2 different types – one is displayed with the tile tools and the other is displayed with the concrete tools. I bought the one from the concrete section but they don't look much different. I had to cut the tip bigger and mix the mortar a little wet to get it to flow right.
I have found the 1x8 T&G to be pretty easy to work with. I would not attempt even the smallest project with this stuff without air tools. I am using a narrow crown stapler for the inside walls. Stapler plus face-screws for the exterior. I have not worked with any pieces over 12 feet, but I think that would become a challenge for one person. I try to select only the straightest boards at the store to avoid the rocking you described. If I overbuy at the store and the boards sit in the cabin for a few weeks they can take on a life of there own and I have been known to set those aside for cutting and use on smaller wall sections and soffits. BTW, I knew I would be buying a lot of this material so I searched high and low for the best price. I don't know how they do it, but in my experience Menards has been far and away the cheapest source of this product.
|
|
trollbridge
Member
|
# Posted: 17 Mar 2012 10:21am - Edited by: trollbridge
Reply
Quoting: BlaineHill I don't know how they do it, but in my experience Menards has been far and away the cheapest source of this product.
GO MENARDS!!!!!!!!! They rock don't they?????? Practically our whole cabin has come from Menards and their weekly ad is like the Bible to me!!!!! We have bought everything on sale========only I'm angry with myself cause I realized on the 15th that my 11% rebate needed to be postmarked by the 14th!!! ARGH!!! Menards headquarters and distribution centers are 25 minutes from our home so we can always get what we need when we need it! I am so impressed with that place!
I know what you mean about quality control and also that way you don't have people saying "You know what you should do?" and giving their opinions. I would always notice Mr. Troll getting an uneasy look on his face when I would be working on something. I had to get good at concealing my "Oops" and my "shoot"s and my "dang it"s. I still have trouble hiding the obvious noise difference the hammer makes when I am trying to fix a nail that decided to not cooperate and "bend over", otherwise he has become much more relaxed or maybe I have just got better! Hee hee!
Well like I said before- you have a lot to be proud of and I will continue to admire your work!
|
|
BlaineHill
Member
|
# Posted: 23 Mar 2012 11:01pm
Reply
Due to a blunder in soffit design combined with the fact I am using T&G siding, I have to side the gable ends from the top down. It's really not a major problem, but the thickness of the bottom board turns out to be an unknown.
|
|
trollbridge
Member
|
# Posted: 24 Mar 2012 10:26am
Reply
Looks so nice BlaineHill!!!
I'll bet at the end of the day you are tired of going up and down that ladder. Your place just keeps looking better and better!!! Amazing!
|
|
BlaineHill
Member
|
# Posted: 8 Apr 2012 08:34am
Reply
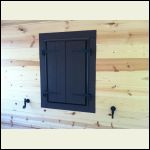
I have always liked the look of operational shutters and I have been looking into the possibility of adding them to my own cabin. I went to houseofantiquehardware.com and ordered just enough shutter hardware to complete one set of shutters. I built the shutters out of regular pine lumber. Last time I was out at the cabin I installed this prototype set.
When I am finished painting this cabin a flat, dark brown, it will lose its good looks and largely disappear into the natural beauty that surrounds it. I think having the shutters will add some visual interest without adding any color. Also, when closed they lock from the inside with the cast iron slide lock. I will like having the option of closing all the shutters if I plan on being away from the cabin for months at a time.
I think I will move forward on the shutters. They are something I can prefab at home and install onsite in just minutes.
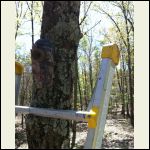
Also, last time I was out I put a PlotWatcher Pro time lapse camera about 15 feet up a tree. I pointed it at the cabin just to see if there is any activity out there while I am away. I put a 32 Gb SDHC card in it and set it to take a picture every 2 seconds during daylight hours. I believe it has enough battery life and storage capacity to easily capture time lapse video for the entire week. I have not had any problems with trespassers. I am just curious. I have included a picture of it here because I was amazed how well the camouflage pattern and shape of the camera blended in with the tree. It is very difficult to see from the ground.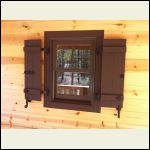
Stutters open
| 
Shutters closed and locked
| 
PlotWatcher Pro
|  |
|
|
trollbridge
Member
|
# Posted: 8 Apr 2012 07:30pm
Reply
BlaineHill,
I love the looks of the shutters and will have to check out the website. Thank you for sharing that. I too like the idea of being able to close off the windows while being gone for extended periods of time.
So has your wife been to BlaineHill yet? I can't imagine she wouldn't enjoy it!
When your cabin is all painted it is going to remind me of the old logging building at the state park by our cabin. I will post pictures for you.
|
|
trollbridge
Member
|
# Posted: 8 Apr 2012 07:58pm
Reply
I guess there is more stone than what I remembered but see the shutters? Cool old building in a beautiful park setting overlooking a private northern lake.
|
|
| << . 1 . 2 . 3 . 4 . >> |

