| . 1 . 2 . >> |
| Author |
Message |
fiftyfifty
Member
|
# Posted: 23 Jun 2018 09:42am - Edited by: fiftyfifty
Reply
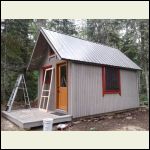
This is my new baby. Almost finished. Isn't it pretty?
Thanks to Owen Chrstensen for building it and especially for graciously putting up with all my picky detail requests. You do beautiful work! Thanks also to the Small Cabin Forum; it's through this site that I found Owen, and was able to convince (trick?) him to build it for me, even though officially he has retired from cabin building to concentrate on his beautiful saunas.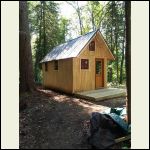
Resized_20180621_160.jpeg
|  |  |  |
|
|
jaransont3
Member
|
# Posted: 23 Jun 2018 11:09am
Reply
Very nice. Do you have any interior pictures?
Where are you located? I presume MN if Owen built it for you. Our cabin is up on the Iron Range, just north of Hibbing.
|
|
jaransont3
Member
|
# Posted: 23 Jun 2018 11:12am
Reply
One other question (for now  ). What do you do for a foundation? ). What do you do for a foundation?
I ask because we are considering a similar size for a workshop/guest cabin at our place. Hoping to get the shell up on our trip to the cabin over the 4th of July week.
|
|
fiftyfifty
Member
|
# Posted: 23 Jun 2018 11:31am
Reply
Yep, North Shore. No interior shots yet. I just had him build the shell. We will finish the inside ourselves. This one is build on 2 treated skids.
|
|
naturelover66
Member
|
# Posted: 23 Jun 2018 11:35am
Reply
Love it!
|
|
fiftyfifty
Member
|
# Posted: 23 Jun 2018 11:38am - Edited by: fiftyfifty
Reply
Here's the main cabin he built us awhile back. The porch is screened in now. Nothing like sitting there bug-free looking at the sunset across the lake. We got pretty lucky.
|
|
KabinKat
Member
|
# Posted: 23 Jun 2018 06:25pm
Reply
Wow, very very nice!
|
|
gsreimers
Member
|
# Posted: 23 Jun 2018 11:28pm
Reply
Yeah, that Owen is a pretty good guy, he built mine also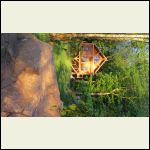
cabin_photo_from_Chr.jpeg
|  |  |  |
|
|
|
gsreimers
Member
|
# Posted: 23 Jun 2018 11:29pm
Reply
and if one of you tech savy guys can fix that for me, I would appreciate it.
|
|
Gary O
Member
|
# Posted: 24 Jun 2018 01:14am
Reply
Quoting: gsreimers Yeah, that Owen is a pretty good guy, he built mine also.

|
|
fiftyfifty
Member
|
# Posted: 19 Aug 2018 06:08pm - Edited by: fiftyfifty
Reply
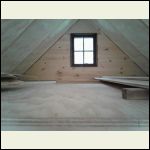
Got some work done on the interior, putting up 8 inch pine T&G. The front right corner will have a cubic mini grizzly wood stove.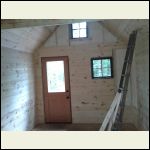
frontcorner.jpg
| 
loft.jpg
| 
outsidecabin2.jpg
|  |
|
|
fiftyfifty
Member
|
# Posted: 3 Sep 2018 01:34pm
Reply
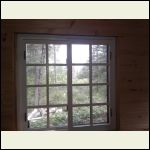
More progress. Stained the T&G cathedral ceiling a light blue. Doing the gable end T&G with a sawtooth detail. Also view out the window, a lot of brush clearing work to do.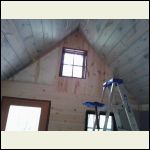
blueceling.jpg
| 
outwindow.jpg
|  |  |
|
|
fiftyfifty
Member
|
# Posted: 15 Sep 2018 11:31am
Reply
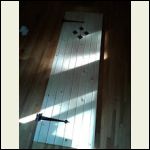
Bathroom door ready to be installed: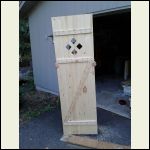
door_back.jpg
| 
doorfront.jpg
|  |  |
|
|
fiftyfifty
Member
|
# Posted: 22 Oct 2018 07:52pm - Edited by: fiftyfifty
Reply
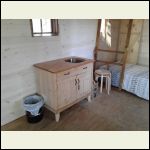
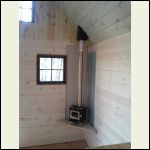
Made some more progress: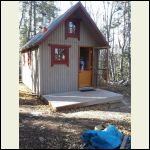
dutch_door.jpg
| 
sink_unit.jpg
| 
cubic_mini_wood_stov.jpg
|  |
|
|
meloj
Member
|
# Posted: 23 Oct 2018 04:27pm
Reply
Quoting: fiftyfifty Made some more progress:
You might not have used it but do you know how well the cubic stove works? Enough to take the bite out of a cold night?
My brother in law has a bunk close to mine and he has a smaller stove but bigger than that one. We have used it in -25C weather and its like a summer night up in the loft. Till about 5 or 6 am when it starts to get cold and someone has to venture down to get the fire going.
I would assume for a fall/spring something like that might be okay. You probably have to re-load in the night if you want to keep the place warm
|
|
fiftyfifty
Member
|
# Posted: 23 Oct 2018 05:38pm
Reply
I did use it a few times, and it heated up the place fast, was easy to use, drew well etc. However my Bunkie is only 10x16, and it is fairly well insulated (2x4 walls and roof, but spray foam insulation, and the floor is insulated too). Also it was not really cold (only down to about 25 deg F).
If you want performance info for the cubic mini in a much colder situation, check out the thread by Whiskey Jack called "New Member from NW Ontario". He is using it in really cold situations, but does reload it in the middle of the night.
|
|
rockies
Member
|
# Posted: 23 Oct 2018 08:13pm - Edited by: rockies
Reply
I am curious about your wall protection behind the wood stove. Building codes require that the protection (usually a metal sheet) extend a certain distance past the stove along the wall and also be mounted on 1"non heat radiating spacers (to keep the metal panel off the wall and allow air to go behind it). Your panels seem to be attached right to the wall.
|
|
fiftyfifty
Member
|
# Posted: 23 Oct 2018 09:10pm - Edited by: fiftyfifty
Reply
Yes, it's totally not to code yet, but we were eager to fire it up anyway, so we jumped the gun. The cement board is adhered directly to the studs because I wanted a solid base to mount some tiles, hand-made by myself and my son (you can see I painted part of it a blue color to get a sense of what it will look like when the blue-glazed tiles are up.) But in addition I plan a smaller metal heat shield that will have the air gap. The cement wall was definitely warm directly behind the stove after running the stove hot for a couple of hours, and I'm not interested in taking any chances.
|
|
offgrididaho
Member
|
# Posted: 24 Oct 2018 10:51am
Reply
Not to hijack thread (nice cabin!), what do people generally use that qualifies as "non heat radiating spacers" when mounting heat shield?
-- Bass
|
|
rockies
Member
|
# Posted: 24 Oct 2018 09:30pm
Reply
Usually they are made from ceramic but there are kits available too.
https://www.amazon.com/HomeSaver-Shield-Spacers-pack-Plastic-Anchors/dp/B001D1FXMU
https://www.homehardware.ca/en/stove-board-wall-spacer-kit/p/5540612
|
|
offgrididaho
Member
|
# Posted: 25 Oct 2018 09:00am
Reply
Thanks rockies. -- Bass
|
|
Janemarie
Member
|
# Posted: 21 Nov 2018 07:36pm
Reply
Just so amazing to see such an immaculate piece of artisanal work. That must give you a lot of joy.
|
|
fiftyfifty
Member
|
# Posted: 21 Nov 2018 08:52pm
Reply
Thank you, it has been a joy. Working with Owen, the guy who built the shell, was great. He puts a a lot of care into what he builds. And finishing out the inside has been a great hobby. I spent about a year collecting various supplies such as windows, doors, furniture etc. on Craigslist. My father and I are doing the finish work together, which is good because he keeps me from being a total hack. He is more meticulous than I am (and perhaps also more invested, as this tiny cabin will be where he and my mother stay.) The part I am really looking forward to is when we construct a built-in Scandinavian style "cupboard bed."
|
|
fiftyfifty
Member
|
# Posted: 2 Feb 2019 08:54am
Reply
After a snow:
|
|
gsreimers
Member
|
# Posted: 2 Feb 2019 10:31am
Reply
You're taking advantage of the break in the cold weather. A lot more fun in Northern Minnesota at 15 degrees above as opposed to 40 below.
|
|
Aklogcabin
Member
|
# Posted: 2 Feb 2019 12:46pm
Reply
That is a very nice looking little cabin. I have never seen a wood stove mounted up like that. And I have seen a lot of wood stoves. I kind of get a kick out of folks that jump right into asking if you have everything built the way the government tells you you have to. Cabins tend to be a bit different . Just my opinion. Especially if it is a remote cabin. Sometimes good old common sense has to be used. I have seen wood stoves built from just about everything. Or so I think until I walk into another cabin.
In my experience, burning wood for over pretty much 40 years , the most dangerous part of a woodstove is under it . Although I did almost burn down my work shed one winter when I put a grease gun above a woodstove in a basket to warm it up so it would flow better. Boy that was a bone head move. Sure learned that nothing, ever, ever, gets warmed up above the stove !!!!! Good thing there was 2 feet of snow on the metal roof. Point being not how stupid I was but that there are not rules for everything, although there are folks that think there should be. Most things are common sense if you think it through. Radiant heat is different than convection heat. For the folks that like physics. I do. Not to get off point.
Try to dream of about what you really want. Then try to make that work first. This is your dream. If you get stumped, and you will, start asking around. That’s one of the best things about building a cabin. And this forum. I know that in my home and cabin and now in my garage my woodstoves are solid, have no combustibles under it or that if a piece of fire wood falls out it cannot light. I think most set ups I see need a larger area in front that is non combustible. Especially if they load their wood so that it goes in length wise and can roll out instead of having the butt end of the log facing out. Most stoves the firebox is longer than deep. Don’t let ash build up, especially if the firebox is shallow. The first thing i consider is the depth of the firebox. And a window because it also serves as a night light. So I keep it clean by burning dry wood. I also make sure my stove pipe is solid. I have only stainless steel pipe in my dwellings including double wall pipe. Steel pipe is ok for the garage and is replaced regularly. If you see rust on your steel pipe and it is not just surface rust. Replace it as soon as you can. Don’t think a lot of that is in a book.
At our cabin I have to have a stash of outdoor gear, I have several sets , fire starter , tarps, rope, knifes, ax , survival saw, tent sleeping bags and such so if our cabin catches fire and burns we have shelter and heat. And the ability to survive comfortably. These are stored in steel drums with removable band strap latches. Probably good for lots of cabin storage stuff. Hint there. Keeps dry and bear proof. Mini connexes.
Any how sorry for jacking your thread. But when the discussion turned to woodstoves and safety I kind of lost it a bit. The fellow who built your cabin built you a good foundation to start from. Enjoy your great looking cabin !
|
|
fiftyfifty
Member
|
# Posted: 20 Jun 2019 07:09pm - Edited by: fiftyfifty
Reply
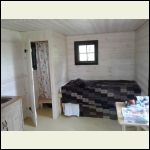
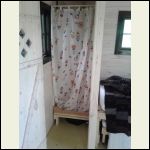
Here are some interior updates. The "bathroom" has a 30x24" shower and a bucket toilet. The bed to the right of the bathroom is a trundle bed.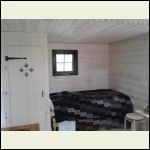
backwall.jpg
| 
backwallwithdooropen.jpg
|  |  |
|
|
fiftyfifty
Member
|
# Posted: 20 Jun 2019 07:15pm
Reply
wall hooks by door, shower stall, "stained glass" windows which are actually Shrinky Dinks.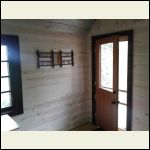
wallhooks.jpg
| 
24x30shower.jpg
| 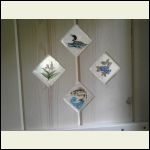
shrinkydinkstainedgl.jpg
|  |
|
|
Hoyuloper
Member
|
# Posted: 25 Aug 2019 05:01pm
Reply
fiftyfifty
So from what I understand from your previous posts this cabin is on laminated skids that sit directly on the ground? The floor joists are then build upon that?
Thanks
|
|
fiftyfifty
Member
|
# Posted: 25 Aug 2019 05:55pm
Reply
Yes, exactly. The 2 skids were built by laminating pressure treated lumber. They sit right on the ground, or on scraps of pressure treated where they needed to be leveled up. The floor joists were then built upon these leveled skids.
|
|
| . 1 . 2 . >> |

