| << . 1 . 2 . 3 . 4 . >> |
| Author |
Message |
Great Outdoors
Member
|
# Posted: 14 Aug 2018 06:14pm - Edited by: Great Outdoors
Reply
Iburners, I am working fulltime as well... 12 hour night shifts but I did take a week of vacation to work on it as well. I was away on vacation with the family last week so no work was done but we were back at it yesterday. My dad who was a carpenter many years ago has been helping a ton. My father-in-law and one of my brothers has also helped quite a bit. My friend who is a carpenter has also been helping. Without my dad I wouldn't have half of what I have done, he is the brains of the operation
|
|
Great Outdoors
Member
|
# Posted: 14 Aug 2018 06:25pm - Edited by: Great Outdoors
Reply
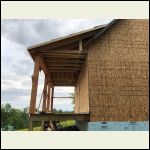
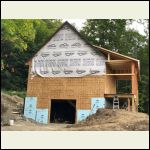
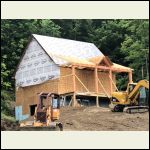
We are almost ready for the roof to be put on. Just a few more odds and ends. The weather was crappy today so my dad and I worked on figuring out and cutting the stair stringers to go to the second floor. I had to leave early as I had an appointment at the surgeons to have two large pine splinters removed that have been lodged in between my middle and index finger for three weeks. Due to their location I had to go to a hand surgeon, lol. After 15-20 minutes of digging around in there she finally pulled out two pieces of pine that were about 3/8" each.. 5 stitches later and another co-pay and I was headed home.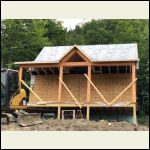
IMG_1557.jpg
| 
IMG_1555.jpg
| 
IMG_1559.jpg
| 
IMG_1408.jpg
|
|
|
bigriver
Member
|
# Posted: 14 Aug 2018 06:34pm
Reply
 looking good looking good
|
|
rockies
Member
|
# Posted: 14 Aug 2018 06:50pm
Reply
Very lucky. When I was about 12 I was trying to pull a rusty flat head nail out of the end of a piece of plywood and it wouldn't move so I decided to hammer it all the way in. The nail head snapped off at the first blow and went into my eye.
Fortunately my dad had this weird device that looked like a pen with a metal loop on one end and a magnet at the base of the loop. He touched the loop to the spot where the nail head went under the surface of my eye and it flicked right out.
Apparently the surface of the eye self seals almost instantly so there was no damage afterward. Never had a problem with my eyesight either.
|
|
Great Outdoors
Member
|
# Posted: 14 Aug 2018 07:27pm
Reply
Thanks bigriver… rockies, sounds like you are the lucky one! You never know when disaster will strike, I seem to have more than my fair share of injuries, lol.. Seems like I at least get stitches every couple of years.
|
|
Great Outdoors
Member
|
# Posted: 16 Aug 2018 07:58am
Reply
Yesterday my dad and I managed to get the porch and cabin hanging rafters tied in together. My dad had been dreading it. It was a lot of moving ladders, sawdust in the face and working on high uneven ground off ladders but we got it done. I am terrified of heights (fell 22' from a ladder 3 years ago) so between that and my bandaged up lobster claw of a hand my dad did the sawing and construction.. I mostly just held boards in place. Today we'll work on the stairs to the loft.
|
|
Great Outdoors
Member
|
# Posted: 18 Aug 2018 02:06pm
Reply
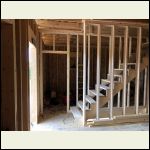
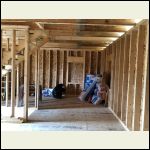
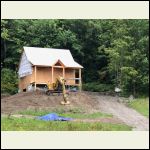
We finished the stairway up to the loft area yesterday and put in some temporary stair treads. We had to cut out the bottom chords of two trusses then box them in. Good thing my dad knows what he's doing, lol. We also framed up the walls on either side of the stairway and cleaned up a bit inside.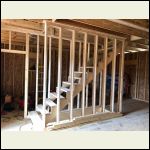
IMG_1571.jpg
| 
IMG_1572.jpg
| 
IMG_1573.jpg
| 
IMG_1576.jpg
|
|
|
rockies
Member
|
# Posted: 18 Aug 2018 05:11pm
Reply
Trusses come pre-engineered from the company that makes them. They are usually designed specifically for the project and can't be altered or cut in any way without engineering approval.
How exactly did you "box them in" because it sounds like you've severely weakened the structure.
|
|
|
Great Outdoors
Member
|
# Posted: 19 Aug 2018 12:24pm
Reply
We didn't cut out the whole bottom chords, just where the stairs go. I should have written headed them off instead of boxing them in. I'll take a few pictures today when I go up to paint the trim boards.
|
|
Great Outdoors
Member
|
# Posted: 20 Aug 2018 11:35pm
Reply
Here are a couple pictures of how we headed off the stairway. The roofer set up his staging the other day and dropped off the drip edge he made today. He will be back in the morning to start putting the standing seam roof up, I am excited... too bad I will miss most of it because I am probably going to go help my brother tear off the sugar house cupola then off to bed.
|
|
rockies
Member
|
# Posted: 22 Aug 2018 01:33pm
Reply
Unfortunately, when you cut out any part of a truss (even a couple of inches to install a plumbing pipe) it eliminates the strength of the entire truss. This is especially true of the bottom piece since it is under a great deal of "expansion" stress (it prevents the loads from the roof transferring into the exterior walls and pushing them outward).
I hope you have added extra reinforcement at the stairs where the section has been cut out, and you might consider doubling up the bottom chords on the trusses next to the ones you cut.
|
|
snobdds
Member
|
# Posted: 22 Aug 2018 01:45pm
Reply
Quoting: rockies Unfortunately, when you cut out any part of a truss (even a couple of inches to install a plumbing pipe) it eliminates the strength of the entire truss. This is especially true of the bottom piece since it is under a great deal of "expansion" stress (it prevents the loads from the roof transferring into the exterior walls and pushing them outward). I hope you have added extra reinforcement at the stairs where the section has been cut out, and you might consider doubling up the bottom chords on the trusses next to the ones you cut.
Only that's not a truss, it's a floor joist.
He's fine.
|
|
Great Outdoors
Member
|
# Posted: 23 Aug 2018 07:45pm
Reply
We built a wall on each side of the stairway which are supporting the sections of bottom chord we took out for the stairway. I will look into doubling up the ones on either side as well. Thanks
|
|
Great Outdoors
Member
|
# Posted: 24 Aug 2018 02:25pm - Edited by: Great Outdoors
Reply
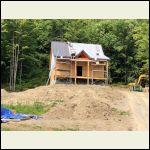
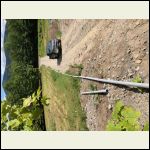
Here is a picture of the roof progress as of an hour ago as well as the wire and conduit which will be buried tomorrow morning. I still need to put the phone line conduit together but that will have to wait until tomorrow after I get done work.. hoping to get 3 or so hours of sleep before my shift tonight.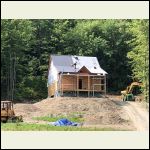
IMG_1656.jpg
| 
IMG_1655.jpg
| 
IMG_1654.jpg
|  |
|
|
Thewaylifeshouldbe
Member
|
# Posted: 24 Aug 2018 11:36pm - Edited by: Thewaylifeshouldbe
Reply
Awesome project!! I'm planning on building almost the same thing. I'm interested in seeing how u built the floor system on the 1st floor and how your running the stairs from the basement. Did you put in a carrier beam. Hoping I dindnt miss pics and am asking reduntent questions. Also did you have any problems getting permits with those plans. I have been messing around drawing plans myself and it's been a lot of fun but I'm worried they won't be detailed enough for a building permit. Great job btw I really like the porch and daylight basement.
|
|
Great Outdoors
Member
|
# Posted: 25 Aug 2018 06:52am
Reply
Thanks Thewaylifeshouldbe, we did put a carrying beam in the basement to support the first floor. I will try to remember to take some pictures. Getting the permit to build wasn't a problem at all. I just had to give the outside dimensions and obey the property line setback requirements. I found a few plans I liked then sort of combined and tweaked them so I could fit as much as possible in a small space. I have some serious hours into the design and layout having changed and moved things several times. The porch isn't quite done yet as I still need to put in the braces for the four posts and the peak of the dormer. It is coming together nicely, unfortunately I am starting to run out of funds so most of the interior will have to wait.
|
|
Great Outdoors
Member
|
# Posted: 27 Aug 2018 08:52pm
Reply
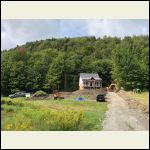
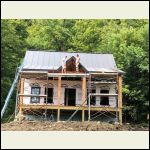
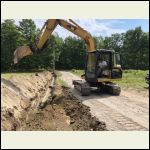
They got most of the front roof on today except for the dormer and my dad and I got the 4 front windows in. We got the power line and conduit buried as well as the conduit for the phone line Saturday. I had only slept 2 hours on Friday and managed to squeeze in about 4.5 Saturday, I slept like a baby Sunday after work for 6 hours then back to work for 12 more. I have been up for 26 hours as of now and I am off to bed, no work for the next 2 days at least.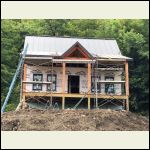
IMG_1689.jpg
| 
IMG_1665.jpg
| 
IMG_1666.jpg
| 
IMG_1660.jpg
|
|
|
Great Outdoors
Member
|
# Posted: 30 Aug 2018 06:41am - Edited by: Great Outdoors
Reply
The roof is on except for the vented ridge cap which they should be back today to finish. The power company is supposed to come hook up the power at the pole tomorrow but I am still a ways away from being ready to connect it inside. My help has pretty much dried up except for my dad on occasion. My friend has not been back for over 3 weeks since he has taken on to much work and now is trying to make appearances here and there to keep people somewhat happy.. I am pretty frustrated but I understand the need to keep a stacked schedule, just wish he would have finished my place first  . Hopefully he comes back next week as I really need to get the rest of the windows and doors in and get the rest of the house wrap on. I want it sided, insulated, and wired before the snow flies which could be as early as late October. . Hopefully he comes back next week as I really need to get the rest of the windows and doors in and get the rest of the house wrap on. I want it sided, insulated, and wired before the snow flies which could be as early as late October.
|
|
Cabindreaming24
Member
|
# Posted: 30 Aug 2018 10:03am
Reply
Looks great! I’m interested in something similar. If you don’t mind me asking what’s the total construction cost so far
|
|
Great Outdoors
Member
|
# Posted: 30 Aug 2018 09:22pm - Edited by: Great Outdoors
Reply
At this point I have roughly $60,000 into it which includes:
-excavation/materials (stone, etc.) -- $6000
-foundation/concrete -- $7600
-building materials/miscellaneous (including insulation, stove/pipe, and everything to finish the outside) --$32,600
-standing seam metal roof --$8000
-power to the building --$3300
-carpentry labor --$2500
This project has gone way over budget but I am doing this with the intention of hopefully using it as my retirement home. I could have shaved a good chunk of money off by not getting premium products like the windows, doors ($3600 alone), trim, and siding so keep that in mind.
However, I also have saved a lot on labor by doing a lot of work myself and having lots of help from family. I will be working in my brother's sugarbush again this year as well as helping with upcoming projects to pay him back. I am quickly running out of funds but I am still hoping to get the living room/kitchen and dining area finished.
|
|
Great Outdoors
Member
|
# Posted: 7 Sep 2018 04:25pm - Edited by: Great Outdoors
Reply
The roof was finished up back on the 1st as was the power to the pole. Since then we haven't done too much as I have also been helping my brother with his sugarhouse and stripping off the roof of his rental property. I have worked on grading out some of the dirt and we put the front door in today. The overhead door company also came this morning to install the overhead door for the walkout.
|
|
Rys
Member
|
# Posted: 13 Sep 2018 09:03pm
Reply
Wow! It's looking great.
|
|
Great Outdoors
Member
|
# Posted: 13 Sep 2018 09:10pm
Reply
Thanks! My Dad and one of my brothers helped me get the rest of the house wrap on and the remaining windows in.. The top two in both ends were not fun as they are quite high but we did it. I will have to do a more thorough job with the wrap at the top when I get to the point with the siding (most likely get a lift for a couple days) but it is good enough for now. I'll post some pictures tomorrow night if I get a chance.
|
|
Great Outdoors
Member
|
# Posted: 15 Sep 2018 08:35pm
Reply
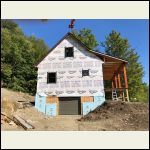
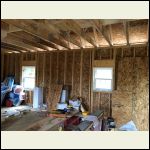
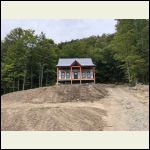
Here are a few pictures, I forgot to mention that I stained the rest of the beams the other day that hadn't been done yet (still have some more to put up). I went up and put in the front door handle and deadbolt this morning.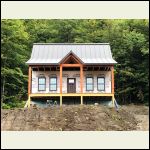
IMG_1760.jpg
| 
IMG_1768.jpg
| 
IMG_1759.jpg
| 
IMG_1748.jpg
|
|
|
Great Outdoors
Member
|
# Posted: 19 Oct 2018 08:26am - Edited by: Great Outdoors
Reply
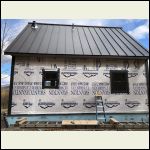
So With the help of my Dad and one of my Brother's we got the beams up on the ends of the porch (mainly just for looks). I got the soffit up under the back eaves and my Dad and I have been putting up the Boral trim and metal flashing above the foundation insulation which I had made by the guy who did the standing seam roof. We also closed in the ends of the porch. Today we'll trim up some more exterior windows and maybe a door or two.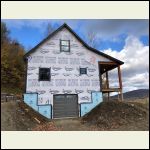
IMG_1940.jpg
| 
IMG_1938.jpg
| 
IMG_1937.jpg
| 
IMG_1921.jpg
|
|
|
Great Outdoors
Member
|
# Posted: 25 Oct 2018 11:37pm
Reply
We've been working on the cabin for a few hours here and there. We managed to get some siding on and most of the windows and one door are trimmed out on the exterior. Working on it when the temps are in the 30's is not as much fun as it was when it was warmer. 
|
|
Great Outdoors
Member
|
# Posted: 27 Oct 2018 03:13pm
Reply
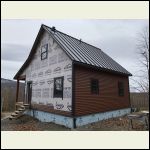
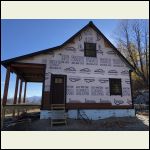
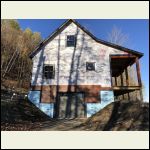
Here are som pictures from today. We got the back finished, I like it. I will need to put a final coat on the trim boards sometime if it warms up.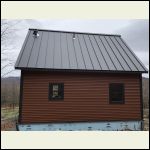
4235220C911E4DE2A.jpeg
| 
FCC90D66D24B42D48.jpeg
| 
6D6484FF73404AE49.jpeg
| 
BAA871D53AFD4E3BA.jpeg
|
|
|
rockies
Member
|
# Posted: 27 Oct 2018 06:13pm
Reply
What are you planning for the exterior door stairs? Hopefully you are adding a deep landing and then the stairs since it can be a hazard to step out of a building right onto the top step of a staircase.
If you are adding a landing why not tie it in to the deck around the corner? You might be able to put a bar-b-que there as well.
Also, on your roof I'm guessing that the larger pipe on the left is for the chimney. By code you have to extend the pipe at least 2' above the ridge.
|
|
lburners
Member
|
# Posted: 28 Oct 2018 12:50am
Reply
That thing is looking way more like a house than a cabin from here. Niice work.
|
|
Great Outdoors
Member
|
# Posted: 31 Oct 2018 02:10am - Edited by: Great Outdoors
Reply
Rockies, thanks again for your input. I had thought about a landing but my space on that side of the property is extremely limited due to setback requirements and where the driveway has to be. The treads are 2x12's and it doesn't seem bad to step out onto but if I can see and appreciate the concern. If after more use it looks like it will be a problem I will definitely revisit potential fixes. The pipe on the left is actually just the roof jack where the stove pipe will go through. I still need to install the stove and pipe and will make sure it is to code. lburners, thanks for the compliments.. I am hoping to retire here someday so I am kind of going about this with that in mind. My Dad and I trimmed out the windows and doors on the front the day before yesterday and the mounting blocks for the exterior outlets, etc. finally came in so we were able to get some more siding up yesterday. We got up to the top of the windows on the walk out side and on the other side we could only go up to where the supports will be for the door overhang.
|
|
| << . 1 . 2 . 3 . 4 . >> |

