| << . 1 . 2 . 3 . 4 . 5 . >> |
| Author |
Message |
trollbridge
Member
|
# Posted: 12 Mar 2012 08:44pm
Reply
Interesting information on the dishwasher soap as a paint remover. We will definitely be giving this one a try! Thank you for sharing!
|
|
turkeyhunter
Member
|
# Posted: 12 Mar 2012 10:31pm - Edited by: turkeyhunter
Reply
nice lockset/latch looks great on the door!!!!!
FWIW---it's so much better than a new one!!!!!
|
|
samoni
Member
|
# Posted: 14 Mar 2012 10:15am
Reply
gorgeous!
|
|
aktundra
Member
|
# Posted: 28 Apr 2012 09:23pm
Reply
Pacific Northwest is sure beautiful!
I love the cabin! Really nice job!
One question for you: I built some doors for my cabin. The front door I am using a twisted branch for the handle. I will just use a deadbolt like your door has and I love the rare earth magnet to keep it shut. How did you attach the magnet to the door?
Thanks!
AKTundra
|
|
leonk
Member
|
# Posted: 14 Jun 2012 03:51pm
Reply
Wonderful, wonderful cabin!
Congratulations! Makes me think about my dream - I better make plans to make it a reality.
|
|
TomChum
Member
|
# Posted: 3 Aug 2012 11:14pm
Reply
Quoting: aktundra How did you attach the magnet to the door?
Hi AK, Magnet is just screwed to a 45degree at the top corner of the jamb, in a very temporary fashion. There is a strip of steel screwed to the top corner of the door. I have a dutch door though; and it actually needs to be in the lower corner to hold both doors closed.
I'm becoming complacent because it is so handy how it works (with no latch) but I need to put in a "real" latch. I'm waiting for inspiration....
|
|
TomChum
Member
|
# Posted: 4 Aug 2012 12:11am - Edited by: TomChum
Reply
Started a new project over the last few weeks, a SHOWER HOUSE. I started by asking some questions HERE because it's built on a fairly steep slope. But it seems like it needs to be in my members project thread.
It's about 130 feet away from the cabin, barely visible from the cabin, behind some trees.
The upper posts set the floor 2 1/2 feet above the slope. Ten feet out, the far side is 8 feet above the slope. The shower will be wide open to the world (on that side) with double french doors with glass. The opportunity to shower butt-nekkid to the world should be readily available (for a proper wilderness shower), and my local VIP agrees. I don't know yet how I'll make it private for a very modest guest. Thus far, the modest guests haven't even let the word shower fall from their lips so I'm forging ahead without their input (just as well !).
The shower room size is nominally 5X7. I think it will be cedar fence boards shiplapped on the walls inside, and a cedar bench. The floor is 5/4 cedar decking. The water is expected to drain between the boards just like on my deck at home. I nailed the deck boards tight, thinking they will shrink a little and open small gaps (fingers crossed). I'll insulate the walls for winter use.
Sketch of the showerhouse.
| 
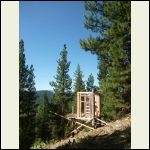
Footings. The little building looks like it's just sitting on rocks on the hillside
| 
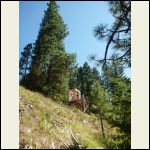
Showerhouse framing left side view
| 
View of framing from below
|
|
|
TomChum
Member
|
# Posted: 4 Aug 2012 12:40am - Edited by: TomChum
Reply
Here are some construction details.
Digging & pouring the footings is in the other thread. There are some pics HERE. Take a look then come back.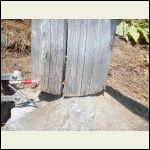
Scribing the post to fit the boulder
| 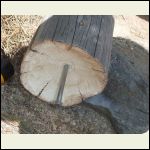
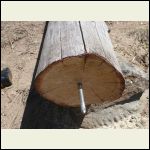
Lag bolt screwed in
| 
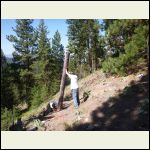
Bolt head cut off and roughed up with the grinder
| 
Epoxy in the hole, first pole up! Grind a flat length of the pin to let epoxy push back up.
|
|
|
|
TomChum
Member
|
# Posted: 4 Aug 2012 12:54am - Edited by: TomChum
Reply
More details. I'm trying my best to hide the evidence of modern materials and methods, trying to make it look like in 5 years ..... SOME folks might think it was made 50, 100 years ago.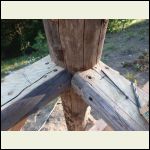
Structure joint
| 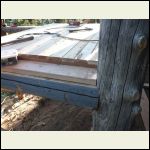
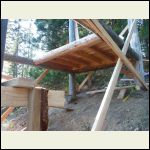
Shower cedar floor. Tight for now, but banking on shrinkage to let the water thru.
| 
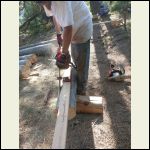
Cedar joists
| 
making beams
|
|
|
DaJTCHA
Member
|
# Posted: 4 Aug 2012 10:11am
Reply
Awesome! I can't wait to see the finished product. My shower house is going up this Monday morning. I will start my own thread, but it is eerily similar to the construction techniques that you are using here. Although I'm thankful that my slope is far less severe! 
Keep the photos coming please!
|
|
oldbuddy
|
# Posted: 4 Aug 2012 10:20pm
Reply
It's nice to see you are still busy working on that beautiful cabin land! i absolutely love your cabin picture in the deep snow. Believe me....if we ever get a nice snow like that, I'll be on the hill with a camera in a flash
Old Buddy and I are getting our plans together for an 8'X16' bump-out for a bunk-house. It will attach to the left side of our cabin as you walk out the door and will drop about 8-10". Hopefully, we'll be starting on it within the next month. I'm waiting on Lowes to run their usual 18 month same as cash program!
Good luck with the completion of your shower house. It looks very rustic already.
Old Old Buddy
|
|
TomChum
Member
|
# Posted: 5 Aug 2012 10:38pm
Reply
Thanks OOB. I can't work on it again for a few weeks. I'm anxious to see what it looks like in the winter, all covered with snow (and I hope it's FINISHED by then ). ).
Sounds like you'll have a lot more room this winter. I wish we had more room, there's not enough space for people to put their 'stuff'. That's one problem with a log house, it's fairly difficult to add-on.
|
|
GowandaNY
Member
|
# Posted: 6 Aug 2012 12:30am
Reply
This is awesome, I love the loft. Very cool.
|
|
oldbuddy
|
# Posted: 6 Aug 2012 07:29am
Reply
TomChum
Couldn't you use temporary shelves along the sidewalls? You know...just high enough that you wouldn't hit them with your head but low enough to get to the items stored on them (shoes, coats, etc.)
If you don't need then put them overhead in the loft when not in use.
I know they weren't in your plans but I'm sure you could dress them up and make them fit in to your rustic look. I know a shelf about 12-18" deep will hold quite a bit of gear. Just a thought.................
Old Old Buddy
|
|
TomChum
Member
|
# Posted: 6 Aug 2012 10:14am - Edited by: TomChum
Reply
A high shelf across the 'kitchen' & a couple cabinets are in the plan. And some bookshelves too. It just takes me a long time to decide what I like 
I have the wood for this cabinet mostly ready, stickered and drying. Probably getting good and DRY this summer!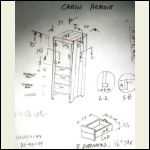
Sketch of a 7-foot tall cabinet for corner behind the door
|  |  |  |
|
|
TomChum
Member
|
# Posted: 22 Aug 2012 10:34am - Edited by: TomChum
Reply
Back to work on the shower house. Have guests coming, so I need to get it at least usable, and 3 sides of privacy.
|
|
bobbotron
Member
|
# Posted: 27 Aug 2012 11:59am
Reply
Looking great Tom, love those big logs! 
|
|
TomChum
Member
|
# Posted: 6 Sep 2012 09:44pm - Edited by: TomChum
Reply
Worked some more on the shower house. Roof is up. We've been using it. The girls take long showers. So I tried it, a long shower outside doesn't seem like the waste of time like a long shower inside. Plus the water is free, it only costs propane. Warm water washes the cold off.
The rafter logs were peeled then installed the next day. After about a week I varnished them. It was much easier than painting overhead.
The roof decking is 1 1/2" doug fir from the property. It was standing dead tree, and the log had no checking. I varnished the bottom side of the roof deck boards before putting them on the roof. The tree was 20" at the base, and provided eight 11 foot logs. It's a hell of a lot of work to get your planks like that.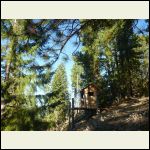
Finished the rafters and the decking.
| 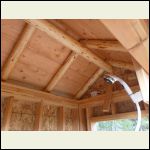
Rafters and ridge beam
|  |  |
|
|
TomChum
Member
|
# Posted: 11 Sep 2012 11:19am
Reply
One side and one window mostly done. I'm learning about board & batten.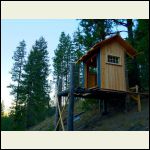
Board and batten
| 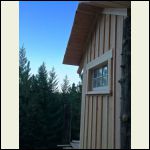
Window framed
| 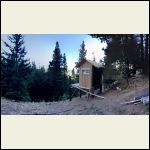
Panorama
|  |
|
|
ErinsMom
Member
|
# Posted: 11 Sep 2012 07:25pm
Reply
It looks amazing. I can't wait to show it to a friend who has built a cabin in SW VA. No shower. His wife and daughter would love it as your girls do.
|
|
TomChum
Member
|
# Posted: 19 Sep 2012 12:12am
Reply
Just built some Adirondack style chairs for front porch. There are Adirondack plans all over the web, but you don't know if they are truly comfortable. I used some dept store chairs that we have at home, (and tested for comfort) as a pattern. I made four chairs, and it took a lot longer than I expected to get it all figured out, but once it came assembly time, the chairs popped up FAST.
Used 1" cedar. The cedar is lightweight, if these were made from Doug Fir they'd weigh a ton. I had it in my mind that I'd use slotted brass screws, but when I found that it would cost about $30 in screws for each chair that idea was cancelled. So used drywall screws.  But they are solid! But they are solid!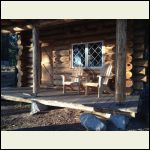
Adirondack chairs on the porch
|  |  |  |
|
|
trollbridge
Member
|
# Posted: 19 Sep 2012 12:04pm
Reply
The chairs look great sittin there on your porch and I'm sure they will bring you much enjoyment!
I love watching your shower come together. It looks very , very appealing. You will have to post more pics the further you get.
I had no idea you could peel the logs and have them varnished a week later. I would think they would be too wet or did you cut them and dry them some time ago?
|
|
TheCabinCalls
Member
|
# Posted: 20 Sep 2012 10:47am
Reply
TomChum, I was just about to make a new post about furniture. I want to make some Ad Chairs too. I have some left over cedar 1x and thought this would be a good use. I found a nice plan at Family Handyman, but wanted to see if you have plans you can share...since you did the sit test.
Also where did you get that jig to make beams from logs?
|
|
AYP1909
Member
|
# Posted: 20 Sep 2012 02:46pm - Edited by: AYP1909
Reply
Quoting: TomChum One side and one window mostly done. I'm learning about board & batten.
TC:
What is the spacing on your battens? It looks great.
|
|
TomChum
Member
|
# Posted: 4 Oct 2012 11:53am - Edited by: TomChum
Reply
The battens are 1.5" wide and they are about 7-8 inches apart (on center). Normally B&B uses wide boards (10", 12") but this building is so small I didn't think it would look right with only about 5 battens across a wall. It was slow-going. I nailed the boards as they are supposed to be (one nail in the center) and bent them over on the backside. On the frontside I nailed them one nail per foot, each nail at an angle downward. Then bent all the nails upward from the backside. Also screwed from the backside with drywall screws (one screw in center, of course) at one screw per foot, ending up with a fastener every 6 inches. Same thing on the battens. I put the screws in at 45deg angle, so I could use longer screws. It took a long time to put this siding on. But I am a very slow carpenter.
It would have been faster to have pre-installed 2x3 nailers on the backside, so the nails would have full engagement, but I did not think that far ahead, so had to improvise with screws and bending the nails over.
One thing to remember about B&B is that it is a method designed to accommodate the shrinkage of wet boards. You cut a tree, saw it into boards, and nail it on the house, without going thru a lengthy 'curing process', or waiting for summer. You have to follow the B&B nailing procedures, so 2 nails cannot split a board, pulling it apart. If your boards are cured, and acclimated to your area, it's all better. Nailed properly, the method allows the board to shrink/grow below the batten over the seasons.
I've laid down the decking (true 2x12s - HEAVY boards!) but the inside is unfinished, and no doors yet, no railings.
Quoting: TheCabinCalls Also where did you get that jig to make beams from logs?
 I was happy that the house is looking like the original drawings. I was happy that the house is looking like the original drawings.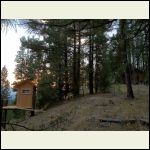
Showerhouse as of Sept24, 2012
|  |  |  |
|
|
AYP1909
Member
|
# Posted: 4 Oct 2012 12:44pm
Reply
Thank you.
|
|
toyota_mdt_tech
Member
|
# Posted: 7 Oct 2012 11:15pm
Reply
Tom, great work, one of the finest little log cabins in the group. Seems all the log cabins are on the top in my opinion. I'm biased towards the log cabins. Love your storage, your shower. How in the heck did the tax man even find you? You are under the sq footage for no permit, and no permanent foundation.
|
|
TomChum
Member
|
# Posted: 7 Oct 2012 11:46pm
Reply
Hi TMT, he said it was the normal land inspection they do every 4 years. He came to the property, heard a generator running (not my Honda, of course) and decided to look further.
|
|
Montanan
Member
|
# Posted: 8 Oct 2012 12:06pm
Reply
The shower house looks fabulous! I love the board and batten and the exposed logs in the ceiling.
|
|
TomChum
Member
|
# Posted: 19 Oct 2012 12:49pm - Edited by: TomChum
Reply
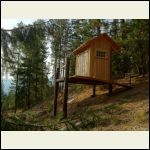
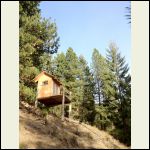
More work on the shower house. Got the doors installed & set. Still need shingles, railing, kneebraces. Almost time to "go inside". It sure is nice working in the Fall.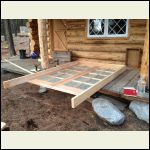
building the doors
| 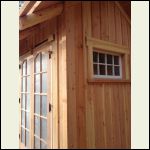
doors set for outswinging, but not trimmed yet
| 
looking west
| 
looking east
|
|
|
| << . 1 . 2 . 3 . 4 . 5 . >> |

