| . 1 . 2 . >> |
| Author |
Message |
JasonB
Member
|
# Posted: 18 Jan 2017 09:52am
Reply
Heya folks. New to the cabin scene, am I.... I'll tell you a little story.
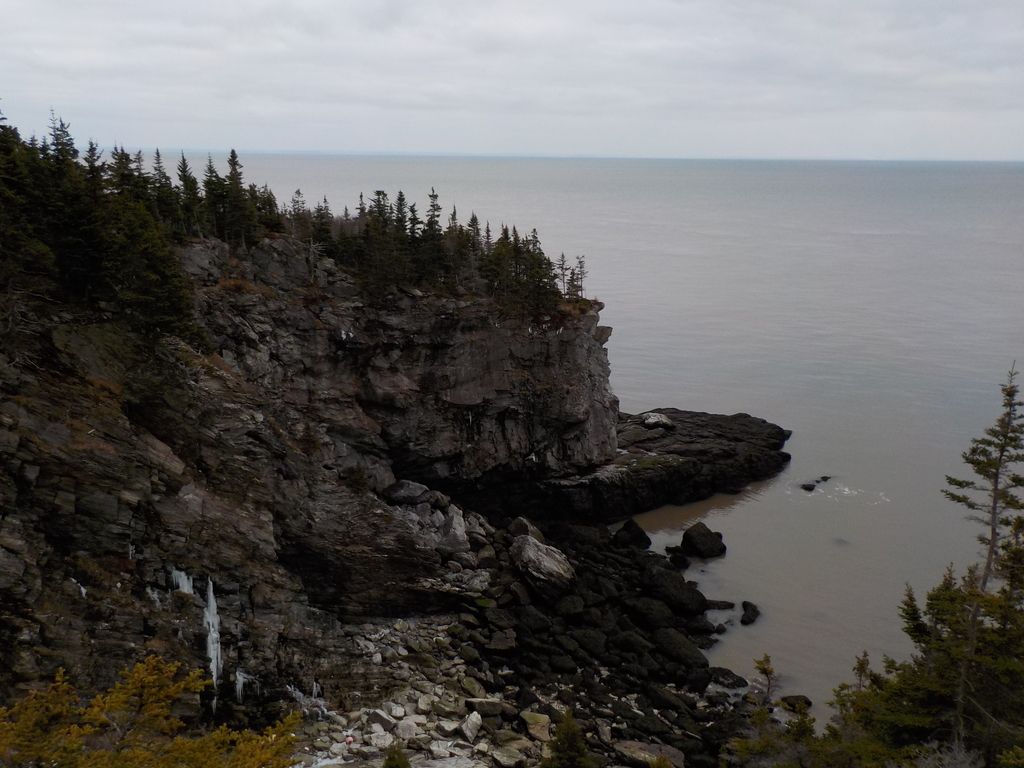
I live on the north shore of the Bay of Fundy, near Saint John, NB. An old lightkeeper's house, at the end of a road surrounded by coastal forest, mostly red spruce and birch. Rocks and moss.
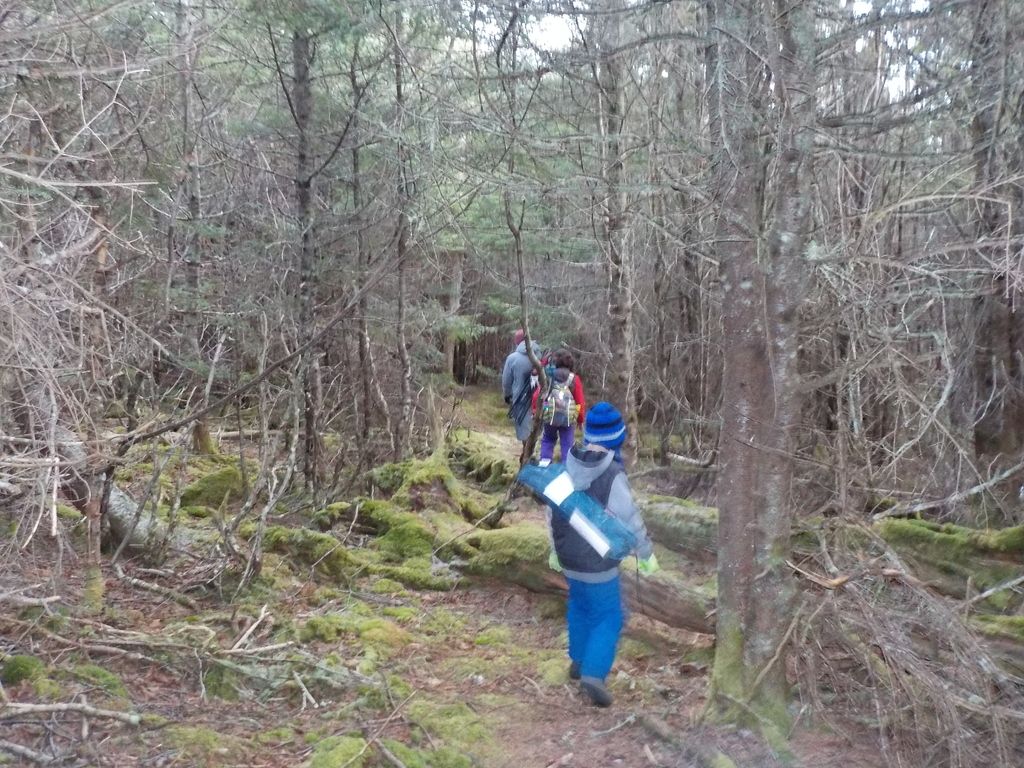
Years ago, my neighbour and I were looking at the surrounding area on Google Earth, and got the idea to try and get to some of the cliff features we could see there. This lead to us blazing some hiking trails leading to those features, just a couple guys playin' with chainsaws. And for the last 10 years, we've enjoyed hiking those trails. They lead to a few impressive sea-cliffs, to a stream and to a bog full of bakeapples and other wonderful berries. My family eventually developed a tenting site beside the stream, near the bog. We've used it for years as our kids have grown. They're 7 and 9 now.
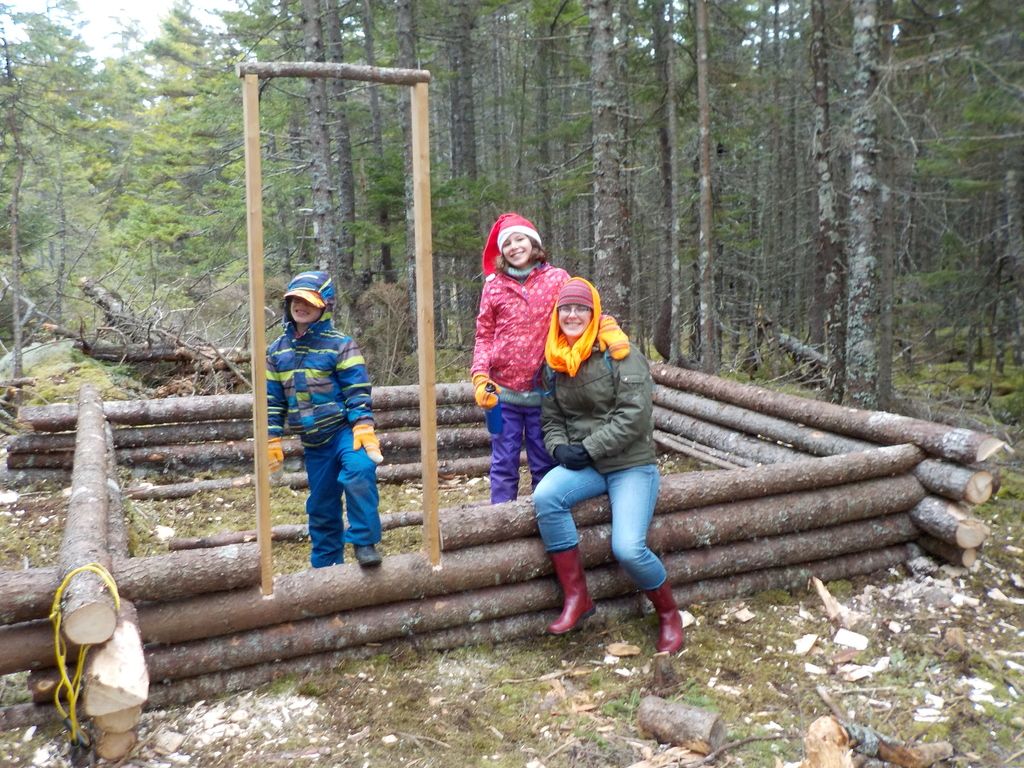
This fall, my step-father gifted me a handful of old books. Among them was "Camp and Trail Methods". Read it and the old urge to build a log cabin was rekindled... A couple weeks later, we got started. We chose our site and laid the first logs on Nov. 11, 2016. We chose to make it 12' x 8' inside:
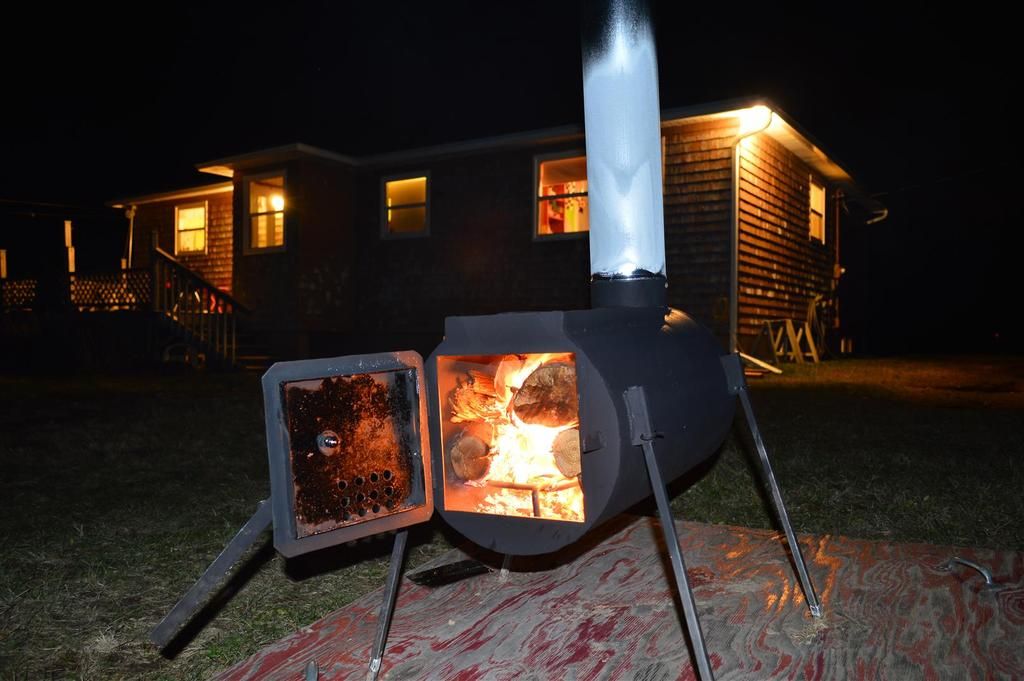
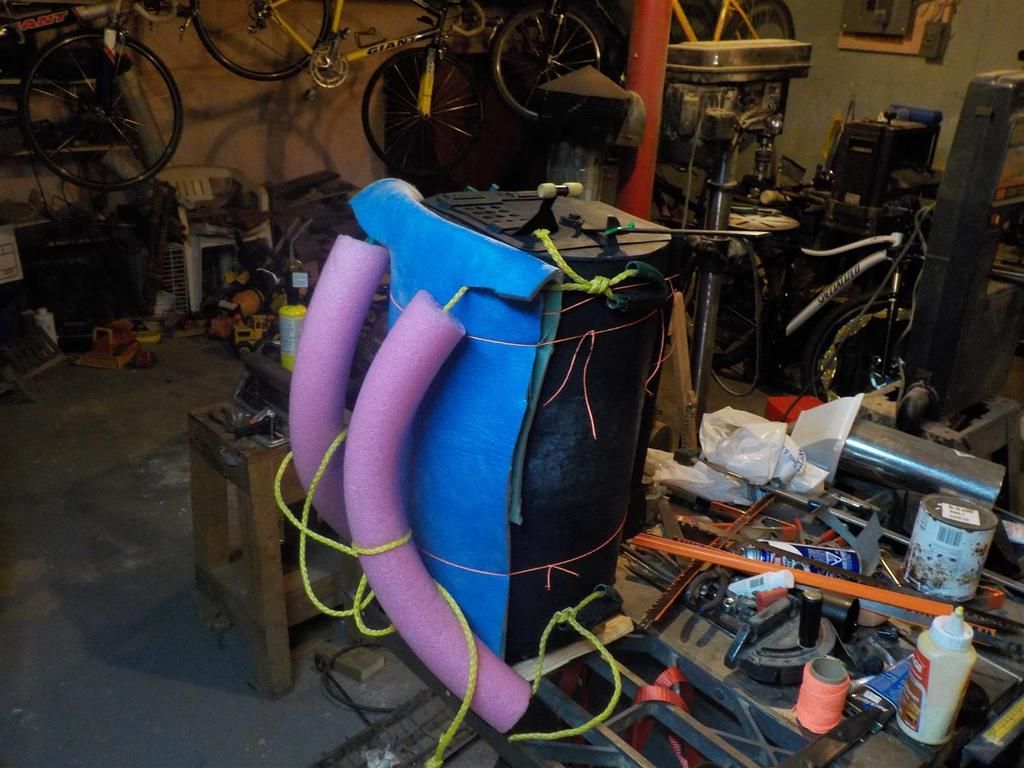
Not long after, I tackled the challenge of the wood stove for the cabin. This I built using my angle grinder and my 120V fluxcore welder, from a hydronic heat expansion tank that had languished between my shed and wellhouse since we'd bought the house.
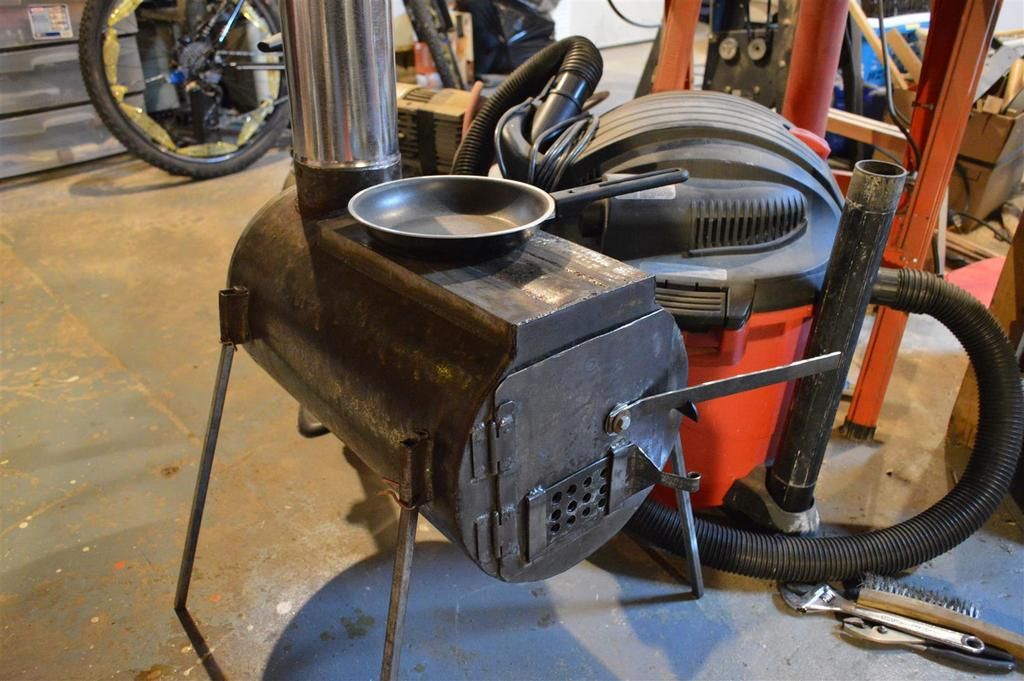
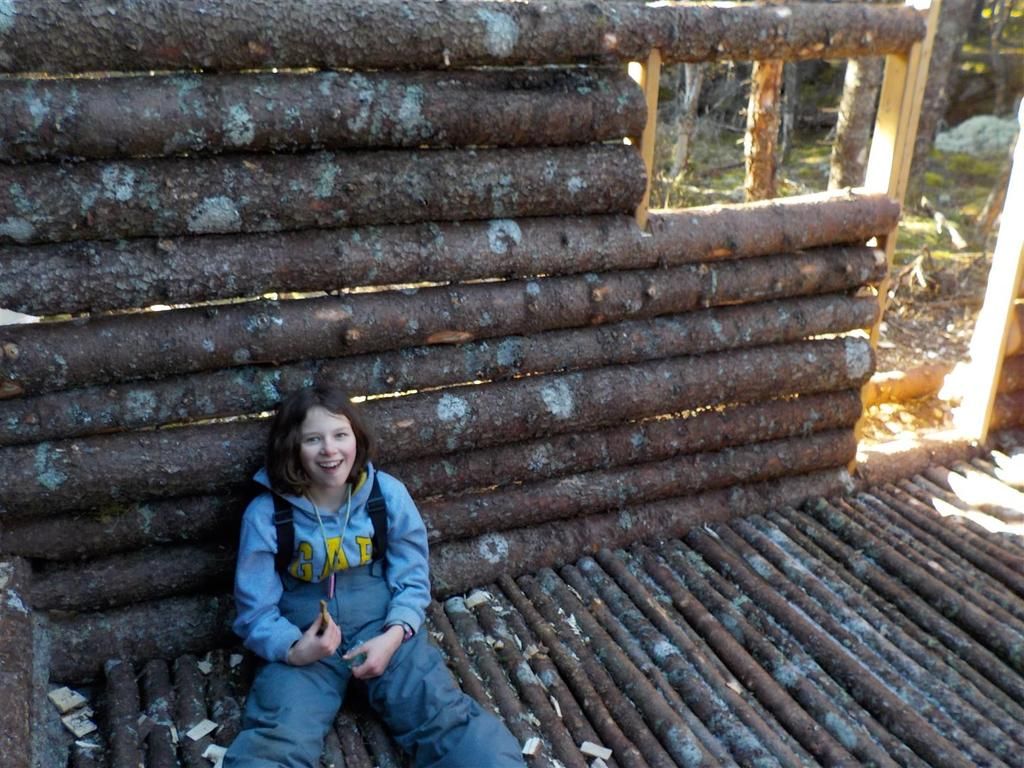
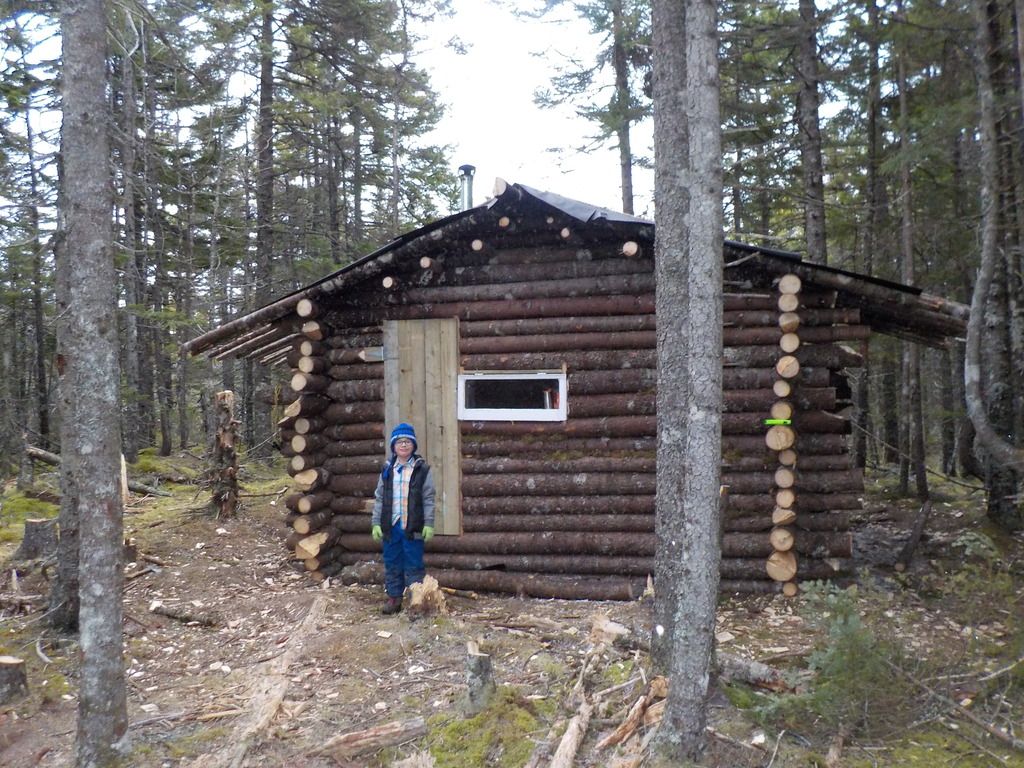
Building the cabin is a weekend affair, and weather limited us to a single day per week for much of the early work. The build is being done with only hand tools, 2 bow saws, a 2# axe on 36" handle, 3 hatchets, a hammer and some ropes for log carrying. The logs come from about 100' away from the cabin. They tend to be from 5" to 8" diameter, lengths generally 11' for the short walls, and 15' for the long walls. Christmas break gave us a good boost. By last weekend, we'd completed the wall build, and the floor (raw spruce poles on 3 grade beams) was complete.
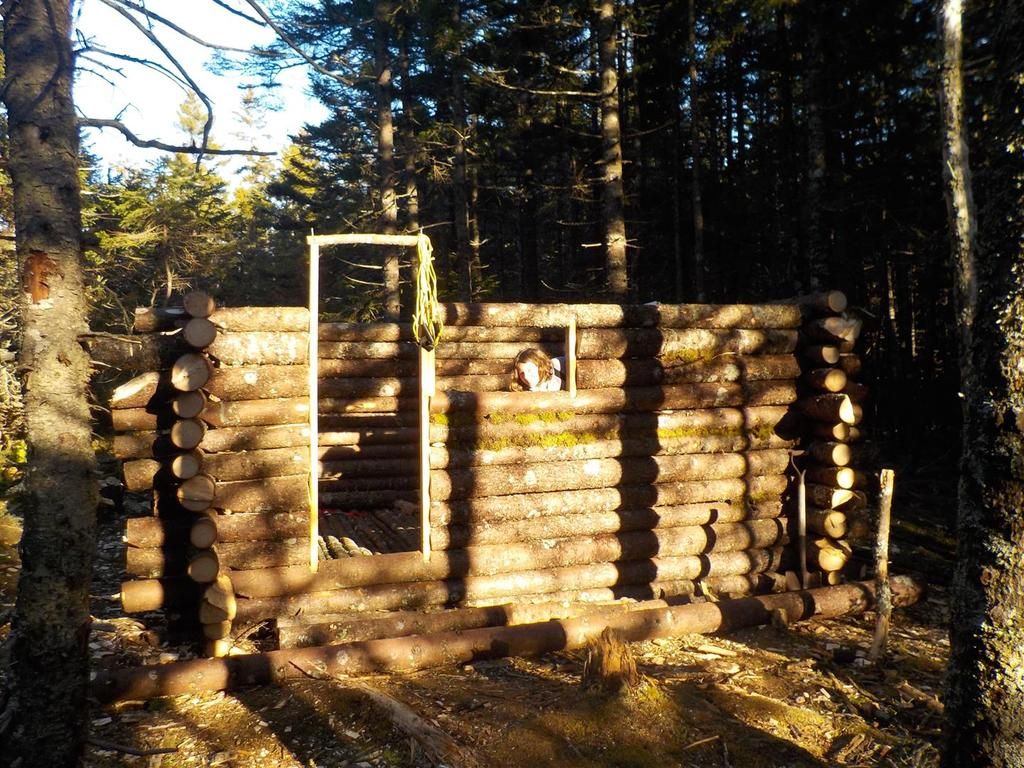
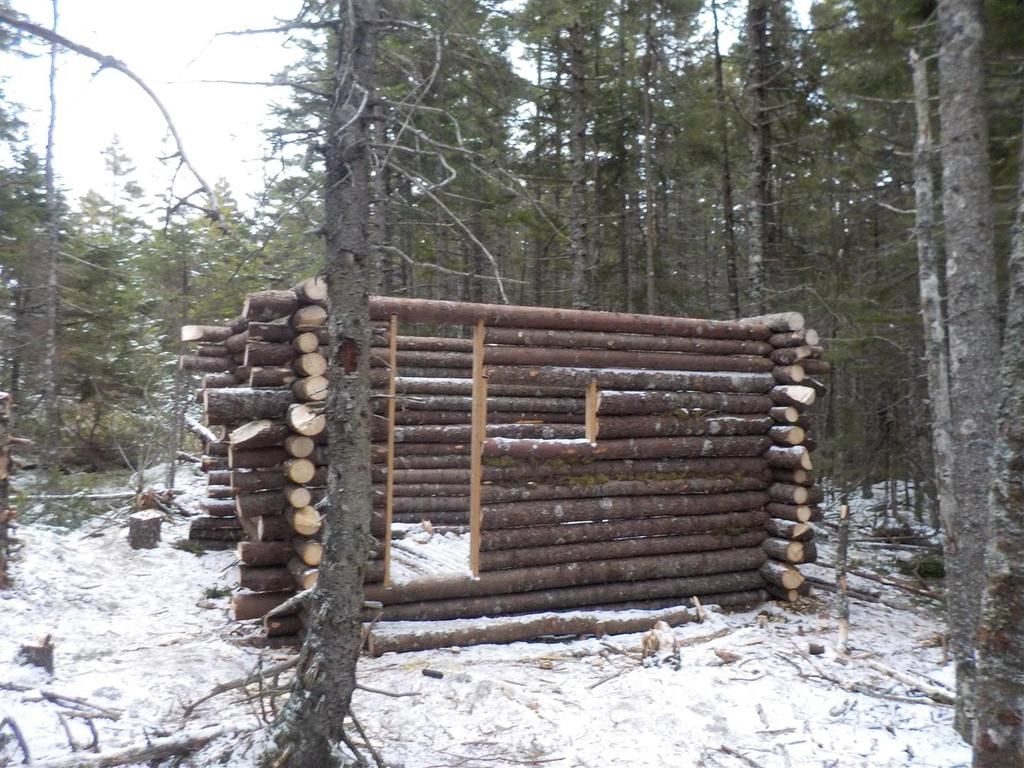
This past weekend provided us with ample good weather, and my helpful neighbour and I managed 2 solid days' work to erect the gables and half the rafters. The roof will be covered with tar felt (2 layers) and ballasted with more rafter poles.
Carry method for the stove:
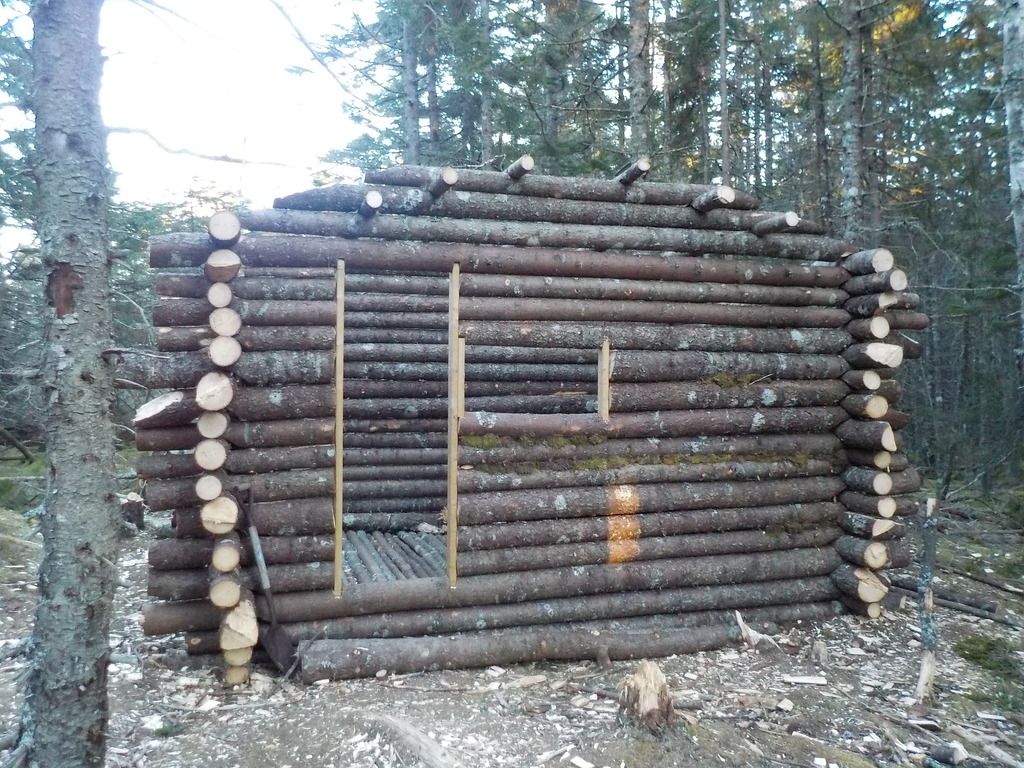
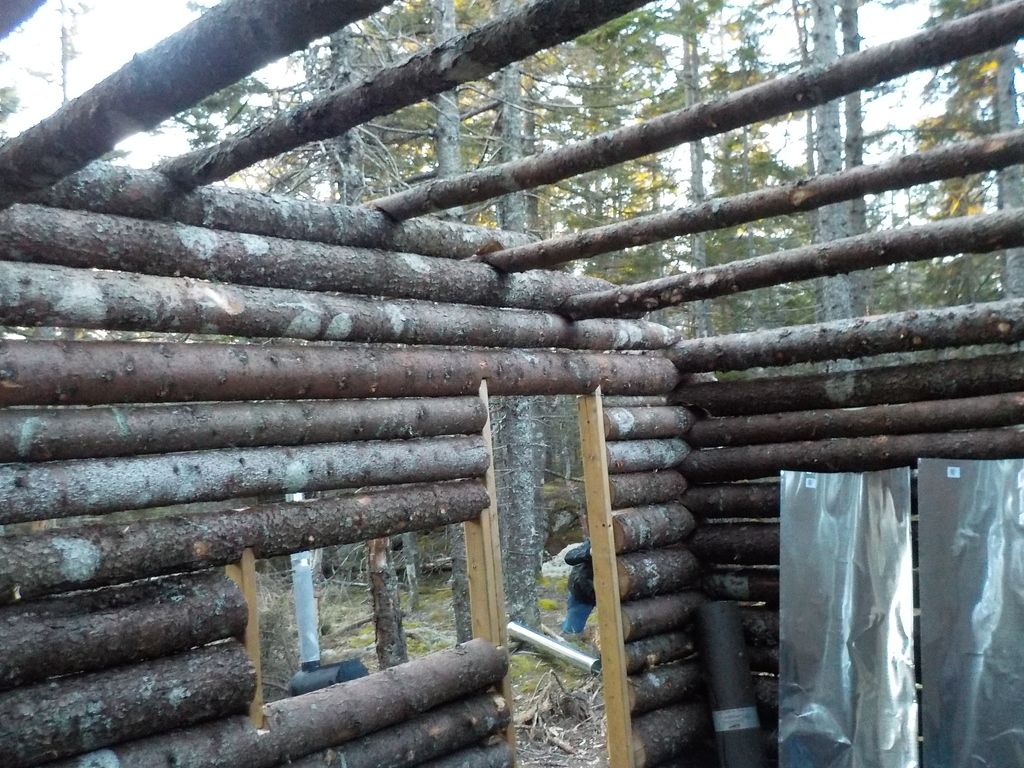
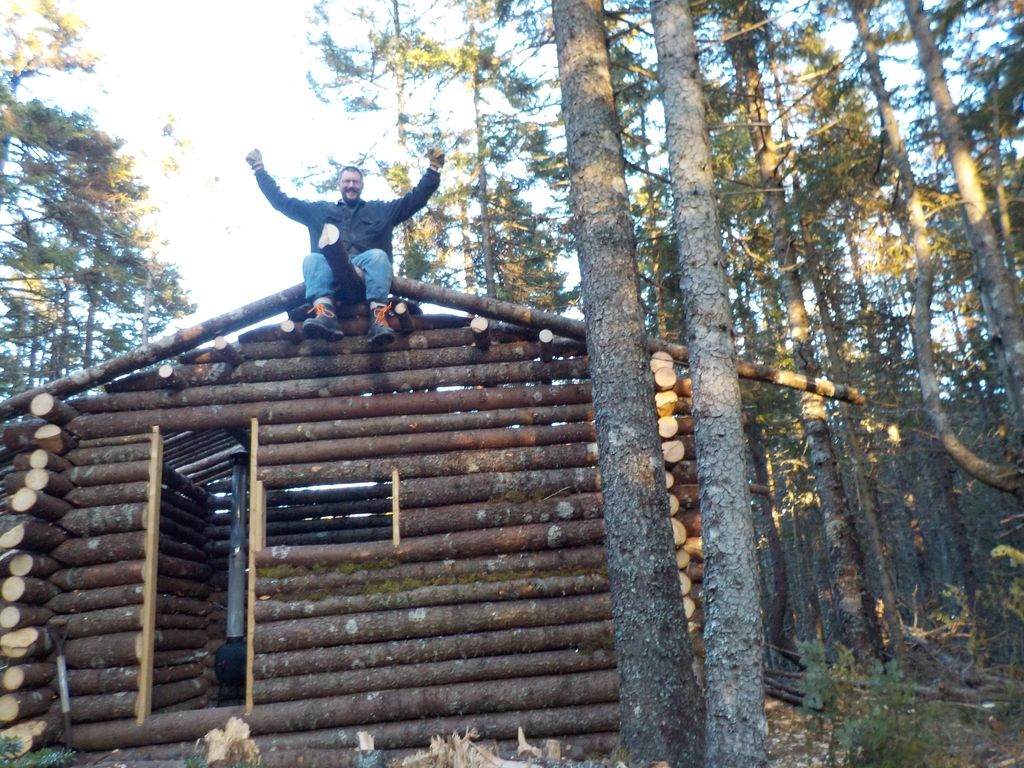
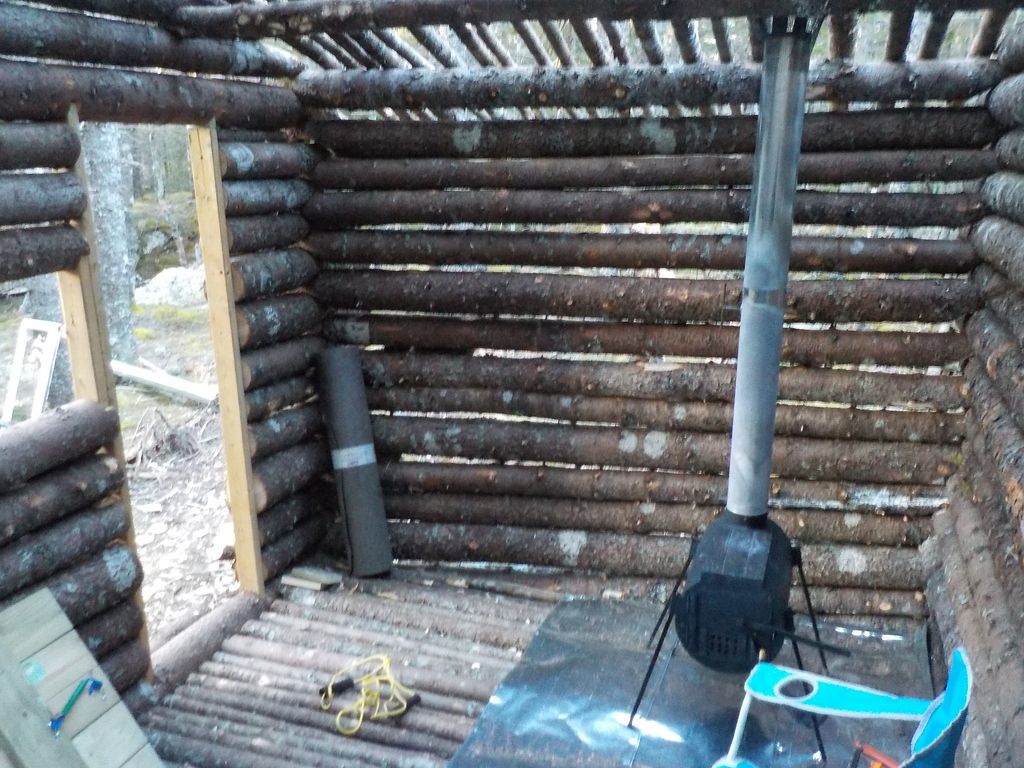
And that's where my project stands today, except that last night, my daughter and I hiked out by headlamp and installed the door (6' x 2') and window (10x32).
Hope you enjoyed that. I sure have!
J
|
|
Cowracer
Member
|
# Posted: 18 Jan 2017 10:17am - Edited by: Cowracer
Reply
Well done! How far of a hike is it for you to get to the cabin?
You remind me of that guy on YouTube "Primitive Technology". If you never seen him, look him up. I could watch for hours.
Keep the updates coming!
Tim
|
|
LDamm
Member
|
# Posted: 18 Jan 2017 10:35am
Reply
Is there a reason you didn't peel the logs?
|
|
JasonB
Member
|
# Posted: 18 Jan 2017 10:41am
Reply
Basically, comes down to time, effort and tradition...
This is intended to be a basic "trapper's shanty" style cabin. They were usually built with the bark on, from what I've read. Also, red spruce is labourious to peel in winter especially. This site is walk-in only, 2km from the nearest vehicle accessible spot.
I know having the bark on may shorten the shack's life, but if I get 10 years from it, I'll consider it a great success.
J
|
|
NorthRick
Member
|
# Posted: 18 Jan 2017 05:36pm
Reply
Looking at those pictures and reading that it was all hand tools made my arms sore. Looks like it will make a nice overnighter.
|
|
paulz
Member
|
# Posted: 18 Jan 2017 09:51pm
Reply
Sounds like an enjoyable area. Are you going to try to lock it up or pack everything in and out? Or does nobody go there?
|
|
bldginsp
Member
|
# Posted: 18 Jan 2017 10:40pm
Reply
Very cool. Tons of fun. Your kids will remember this forever with their most treasured memories.
|
|
JasonB
Member
|
# Posted: 19 Jan 2017 08:12am
Reply
A simple overnighter cabin is exactly what we hope for from this little spot. It might be visited a dozen or so times a year.
We'll leave stuff there year round, basic utensils, chairs, some lanterns and the like. There'll be no need to lock it, we're in a very rural spot, and the cabin is almost a mile from any ATV trails. The only access is via a hiking trail (too rugged for ATV or other mechanized travel), a little over 2km long, beginning in my back yard. Very dense spruce forest interspersed with bogs and rock formations.
As far as manual labour goes, it's not been too bad. Virtually all the work has been done by me and my neighbour, both of us big fellows of 6'2", 220+ pounds, but both with pretty sedentary jobs - me, a CAD operator, he a teacher. The first few weekends left my arms and upper back aching from the bow saw and ax, and I could only manage 1 day of work on a weekend, the second being dedicated to rest and recovery.
The last 2 weekends, we've done 2 full days of work, with little need for recovery after. The only real trouble I've had is with my hands... The middle 2 fingers of each ache after a day's work from anchoring the butt of the ax handle while notching or carving. But that goes away after 2 or 3 days...
I've lost 10 pounds, 1.5" of waste, and gained strength.
My daughter, 9, has learned how to use a bow saw well enough that she cut perhaps 1/3 of the rafter/binding poles and floor poles. She just loves the work, the hiking, the thought of overnighting...
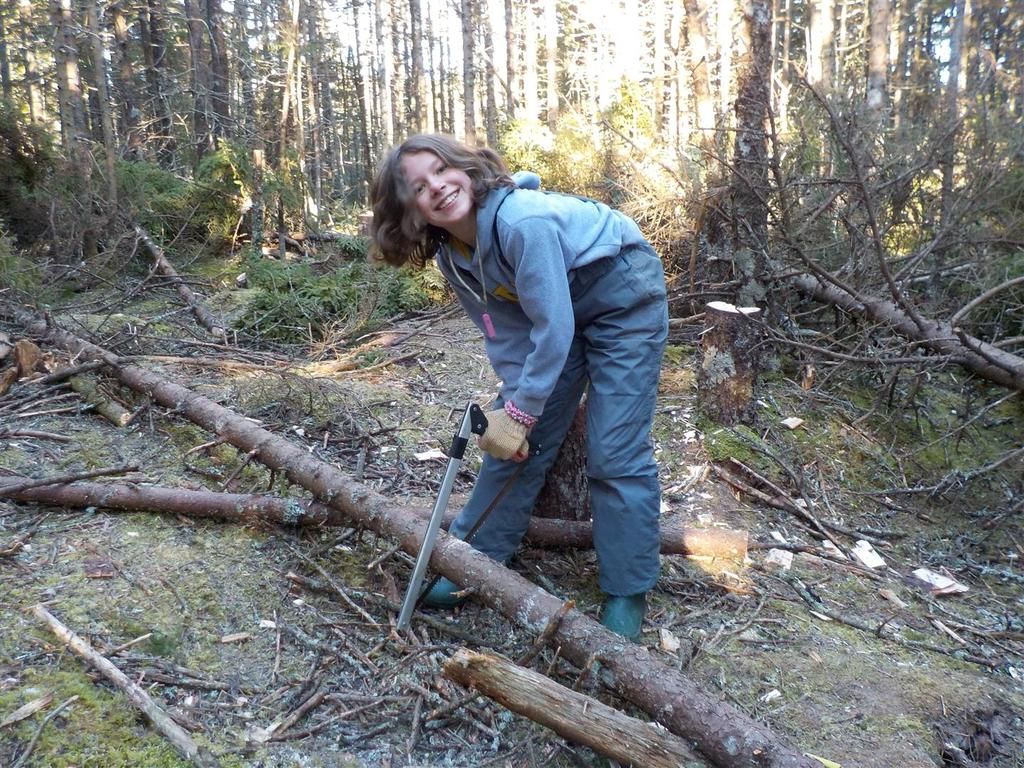
My 7 year old son has found enjoyment in trying to chink walls with moss, carrying poles and clearing limbed boughs... Though much of the work, naturally, overwhelms him.
My wife simply freezes, no matter what she wears, but once the stove's commissioned, she'll come 'round 
Ye gods, I cannot wait to get that roof finished and tar paper'd...
J
|
|
|
JasonB
Member
|
# Posted: 23 Jan 2017 08:42am
Reply
Saturday dawned bright and early, but as predicted, my neighbour's idea of leaving home at 7am turned out to be a bit of a pipe dream.... We left at 8.
Arriving at the campsite a bit before 9, we set about finishing the raftering, cutting some 2 dozen small trees and cleaning the poles, then placed them all. After that, measure and cut tar paper and placed that, weighed down with more rafter poles.... By mid-afternoon, we had the stove lit and learned a bit about that...
On my back deck, it was all but impossible to coax that stove to glowing temperatures... now we have to be careful, turn it down with the air damper. With the roof on, but walls un-chinked, even the glowing stove struggled to get the cabin to comfortable temperatures.... But that was a day's work.
Sunday morning, my wife and I took the kids out with breakfast fixin's and folding chairs and the intention that Floyd and I would get a good go at chinking the cracks with moss after wife and daughter headed out to B-day parties in the afternoon. We fried up a mess of sausages and eggs on the cabin woodstove, and ate'em all up. Very delish.
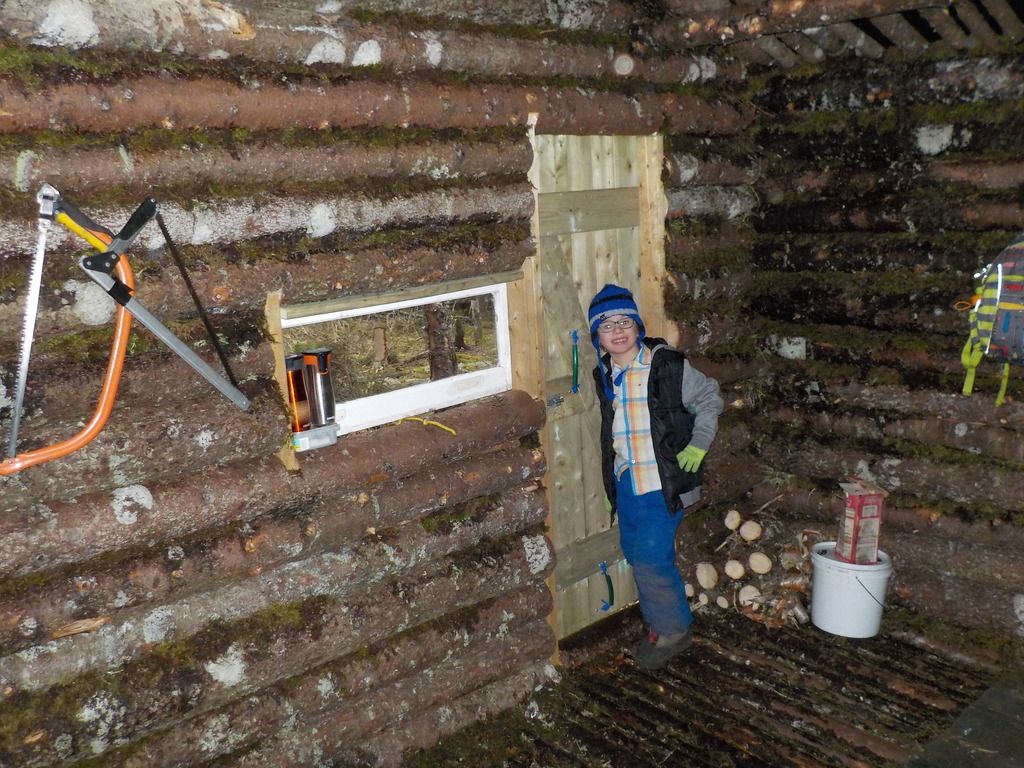
After that, bucket after bucket of moss, from the few un-frozen bits we could find were manhandled into the cabin... And much stuffing and chinking ensued. A few of the photos here are interior shots, taken at the end of the day, showing very very little for light leaking thru. The stove, turned down to minimum, was maintaining a very comfortable shirtsleeve environment inside. I think I'm stayin' out overnight next weekend, assuming our roofing job survives this week's weather (it's first test!).
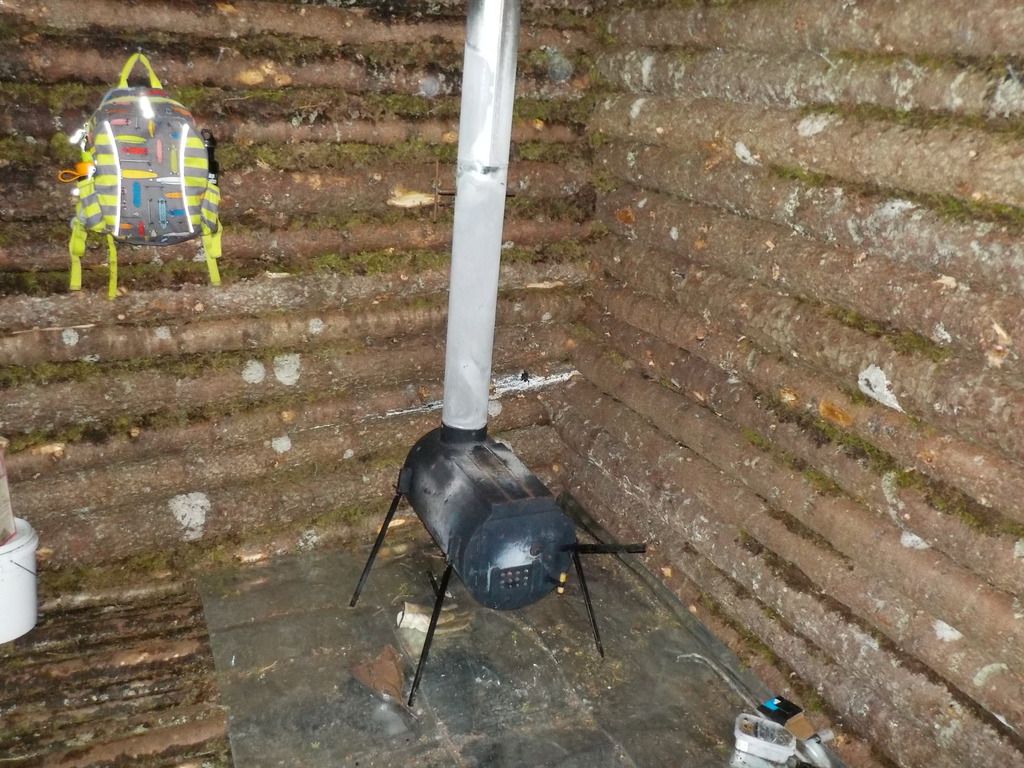
Hello, Darkness, my old friend - No light leaking thru the moss chinking...
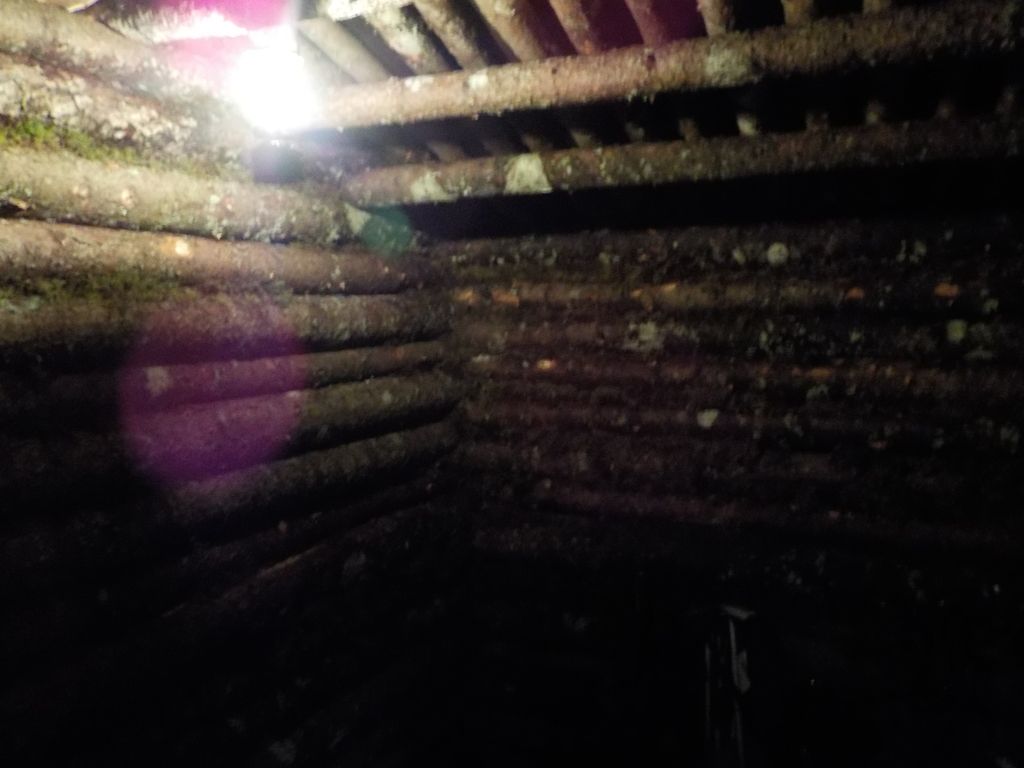
Floyd models inside the cabin:
And outside too...
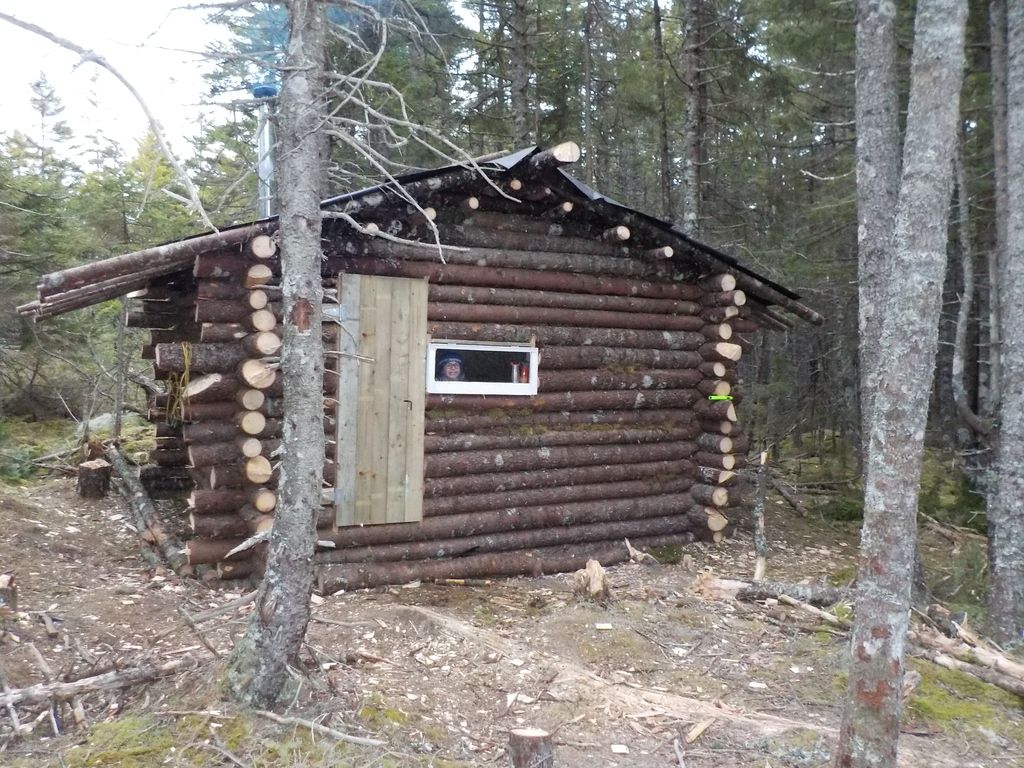
Where's Floyd?
In another note, my hands ache from chinking today... But totally worth it... Thanks, Rob, woulda taken 10x longer without ya!
J
|
|
FishHog
Member
|
# Posted: 23 Jan 2017 09:08am
Reply
fantastic. lot of work, but that is the good kind of work in my books.
|
|
neb
Member
|
# Posted: 23 Jan 2017 09:28am
Reply
Outstanding! Great pictures and what a rewarding place to spend time at. Thanks
|
|
sparky30_06
Member
|
# Posted: 23 Jan 2017 09:38am
Reply
WOW is all I have to say!!! A place family memories are made for sure. So much better for the kids than sitting at home with an Ipad in their face. not going to lie, tad jealous! GREAT BUILD!
|
|
JasonB
Member
|
# Posted: 23 Jan 2017 10:28am
Reply
Thanks, guys, we're pretty happy with the result! Looking forward to some nights out soon.
This is an interesting photo to share:
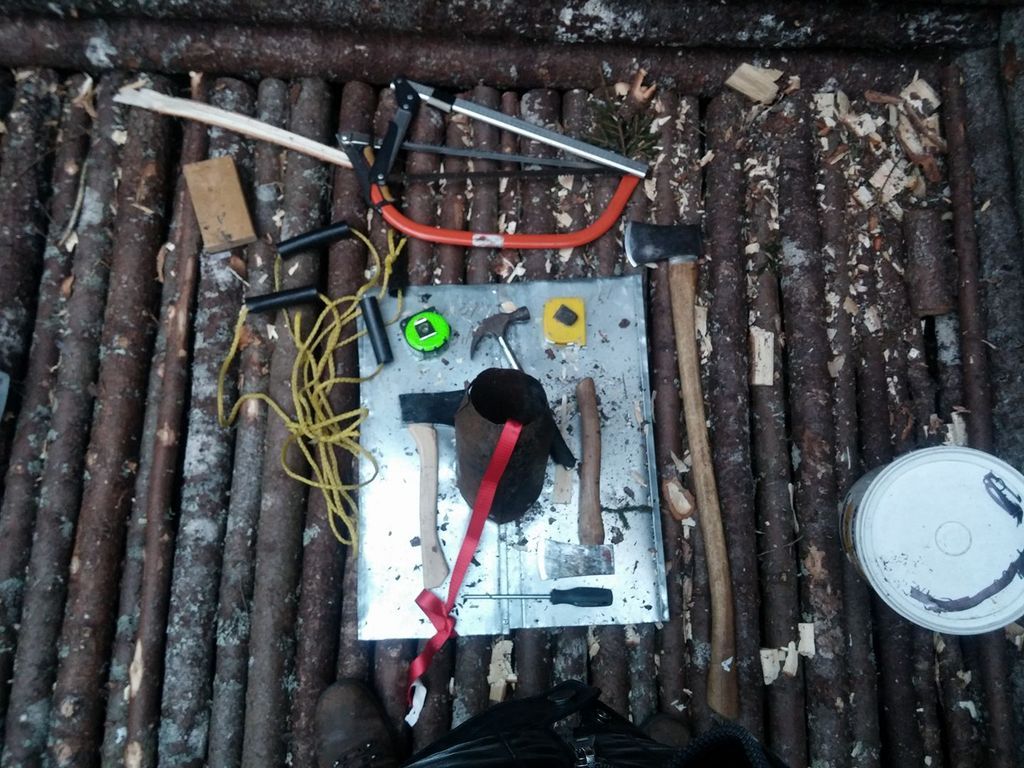
1 ax, 2#, 36"
3 hatchets, 1.25# each
2 x 21" bow saws (1 folding)
2 x 25' tape measures
1 16oz hammer
4 x rope log lifters
screw drivers (#2 and #3 Robertson).
About 40 x 5" spiral nails, 100 x 4" spiral nails, 50 x 1" roofing nails and 30' of galvanized wire were also used.
I cheated and used a cordless drill to hang the door and window.... *sigh*
J
|
|
Steve_S
Member
|
# Posted: 23 Jan 2017 10:52am
Reply
Excellent ! The best part with your project is this is a Lifetime Memory Builder that all of you will remember forever... When your 7 year old is 37 with her own kids and telling them about how she & their granpy built this cabin and the fun you all had... will warm that special place in your heart. A TRUE GIFT that is priceless ! The BEST investment anyone can make, is those special memories which nothing can replace, treasure it.
|
|
paulz
Member
|
# Posted: 23 Jan 2017 11:09am
Reply
You need to go on the TV show 'Survivor'. Those guys can't build a shelter to save their lives!
Great job!
|
|
JasonB
Member
|
# Posted: 23 Jan 2017 11:22am
Reply
Ha! Ain't that the truth!
|
|
leonk
Member
|
# Posted: 24 Jan 2017 11:40am
Reply
Hi Jason,
Congrats on your cabin and living in the beautiful part of the world! I see some things I would do differently, but now is too late to tell you 
Again, enjoy it! I envy you 
|
|
JasonB
Member
|
# Posted: 24 Jan 2017 12:51pm
Reply
Hey, I see things to do different too! Go ahead, I don't mind critiques.... Probably be building another cabin next winter for my neighbour's family.... 
J
|
|
KelVarnsen
Member
|
# Posted: 24 Jan 2017 01:01pm
Reply
Hey JasonB,
I'm not trying to be a downer, honestly, but I was just wondering how you justify squatting and harvesting trees owned by the paper company? Here is a quote from another thread that you posted to "Squatting on paper company owned land (Shhhh!) 250m from the Bay of Fundy in New Brunswick, Canada....". Don't you feel like this is stealing? Have you looked at purchasing your own land? Would you be doing the same thing for your neighbour's family?
We have some squatters near our place and it angers me a bit that I bought and paid for my land while they get away for free.
Again, I'm not trying to be a jerk, I'm honestly curious on your perspective.
|
|
leonk
Member
|
# Posted: 24 Jan 2017 01:28pm
Reply
Kel,
People used to do it, I am sure you know.
I guess where the OP is there's no one to upset, it's really quite sparcely populated. Just a guess, let's see what the OP says.
Jason,
Locate window opposite of door.
Try to keep corners vertical (plumb).
Consider running chainsaw between the logs to remove biggest bumps.
Lay moss after completion of each round by lifting the logs, placing moss and replacing logs.
if you have to chink the raised walls go from bottom up around each course of logs
Avoid log gables, they settle a lot and create all sorts of issues later
allow for settling in door/window
If you take me hunting there, I will help you build 
|
|
JasonB
Member
|
# Posted: 24 Jan 2017 02:29pm - Edited by: JasonB
Reply
Kel,
You do have a valid point there. I'm actually working at purchasing this parcel. In the meantime, yes, it is rather improper of me.
That said, let me describe the area. There is a single road here with homes on them. I'm at a dead end, at the sea. This piece of land is leftover from historic logging operations, last cut perhaps 30-50 years ago. Some stands, such as this one, were left uncut due to the difficult terrain for mechanized harvesting. The wood is low value pulp wood.
We've been hiking and exploring this parcel for 14 years now, and have yet to encounter another soul in this piece. There are a handful of other "squatter" hunting cabins on the same parcel, but perhaps 1.5-5km away. I'll be very surprised if anyone ever finds this spot.... Likely won't happen unless the area is harvested again.
At local pulpwood prices, I've used under $250 in wood value. Nothing I've cut was ever gonna be more than pulpwood, as few trees here exceed 8" DBH, and none that I used.
Not right, I know.
J
|
|
JasonB
Member
|
# Posted: 24 Jan 2017 02:40pm
Reply
LeonK:
Locate window opposite of door.
- Indeed, should have.... Placed on south west wall for light...
Try to keep corners vertical (plumb).
- Chalk it up to inexperience.
Consider running chainsaw between the logs to remove biggest bumps.
- No power tools allowed! We did do this, in the worst places, with hatchets.
Lay moss after completion of each round by lifting the logs, placing moss and replacing logs.
- Interesting!
if you have to chink the raised walls go from bottom up around each course of logs
- Interesting again...
Avoid log gables, they settle a lot and create all sorts of issues later
- I've attempted to account for this in the design. It's following the basic technique laid out in the book "Camp and Trail methods". I've allowed for settlement by nailing the rafters only to the ridge. At the walls, they're tied down with wire, to allow them to move when the structure settles.
allow for settling in door/window
- How?
J 
|
|
KelVarnsen
Member
|
# Posted: 24 Jan 2017 03:07pm
Reply
Sometimes we have to make tough choices to give our kids the experiences that they need and deserve. Good luck purchasing your parcel!
|
|
JasonB
Member
|
# Posted: 24 Jan 2017 03:12pm
Reply
Thanks, Kel. We do indeed.
J
|
|
Malamute
Member
|
# Posted: 24 Jan 2017 03:14pm
Reply
Quoting: leonk Avoid log gables, they settle a lot and create all sorts of issues laterallow for settling in door/window
Log gables are traditional for small cabins (or large ones for that matter), and his goal is a traditional cabin.
Ive built several cabins, with log gables, and had no problems with them. I allowed for settling, and used dead standing dry trees, and they seasoned more after building started. Its just not been a problem. I think it more theoretical than actual, unless using green logs, (and large walls) and I haven't heard of anyone using green logs in building modern log cabins or larger houses.
For all the old cabins built "wrong" (in so many ways, according to modern methods), there sure are a lot of them left standing around here.
|
|
leonk
Member
|
# Posted: 24 Jan 2017 03:21pm
Reply
allow for settling in door/window
- How?
I am sure you can find more info on the web.
If you install window or door jumbs, just make them shorter than the openings. Thus leaving room for settling.
Malamute, your experience is greatly appreciated. The OP doesn't have it (sorry for pointing the obvious), so I just mentioned there's perhaps an easier way. BTW, OP is building with green logs.
|
|
JasonB
Member
|
# Posted: 24 Jan 2017 03:26pm
Reply
Entirely green logs 
Anyway, ultimately this one's an experiment of sorts. Time will show its flaws. 
J
|
|
Malamute
Member
|
# Posted: 24 Jan 2017 06:12pm - Edited by: Malamute
Reply
Yes, his are green, though in that small of a cabin, the shrinkage is probably not going to be too big of an issue. Green was common with fast, rough cabins being built in a hurry, and often for short term use. In more deliberate, modern building, all the builders I know of and have checked their info are using dead standing trees. I think I only had about 1" or 1 1/4" of settling overall in the larger cabin I built.
A simple way to allow for settling in rough cabins is making slots in the door and window frames for the nails or screws that hold them to the logs so they can slide downward as it shrinks and settles. It also requires leaving the openings tall like was mentioned so theres room to settle, and a highly compressible material used to allow the settling. Overlapping trim boards can work also for the tops of the door and windows. A skill saw makes the slots in the frames quickly and easily, that could be done off site. A bit late now, but someone looking for info in the future may make use of it.
I re-did chinking on a large log house that they used Styrofoam above the windows and doors. With the square inches of surface area, they compressed the window frames nicely and made a number of windows not work right. Once that material was removed, the frames relaxed and most worked properly again. we re-shimmed a couple and got them working also.
The black foam tubes used for pipe insulation work nicely as highly compressible backer rod to chink over on door and window frames with modern chinking materials.
The moss our thread creator used will probably need re-doing fairly regularly, so any problems with compressing frames will be somewhat self limiting.
|
|
JasonB
Member
|
# Posted: 24 Jan 2017 06:48pm
Reply
Thanks Malamute, I appreciate the information you're sharing. I expect to have to repair the chinking in this little cabin pretty much with every overnight use. If 90 percent of it survives the month, I'll be pretty happy.
J
|
|
Malamute
Member
|
# Posted: 24 Jan 2017 07:03pm
Reply
I recall reading of people in cabins with moss chinking. Mice and critters would dig in fairly regularly, and the spots would have to be repaired now and then. Weather probably plays a part also.
Your little trapper cabin is great. If you haven't see it, Calvin Rutstrums book The wilderness Cabin has quite a bit of info about simple cabins on up to more civilized versions. He built many cabins in the Canadian backcountry, often just as a one winter item. He sometimes canoed into an area, started building, waited out the winter, then canoed out in the spring. He also canoed in with sled dogs at times and mushed around the country in the winter. Hed kill moose or caribou for meat, and he brought basic staples in bulk for much of the rest of his needs. Good stories, and some interesting tales of people he met.
|
|
| . 1 . 2 . >> |

