| << . 1 . 2 . |
| Author |
Message |
Absolutely
Member
|
# Posted: 6 Jul 2018 02:31pm - Edited by: Absolutely
Reply
Today is finishing day, two years after starting my little island bunkie. I'm touching up the paint and calling it complete.
After the weekend trip in June of last year we travelled to Europe for two weeks. Upon arriving in Switzerland I popped a fever, which persisted for the whole trip. At the end of the trip, in Paris, I developed Bell's Palsy. My wife, using Dr. Google, immediately suspected it was caused by Lyme disease.
Long story short, after landing in Toronto and going to the ER, it turned out I did have Lyme. I spent the rest of the summer and early fall getting treated and have now returned to normal (fingers crossed).
Fast forward to this spring and I finally cut and installed the jamb extensions and trim on the bunkie. The family is coming up tonight for a month and both boys have friends coming up for nearly the entire time.
Adding the bunkie and the kayak shed have increased the utility and useability immeasurably. Thanks for reading and have a great summer. Next year I begin work on the shed for the composting toilet so stay tuned.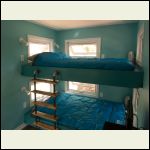
Bunks
| 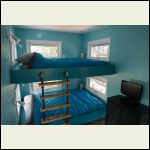
Bunks
| 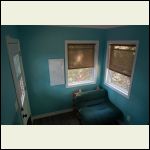
Futon for seating or a third guest
| 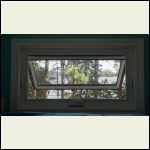
View from the top bunk
|
|
|
socceronly
Member
|
# Posted: 14 Sep 2018 01:53pm
Reply
Fantastic.
What lake are you on? I didn't see it above.
I'm on an island in Rice Lake.
JM
|
|
Absolutely
Member
|
# Posted: 14 Sep 2018 07:55pm
Reply
I'm going to keep it vague and say north of Kingston.
|
|
Absolutely
Member
|
# Posted: 4 Jul 2019 10:46am - Edited by: Absolutely
Reply
It's time for an update. I built the bunkie in 2016 and as part of that process the old outhouse was knocked down to dig footings for the boat shed. That left us with only one functioning toilet on the island. As an islander you never want to have only one of something - if that goes pear-shaped then you're hooped.
As a result, my wife and I decided to add a second toilet. Discussions ensued and we went around and around, trying to decide on the ideal waste solution. We talked about another pit toilet, a simple bucket system or another "traditional" flush toilet tied into the existing septic system. In the end we decided to buy a Separret Villa. It got great reviews and was the closest to a "traditional" toilet that still seemed to work as designed (unlike reviews on other non-separating composting manufactured toilets).
The discussion then centred around the building to house it. We started out talking about a simple 4x4 shed. Then my wife said "why not put a sink in there to wash your hands with?" Well, if you're going to put a sink in, you need a grey water pit. And if you have a grey water pit, why not have a shower too? Oh, and the toilet needs electricity to run the fan so you may as well run a 20A service out to it. That's how I ended up with the bathroom you see below.
There's still a bit to do. I need to add more gravel to the grey water pit and sod it over. The water supply is simply two hoses running from the cottage to the building. Winterization is performed by disconnecting the hoses. Everything is sloped towards the connection points so it'll drain. The hot water is only a degree or two cooler than in the cottage. All of our water is drawn from the lake, ie not potable, so the use of hoses for supply isn't an issue.
Just a note on the design - I didn't want the small room to feel even smaller with a flat ceiling. I decided to install T&G pine against the rafters to make the room feel airier. Cutting around the rafter tie was a bit tricky as was trimming it out. I liked the look of the shiplap and although relatively expensive it was quick and easy to install and finish. I went with LVT on top of 3/4" ply as it puts up with wetness better.
With the bunkie. boat shed, and bathroom completed I have now formally ceased construction on the island. When we bought out island in 2001 we had a 10 year plan of things we wanted to do. Other than fixing some of the siding, we're done. I'm semi-retired so now it's time to put my feet up and enjoy (although I still have a strong urge to drive a few nails in with the hammer!)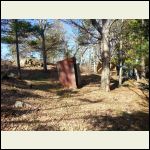
The old outhouse
| 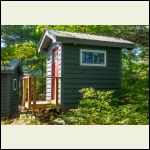
New Bathroom with boat shed behind
| 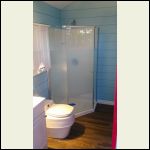
Interior
| 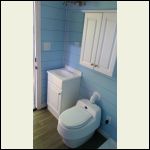
Interior
|
|
|
Absolutely
Member
|
# Posted: 4 Jul 2019 10:50am
Reply
Here's a few extra photos of the build.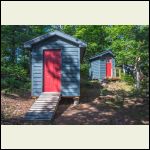
Boat shed with bathroom behind
| 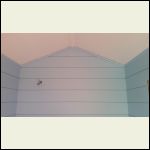
Ceiling
| 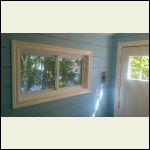
Window
| 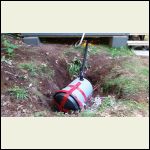
Grey water pit to be finished
|
|
|
fiftyfifty
Member
|
# Posted: 7 Jul 2019 12:00pm
Reply
How do you like the Separret so far? Your bathhouse looks great!
|
|
NorthRick
Member
|
# Posted: 7 Jul 2019 12:40pm
Reply
Nice looking camp!
|
|
Absolutely
Member
|
# Posted: 7 Jul 2019 04:36pm
Reply
TBH, I haven't tried it out yet. I wanted to make sure my family had a chance to see how it all worked before I "christened" it. I'll get back to you before Labour Day, when we close up, to let you know how it goes. I expect good things, though. It was probably the best manufactured, packaged product I've bought in a long time, with excellent instructions and all the necessary parts for multiple installation configurations.
Thanks for the kind words, NorthRick, it's getting there. I've had lots of inspiration from the members of this forum.
|
|
|
KabinKat
Member
|
# Posted: 25 Aug 2019 03:34pm
Reply
Looks Great!
|
|
Aklogcabin
Member
|
# Posted: 26 Aug 2019 11:12am
Reply
Looks great! Had to chuckle a bit when you said that you were done constructing.
|
|
aktundra
Member
|
# Posted: 26 Aug 2019 04:08pm - Edited by: aktundra
Reply
Very nice project. I like how you did the windows in the bunkie! I bet that keeps the temperature nice.
I need a Yak Shack! Love it.
Maybe I missed it... What color/paint did you use on the siding? I think I read you used pine clapboard? The color is great!
Great work. Thanks for sharing and be sure to update us ton the new Separett Villa.
|
|
Absolutely
Member
|
# Posted: 26 Aug 2019 07:59pm - Edited by: Absolutely
Reply
Thanks for all of the kind words. I really think I'm done constructing. I do need to re-side the main cottage and replace the soffit and fascia but the island is feeling "full" so I really think I'm done.
The stain I used for the siding is Cabot semi-transparent called "Foothill". My wife and I go back and forth on what colour it really is. Sometimes it looks blue, sometimes grey, sometimes green. It depends on the light and whether it's reflecting the leaves.Browse through google and have a guess.
The siding was, I believe, 8" bevelled pine siding. It was easy to cut and nail up.
The Separett Villa has been great so far. It was used daily by four adults for three weeks. My wife thinks it's full because the toilet paper is a bit mounded but I think it'd be good for a while yet. There is no smell or flies inside. Outside, there's a bit of a "earthy" smell coming from it. It's not exactly offensive, nothing like our old outhouse, but it's not exactly pleasant either. All in all I'm thrilled with it so far.
The bunkie windows are good. You can keep them open in most rainstorms but would need to close them if the rain gets more horizontal. I'm not sure if they are as efficient as sliders, though, as the glass seems to hood the breeze sometimes. The kids sleeping out there like it because both beds are bright with lots of ventilation and you avoid the claustrophobic feel you sometimes get in bunk beds.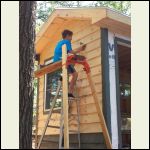
111.jpg
| 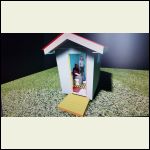
3D Model of Toilet and Shower
| 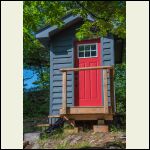
Outhouse
|  |
|
|
Absolutely
Member
|
# Posted: 1 Sep 2019 01:52pm - Edited by: Absolutely
Reply
Closing day. Today was the first time I had to prepare the Separett Villa for winter. The process went ok, but it could be improved upon. Firstly, the top was opened and the lid placed on the pail and the pail was easily removed. I decided to put the bag from the pail into a kitty litter pail, mainly because Separett recommends leaving the bag outside in a container with a bit of dirt for six months with a lid slightly ajar and the kitty litter pail is ideal. The bag had leaked a bit of moisture into the bottom of the Separett pail as I transferred it. This is likely because I exceeded the recommendation to remove the bag every four to six weeks regardless of how full it is. The dampness would be similar to that which you'd find at the bottom of a green composting pail when it'd sat too long.
I washed out the pail and set it to dry. I prepared the new pail for next season by first placing paper towel in the bottom before putting the bag in. I also double-bagged the new pail.
I am using the Separett "ejector" tank for urine. I connected the discharge hose and the supply hose and sprayed the water / urine mixture over the bushes at the top of the island. A small amount of urine did not get siphoned out so I mixed a bit of water in the tank and dumped it into the bushes.
All together it took about 30 minutes to winterize the toilet and it was a fairly pleasant process. I'll report back in the spring when I put it back into service.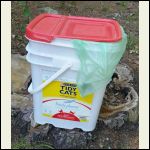
Bag put into litter pail for winter
| 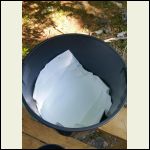
New pail lined with paper towel
| 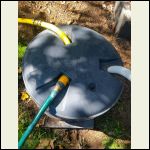
Urine tank configured for pump-out
|  |
|
|
| << . 1 . 2 . |

