| . 1 . 2 . >> |
| Author |
Message |
Absolutely
Member
|
# Posted: 5 Jun 2016 06:43pm
Reply
Hi! I've been a long-time reader here and I finally have a project to share.
I own my own island on a lake in Ontario. I bought it about 15 years ago and slowly fixed up the cottage, one project at a time. However, it's too small for my boys to have friends up - therefore, the bunkie.
The plan is to build a 108 sq ft bunkie to code, roughly 8' x 13', with double-over-double bunks. This is the configuration the boys have in their current bedroom in the cottage. In the bunkie, though, the beds will be set up width-wise rather than length-wise, as shown below. Each bed will have a 20" x 40" awning window at their head, side and feet.
I will be using 2" x 6" rafters on 16" centres, with a 5/12 pitch and a steel roof. I plan on using pine clapboard siding over 1/2" ply sheathing.
This last weekend my contractor floating his Kubota over on his barge and dug the holes for the footings. Concrete was poured, the frame was built and he was ready to start applying the subfloor. However, I noticed that he had used a single 2" x 6" as a beam between the posts. Words were shared and I asked him to stop working and give me his bill for the work performed. The next day I removed the frame he'd built and replaced it with double 2" x 8" beams and 2" x 8" joists. While removing the frame I noticed that he'd only used 1 1/2" joist nails in the toe-nailed holes in the hangers - a real non-no. Simpsons calls for 3" 10d nails to ensure they don't pull out. I would have liked to use three 2" x 8"s but there wasn't enough room for them on the concrete pier (due to the location of the tie-down bolts).
Next up is framing the walls. I've already cut my headers - using two 2" x 12"s with 1/2" foam insulation in between. Using the wider wood eliminates the requirement for cripple studs.
Hopefully I will have many more photos to share soon.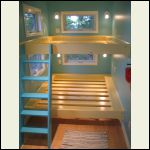
Bedroom Layout
| 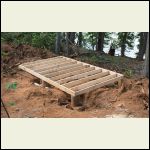
Frame as built by contractor
| 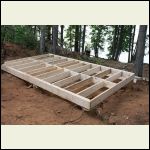
Frame rebuilt
|  |
|
|
SE Ohio
Member
|
# Posted: 6 Jun 2016 06:46am
Reply
Good thing you checked the contractor's work! Off to a good start.
Looking forward to seeing your progress.
SE Ohio
|
|
Absolutely
Member
|
# Posted: 14 Jun 2016 09:55am
Reply
I was able to spend four days on the island last weekend and have accomplished quite a bit.
On Friday I insulated between the floor joists with R24 Roxul batts. This should help keep the floors warm and insects and rodents don't like the taste of the stuff. Next, 4' x 8' sheets of 5/8" plywood went down, screwed and glued with staggered joints. It was finally time to start building the walls.
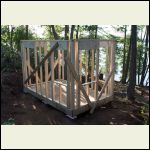
The first wall went together fine but I decided to limit the number of studs because, working solo, there was only so much I could lift. With two double 2" x 12" headers the wall was quite heavy to lift. Once the wall was in place and secured I cut out the bottom stud for the door opening and added the jack studs. I would later add the window sill plate and cripple studs.
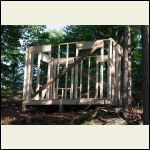
By the end of the day I had all four walls erected. There were still more sills to be added, along with the cripples and an extra stud or two to act as backing for the sheathing. I also had yet to fully secure the overlapped double top plate.
It was beer thirty so I packed up and fired up the BBQ.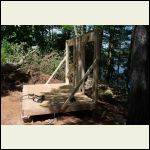
First wall is up
| 
All walls are up
| 
The front facing the lake
|  |
|
|
Absolutely
Member
|
# Posted: 14 Jun 2016 10:08am
Reply
Saturday was sheathing day.
Ideally, I would have liked to have fully framed the walls and sheathed them while they were laying flat and then raised them but they would have been way to heavy for me to lift on my own. Instead, I'd need to nail the sheathing to the walls in place.
I positioned the first piece of 1/2" exterior plywood and, after checking for square, nailed it into place. I drilled through the plywood at the window corners, marked lines and cut the window openings out with the skil saw. That was a mistake. I should have cut the opening and then raised the panel - it was difficult to cut over my head with the saw.
Lesson learned, I cut the rough openings in the remaining 11 panels while they were laying down, then raised them and nailed them into place.
I reduced the air pressure to my framing nailer as the higher pressure was driving the 2" nails a little too far into the plywood.
With the framing complete and the overlapping double top plates installed the Bunkie is becoming quite rigid. I would have liked to have used 9' panels as they would have extended down over the 2" x 8" beams but they were not available in the area. I will cut pieces from the leftover plywood to cover the foundation prior to applying the siding.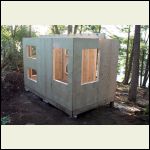
Sheathing done
| 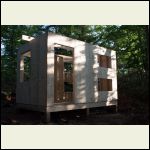
Sheathing done
| 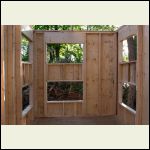
Sheathing done
|  |
|
|
Absolutely
Member
|
# Posted: 14 Jun 2016 10:33am
Reply
Sunday was planned to set the ridge board and cut and place all the rafters. It was my first time building a roof, working alone, and it was not a great experience.
I had bought two 2" x 8" x 16' boards from the lumberyard and I planned to use the straightest for the ridge.
I also planned on using Simpson rafter and hurricane ties at the ridge and top plates, for a few reasons. Firstly, I figured that I could lay everything out and nail the Simpson brackets into place ahead of time and they would help me accurately position the rafters as I nailed them into place. Secondly, they create an incredibly strong joint and the hurricane ties hold the top plates and sheathing together. I realized how strong they are when I had to pull two nails out that I drove by mistake - it took about 10 minutes of hard labour to get those two nails out.
I used the rafter calculator at blocklayer.com to lay out the rafters. I cut a master and proceeded to cut another 21 rafters. I set up the ridge board as best I could, adjusting for plumb, square, level and correct position along its length. Working from one end, I started adding rafters, two on one side then two on the other.
I'm not sure entirely what happened but they didn't end up looking like how I thought they would. Maybe it was because of small variations in the birdsmouth cuts but no two rafters sat the same on the top plates. Neither was the angle perfect at the ridge. I'm assuming there's a bit of a gap due to the thickness on the Simpson bracket.
By the time I got to the last rafters it was apparent that there was quite a bit more warp to the ridge board than I originally thought. It took a lot of work to try to sweet talk it into position for the last rafters to get set in place.
It was now late and a cold wind had been blowing all day. I was exhausted, tired and a chill had set in. My mood was not improved by how I felt the work had gone. The finished product looked nothing like what I had envisioned and I was pretty depressed. I made myself some dinner and went to bed early, hoping the next day would be better.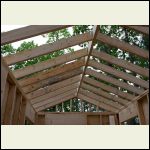
Rafters going in
| 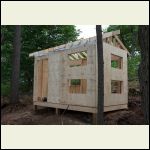
Roof framing mostly done
| 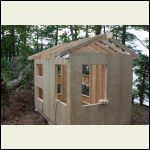
Roof framing mostly done
|  |
|
|
silverwaterlady
Member
|
# Posted: 14 Jun 2016 10:39am
Reply
Your camp sounds very nice,a peaceful place to spend the summer.
A lot of wonderful childhood memories will be made by your sons and their friends in the new bunkie.
We love photos. Do you have any of your cottage?
|
|
Absolutely
Member
|
# Posted: 14 Jun 2016 10:59am
Reply
I woke up early on Monday and I had a lot to finish. I had a hard deadline of 5:00 before I had to drive home.
I walked out to the Bunkie at 6:00 a.m. as the sun was coming up and realized that the situation probably wasn't as bad as it had seemed the night before. Being cold, tired and hungry can affect your outlook and make things seem worse than they are.
I got up on the roof to grab the actual dimensions, jumped in the boat, then the car and went to the local lumberyard to order the steel roof. I decided on Ideal Roofing's Security Rib roofing. I have never done a steel roof before but the person at the order desk was extremely helpful and encouraging. It's supposed to be here on Friday.
Returning to the island, I set about framing and sheathing the gable walls. I had used every one of the 80 2" x 4"s I had bought so I scrounged the scrap pile for wood I could use as studs for the (non-load bearing) gable wall. I left a gap under the ridge board for the still to-be purchased gable vents that will go there.
With the gables closed in, I cut eight more rafters without birdsmouths to use as barge rafters mounted on ladders. This will give me a overhang at the eave, the underside of which will be boxed in with 1" x 12" gable soffit. I will apply 1" x 8" fascia to the front of the barge rafters to give a clean appearance. Finally, I will install 2" x 8" fascia and continuous soffit venting along the eaves. The 2" x 8" will give a solid support for the eavestrough.
I finished up around 3:30, put my tools away, grabbed a few photos and headed for the mainland.
I guess I was hoping to do more but I think I accomplished quite a bit in my four days on the island. There's still work to do on the roof - fill the rest of the nail holes in the Simpson brackets and add ceiling joists. When that's done, it'll be time to sheath, add drip edges and snow and ice shield and lay down the steel. Hopefully, by the end of next weekend, I'll have a roof over my head.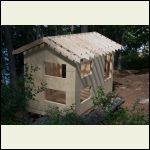
Roof framing mostly complete
| 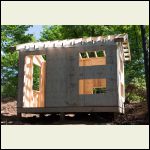
Roof framing mostly complete
| 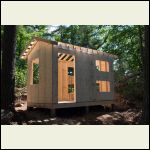
Roof framing mostly complete
| 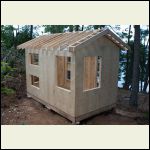
Starting to look like a real house
|
|
|
Absolutely
Member
|
# Posted: 14 Jun 2016 11:32am
Reply
Quoting: silverwaterlady Your camp sounds very nice,a peaceful place to spend the summer. A lot of wonderful childhood memories will be made by your sons and their friends in the new bunkie.
Thanks for your kind words.
I will post photos of the cottage but I don't have any with me here.
We bought our island in September 2001 from an older couple who could no longer maintain it. The island had previously been crown land and had been used as a guide island, where fishing guides would bring guests to fry up their catch as lunch. The couple built a crude cottage on the island when they purchased it in the '50s.
When we were gutting the cottage we came across a section of wall with many names, heights and dates. It had obviously been a popular spot, nothwithstanding the extreme rustic flavour.
My wife took down the old sign hanging over the front door, "Whispering Pines". I asked her what we should re-name it. Her answer, which has stuck, is "Lingering Doubts". It's a perfect name because, for many years, we had many lingering doubts. The jetskis come too close to the dock, it's a pain loading and unloading the boat, the cottage is too small. Maybe we should sell the place.
But the boys wouldn't hear of it. They love it there. They drive the boat to town for ice cream and licorice and sometimes they even remember my newspaper. They jump off the cliffs on a nearby island. They swim for hours. The doubts still linger but there are fewer of them these days.
A boat came by the other day. An older lady and her husband called out. She told me her name and told me that she used to live on the island when she was younger, with her siblings and cousins. She said it was the happiest she had ever been. She said she was glad that the cottage had gone to someone who loved it and would take care of it and asked if my kids loved it there as much as she did. I replied that my kids did indeed love it and would kill me if I sold it. We said goodbye and they motored away. It was much later when I realized that her name was one of the many written on that wall, fifty years earlier.
"Lingering Doubts", indeed.
|
|
|
silverwaterlady
Member
|
# Posted: 14 Jun 2016 11:42am
Reply
Wow.
Beautiful story.
|
|
Absolutely
Member
|
# Posted: 14 Jun 2016 03:48pm
Reply
Quoting: silverwaterlady We love photos. Do you have any of your cottage?
Here's a few to give you an idea of life on "Island Time".
Cheers.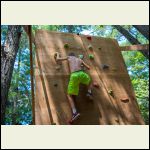
Climbing Wall
| 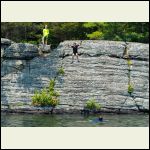
Cliff Jumping
| 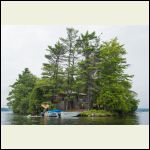
Swimming at the dock, cottage in background
| 
Even the cats love island life
|
|
|
Julie2Oregon
Member
|
# Posted: 14 Jun 2016 04:23pm
Reply
Oh, what a beautiful place! Beautiful stories, too! Your family is making memories there, and it sounds like generations of people hold lovely memories of your island. Which makes it enchanted. 
|
|
silverwaterlady
Member
|
# Posted: 14 Jun 2016 05:01pm
Reply
Very nice!
We are on a island too. It's just a little bit bigger. 
|
|
naturelover66
Member
|
# Posted: 14 Jun 2016 05:50pm
Reply
Wow... You have your own island....
I would never sell it...
I would plan on dying there.
Youre so fortunate.
Lisa. 
|
|
Absolutely
Member
|
# Posted: 14 Jun 2016 06:09pm
Reply
Quoting: naturelover66 I would plan on dying there.
If I don't buy a better ladder I just might.
Thank you all for your kind thoughts. I've lurked here for a long time so it's fun to finally have something to post and share. I've heard my island called many things before but never "enchanted". I like that very much. Thanks!
The lockmaster on our lake, recently retired, who we've known for many years (my wife's mother has a cottage on an island the next lake over) also spent his childhood on our island. He, too, has many stories of swimming, fishing and campfires. In many ways we often feel more like the island's stewards than owners.
Thanks again for reading!
|
|
naturelover66
Member
|
# Posted: 14 Jun 2016 08:35pm
Reply
Maybe a great fathers day gift is a better ladder.

|
|
Absolutely
Member
|
# Posted: 28 Jun 2016 07:53am
Reply
Lots of progress has been made over the last two weekends. I went back up on June 16th and spent four days progressing the build.
I had decided to go with a continuous 2" x 8" 15' fascia, rather than the original plan, which was using two 1" x 8" pine boards along each eave. It may have been the right decision but getting them into position and fastening them solo just about killed me. However, they eventually went up and I'm happy with them as they're rock solid.
Fascia in place, it was time to install the verge rafters, gable soffit and roof sheathing. All of that went smoothly. Drip edge was nailed into place along the eaves. I began applying "Snow and Ice" shield along the sheathing. Even though this will be an unheated cabin, and decidedly unoccupied during winter, I went with the full shielding because it was not a huge outlay in cost and also because the local building centre did not carry 30 lb roofing felt. Given the choice between a full membrane and 15 lb felt, I thought the full membrane was the prudent choice.
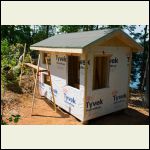
I cut a 45' long piece of Tyvek and began gift-wrapping the cabin. It all went up without problems and there is only one seam on the leeward side of the cabin. I cut all of the openings in the house wrap and stapled it into place.
Up next was the absolutely worst part of the construction process so far - the soffit. I had done a lot of reading regarding soffit venting and I wasn't sure which way I wanted to go - continuous, or a solid soffit with vents cut into it at every rafter opening. In the end I decided to go with a manufactured soffit vent product, in 8 foot lengths, that sits in a channel. Given that the vent is 2" wide and I had 13" between the sheathing and the inside edge of the fascia, I planned to use 1" x 6"s with a routered rabbet to support the vent. Great in theory, horrible in practice. It probably took 10 hours to get it into place and I'm not thrilled with the appearance at all. Oh well.
Soffit in place, it was time to build the 'pork chop' to finish the verge rafters and begin installing corner trim. On the roof, the rest of the "Snow and Ice" shield went down and the rake drip edge was nailed down.
I didn't feel that I was as far ahead as I should have been after four days of gruelling work but, hey, progress is progress. It was time to pack up and head home for a few days.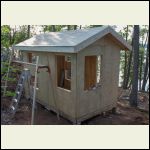
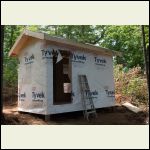
Roof sheathing on, eave drip edge in place
| 
House wrap going on
| 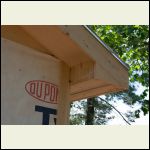
Soffit with vent, pork chop and eave soffit
| 
End of a weekend's work
|
|
|
Absolutely
Member
|
# Posted: 28 Jun 2016 08:29am
Reply
After working solo for two weekends, my family was coming up to help for a few days. I was delirious with the thought that if I dropped something while standing on a ladder that someone could actually pick it up and pass it back up to me!
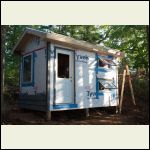
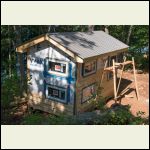
I bugged out of work early on Thursday and arrived in time to begin applying flashing tape to all of the rough openings. Installation of the windows was straight-forward as the nailing fins make it dead easy. Between Thursday afternoon and Friday, all eight windows and the door were set into place.
Trim pieces were cut and tacked into place using a brad nailer, to be fully secured later using 7d 2 1/2" siding nails.
Late Friday my family arrived and the six of us (four humans, two cats) crossed the lake under the stars to the island. My wife and two boys explored the cabin by flashlight and were amazed by how much was accomplished, alone, in such a short period of time.
Saturday morning saw everyone up and ready to get to work. My young lad helped with sawing and nailing while my wife and older boy started removing the dead oak tree that was felled where the Bunkie was sited.
What should have been a great day was marred by possibly the worst nails I have ever used. Let me start by saying that I had seriously considered using the framing nailer to shoot nails into the siding to hold it in place. I was concerned, however, that the nails would be over-driven and this could lead to depressions that would encourage rot. Given that, I scoured Lowes and home Depot for nails specifically designed for siding. I was looking for hot-dipped galvanized ring shank nails but settled for the 7d siding nails mentioned above.
The problem was that the nails were so soft and weak (the young lad could easily bend them in half) that they were impossible to drive. The four of us tried, using large and small hammers, the palm nailer, etc. Nothing worked. The nails bent roughly 50% of the time, leading to massive frustration. We stopped work early because the frustration levels were reaching critical.
My wife and I got up early Sunday and drove to a local building centre to pick up new nails. We decided on similar nails but they were much more robust. The problem was that there was only one box left on the shelf. Returning to the island, we found that the nails were easily driven using the palm nailer and my son followed along with the hammer to properly set them. Success! We kept going until we'd used all of the nails in the box.
Everyone went for a quick swim and I took the family back across the lake to the car as they began the return trip to the city.
My steel was finally delivered on Monday and I brought it across from the mainland. Laying it out on the deck I discovered, as I suspected, that the steel was actually bigger than described. It was described as 31" panels. My roof was 184" wide, so I decided on six panels, each 31", which would give 186", or a 1" overhang at the gable ends. In reality, the panels were 31" between interlocking ribs, but there was also an extra bit on each side, so the panels ended up being 188" wide. That meant there would be a 2" overhang, more than I wanted.
I decided to try cutting a panel using aviation snips. This was, of course, a disaster. I'm not sure what I was thinking but it wasn't very smart. In an effort to fix my mistake, I pulled out the angle grinder but this, too, did not produce a smooth cut. The panel was now ruined but, luckily, the damaged section would be covered by the next over-lapping piece.
I set about drilling the panels for the screws and started hoisting and screwing them down. In doing so, I discovered that the roofing company had set me one extra panel which meant I could now discard the panel I butchered. Sweet!
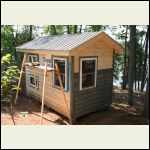
Before long I had all 12 panels secured into place. It was late in the day so I deferred installing the ridge cap, cleaned up and drove home. We will all be back up in two days to begin our month-long vacation. I figure there's about another 7-10 days of work to do before it will be completely done.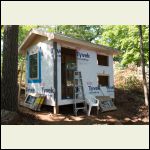
Windows going in
| 
Casement windows looking good
| 
The end is in sight
| 
Roof on, siding mostly done
|
|
|
sparky30_06
Member
|
# Posted: 28 Jun 2016 08:52am
Reply
Looking good!! I totally know where your coming from working alone and having no one to pick up something when you drop it. climb down the ladder then climb back up is no fun!
|
|
Absolutely
Member
|
# Posted: 28 Jun 2016 09:19am
Reply
That gets old really fast, doesn't it?
|
|
abby
Member
|
# Posted: 29 Jun 2016 10:38am
Reply
I just love it! love the story, and can't wait to see more. no wonder your family loves it there, it's gorgeous! 
|
|
Absolutely
Member
|
# Posted: 29 Jun 2016 11:21am
Reply
Thanks for the kind words.
I was hoping to have electricity run to it this summer but it's not looking good. My go-to electrician, who didn't seem to mind island work, has retired. The next guy I was going to use is sick and the third is booked all the way through to Labour Day.
I have a pretty good idea how to do it but I'd prefer to pay a licensed electrician to do it right, and then have it pass inspection. Oh well, I'll probably rough it in and wait for September for the pro.
|
|
sparky30_06
Member
|
# Posted: 29 Jun 2016 01:03pm
Reply
If I had the vacation time it would only take a plane ticket and some fishing or hunting. I'm cheap labor!! lol
|
|
Absolutely
Member
|
# Posted: 29 Jun 2016 01:47pm
Reply
That would be awesome! I don't fish but apparently the waters around the island are filled with bass, judging by the number of boats parked offshore. The boat traffic has been crazy since bass season opened last Saturday.
I hope you find some vacation time - life's too short to work.
|
|
sparky30_06
Member
|
# Posted: 29 Jun 2016 04:54pm
Reply
Absolutely you can say that again. You blink and the year is half over. You close your eyes for a min and your 40 years old
|
|
boomhaeur
Member
|
# Posted: 29 Jul 2016 02:14pm
Reply
Hey Absolutely - looking good... just about to start building a similarly size structure to yours - ironically on a similar slope. 
Question for you - your footing posts on the downhill side - are they 6x6? and do I see correctly that you've notched them at the top ~halfway and rested the frame on them? Finally - are they resting on bedrock or did you need to pour concrete footings for them as well?
Thanks! Look forward to seeing the finished product...
|
|
Absolutely
Member
|
# Posted: 2 Aug 2016 03:33pm - Edited by: Absolutely
Reply
Boomhaeur:
Thanks for the kind words. We just got back from five weeks on the island.
Yes, the contractor installed 6"x 6"s on the downward side. They are sitting in 6" x 6" galvanized steel saddles that were put into the wet concrete. The contractor told me that the footings were excavated down to solid rock, near the frost line, which is four feet in our area.
The contractor notched the posts when he installed his 2" x 6" base. I ripped his base apart and had to re-cut the existing posts to fit my doubled-up 2" x 8" beam. It's not the way I'd do it if I was to do it but c'est la vie.
For example, I finished the porch on my vacation. I poured 16" x 16" x 6" footings , not down at the frost line, and put a 6" x 6" saddle in. When the concrete cured I set my posts using string and a water level, then placed the doubled 2" x 8" beam on it. I used Simpson brackets front and back to secure the beam to the posts, and hurricane brackets to secure the joists to the beam.
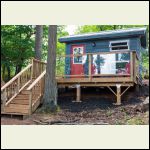
Here's two shots of the finished product.
Good luck with your project. I'll be looking forward to lots of photos!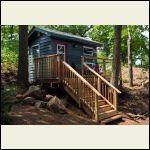
Island Bunkie - Exterior finished
| 
Island Bunkie - Exterior finished
| 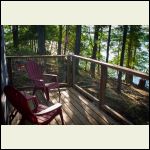
Favourite spot for sunset beer
|  |
|
|
Ontario lakeside
Member
|
# Posted: 2 Aug 2016 09:04pm
Reply
looking great, I like the colours you picked!
|
|
Absolutely
Member
|
# Posted: 26 Jun 2017 08:31pm - Edited by: Absolutely
Reply
Long time, no update.
We closed up the cottage at the end of last summer since there's no time to visit after Labour Day, when the boys' hockey starts up.
The winter was spent trying to line up an electrician for the spring and getting ready to build what i call "The 'yak Shack", a boat shed big enough to store four kayaks and still fit in a 108 square foot footprint.
I went up in mid-April after the ice went out and had the building mostly done by the beginning of May. However, May turned into a trial. Historic flooding in Ontario washed away my docks. I had to tie my boat up at a neighbour's dock, where it was stolen (and later recovered sans motor). Finally, I had to deal with a serious eye infection that nearly cost me my eyesight.
June came, and it brought good luck with it. My eye recovered, I bought an old motor with the insurance money and, best of all, an electrician finally showed up to wire up my service. With the wiring in and inspected I was able to make some progress on the bunkie. Drywall went in and I installed the flooring and baseboard. The jamb extensions and window trim will have to wait. Lastly, I cut, painted and installed the bed frame. Just in time, too, as my boys each had two friends up for the weekend. Six teenagers, two adults and two cats on a small island made for an amazing weekend.
Here's a quick video I put together to give you a feel for "island life".
URL
|
|
Absolutely
Member
|
# Posted: 26 Jun 2017 08:51pm
Reply
Here's a few shots of the kayak shed and the bunkie interior. I used air mattresses in the bed frames as I haven't ordered real mattresses yet but it gives you a good idea of how the room works.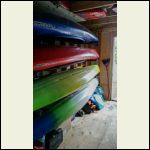
Kayak Shack interior
| 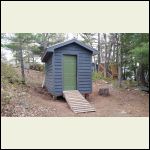
Kayak Shack front view with ramp
| 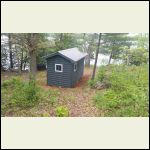
Kayak Shack from Hill
| 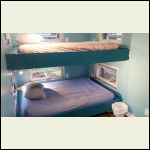
Bunkie interior so far
|
|
|
KabinKat
Member
|
# Posted: 27 Aug 2017 06:08pm
Reply
Fantastic! Very nice work! 
|
|
| . 1 . 2 . >> |

