| . 1 . 2 . >> |
| Author |
Message |
MikeOnBike
Member
|
# Posted: 15 Nov 2010 02:20am - Edited by: MikeOnBike
Reply
My next shed project is another 10x12. This one will have a shed roof, but will not have a loft like the last one. This will be be our 'cabin' (wife and I) for a least three seasons until the 'big' cabin can be built.
Specs
- 10x12
- shed roof
- 10x6 deck
- 10x6 pergola
- no loft
Issues
- shallow roof slope
- snow load
- fire protection
- tiny size
- outdoor living space
.
|
|
Gary O
Member
|
# Posted: 15 Nov 2010 08:38pm
Reply
Hey Mike
Why the shallow roof slope?
Got elevations figured yet?
Gary O'
|
|
nathanprincipe
Member
|
# Posted: 15 Nov 2010 10:42pm
Reply
you might consider a very small loft for over head storage only
|
|
MikeOnBike
Member
|
# Posted: 15 Nov 2010 10:44pm
Reply
Well, I'm tired of falling off steep roofs and she likes the look.
I'm going to try to keep a 3:12 slope on the roof. With 3' of snow that is still a bit shallow. The roof slopes from the front/door to the back/bed.
Since we have no fire protection I'm going to use fibercement siding. It comes in up to 10' lengths. Given that the floor platform is ~6" that gives me about a 9.5' wall height in the front and a 6.5' wall height in the back.
The water content of the 3' of snow last year was about 12". That's 64lbs/sqft on the roof so it will need to be pretty beefy. It translates to 2x8 rafters on 12" centers. Been playing with the Snotel data. As a safety measure I'm going to put a 10' 4x6 beam across the center of the 12' span.
|
|
MikeOnBike
Member
|
# Posted: 15 Nov 2010 10:56pm
Reply
Nathan,
Yeah, the loft would probably be practical but the shed roof construction is a trial run for the cabin roof. The cabin is currently targeted for 12x40. We have a great view and want every room in the cabin to experience that so it will be long and narrow.
If the shed works too well I'll never get the cabin built!
.
|
|
MikeOnBike
Member
|
# Posted: 15 Nov 2010 11:19pm
Reply
Gary,
I think I'm going to build a model like you have for your next phase. What did you use for materials? Did you mill them yourself or use model balsa?
|
|
Gary O
Member
|
# Posted: 26 Nov 2010 09:13pm
Reply
Mike-
Just 1 x 8 pine boards run thru the table saw for dimension.
It works quite well with a good air driven stapler.
Don't use a brad nailer, they don't hold.
Of course wood glue and/or clamps (unless you happen to have an extra hand).
It's quite fun, and sure helps me solve the unforeseen.
|
|
MikeOnBike
Member
|
# Posted: 26 Nov 2010 09:21pm
Reply
Is that 1" = 1'
|
|
|
Gary O
Member
|
# Posted: 26 Nov 2010 09:49pm
Reply
Quoting: MikeOnBike We have a great view and want every room in the cabin to experience that
That's one of the beauties of building from your own design; creating the cabin to fit the surroundings.
Really like the set up you show, with the couch facing the window, and the bed placed where you can gaze out at the view upon retiring and when rising (first thing you see in the day, and the last).
How can one have a bad beginning or a bad ending of a day?
Nicely done.
Very nicely done.
BTW, your earlier pic from another thread really is spectacular, and you should publish it. Found this highly touted one on the web, but it just doesn't have the depth of yours.
|
|
Gary O
Member
|
# Posted: 26 Nov 2010 10:14pm
Reply
Quoting: MikeOnBike Is that 1" = 1'
Heh heh, trying to make me think while watching my Ducks come to life in the 2nd half.........
Permit me to make a correction.
I used 1/2" pine (not 1"), so 1/2"= 4" (8 to 1 ratio)
Thus my model is 2' x 1 1/2' (16' x 12')
At one point, I'd thought to go with a 4 to 1 ratio, but the thing turned into a dog house..............
|
|
MikeOnBike
Member
|
# Posted: 26 Nov 2010 10:37pm - Edited by: MikeOnBike
Reply
It would help my Broncos if your Ducks would lose but as you said they came back to life.
Thanks for the compliments on the photo. I wouldn't even know where/how to publish it.
|
|
Gary O
Member
|
# Posted: 26 Nov 2010 10:58pm
Reply
Man I love those Broncos (even though they have quite a winning streak with Oregon teams).
Fiesta Bowl 2007
That's stuff of which movies are made.
I'd pay good money to have that video.
Awesome.
Best game I ever saw.
If Oregon and Boise State vies for the BCS, well then it just doesn't matter.........win win.
|
|
Moontreeranch
Member
|
# Posted: 30 Nov 2010 12:24pm
Reply
I used some basic luan ply and built a small scale model...ending up adding another foot the width of the cabin...from 10 to 11 feet. Our shed roof is built with BCI wood Ibeams...very strong and light weight
|
|
MikeOnBike
Member
|
# Posted: 11 Jan 2011 06:51pm - Edited by: MikeOnBike
Reply
Quoting: MikeOnBike We have a great view and want every room in the cabin to experience that so it will be long and narrow.
The cabin will start at the solar shower and run to the left for 40ft.
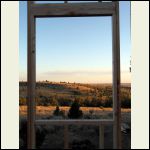
Here is the view from where the main cabin will be and the shed view (minus the truck and solar shower).
|
|
MikeOnBike
Member
|
# Posted: 9 Feb 2011 12:53am
Reply
Well, spring is around the corner and Pamm and I started talking and thinking about the shed project. We decided that without a loft the 10x12 is going to be real cozy with a kitchen, bed and a chair or two. We are going to add a little space to the shed. The current thought is to jump up to 10x14. The other size we have talked about is 8x16 but that really isn't much bigger and doesn't fit the space I have for the shed too well.
I would really like to put a sliding glass door on the front of the shed but I need to remember, it is just a shed. The kitchen will just drain out on the ground and have gravity water flow.
Our county allows up to 200sqft. before a permit is required but we are trying to resist a bigger build. Eventually we will build a larger cabin so his is just a stop gap for a couple of years.
I'm going to prefab the walls at home and would love to start them now but I don't have the room to store them. I'll build them at home the week before it is time to install them.
Idle hands in winter are a dangerous thing. I need to go clean my shop and stop thinking about this.
.
|
|
Gary O
Member
|
# Posted: 9 Feb 2011 03:09pm
Reply
Quoting: MikeOnBike I need to go clean my shop and stop thinking about this
....or build a model
|
|
bcfrombc
|
# Posted: 12 Feb 2011 11:17pm
Reply
Moontreeranch
what plans did you use to build this? Looks great
|
|
MikeOnBike
Member
|
# Posted: 12 Feb 2011 11:27pm
Reply
This one isn't built yet but I got the floor/pier/beam info from the Little House Plans at. Countryplans.com. The rest is just normal build stuff. I used a span calculator to figure my shed roof beams for a 65lb sqft snow load. I will be able to use 2x8 on 16" centers. I will prefab wall sections and haul them up the mtn.
I really like your place but we will build small for now and build a bigger place in 3-5 yrs. Both of mine will be long and skinny to maximize the view. The final cabin will have 2 sliding glass doors to maximize the view.
|
|
MikeOnBike
Member
|
# Posted: 12 Feb 2011 11:32pm - Edited by: MikeOnBike
Reply
Bcfrombc,
Oops didn't realize who you where asking. Here is his thread.
http://www.small-cabin.com/forum/6_169_0.html
|
|
MikeOnBike
Member
|
# Posted: 29 Jul 2011 06:08pm
Reply
Headed up Sun. with a load of supplies. I have the second week of Aug. off and we are going to try to get it built up through plywood on the roof.
|
|
MikeOnBike
Member
|
# Posted: 1 Aug 2011 12:33pm
Reply
It was 90/90 on the mtn. this weekend. 90F and 90% humidity. What a sweat box.
My main goal was to deliver a load of supplies in advance of the week off I have coming up. I also needed to survey the materials on the mtn. and figure out what else I need to take up next week.
After I had sweated it out all day a cool evening breeze came up for about 30 min. and then sky opened and dropped 1/4" of rain.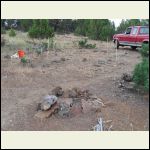
Piers marked out
| 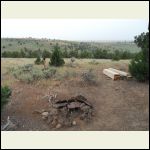
View from the shed deck
|  |  |
|
|
MikeOnBike
Member
|
# Posted: 14 Aug 2011 01:34pm - Edited by: MikeOnBike
Reply
Building Day 1:
A week after dropping off a load of materials we were back up to the mtn. for a 6 day vacation. We stayed at the lower camp while I worked at the upper shed site.
The first step was to get the piers in place. I probably dug a dozen holes trying to get the deepest six to support the shed. Finding something solid to put the pier on is no problem. Getting deep enough for lateral support is.
.
|
|
MikeOnBike
Member
|
# Posted: 14 Aug 2011 01:59pm
Reply
Building Day 2:
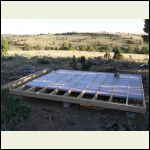
I'm using Simpson brackets to attach the beams to the piers. The 4x6 beams are 3.5x5.5 nominal, except when they aren't. My brackets were too narrow. Ok, where is my chisel, I can fix this. Hmmm, ok, I didn't forget my hammer but the chisel is 100mi away at home. Time to get creative. A cordless circular saw is a wonderful thing.
Next step was to assemble the floor joist. I bought an extra 14' and 2 extra 10' 2x6 joists. I was going to need them. Although they all looked good at the lumber yard the extras went crooked sitting out for a week.
I had enough daylight left to get the 2" foam insulation installed. I ran out of energy and water a couple of pieces short of completed. I was cooked.
.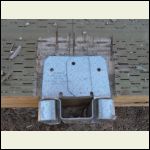
Using a circular saw as a chisel
| 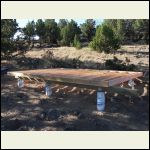
Finished floor joist
| 
Almost insulated
|  |
|
|
MikeOnBike
Member
|
# Posted: 14 Aug 2011 03:05pm - Edited by: MikeOnBike
Reply
Building Day 3:
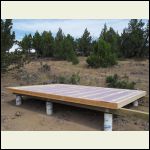
The first task was to finish the foam insulation. When I had all of the big pieces in place I used a can of the window and door foam sealer to fill the cracks between the sheet foam and the joists in the places where they didn't fit tight.
At last it was time to put on the decking. We are going to try a stained plywood floor with several coats of polyurethane as a top coat. I glued the floor with Liquid Nails and put down a nail every foot to get the curled plywood sheets to lay flat. I have the darnedest luck with materials warping. Going to have to talk to my supplier.
I used Minwax water-based stain. I didn't have time to seal the plywood so it went on a bit blotchy. By the time I had finished I had perfected my method of dry brushing it to get an even coat. I used a broom handle mounted applicator pad. I did not hand brush all 140sqft.
I didn't get a chance to put on a coat of poly before we had to leave. I'm watching the weather forecast and hoping it won't rain until I can get back and get a couple of coats put down.
The next planned trip is a 4-5 day Labor Day weekend. A couple of coats of poly on the floor and then up go the walls.
.
Finished floor insulation
| 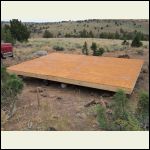
Blotchy stain job on the plywood floor
|  |  |
|
|
MikeOnBike
Member
|
# Posted: 21 Aug 2011 06:55pm
Reply
I was working in the area so I went up yesterday to put a coat of poly on the plywood floor. On the way into camp I notice ATV tracks. Not a good sign. This is the first time in 3 yrs that someone has ventured in over the goat trail and onto the upper part of the property.
Got to camp and the time lapse camera is missing. All the lids on the 5-gal buckets I store supplies in are loose. Hmmm, only other item missing that I can tell is the large screwdriver that I used to open the polyurethane can with.
So, we have been robbed. For the 40 years that I can remember everyone on the mtn. has left their cabins open. Maybe that is changing. We have a good idea of who it is but no real proof. I'll spread the word and hopefully they will get caught before they get shot.
It was hot, the poly dried very quickly. Probably too quickly.
|
|
hattie
Member
|
# Posted: 21 Aug 2011 07:14pm
Reply
I'm sorry you were robbed MikeOnBike. *sigh* I hope they get whoever it was...Even better if they got them plus the return of your camera and screwdriver.
|
|
MikeOnBike
Member
|
# Posted: 21 Aug 2011 07:26pm
Reply
I have no real evidence to give the police. The only hope is that the rest of the community on the mtn. becomes more aware and they get caught stealing from someone else.
A greater loss than the dollar value of the camera is the weeks of photos for my wife's cabin build documentation project. She was using the time lapse camera to create a video of the building process. That has been pretty much trashed.
|
|
cxdyer
Member
|
# Posted: 25 Aug 2011 06:49pm
Reply
That is terrible, it's such a feeling of violation to be robbed. Plus, the sense of community in rural areas is honesty, not theivery. That type of crime just isn't usually part of a rural environment. That's why most of us are building cabins and cottages in the tranquility of rural landscapes.
|
|
bugs
Member
|
# Posted: 25 Aug 2011 08:34pm
Reply
MoB
Sorry to hear of your experience. It is the concern of all cabin owners I guess. Sounds like it could have been worse.
But as you mention the pictures are irreplaceable.
All the best
bugs
|
|
MikeOnBike
Member
|
# Posted: 6 Sep 2011 04:41pm - Edited by: MikeOnBike
Reply
I went up to our place over Labor Day weekend. Fortunately no more signs of theft. The previous week I had dreams that someone built a bonfire in the middle of my floor. No worries the floor was still intact.
Day 1:
We surveyed our property three years ago and used 12" zinc coated spikes to mark the edges. We used orange tape to make it easier to find the spikes and as we are a year or so behind on fencing the place the tape is starting to disappear. I spent the day retaping the spikes that I could find. I missed a few but found enough.
Day 2:
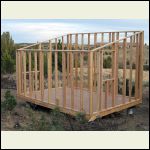
Work on the walls commences. Only two walls completed but working by yourself can be really slow. Weather was hot and that didn't help either.
Day 3:
Another hot day, another two walls. Not too bad and I met my primary goal which was to be ready for rafters and sheathing.
Time is running out this season and I'll probably be working on the shed every weekend this month. I've arranged to take 3-day weekends for all of Sept. so I can actually get something done.
.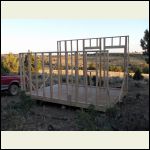
First days work
| 
Second days work
| 
View out front window
|  |
|
|
| . 1 . 2 . >> |

