| << . 1 . 2 . 3 . 4 . 5 . >> |
| Author |
Message |
Steve_S
Member
|
# Posted: 27 Oct 2015 08:40pm
Reply
1) The GUARD CRITTER... Yes IT IS REAL and reasonably hostile... This little fellow was 3" long !
Everything went up fairly well, there is a few minor tweaks that need doing then all tie in with the top plates.
Then build internal centre wall and cross wall, this will be dead centre and will have a beam running up to the Ridge Board. The beam will only be at the exact centre of the floor.
Then lay up the floor joists for the loft over the Bedroom, Washroom & Kitchen. No joists over the living room as that will be open to Cathedral Ceiling...
After that build the gable ends in 2 sections for East & West sides (have I said I don't like heights or scaffolds) pop up the Ridge Board with the Simpson Tie Brackets and get Mr Chop Saw out and start making rafters (2x8)
Between the Rafter will have 7-1/2" of PolyIso Insulation, 7/8 sheathing outside, Tyvek Roof Wrap, 2" Foil Faced ISO, 2x4 Vertical strapping @ 24oc & then 1x6 Horizontal Strapping @ 16oc for the Tin Roof.
The wonky concrete created issues... Ugh-ness.... for the exterior, I will be using 2" thick Type-2 EPS from the slab up 2' around the perimeter, then 2" thick ISO next 6' up. From the bottom of the slab (the part that is sitting on the 4" foam) up to the "floor surface" will have 2" foam which will have to be carefully carved round the wonky bits.
OK Still Grumping over the poor concrete works, especially after discovering 2 more cracks yesterday...... Grrrrrrrrrrrrrrrrrr
Well that's it for now....
|
|
Steve_S
Member
|
# Posted: 29 Oct 2015 03:22pm
Reply
@ Just & ColdFlame: Can't work onsite today because of weather but I trekked up and went through that Duo-Therm furnace... Mine is 12V / 8A. There are two other 12V models, 1 is 10A the next one up is 15A.
@Creeky & Other Solar Guru's... head scratchin and pondering the growing grey hairs, I'll be rigging up my Inverter Charger to the battery banks... It's the only way I'll be able to properly charge the 24V without the solar panels & controller in place. I looked at the IOTA Chargers, ouchie$. I grabbed the instructions out of the box and have to study it a bit when the migraine is gone...
I'm still thinking I should build a vented battery box with a roller bottom (6 wheels) so that I can put the batteries on a "tray" which I can pull out to service the batteries. Given that I insulated the heck out of the powerhouse should I still insulate the battery box ? Not like it would hurt anything but I'm thinking of "worst case scenarios" given our extreme temp swings up here & of course Murphy's Laws Avoidance 
|
|
Steve_S
Member
|
# Posted: 30 Oct 2015 09:55pm
Reply
Because today was quite a chilly day and somewhat damp from the last couple of days of rain, I went and picked up a pile of ISO Insulation for my roof... Two BIG Loads took care of it... I grabbed 40 sheets of 3-1/2" 4'x4' & 20 sheets of 4" 4'x8' which will fill all the available space in the 2x8 Rafters. Not even enough room for ants will be left in there LOL.
I was in quite a rush with the first load and didn't take a picture... I used my old Chev K1500 for the first load and it stood 6' above the Cab Top ! Ohhh My did the gusts of wind have fun with that !
On the second load, (smaller) I decided to use my Mazda B4000 and a rented U-Haul 5x9 Trailer... My that little Mazda takes it ! Here's a photo of the "slightly overloaded U-Haul trailer with 2 lifts of 4" and the left over 3.5" that I had to leave behind from the first load.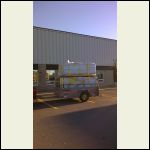
U-Haul trailer Working Hard !
|  |  |  |
|
|
spoofer
Member
|
# Posted: 31 Oct 2015 08:56am
Reply
Steve S My vented battery box is an old Coleman cooler. I drilled some holes in the side for venting and can leave the top slightly ajar, if I want. Some coolers now have wheels to make it easy to move. The other side of the cooler I drilled a doorknob size hole to run wires through. I only have 2 six volt batteries wired in parallel to create 12 volts. I think they are Deka gc15's. My total power is 215 amp hours. I'm only at camp for a day or two at a time so my 100 watt panel is marginally enough to power a couple led lights,radio and a small 20inch led tv.
|
|
Steve_S
Member
|
# Posted: 31 Oct 2015 09:40am
Reply
Thanks for the suggestion Spoofer, but I have 8 Rolls Surette S-550's so a simpler solution is not really the option.
Todays project is installing the Inverter/Charger, Wiring the batteries up to it and running a small 120V Panel off the Inverter so I can put 2, 120V plugs in the Powerhouse (1 for the water pump).
While I can't get my panels up right now and wire all that in with everything else I have to get done before the "fluffy rains" start, like put a roof on the cabin, I'll have to charge with the Genny.
Then there is a new twist in the Genny Issue... Temporarily I can use my big beasty with an extension cord to Inverter/Charger that is NOT a long term solution by any means... That has to run saws, compressor & more right now and isn't Pure Sine. This is my Biggy: Champion Model:41552 - 7200w/9000w
which does what it is supposed to quite well BUT is so LOUD... eeks...
Right now I am hunting for a nice 2/3Kw Inverter Genny that I can buy off the shelf for a reasonable price as that will be the backup to the entire Solar System. The big one will be used for the tools & equipment like MIG Welder, Compressor when needed after the construction phase ends.
|
|
creeky
Member
|
# Posted: 31 Oct 2015 10:35am
Reply
no. no. I like your idea to put 1000 lbs of lead on a moveable cart. then you could add a 24v motor and race around the yard. how cool would that be?
of course you would have to design real good quick release cables, but that's not hard.
now most of us with huge battery packs just put down a fat sheet of xps insulation. put a plastic sheet over it and then put the batteries on that. thereby creating a thermal break between the batts and the floor. and then use ordinary bus bars to connect everything together.
but that's just simple and fast. and safe. and reliable. and sensible. to hang with that. 
|
|
Steve_S
Member
|
# Posted: 10 Nov 2015 07:03pm
Reply
Well another tardy update:
Got some wall insulation in where the interior walls connect to the exterior... BOY... Cutting the Foam with bonded Fibreboard is a freakin tricky deal... Wasted a couple of 4x4 sheets getting it down... These panels are 5-1/2" thick and completely fill the 2x6 wall cavities, tightly, plus I am putting them in good & snug... which in itself is quite a bit of effort... Using 2x4 & Hammer to convince them into the space. A wee bit of spray foam in a couple of spots and 6Mil poly over the sections, sealed to the studs with Accousti-seal.
Interior walls assembled & installed. Had some furtling around to do as the Concrete is not as smooth or level as it looks... Grmbl, grmbl, grmbl... OK the concrete is the bane of my existence... getting past that though...
Next stage: Tyvek Wrap the outside walls and lap over the top plate, mark all stud locations on the wrap, prep the Hurricane clips and rafter guides to get started on the roof section. Getting a serious scaffold to be up there... I'm not fond of heights on less than 100% stable platform...
-- Powerhouse/Pumphouse --
With a bunch of kit acquired and a nice visit to an RV Supplier I got a Marinco 30 Amp Standard Shore Power Inlet 30 Amp 125V inlet plug assembly complete with locking collar and weather boot, where the Genny will feed power into the powerhouse. They also checked out my Duo-Therm RV Furnace (direct vent) and it's not an 12V-8A unit but rather a 12V-4A unit and it works a treat (on the bench). That will be installed in the Pumphouse Side with a dual propane tank setup outside (RV Parts \\YAY// ), plus I have the new lines etc ready to go. ** PumpHouse side has my 50gal Pressure Tank in it.
Inlet PLUG Looks like this: 
I ordered a DC/DC Converter Waterproof Motor Voltage Regulator 24V to 12V Step-Down 20A 240W which should arrive soon and that will drive not only the Furnace but also a couple of other 12V things with little to no hassles... Geez a whole $19 !
PHOTOS & PIC'S I have some which I will post but sadly my Cell Phone has decided to be rather "persnickety" so I'll post them once I've had "discussion" with that pile of ..........
|
|
Steve_S
Member
|
# Posted: 11 Nov 2015 07:42am
Reply
Here's a couple of Pics of the Insulation stuffed between the studs where the interior walls are connected to exterior. Few small gaps were filled with spray foam, then Accousti-Seal on the studs and 6mil Poly vapour barrier stapled on... the rest pretty much has to stay open for the bldg. inspector. It would be impossible to put this insulation in after the walls are up... 5-1/2" thick with the Fiberboard facing & no flexing ! LOL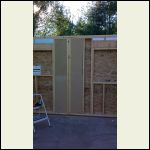
West facing wall @ cntr
| 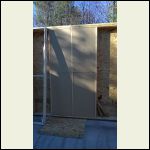
North facing wall @ cntr
| 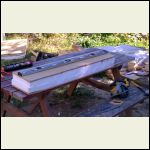
5-1/2" HD EPS & Fibre
|  |
|
|
|
Steve_S
Member
|
# Posted: 12 Nov 2015 12:52pm
Reply
The old Cell phone was replaced (died 2 months after warranty, go figure) and after figuring out the new Samsung Galaxy Grand Prime here's a couple of Pics of the interior wall.
It's pouring rain today so not working on cabin but got a new King Canada 3kw Inverter Generator See the thread here @ PowerHouse(tm) Inverter Generator (feedback requested)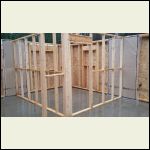
Bedroom side & centre wall
| 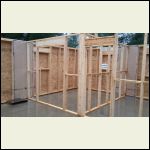
Kitchen side & centre wall.
|  |  |
|
|
Steve_S
Member
|
# Posted: 16 Dec 2015 10:06am
Reply
My goodness, been a while... geez time flies.
Well I had to take a wee break for a couple of weeks as I cracked a couple of ribs falling off a scaffold... 16' drop onto concrete, could have been much worse had I not bounced off the lower level platform... ice on plywood != good thing. Sure enough the ice vanished and hasn't returned since (yet).
Progress has been slow but is about to pick up as the roof goes on next week... Just in time for Xmas.
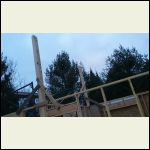
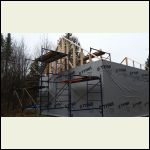
Because of the 7-1/2" of ISO being stuffed between the rafters, the roof structure is a bit different to accommodate it. The Gable Ends are built along with the centre support for Ridge Board is up now. The 2x8x16 rafters sit atop the gable top face board and continue on the same plane.
These pics don't really explain it but after the Ridge Board is up and a few rafters are installed the pics will better explain it.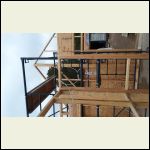
WaterLeveling_over_.jpg
| 
East_Gable_.jpg
| 
CentreWest_centre_s.jpg
| 
WestGable_.jpg
|
|
|
Julie2Oregon
Member
|
# Posted: 16 Dec 2015 12:06pm
Reply
Steve_S
Oh my goodness! So sorry to read of your fall! Take good care! I hope you're not out there working alone and do have ample help! Your cabin is looking awesome but easy does it!
|
|
ColdFlame
Member
|
# Posted: 16 Dec 2015 02:39pm
Reply
She's comin' along nicely, Steve. Sorry to hear about your tumble - stay safe out there!
|
|
Steve_S
Member
|
# Posted: 16 Dec 2015 05:09pm
Reply
@Julie: Yeah, I'm out there working alone 99% of the time, which makes certain things a bit tricky. Next week the roofers are coming to do the sheathing, tine, facia & install the chimney. There's no way I can do that on a 9:12 pitch with my buggered up ankle.
@CF I got lucky, could have been much worse, I thought initially I was just bruised but nope... Doing better now and able to reach up and move about...
Been a rough year with illness & injuries on top of that which has really "irritated" me (yup, very PC of me).
Have help coming in this Friday and through the weekend, so should be ready for the roofers on Monday (fingers crossed).
Had the pleasure of encountering a rare creature of the North... I could not get very close and had to use the zoom on my phone, so the photo is terrible... When this fella flew off, I was shocked at the wingspan, absolutely massive !
Big Snowy White Owl resting roadside.
|  |  |  |
|
|
ColdFlame
Member
|
# Posted: 16 Dec 2015 05:18pm
Reply
They're stunning aren't they? My grandfather found one that had been struck by a car and killed, and had it mounted and stuffed. It's resided at our family cabin ever since and is so beautiful. I wish owls were more common, but seeing them so rare makes it that much more special I suppose!
|
|
Don_P
Member
|
# Posted: 16 Dec 2015 07:19pm
Reply
I'm glad it was no worse. 50% of people that fall just 13 feet die. I spent 9 months in casts after diving just 8'. You were very lucky. A friend I have worked on different jobs with over the past 30 years had a bad fall just before Thanksgiving. He broke ribs, collar bone and pelvis. We did a roof last week and the guys did their best to keep me on the ground feeding them most of the time. Be careful out there.
|
|
Steve_S
Member
|
# Posted: 17 Dec 2015 06:34am
Reply
I think, given the year I've had with illness & injuries etc... I am "Extremely Lucky" and things could have been - well I don't wanna ponder that too much... but "worse" could have been indeed. That's a day that I'm glad Murphy was looking the other way... Man I'm sick of Murphy's Laws !
|
|
FishHog
Member
|
# Posted: 17 Dec 2015 07:59am
Reply
Steve, before I forget, your guard critter is a "Giant Water Beatle" Cool critters, don't see them all that often.
but more importantly, glad to hear your OK. Scary stuff. But your right, don't dwell on it, just learn and move on. Human's are very fragile, but you have to live life at the same time. Its a good lesson, and having spent a lot of time alone at my remote place this year, it will make me think twice.
Place is looking great, and this weather is sure helping hope you can keep getting stuff completed.
FishHog
|
|
Steve_S
Member
|
# Posted: 18 Dec 2015 07:41am
Reply
 Fishhog, someone else told me what that thing was... Certainly not terribly friendly either but very cool to look at, neat markings... I'm always amazed at the markings on critters - almost artful (Mother Nature being an amazing artist). Fishhog, someone else told me what that thing was... Certainly not terribly friendly either but very cool to look at, neat markings... I'm always amazed at the markings on critters - almost artful (Mother Nature being an amazing artist).
I try to be cautious & careful and plan for safety but sometimes Stuff Happens and Murphy's Laws get applied regardless of plans.
RIDGE BOARD UP !
Tightened my belt, took many deep breaths, self-psyching up and I managed to get this beastly thing up & in place by myself. Ohhh What a TREAT that was ! Rickety Scaffolds, a decent breeze, no sense of balance in a precariously location... NOT what I live for I tell ya.
I just have the East Gable side to finish attaching then I can get started on the 28, 2x8x16' Rafters...
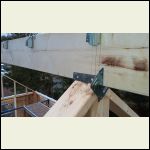
Because I'm having to do this alone, I chose to use an assortment of hardware to help me so you'll see Hurricane Clips, T-braces etc... Could be better or worse I suppose but it's accomplishing the task and when I chucked my method at my building inspector he felt there would be no issues doing so.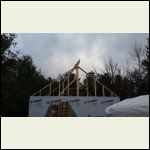
Ridge Board Up
| 
Ridge Board gable end detail
| 
Ridge Board Centre point
| 
Hurricane Ties for Rafters on wall
|
|
|
Steve_S
Member
|
# Posted: 10 Jan 2016 08:21am
Reply
Another Update (albeit a tardy one).
Took a wee break around Xmas, so things slowed up some... There's a few could'ves, should'ves & would'ves but that's irrelevant now... silly weather is all I'm sayin on that....
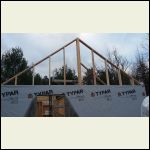
Notched End Rafters going up
| 
Rafters mostly up (feelin better now!)
| 
The "ICK" has begun... shivers
| 
The ICK piling up (3' inside when it ended)
|
|
|
Steve_S
Member
|
# Posted: 10 Jan 2016 08:36am
Reply
Continued:
We got almost 4' of ICK which resulted in my spending a total of 21 hours snow blowing my 400' driveway, build areas, around the outside of the cabin as well as hand shovelling out the interior, twice no less... Fortunately it wasn't brutally cold and the new Ariens 28 Deluxe snowblower handled the battle just fine (- 4 shear bolts).
NOTE ON ARIENS SHEAR BOLTS ! Lessons Learned Dept.
Avoid using the recommended after market shear bolts ! The shoulder cuts on the bolts are off by 1mm, which when they shear the remaining shaft will score the tube inside... Buy only the Genuine Ariens bolts (black with bold pinch nuts) and avoid the silver bolts. Ariens Canada does not stock the OEM Bolts, only the aftermarket ones recommended by Ariens. I convinced a local dealer to pillage 10 and sell them to me because it's a boat load cheaper than replacing a mangled shaft or tube !
More "ickage" to add insult to insult...
| 
after 4 hrs of shovelling ... ugh
| 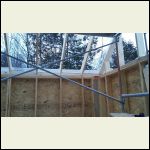
Blockers nailed in place
| 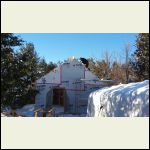
Gable Sheathing done, Fly Rafters being installed
|
|
|
Steve_S
Member
|
# Posted: 10 Jan 2016 08:56am
Reply
Continued again ;)
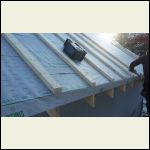
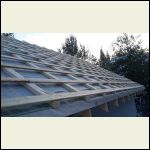
I'm doing the roof using a variation of the Texas Cool Roof which provides an air space between the sheathing & the tin. So using 2x4 battens with 1x4 @ 16oc strapping as counter battens. This allows for airflow to rise up and exit through the vented Ridge Cap. The Tyvek Roofguard will protect the 5/8 T&G Flordeck (that's what is used for the sheathing) and ensures things stay dry.
I would have put some foil faced ISO on top of the sheathing BUT I would have to buy new and the price has jumped to $35 a sheet ! Holy Sheet I say !! Given that there is going to be 7-1/2" of ISO between the rafters, I figure I'm good.
REFERENCE to the Cool Roof info I borrowed from
cool-roof-design-texas. There is also more info on BuildingScience site.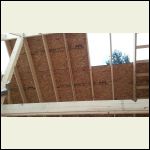
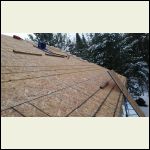
The Sheathing underway ! YAY !!
| 
Ahhh it's a beautiful thing...
| 
Tyvek Roofguard on, 1st battens being installed
| 
Counter Battens installed
|
|
|
Steve_S
Member
|
# Posted: 10 Jan 2016 09:05am
Reply
And More...
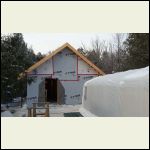
The view inside with a roof... YAY ! Watershed Moment !
The face boards are just a hair under 12" as the rafters are 2x8 + 2x4 on flats + 1x4 strapping... The green tin facia is being made up now and will be available next week along with the special ordered green soffit...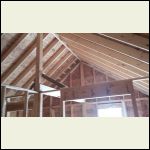
Inside with the roof sheathed
| 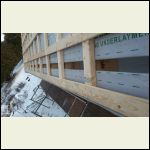
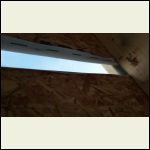
2-1/2" air channel in the eves for airflow.
| 
Roofguard rolled under and stapled up
| 
Face boards installed (12" ! thanks to the extra)
|
|
|
Steve_S
Member
|
# Posted: 10 Jan 2016 09:22am - Edited by: Steve_S
Reply
Even more...
The tin going on... Ohhhh what a morale booster & Motivator that is ! The roof tin is on, the woodstove chimney installed with the cathedral kit...
Next up tasks; is the loft joists, loft floor and the insulating begins after that.
At least now I'll be dry and able to toss some heat in there while working. As I still have to install 2" ISO + strapping on the exterior walls, I haven't cut out the window & door openings yet... This will be a bit dependent on the weather and if I broke my ankle yesterday.
Mishaps... I hoped Murphy would have taken his laws and left me alone for 2016, but Ohhh Nooo he just couldn't. Yesterday while loading 4x4 insulation panels into my truck, I slipped on ice and a lift of the insulation fell on me (thank goodness it's very light) BUT I heard a snap and hoped it was the pallet... Well this morning my ankle and knee (good leg to boot Grrrr) are swollen and my leg is a tad discoloured... So there's a trip to hospital today to get that checked out... Thank goodness that my Beasty Truck (86 Chev K1500 4x4) is an automatic as my small truck is a 5 speed and I doubt I could handle the clutch right now.
OHHH almost forgot... the previous mishap with me falling off the scaffolding... While I was mostly bruised up, I did however crack 2 ribs which I found out the hard & painful way... that slowed things up & highlights the need to be doubly safe in foul weather.
EDIT: 20:30 hrs. After 6 hours in hospital, 12 x-rays (knee & ankle) & 2 doctors, nothing is broken, severely sprained and tore a couple of ligaments. Dr's orders are to stay off feet for 2-3 days and rest, so that's what I'll be doing.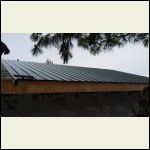
Tin going up - 1
| 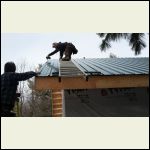
Tin going up - 2
|  |  |
|
|
ColdFlame
Member
|
# Posted: 11 Jan 2016 12:00pm
Reply
All of your mishaps aside, the building is looking wonderful and is progressing very nicely. Thanks for the update, Steve... heed the doctors orders this time around, would ya? ;)
|
|
Steve_S
Member
|
# Posted: 12 Jan 2016 08:21am
Reply
Went out yesterday to the drugstore & to pick up a propane tank I had on order... That was quite enough. Advil & Naproxen today and back at it tomorrow. Gotta finish things up for the facia & soffit installation.
SOFFITS & FACIA:
Just to be different, I suppose... Decided to go with the same Forest Green for both the soffit & facia... I want this place to blend into the surroundings. So far, it's really really hard to spot even with the Winter Defoliated forest, thanks to the big Pines.
The eaves / soffits & Gable ends are 24", so I have plenty of overhang. Sure looks a lot better than I had envisioned.
I would have went with a Cammo Tin if I could have but that would be something to order and have shipped most likely from the States @ insane costs... Had it been available here, Cammo it would have been. At least Forest Green in a mostly Pine & Cedar Forest doesn't stand out much.
|
|
Sustainusfarm
Member
|
# Posted: 24 Jan 2016 11:56am
Reply
I have a comment regarding your grey water system...it seems from the pics you have your outlet tubes coming out the bottom...they should be coming out of the upper sides of the barrel instead of the bottom. The object of the barrel is to collect the grey water and allow the solids to settle to the bottom so they don't clog up your drain pipes...Im not talking just solids but grease and other crud that grows more crud when it gets into the drain pipes. Once the barrel fills to the level of where the tubes exit the barrel only liquid will enter the drain field. Unless you have another reason or code dictated for the tubes at the bottom...curious because the way it is set up now it will clog very quickly...
|
|
Steve_S
Member
|
# Posted: 24 Jan 2016 02:34pm
Reply
@ Sustainfarm: Good Catch there but there is a reason... Everything leaving the cabin will go through a matt filtering bucket of sorts before draining into that tank. This will allow me to do a clean out whenever necessary without having to use a shovel or other major tools. Photo's will be posted as it all comes together.
Having been held hostage a bit by serious cold and injured foot I'm back to mobile mode now and restarted. Only working on days that are above -10 for the time being, once I get some heat into the shell that will help.
Facia & Soffits ON:
Well the facia came out to 11 7/8's high because of the batten counter-batten's on the roof. Looks really substantial and takes a wee bit of getting used too.
I really wasn't sure how the Forest Green would look but I really like it and keeps the colours down... Still can't see the cabin from the roadside, just blends in (even with that big roof), as was hoped.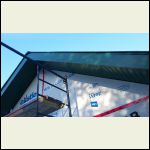
West Gable
| 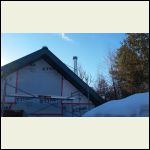
East Gable w/chimney too
| 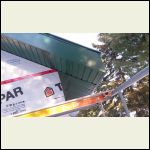
Corner Detail
|  |
|
|
Julie2Oregon
Member
|
# Posted: 24 Jan 2016 05:13pm
Reply
You've come so far, Steve_S!!! It's looking great!!! You've really thought out every detail, well-done!
I'm curious as to why your roof color choice is one of camouflage rather than energy. Will the green be a good choice for your climate, too? Are you concerned about vagrants, interlopers, break-ins? I've been mulling metal roof color, too, in terms of energy and have decided on a light tan as a compromise, lol. There can be hot spells in the summer where I'll be so I want some reflective rather than absorption properties but it also gets cold in the winter and I don't want ALL reflective, you know?
|
|
Steve_S
Member
|
# Posted: 24 Jan 2016 06:02pm
Reply
For me it was because I wanted low key, hard to notice. The cabin is surrounded by pines & cedars as you can see and it sure helps to blend in, plus with the proximity of the trees there's a fair bit of shade. This green is actually quite popular around here.
Lighter colour would have meant less heat gain which is a good thing but I'm hoping that with my roof design, that it will counter the heat gain I'll get. I'm hoping that in winter the roof will perform better as a result of the air space but I doubt I'll know that re4sult this winter.
I'll be living here full time by May 1st so it's not a matter of being concerned about interlopers.
|
|
Steve_S
Member
|
# Posted: 27 Jan 2016 08:54am
Reply
I just realized that in this entire thread I failed to put some valuable links in for other's reading along here.
Software used to design our Cabin:Home Designer® Professional Product Comparison / Chooser
Wall Design & Build Method based on:
BSC: 2x6 Advanced Frame Wall Construction with Mineral Fiber Insulation Board
BSC: 2x6 Advanced Frame Wall Construction
I like a few others here are using variations on what is called "The Perfect Wall" which is a building/insulating method to maximize energy efficiency and keep our heating & cooling costs minimal. Here's some reference info related to "Perfect Wall" building.
BSI-090: Joseph Haydn Does The Perfect Wall (2015)
BSI-001: The Perfect Wall (2010)
Roof Design:
Variation based on the Texas Cool Roof
My Wall Design below is a cross section of the structure and how the Board on Board siding will be installed. This provides for free air movement under the wood siding horizontally with air channels going vertically. This is more a "Weather Screen" effect and should prevent moulds, mildews and fungi from stablishing under the wood. This airspace provided by the channels also acts as a Thermal Break from the siding to the external ISO Insulation.
More stuff going on this week and will be posted later when time permits (time is being ruled by the weather ATM).
|
|
| << . 1 . 2 . 3 . 4 . 5 . >> |

