| << . 1 . 2 . 3 . 4 . 5 . >> |
| Author |
Message |
ColdFlame
Member
|
# Posted: 23 Jun 2015 12:39pm
Reply
Can you have no recourse with the concrete or concrete finishing company, Steve? Seems to me that they should be making this right. Is there any room that they could pour a self-leveling compound down as a skim coat perhaps? That's awful - I'm sorry to hear this.
|
|
Steve_S
Member
|
# Posted: 24 Jun 2015 08:54pm
Reply
CONCRETE UPDATE:
We met with the Concrete Co's owner today onsite and he took a good look at it and the issues I have with it.
He reassured me that the lines/streaks and patchiness from the sealer will fade over the next month or so and everything will clear up. He attributes this to the curing process of the concrete itself. WE WILL SEE...
I showed him the voids and while not optimal he also says this is not anything to worry about. This he called honey combing... OK SURE... Not so sure about that either as I have seen a LOT of poured concrete in my years and have only seen such on hand mixed and improperly laid concrete that hasn't been tamped or vibrated in...
He said that if in a month there is no improvement he'll have it sorted. HMMMmmmmmm.....
The whole "Small Town" thing does indeed suck somewhat in the sense that everybody knows OR wants to know your business and they certainly love to gossip... PLEASE BRING BACK DAYTIME SOAPS FOR THESE BORED FOLKS !!!
I asked what it would be to grind & polish the concrete and his answer was because the CITIOTS (say like Idiots) & Yuppies have made it popular that for my slab I'd be looking around 6K REALLY ??? HOLY FRACK ! (In the way that Starbuck said it on the Original Battlestar Gallactica series)
We start building the Powerhouse on Friday and hope to have that done over the weekend... This is a pseudo experimental structure where I am going to try out my plans for the Cabin and a wee bit of creative engineering...
|
|
Steve_S
Member
|
# Posted: 4 Jul 2015 06:00pm
Reply
Things have slowed up unfortunately due to weather and my darned foot causing more troubles again... Now on the next round of Antibiotics for 3 more weeks and slowly working as possible before the pain makes it too difficult... Why is it that often a small injury can knock you down 10x worse than a big injury ???
CONCRETE:
Well they are coming back on Monday July 6th to check on it... The streaking has gotten worse and now there is a film of white stuff on the concrete... During recent rains, we seen big spots that the concrete was wet and not beading up as it should, so it certainly needs their attention.
CABIN:
Waiting on the concrete issues to be settled prior to framing up as it would be next to impossible to fix once walls are up & in place... Best to do the "whole enchilada" prior to building on it.
Power House:
We opened up the Pump House west wall and built the extension on there. Not the smoothest transition (rough cut wood in Pump House to dressed lumber in Powerhouse side makes it a touch more tricky.
The walls are up and 3" ISO is now between the studs along with 1" of ISO & 1" Styro-SM (first 2' from slab up) and sheathed over that. Roof is framed and will be insulated and sheathed tomorrow and membrane applied. We'll be wrapping the pump house / power house and leaving it at that point till the siding is being done on the cabin... This will have the same Tin Roof & Siding as the cabin.
Couple of pics of the Pump-House / Power House: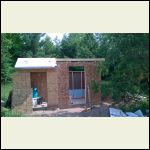
Pump House (with roof) & PowerHouse addition being setup
| 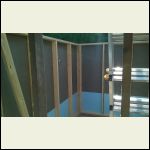
Inside view Styro-SM for bottom 2' and ISO above that
| 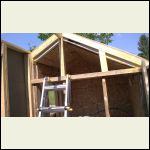
New meets Old, there will be an opening between the two. Pump House door will be closed off.
| 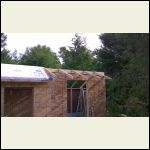
Framing ready, yes roofline is changed and old will be modded to align.
|
|
|
Rowjr
Member
|
# Posted: 6 Jul 2015 07:07am
Reply
Whats the plumbing like in your barrel for grey water. Are you using uprights so just the liquid overflows out ? Also I'm looking at the similar ecotemp but will be getting the NG version. Whats your overall temp your hoping to get to shower ?
|
|
Steve_S
Member
|
# Posted: 6 Jul 2015 08:34am - Edited by: Steve_S
Reply
The recycled 40gal Olive Barrel (buried) has 2 lines of 4" Drainage Pipe with "sock" that run 50' downhill. These are installed in the sides @ the bottom of the barrel through 2, 4" holes. I pulled the "sock" over the ends and zippy-tied them closed.
I went through the top of the barrel so I would have a way to disconnect the pipe and spin the top off in case any work had to be done in the barrel. The top has 4" of foam on it and is buried about 3' deep.
I'll be installing a "Catch Can" for particulates & matter going down the pipe before it hits the barrel. That will be openable and will use a plastic fibre mesh initially, although I may go with cedar chips. This will serve to keep "gunk" out of the olive barrel & drain lines.
The Eccotemp (LP) isn't setup yet, so for temp I'm not sure where I'll settle on it yet...
|
|
Gary O
Member
|
# Posted: 6 Jul 2015 08:42am
Reply
Man, this is a great thread to follow.
Keep posting, Steve_S.
Lookin' good.
|
|
Steve_S
Member
|
# Posted: 6 Jul 2015 08:57am
Reply
Thanks Gary, glad you like it... Unfortunately I don't have your chuckle factor which has good entertainment value as well as good readin.
Wish I could post more & faster but I have been having an extremely difficult time with my Left Foot which has been really slowing me down, even knocking me down for days at a time if I over do it. Ironically it's my Right Foot that is permanently buggered up (crushed ankle and destroyed ligaments etc) and with Lefty being bad - I'm effectively hobbled. Hopefully this last round of Antibiotics, Lotions & Potions will solve it as I have to be swingin hammers as I NEED to be in-residence by Sept.01.
Maggie is helping till end of July then I'm back to working on my own (gotta love a woman that likes swingin hammers and haulin wood).
|
|
Steve_S
Member
|
# Posted: 7 Jul 2015 09:53am
Reply
Got a few nice hours in yesterday... and any progress is still moving forward. Thunderstorm Warnings issued today, so maybe we will get an hour or two in but there are other pressing issues too... Hard to decide on things for "Rain Days".
Power House:
Wall insulation panels done with extras... West Wall still needs lovin.
Roof insulation panels cut in and sheathing done.
Pump House roof still needs work to align with new roof lines.
Once the shell is done and insulation panels in place, spray foam will seal gaps & nooks ...
PICS: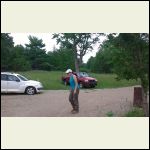
My Favourite Hammer Swinger - she's da bomb !
| 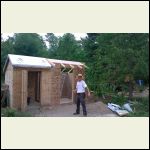
Roh OH ! The Ol' Krusty caught on film...
| 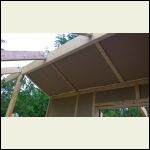
North Roof insulation
| 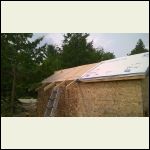
South Roof insulated
|
|
|
|
Steve_S
Member
|
# Posted: 10 Jul 2015 11:46am - Edited by: Steve_S
Reply
The battle continues... Between Weather, Foot & a few other "distractions" things are moving along slowly for now... GOOD NEWS is the foot is starting to feel better (albeit way too slowly for my liking).
PowerHouse / PumpHouse combo is nearly done, metal roofing is ordered for tomorrow... \\YAY//. We'll be finishing the roofline today along with sealing etc... This weekend putting on the tin (same as will be on Cabin).
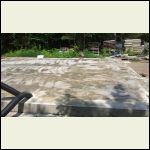
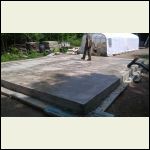
CONCRETE: Ahh the BANE OF MY EXISTENCE. The concrete contractor is using the lamest of excuses - he sub-contracted out the sealing and is waiting on specs of the product to determine how best to fix it... After 30 yrs in business he should KNOW what goes on... The mess is unacceptable with the streaking and patches all over the place and how some spots are not sealed at all and get wet in rain...
What ever happened to Good Workmanship & even Craftsmanship ? FORGOTTEN WORDS IN the 21st Century it seems ! "Just get it done" replaced it all EH ! Grrrrr !
I have been pricing out solutions for grinding & polishing the concrete and I'm looking about $1500 to do the 500 square feet ... SUCKS.
Sealing over the crap sprayed on there is not gonna work as it has to be removed first... That means grinding it...
Painting over it is possible BUT it is absolutely NOT what we wanted at all... Grrrr !!! Plus it may interact with the junk on the floor...
Covering it ? ! - Wood floor was not in the plan but may be the only solution... Vinyl will never enter my place... Laminates ? Ick the chemical stew...
The entire concrete issue has halted the cabin as it would be better off to have it right before we have walls and stuff going up... This is something I have to resolve Next Week so we can start framing...
PICS: Taken @ 11:30, what's on the concrete is the remains of the morning dew... lot of spots... hrmph....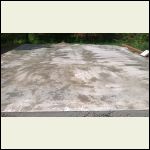
some beading and some not...
| 
another view
| 
WP_20150708_11_40_24.jpg
|  |
|
|
ColdFlame
Member
|
# Posted: 5 Aug 2015 04:08pm
Reply
Steve_S
How ya making out? Haven't heard from you in nearly a month - wanted to be sure you were ok (health-wise) out there! I'm hoping that no updates mean you've been busy framing and whatnot and just haven't taken the time. Take care...
CF
|
|
TheCabinCalls
Member
|
# Posted: 5 Aug 2015 04:33pm
Reply
I don't know concrete too well, but we had some streaking and all we did we etch it and seal it with a paint roller (instead of a sprayer). Looks great now.
Insulation. I noticed you are using rigid insulation and I wonder if anyone out there has had issues with ants getting between layers? We had a layer of Polyiso sandwiched with XPS. Granted it was near ground level, but the ants got into the XPS (pink stuff), but didn't touch the Polyiso.
|
|
Steve_S
Member
|
# Posted: 12 Aug 2015 11:07am
Reply
Hey Folks, work has been "extremely slow" and very spotty lately with continued issues with my foot and now other issues... I'll be damned as I've had enough and I'm starting the push on Saturday regardless as I will be living there come Oct.01.
Pump / Powerhouse is painted inside, tin on roof just have finishing details on the roof and wrapping the building in Tyvek till the siding (board & batten) is being installed on the cabin.
I've been using a lot of ISO and XPS foam for many things, but the cabin walls will get the white EPS with bonded Fiberboard between studs and 2" of ISO on the outside between wall & siding... I can't say that I have had issues with wildlife trying to make homes in it... I DID NOTE however that the ISO with Kraft Paper backing (the stuff you get from commercial roofer's) does seem to appeal to the big black ants "if" conditions are right. I only noticed that after having a couple of lifts of it sitting in my storage tent for a while, that the black ants seems to like nesting between the sheets but not causing any damage...
To that end, I wonder if there is something I could spray on that kraft paper before I install that will remain as a bug deterrent - killer. I know the foil covered ISO does not appeal to the ants.
Updates will follow as I resume.
Take Care everyone and have fun !
|
|
Steve_S
Member
|
# Posted: 7 Oct 2015 04:12pm
Reply
Sometimes things JUST DON'T GO YOUR WAY and then there's that guy Murphy & his cursed Laws... have I got a nice piece of rope for you Murphy.
Sadly health issues stopped me cold BUT that's dealt with to the point where I've been back at it, so this now continues.
Power-House is built, roofed, wrapped & strapped ready for exterior finish. That little building sure keeps steady temps so I'm feeling pretty good about it. Still some minor stuff for the Solar Collector (heat system) and it's own power supply (lights & backup heat). Yes it will have a separate 12V system for the lighting and to run an emergency 12V auto heater in case.
Main Cabin:
3 Day's of furtling (ok sailor talk too) to work out dead centre and get my wall lines to work out but got it worked out to 2mm diff. That ****!**** concrete having wonky edges **** anyways...
Pressure Treated Base Plates installed with 6" sill gaskets and secured with 6" Hardened Concrete bolts with connections sealed using Butyl. (NB the new type of Butyl is NOT like the good old super gooey stuff) This build is a tad different as there is 2 base-plates & 2 top-plates.
As of today, Maggie & I assembled 3 wall framing sections (2x 8' & 1x 10') in a couple of hours.
Tomorrow we will be doing the exterior corner insulation pieces (I'm using 5-1/2" EPS + Bonded Fibre Insulation in walls) and applying the Sheathing afterwards. The corner strips have to be done prior to sheathing as there is no way to slip that in there afterwards.
Photo's will be added as we go and will try to catch it up here.
BTW: The Mastercraft MAXIMUM 34 Degree Framing Nailer works an absolute treat BUT do not exceed 110 lbs Air Pressure as that will deeply embed the nails. I've used the commercial Bostitch ones and this is just as good.
|
|
Steve_S
Member
|
# Posted: 21 Oct 2015 08:24pm
Reply
We made reasonable progress and then some nasty weather hit that stopped us for a few days...
Got back to it and Murphy's Laws had to be applied and I managed to shorten a finger 1/8" with the DeWalt Circular Saw, had it stitched back on and stuffed a bunch of Antibiotics... A day later I got horribly sick which almost turned to Pneumonia... Full week written off there (and with good weather at that Grrr)
Finger is reasonable now and stitches (6 of them) removed the tip fell off BUT it's healing and I can use my hand OK again. Still having issues with the cursed foot but managing it.
We have 6 Wall Modules to build yet (1/2 the building) and with luck & IF THE WEATHER HOLDS we should be lifting them into place this weekend with out friends / neighbours.
After that comes the internal support wall in the centre and then roof/2nd floor.
SOLAR SYSTEM: ERF-age Keeping my batteries toasty in the power house with a little buddy propane heater. THIS IS NOT A SOLUTION !!! Unfortunately Panels, Charger, Inverter etc are all still sitting in boxes & packing... I'm gonna have to drag the batteries to my apartment in the village (3 flights up stairs) and get a Genius Trickle charger. Ohh I am SO NOT LOOKING FORWARD TO THAT. 8x Rolls S-550's = sore back +++
THE PHOOEY FACTOR:
I had seriously hoped to get this done this year but health issues and other unpleasantness's totally trashed the plans of this man... Plans of Mice & Men ya know.... I HOPE to get the cabin shell done and sealed Wind & Water tight sometime in November. IF I can reach that stage, then I can continue working inside with Buddy Heater + Generator outside doing the insulation and all the other stuff.
Would be nice to have someone who is "Solar System Smart " to come out for a day or two to help set that up as some of it is still a wee bit of a mystery to me... But as I won't have the chance to use it this year, I'll just have to maintain the batteries manually....
PICTURES:
Taking photo's through the process and will post when I have a chance... Currently my Internet is seriously throttled because I upgraded to Windows-10 Which whumped my internet with 45 GB of downloads, uploads and patches. IF YOU PLAN ON UPGRADING TO WIN-10 WAIT till Service Pack 1 is issued AND do NOT upgrade if your on Satellite or limited bandwidth internet.
|
|
creeky
Member
|
# Posted: 22 Oct 2015 11:07am
Reply
Steve, If yer not using your batteries you don't need to keep them warm. In fact the cooler temperature will help keep them from aging.
You have to charge your batteries tho. We had a guy leave his brand new Trojans overwinter a few years back. (blueberry?) He found out in the spring the delights of lead acid sulphation.
I would suggest
* hang your inverter/charger on the wall. Take about an hour to put a couple of screws into the wall panel and hang the thing?
*wire your batteries together. You bought all the cables already, so that's probably a couple of hours with breaks.
*install your bus bar.
*run the wire from the bus bar to the fuse and then to the inverter/charger. Another hour? Three with setting things up and double checking everything.
*run a wire from the inverter/charger to your generator. You could buy an extension cord and cut off the one end. or ... make a pig tail for coming out of the inverter/charger and then just plug in the extension cord. That's what I did.
*wire your 2 battery packs to the bus bar.
Now start your generator and let the inverter/charger charge your batteries. Top up in the winter time every two weeks. But I don't really know the best schedule. Might want to check with your battery mfct.
Another advantage to this is you could start using your batteries / inverter for power for lights while doing your interior fit out, etc.
I'd suggest doing this while your friend is there visiting so that she can double check everything. Needless to say pay extra attention that all your polarities are right. Doesn't hurt to buy a can of that anti corrosion spray stuff.
Two more things
That's a huge battery pack. That trickle charger is probably not up to helping much.
I know a guy who I could call. But he charges $75/hr and would need a good chunk of cash upfront.
|
|
Steve_S
Member
|
# Posted: 22 Oct 2015 06:21pm
Reply
Hey there Creekster.... Wanna take a road trip for a couple of days... Great Food, Good Company & a Few things to do too... Might even add to your "Xmas Fund" as well.... Something for ya to ponder, you know the e-mail address.
Maggie hasn't a clue about building or electrical but she's a champ and eager to learn & do.
The other folks coming up this weekend also don't know anything about Solar etc... Building, Wild Gardening & Permaculture, raising certain critters yep.
|
|
creeky
Member
|
# Posted: 22 Oct 2015 09:37pm
Reply
got a pile o'chores myself. trying to get a run in for the tractor hacked together. my plastic tent storage barn is coming apart at the seams. need to get them tools/workbench out of there and into something drier.
the guy i know. electrician for a solar install group. he's booked.
seriously. not that hard. just one step at a time. double check. everything. if you can wire for a light bulb. you can install a solar system. ha ha. heh.
get a charger on those batteries asap tho. even if it means running them off the generator and burning some gas $$.
enjoy the party.
|
|
Gary O
Member
|
# Posted: 22 Oct 2015 10:37pm - Edited by: Gary O
Reply
Quoting: Steve_S Thanks Gary, glad you like it... Unfortunately I don't have your chuckle factor which has good entertainment value as well as good readin
No worries. Sometimes even one of me is too many.
Here's the deal, yer a positive guy in a sometimes negative world.
That's huge.
And not as tiring as a Mr funny guy when folks are trying to be serious.
Your thread rocks, man.
Lotsa folks here that can walk you thru the solar stuff.
I'll live a bit vicariously thru your efforts.
Keep on keepin' on.
|
|
Steve_S
Member
|
# Posted: 23 Oct 2015 08:09am
Reply
Thanks for the encouragement there Gary & Creeky... Sometimes I need a bit of a moral boost, specially when things go wonko... Hmmm new middle name maybe, or I'll name the Cabin, "Wonko's House of Pain"... or "School of Wonko" as many lessons are being learned 
Time is our problem ATM. Maggie's off again mid next week till early spring and I'll be back to the solitary busy bee mode.
More wall modules to build today... Geez, we need to get 4 more knocked together today... but the weather "appears" to be cooperative for today, so far anyways, albeit a wee chilly @ 0 deg C.
|
|
ColdFlame
Member
|
# Posted: 23 Oct 2015 10:14am
Reply
Best of luck, Steve. If I were closer, I'd certainly offer to come lend a hand for a weekend! Keep up the good work though, and as Creeky & Gary said, I'm sure you can do the solar install enough that you can get it up and running, although maybe it wouldn't be your final completed install... Something to ponder anyway. 
|
|
Steve_S
Member
|
# Posted: 23 Oct 2015 08:55pm
Reply
Aie, we are working hard and got another couple of wall sections assembled & nailed together today...
Have had a few moments of Should've, Could've & Would've's but I push those thoughts out past the Turkey Vultures fast. Muffed up two Header Beams today, ruckus, stuckus, frickus, fruckus but got it done.
3 More Sections to build, 1 with 5' doorway, 1 with a 32x28 Window and 1 with a 34" doorway....
Helpers are dropping in tomorrow BUT looks like we will be lifting & pinning the walls in on Monday now.
LESSONS LEARNED DEPT: 
* IF doing Double Base Plate & Double Top Plates think about the awkwardness of it & the weight ! even @ 24oc.
* Always bang the 2nd Base Plate over the Bolts anchoring the first base plate to the concrete ! Drill the holes 3/4" deep & make sure it's 1/2" bigger then the bolt head. Wiggle room.
* Squareness (ok not an official word) triple & quadruple check BEFORE nailing on sheathing... 10Lb Sledge helps BUT try not to do that and avoid Mr. Sledge Convincer.
** KEEP WALL PANELS UP & DRY... One set got wet underneath & warped a little... Tops & Sheathing OK as that was all covered but wasn't off the flat concrete... Grumbles...
SOLAR:
I haven't any issues with doing electrics, time is the big issue. I still have several bits to buy: main & pony panel, transfer switch, combiner etc.... Lightning Arrestors ! Build frame for Solar Panel mounting and mount that to the side of the Sea Container, Trench the wire run from Panels to Power House.
BATTERIES ? ! ?
I took a few minutes and checked voltage on all of them... 6 are at 6.22 volts, 1 @ 6.20v & 1 @ 6.19v. All have good water levels. They are presently sitting on top of 4" Type-2 EPS foam to isolate them from the concrete floor (aka heat sink). The Power House is staying pretty even around 10 degrees Celsius but has dropped to 2 Celsius. I quickly warm it with the Buddy Heater when needed ATM.
QUESTION
I have a RV FURNACE Duo-Therm 659xx (series to -049) which runs on LPG and is a 12-Volt DC Only (not 120v) unit and uses a Thermostat. It's a Direct Vent unit with a separate air intake. It came from my 20' Terry Taurus Trailer which I knocked apart last fall. This works and I'm pondering the possibility of setting that up for the Power House / Pump House but I would have to extend the vents because they were designed for a 3" thick Trailer Wall.
THE Q's:
- Powerhouse walls are 8" thick (with Tin Siding on). Would / Could this work ?
- What kind of Regulator would I need and would a 20Lb Tank last a while ? (Regulator off trailer is for 2 tanks to one Iron line) Could I steal one off a dead BBQ ?
- IF I use 2 Automotive 12V batteries (have'm) & a Coleman 40w Panel with a 7a charge controller (supplied with it) would that be enough to top those 2 batteries and run that little furnace & maybe 2 small 12V LED lights in powerhouse ?
NB: I have a manual for that Duo-Therm furnace. Pretty Simple little kit actually.
|
|
creeky
Member
|
# Posted: 24 Oct 2015 11:53am
Reply
Your readings indicate 30% discharge. And there will be stratification in the electrolyte.
http://batteryuniversity.com/learn/article/water_loss_acid_stratification_and_surface _charge
Get a charger on those batteries at a low level. Run it off your genny if need be. Be prepared to run it for 10-15 hours. Perhaps over a few days. you could grab a cheapo charger from CT with 6v?
why do you need a transfer switch? there's one built into your inverter/charger, no?
or. hook up your solar controller temporarily. wire in one panel. put the panel propped up on the ground. charge the batteries.
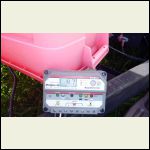
here's how I kept my batteries alive that first summer while I built the solar shed. for s&g.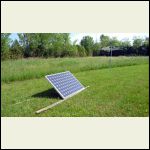
firstpanel.jpg
| 
firstsolaramps.jpg
|  |  |
|
|
Just
Member
|
# Posted: 25 Oct 2015 11:33am
Reply
Quoting: Steve_S IF I use 2 Automotive 12V batteries (have'm) & a Coleman 40w Panel with a 7a charge controller (supplied with it) would that be enough to top those 2 batteries and run that little furnace & maybe 2 small 12V LED lights in powerhouse ?
I have the same panel, charge controller, and batteries , and i abandoned a RV furnace because it used to much electricity even to get through one night of operation . The fan uses a lot of power!!
|
|
Steve_S
Member
|
# Posted: 26 Oct 2015 10:38pm - Edited by: Steve_S
Reply
WALLS ARE UP ! We had a few delays due to weather and a few other things but our friends came over today and within 4 hours all exterior walls went up ! Geez WHAT A MOTIVATOR & FEEL GOOD thing it is to see the walls up. Only one small "Boo Boo" in our pre-assembled wall panels which Maggie & I built on the concrete but no problem to fix.
Goodness Gracious the Maxximum Nail Gun certainly has had a workout so far... Walls alone took just under 3,000 nails, sure am glad I didn't have to put my hands through all that nailing !
With us zipping along today, I forgot to take photo's, LOL only realized it when we packed up & it was already 45 minutes after sun-down. PHOTO's being taken tomorrow and will post some here now that my internet is back to full speed... \\YAY//
|
|
Gary O
Member
|
# Posted: 27 Oct 2015 05:25am
Reply
Quoting: Steve_S PHOTO's being taken tomorrow and will post some here now that my internet is back to full speed...

|
|
Steve_S
Member
|
# Posted: 27 Oct 2015 08:20am
Reply
@Just: How big of a building where you trying to heat with that RV Furnace ? My pump-house / powerhouse is only 6' wide x 14' long (exterior dimensions) and seriously insulated. My goal is to keep it between 5-10C / 40-50F.
|
|
ColdFlame
Member
|
# Posted: 27 Oct 2015 01:05pm
Reply
@Steve_S:
I've had a similar experience with those RV furnaces. My RV (TrailManor 3023) has one, and we have an 80watt panel up top with 2 x 6V golf cart batteries. Admittedly, my batteries are nearing the end of their life, but even with the heat set to ~15C, by the time the morning rolled around, we had seriously depleted our available amp hours. The fans inside those RV furnaces are very high draw appliances. Unfortunately I never bothered to measure what the draw is, and I am uncertain which model it is for direct comparison.
|
|
Steve_S
Member
|
# Posted: 27 Oct 2015 07:51pm
Reply
PHOTO TIME ! Lot's of Catchin Up, so sit on back now with a cool one in hand...
First 4 pic's ...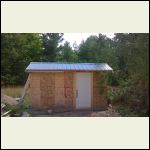
PumpPowerHouse_tinn.jpg
| 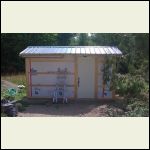
PumpPowerHouse_Wrap.jpg
| 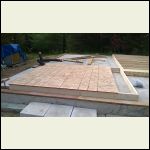
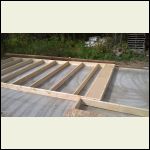
EN_10foot_wall_mod.jpg
| 
NE_Corner__NCentr.jpg
|
|
|
Steve_S
Member
|
# Posted: 27 Oct 2015 08:04pm
Reply
4 more....
1) 3HP Compressor & 7.2/9.0 Kw Genny Workhorse... Loves to drink Gas but the compressor is a Champ !
2) Bedroom, Small Window 2-1/2" Foam is towards the outside, under the sheathing.
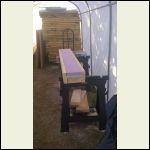
3) Wall Insulation 5-1/2in thick! I got 6 Skids of this for my walls, rated at R24 and came in 4'x4' sheets ($9 ea) These with the cut go into the corners, the cutout is for the 2x6 brace support.
4) The Headers. My Windows (small ones <36") get these with 2x6 lumber, foam side towards the outside. Big Window & Double French Door for 2x8, same design.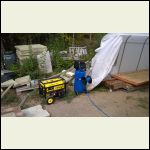
3HP_Compressor__7.2.jpg
| 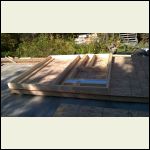
BedroomSmall_Window.jpg
| 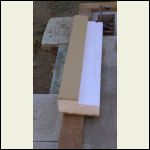
Wall_Insulation_5.5i.jpg
| 
The_Headers.jpg
|
|
|
Steve_S
Member
|
# Posted: 27 Oct 2015 08:17pm
Reply
4 More ! And I am keeping it simple.... (yeah right  ) )
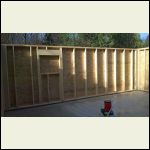
1) West Wall-Bath & Bed windows. 2x8 Header for Bedroom Big Window, 2x6 Header for Sm Bath Window. 2x 10' Wall Modules.
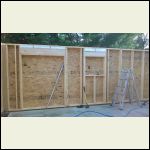
2) South Wall with 5' Double French Door & Sm Kitchen Window. This is 2 wall modules.
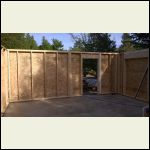
3) East Wall with opening for 36in Door, 2x 10' Wall Modules.
4) North E, North Centre, & North Bed with Sm Window (alternate view)
Something looks ODD eh ! ? YUP... As you can see the 10' wall sections have a fair bit of lumber in the centre... That's there to support the next layer up (Gable) and will be triple 2x6 to support the Ridge Board.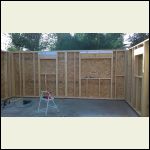
West_WallBath__Bed.jpg
| 
South_Wall_Dbl_Door_.jpg
| 
East_Wall_for_36in_D.jpg
| 
NENCentre__NBed_.jpg
|
|
|
| << . 1 . 2 . 3 . 4 . 5 . >> |

