| . 1 . 2 . 3 . 4 . 5 . >> |
| Author |
Message |
Steve_S
Member
|
# Posted: 31 May 2015 11:50am - Edited by: Steve_S
Reply
Well... 2015 arrived and things changed a lot since winter. The original plan of putting up a "Temporary" cabin on skids was derailed in a positive way. We have reclassified our build as a permanent Hunt Camp which opened up many options and possibilities. So a month spent on redesign and tossing ideas around + discussing options with our Building Inspector (a terrific and helpful fellow, we got very lucky) we finally settled on our plan and things are moving along fast.
I'll post some diagrams soon of what we are building when I get a chance.
Build Description:
100% off grid, Solar Powered,
20x24 Frost Protected Slab Foundation,
Radiant in-floor heating plumbed in,
Wood Stove (Jotul 3TD) heating as well,
Single Floor 2x6 stick framing (no loft), vented attic, 10/12 Pitch roof (tin),
Main Floor bedroom,
Washroom with 36x36 shower & compost toilet,
Grey water system with 2 50' weeping tile drains running down grade, 6 feet deep in gravelled trenches.
* Hot Water will be provided by an Eccotemp FVI12-LP Tankless
* Cookstove Wedgewood Stainless Propane (recovered from camper)
* Wall insulation 5-1/4" this EPS Foam with bonded fibre (commercial roof insulation going between studs (R21)
** External 2" ISO Foam sheathing completely wrapping cabin. (R10)
* Roof Insulation is 8" ISO with 4" between rafters & 4" over the top of rafters & sealed (R45)
* FPSF Foundation with 4" SM Roofmate Blue Foam (R20) [double the code requirements]
PS: As things are moving along quickly & being busier than a long tailed cat in a room full of rocking chairs, updates will be sporadic. Priority of course is on "Hammer Swinging Time" with a pinch of "Drunken Sailor Talk" for good measure. LOL
PHOTOS: Just 3 but worth at least 3000 words  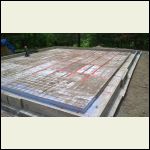
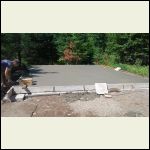
Slab being formed (incomplete)
| 
Grey Water barrel & drain lines before burial (Nov.2014)
|  |  |
|
|
Steve_S
Member
|
# Posted: 31 May 2015 12:04pm
Reply
Geez... having issues with uploading images. Here is #3.
These are 4x4 sheets which will be cut to fit between the studs tightly and then sealed in with low expansion foam from a spray bomb where needed. On the outside there is going to be 2" ISO Foam (sorry no pics yet) sealed & taped then strapping and Board & Batten to finish. The ISO Foam I'm using is not foil faced but rather treated craft paper faced so I'm undecided if I should wrap it with Tyvek... opinions are 50/50 as to doing it or not, so I will likely do it as Tyvek is cheap & peace of mind is always good.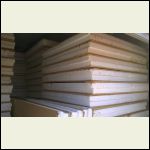
5 1/2" Insulation going IN walls (to be cut & tight fit)
|  |  |  |
|
|
Steve_S
Member
|
# Posted: 31 May 2015 12:12pm
Reply
Another quick update from last fall... I built the Pump House (6x6) which I hyper insulated on a FPSF slab of it's own. I had intended to also house my Solar Equipment in there BUT (dang that Murphy & his laws) the space is not big enough... Didn't realize just how much room you need for the Rolls S-550's and to work around everything. Lessons Learned Dept.
I will be expanding that by 8x6 for a total of 14'x6' with the 8' side also on a slab where the electrical equipment, batteries and such will be. The existing slab will be extended during the main cabin slab pour. I hand mixed the concrete in a wheelbarrow the first slab and decided to never do that again, certainly on that scale anyways.
|
|
azgreg
Member
|
# Posted: 31 May 2015 04:13pm - Edited by: azgreg
Reply
Anymore info (photos) of your grey water setup? Also, what exactly is a Frost Protected Slab?
|
|
Steve_S
Member
|
# Posted: 31 May 2015 06:55pm - Edited by: Steve_S
Reply
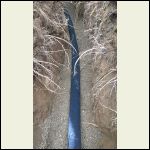
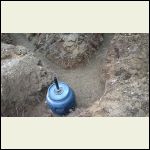
The Grey Water setup is pretty straight forward in my case. I have 2 runs of 50', 4" perforated drainage pipe buried 6' deep. The pipe was put on a 1' bed of drainage gravel and then buried with another foot of gravel then topsoil. Both dump lines come from the recycled Olive Barrel (food grade) which has a screen in it. That is fed from the top via 2" pipe to cabin which is encased in 2-1/2" foam box. Fortunately I am building on High Ground (natural ridge in the hill) so my drain lines run downwards nicely... That was tricky as I almost tipped the Excavator twice on the steep incline, lucky the trees prevented it... (Mother Nature helping I think). It is also 70' downline from my well.
NB: The grey water tank is topped also with SM foam and is 24" below finished grade. I put a neoprene connector between it and the line in so if I ever have to uncouple it I don't have to dig a trench, just uncover the top and 6" to the side and disconnect. There will be a filter / catch can in-cabin to stop nasties from entering the tank & lines. That catch can will be cleaned out a couple of times a year or as needed.
My soil is a Low Clay, sandy loam, about 9' deep sitting on solid granite bedrock with a lot of glacial deposits.
FPSF Slabs are more common in Northern Climates where we get frost. Our frost level is 4' as I am in North Eastern Ontario Canada. These do not require deep footing or anything like that but they cannot have organics underneath. The concrete sits atop sealed High Density foam and in my case will extend 24" beyond the foundation as well, to prevent frost creep under the slab. The slab sides are also encapsulated in foam so as to not act as a heat sink in winter. The "wings" are covered over with drainage gravel, fabric then topsoil and finished as you wish.
Of note, I am varying the design slightly on the side insulation by using 2" SM 2' high as opposed to just covering the slab side alone. Then the exterior insulation from 2' to roof will be 2" ISO, This will create a solid foam barrier from the bottom of the slab part way up the wall. This will help keep the heat in-slab, also effectively act as a water shield.
FPSF REFERENCE:
CMHC doc NH15-457-1998-eng.pdf
buildipedia.com Article
More Pictures: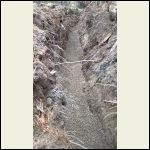
South Trench w/ gravel
| 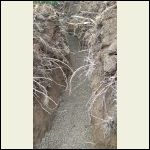
West Trench w/ gravel
| 
Pipe in before topping gravel
| 
Gravel on top both dump lines, pre soil backfill.
|
|
|
creeky
Member
|
# Posted: 1 Jun 2015 09:52am
Reply
looking good. two questions.
the two references you provide both discuss larger corner insulation extension. the distance of the exterior insulation extension in your area is recommended at 36". The extension for the corners being 4' looks like.
i have followed a fpsf slab installation carefully when they first began to be built and took a brief course. the engineer specified 36" extension plus wings at the corners of his slabs.
what is your reasoning behind no wings and 24" extension?
two:
I see your installation is still in progress. looks really good I must say.
what did you use for chairs to lift the rebar and how did you support and lift the pex?
good luck with your pour.
|
|
Steve_S
Member
|
# Posted: 1 Jun 2015 10:12am
Reply
Hey Creekster 
The doc's I posted are a tad older. I'm keeping it simple and drawing on the concrete guys & building inspectors advice. No need for wings as I went double thickness on foam and the lay of my build site. The 24" *actually about 30" sides will be sufficient.
The pex etc are not in yet, we have some reorg to do for water & power lines in (they put them in the wrong place) then I am laying in the 3/4" SuperPex. There's a pack of nice little plastic "chairs" for the rebar etc. Pex will be attached to the 6x6 mesh and only extending to 6" from the edge of slab.
I won't be using water in the PEX, I'll be using that Environmentally safe antifreeze stuff... I forget the product name right now.
Much to do and I have some forming to do for the pump house extension today.... even though I am "supposed" to be on Bed Rest for the next 3 days, I'm gonna push through it and get'er done. I want to see nice shiny flat & polished concrete by weeks end... LOL...
|
|
Julie2Oregon
Member
|
# Posted: 1 Jun 2015 11:54am
Reply
So, so jealous that you can do a greywater plan like that! It makes perfect sense! Wish we'd get with it here in the States!
Your cabin's coming along great!
|
|
|
ColdFlame
Member
|
# Posted: 1 Jun 2015 03:31pm
Reply
Looking great Steve! Posting to subscribe and follow along as I love reading your posts. I hope you're doing well - don't push yourself too hard if you have been prescribed bed rest. The last thing you need is to be down and out for weeks as a result of overdoing it!
Cheers,
CF
|
|
Steve_S
Member
|
# Posted: 1 Jun 2015 08:14pm
Reply
@Julie Welcome Back, glad things turned to the better side for you ! Things are pretty confused up here too and it depends on Building Inspectors and "their interpretation" as much as Provincial/Territorial guidelines and what individual townships decide on. Next township over I would not get away with it as they are somewhat regressive in some ways.
@ColdFlame, Glad you like my "wordy posts" and follow along as I trudge through the quagmire of building my little piece of heaven. I paced myself reasonably well today and as such did not get as much done as I would have liked BUT any progress is good progress and so I chalk it up to another good day. As long as my Dr's don't find out, I'm OK and I am certainly not telling them nothing... They must seek out the Oracle of Delphi for their answers.
BTW: I get a tad wordy as I try to explain things as best as I can while trying to answer potential questions... I try for a certain amount of brevity but my many years of training & conditioning to anticipate questions, issues and arguments has taught me to try & cover more than not enough... At least some find it helpful (I hope anyways).
|
|
old old buddy
Member
|
# Posted: 1 Jun 2015 10:56pm
Reply
Steve....I wish you all the luck in the world. You're going to end up with one fine cabin in the not too distant future. When I go back and look at our build over the past five years (four years on this forum) I can hardly believe it. It was the best thing that ever happened to me and had a lot to do with my son keeping his sanity while going through Registered Nursing School at 35-36 years old! I leave you with one thought.....get a journal started and have visitors and family alike, write about their adventures while visiting/working/staying at the cabin. You will never regret it!
Where is your cabin being built in Canada?
Again.....good luck and have a great time....Old Old Buddy
|
|
Steve_S
Member
|
# Posted: 2 Jun 2015 08:09am
Reply
Hey there Old Old Buddy 
I am journaling in a manner... I take plenty of photo's (just trying to get back into the habit) and keep a general log of sorts for my daily activities... It's kinda tough getting back into the routine of doing so after a 6 month break... Have been pondering blogging it on some place like WordPress but haven't decided on that yet which is fine as it's not really a priority.
We started this "project" in August of last year after my better half convinced me to follow through with following this dream I've had for many many years... I suppose that "Technically" this is year two of the 5 year project.
Our cabin is near Pembroke Ontario (closest big town)... We are off the beaten path in a nice quiet corner of bush country.
|
|
old old buddy
Member
|
# Posted: 2 Jun 2015 09:00am
Reply
I came to Ontario to Muskie Fish on three occasions, about twenty years ago. We fished Pigeon, buckhorn and was Rice Lake third Lake out of four called the "quaworthsa's?" I can't remember for sure but on my first outing I managed to get one of my huge treble hooks "buried" in the knuckle of my ring finger within the first thirty minutes of fishing...lol. It tickled me....everyone at home asked me, " "Why didn't you just back it out?" I told them it was obvious they had never seen Muskie lores. I ended up in the Emergency Room at a hospital in Lindsay, Ontario.
We fished there for two years in a row and then went to Honey Harbor to fish Georgian Bay. My buddy caught a Tiger Muskie (hybrid) that was tied for the largest Muskie caught in North America that year with me and made the cover of three fishing magazines. We were fishing in 110 feet of water with stainless steel line!
You live in a beautiful province. Are you on or near water? Are you far from Toronto? Good luck with your build. OOB
|
|
Steve_S
Member
|
# Posted: 2 Jun 2015 09:22am - Edited by: Steve_S
Reply
Well Ottawa is 150kms away and Toronto I believe somewhere around 450kms away. About as close as I want to be to a "big city".
Yes, lot's of lakes, creeks all around us but we are not "on the water". Actually, Algonquin Park is not too far from our spot. So for anyone familiar with Algonquin, you know what I mean by "the rough terrain". There isn't a flat spot (aside from lakes) for miles & miles around....
Muskies are tough buggers to fight with ! I agree that anyone who has never fished for Muskie has no real understanding of the hooks used on the lures... Some might say they are barbaric almost (they do look medieval) but those are fish with serious attitude, especially the older ones, they get downright mean !
PS: I did over do it yesterday & now paying the price for it  So it is going to be a very slow day... patience is something that is hard to corral when things are happening, especially when Milestones are being attained, such as the foundation... So it is going to be a very slow day... patience is something that is hard to corral when things are happening, especially when Milestones are being attained, such as the foundation...
|
|
Steve_S
Member
|
# Posted: 2 Jun 2015 12:31pm - Edited by: Steve_S
Reply
Another UPDATE... Sheesh !
We are putting in-floor radiant heating into the slab as already mentioned. Well things are never as simple as one would like EH ! Getting the proper pipes (Oxy-barrier PEX) and all the goodies are NOT easy in my area and Home Depot, Lowes, Home Hardware Building Centres and such DO NOT SELL 3/4" - 7/8" PEX for this application, they all say call a heating supplier ! So I did that and one "shmuck" had the audacity to want to charge me $1 per foot for the PEX alone !
SOLUTION: (post "drunken sailor talk")
I recently got a quotation from the Radiant Floor Company out of Barton, Vermont. They specialize in creating complete DIY "kits". They can supply all bit's and widgets. We decided to go with the One Stop Solution and get their "kit" from them... Now ordered and being shipped out today !
We are going with a Closed Loop, Single Zone system with On-Demand heating + external heat source (radiator @ wood stove) using Propylene Glycol (non-toxic) as opposed to water.
So here is what is coming for a 480 square foot slab:
(no prices posted here as this varies but to give an idea)
sadly the [list] [/list] function is disabled on this board.
*) 7/8'' XL PEX 400ft coil.
*) 2 loop manifold for concrete application using 7/8'' XL PEX tubing.
*) Wrench - Combination open and split boxed ends.
Ideal for tightly spaced connections. For use with 7/8''
adaptors & couplings. (Free with 7/8'' loop manifold
purchase - 1 per customer).
*) Nylon Ties (100/pk) Ideal for attaching pex to wire
(and or) rebar in concrete re-enforcement applications.
*) 7/8" PEX to 7/8" PEX coupling with a 24" strip of
3/4" wide, water resistant rubber, self vulcanizing
tape. Protects brass coupling from concrete.
*) Radiant-Ready - single zone Closed 3/4'' - A complete
package designed for a single zone radiant systems
using On Demand water heaters. Includes pump,
pre-wired controls, all valves, system mixing
valve(3/4"), adaptors & gauges as well as components
needed for periodic back flushing of on demand units.
Factory assembled, mounted, & tested.
They recommend a Takagi Direct Vent on-demand heater but we're waiting to order that till later.
The BIG POINT on this is the complete Radiant-Ready package all factory tested and assembled. Saves the hassles & problems of having to source bits, plug it all together and many hours of "futzing" with it.
EDIT: Apparently it will be here on Friday ! Shipping via UPS and getting through Customs too...
Just got word from DHL Courier, my long awaited 3Kw Inverter for my Solar System arrives tomorrow. Ooooo for me, THAT'S EXCITING hehehe... and considering it was shipped on May 31st from Hong Kong that's pretty amazing IMO. REFERENCE LINK to my Solar Bits & Pieces which has it all detailed out for inquiring minds.
|
|
Steve_S
Member
|
# Posted: 3 Jun 2015 11:35am
Reply
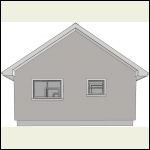
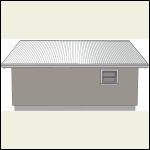
While waiting on Courier for my inverter, I figured I'd pop in my "Home Made Blueprints" such as they are. These are done with Home Designer Pro 2015 (not the demo), here is the link for anyone interested home-designer-pro 2016
NOTE: This software is a tad $$$ and not that easy to use and tweak. I used it because I bought it but could have used Sketchup with likely less hassle and saving on bucks too.
Images: (Elevations)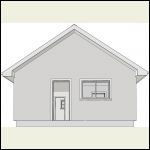
Elevation-E (Main Entry)
| 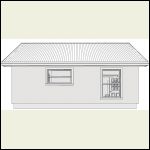
Elevation-S
| 
Elevation-W
| 
Elevation-N
|
|
|
Steve_S
Member
|
# Posted: 3 Jun 2015 11:38am
Reply
Next batch of Images:
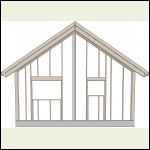
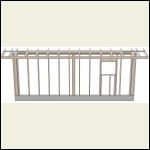
These are the framing details... Keepin it simple !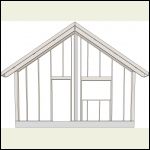
Framing-East Wall
| 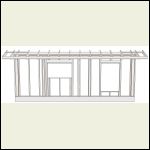
Framing-South Wall
| 
Framing-West Wall
| 
Framing-North Wall
|
|
|
Steve_S
Member
|
# Posted: 3 Jun 2015 11:47am
Reply
Here is the last batch;
Basic foundation detail does not show the extended foam (24" from slab edge) around the perimeter which I am putting in. The little walls on south side (bottom) is where water & power come in as well as the Radiant Heating plumbing from the slab.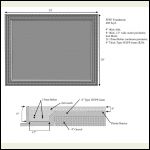
Basic Foundation (FPSF) detail
| 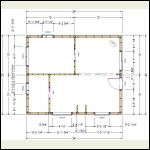
Floorplan Layout (Basic)
| 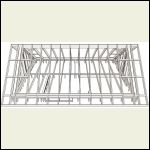
Roof Framing from Cross Section
|  |
|
|
toyota_mdt_tech
Member
|
# Posted: 3 Jun 2015 12:35pm
Reply
Are the walls 24" OC??? It looks like it from the plans.
Actually, may have been spendy software, but looks like its doing a great job and once you have it all figured out, I bet you could draw up plans for others and make a few $$$ to pay you back on thta software.
Should make for great drawings for submitting to buiilding dept.
|
|
Steve_S
Member
|
# Posted: 3 Jun 2015 01:10pm
Reply
Hey there Toyota_mdt... Yes, 24oc all the way through. Interior walls are 2x4 as well.
Our building Dept. accepted these under the Owner Designed & Owner Build provisions. There is some technical term for it which I can't remember but hey, it works.
Twas a bugger to get the software to do what I wanted and to present the material properly... One really sweet feature / function is that it also generates Cut-Lists & Buy Lists into a spreadsheet format also with the mass dimensions etc... Certainly makes the quoting & shopping easier !
I suppose I could draw up stuff for others but I haven't really put much thought into that... Maybe something to do over those cold winter days & nights. Something for the "Ponder List" I guess...
I did purchase a full set of plans from Cad Northwest for another cabin we were contemplating (same 24x20 footprint) plan # C0480A but we decided after looking hard & heavy at it that I could not work it the way I wanted. Largely because I have been collecting materials since last summer. I showed the CDW plans to my Building Inspector and he just grinned and said they would be accepted without issue... BUT (there it is) for 500 square feet or less, over 500 they would have to be stamped by a local engineer or something....
I've managed to pick up good thermal windows with all the goodies as well as doors with their frames. I got my insulation from a few different roofing companies via Kijiji.ca for far less than retail. This has meant that I needed the "wiggle room" to fit in the components I have into the structure. That is where it's get's a touch tricky !
|
|
Steve_S
Member
|
# Posted: 10 Jun 2015 06:46pm
Reply
After having been "forced" to take time off because I didn't do what the Doctor said. Then waiting for couriers to deliver things, which of course had to have an injection of Murphy's Laws, causing more delays and issues.... I FINALLY GOT BACK TO WORK !!!
After 2 hours today, got forced off the property by very very bad weather... We are now on the 4th Tornado Alert and it's a royal mess out there...
Fingers crossed that the concrete for the Cabin & Power House can be poured this week (Weather permitting)...
I'll post photos when I can... Going to have to do a full photo layout of the Radiant Heating system as well... I bought a complete kit from the Radiant Floor Company in Barton Vermont. This kit is complete, well made and darned near a shame to have hide away as it's almost a piece of artwork. Something I been pondering as to how NOT to hide it and incorporate it somehow... would certainly blend in with a Steam Punk motif... Photo's Tomorrow.
|
|
Steve_S
Member
|
# Posted: 12 Jun 2015 09:19am
Reply
Powerhouse foundation is now prepped with 6" drainage gravel, 2" of foam (2 4x8 sheets) as base & 4" (3 2x4 sheets) of Styro-SM. Pair of 10mm REBAR and 6x6 wire mesh.
TO-DO: Install 1/2" Radiant-Pex for the Powerhouse. Doing that as "future planning" as I want to setup a solar panel on the roof that can heat the Propylene Glycol. Based on material from BuildItSolar.com
I'll be plumbing in all the PEX this weekend, I'd do it today but it's pouring rain and not very nice out 
Concrete is to be poured next week...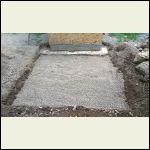
6" Gravel Base (pre tamping)
| 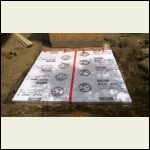
2" 4x8 Base Foam
| 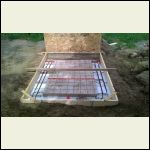
Rebar & Mesh in-place, just need the 1/2" PEX
|  |
|
|
Pawatch
Member
|
# Posted: 13 Jun 2015 10:35pm
Reply
Nice plans! I think you will really like the radiant floor heat.
|
|
Steve_S
Member
|
# Posted: 15 Jun 2015 10:21pm
Reply
Well 13 hours of work, a weird "almost twister", being attacked by giant flying ants and last but not least being told off by my local chipmunks... I got all the PEX in place for the Cabin & Powerhouse.
Cabin got 7/8" pipe @ 16" spacing while the Powerhouse got 1/2" @ 12" spacing and no manifold, unlike the Cabin. The powerhouse will have a solar heater -> to insulated tank as mentioned in previous post.
SOMETHING IMPORTANT for Radiant Heating !
There is a Temp Sensor that goes into the concrete, inside a piece of PEX which allows for easy changing. This is ESSENTIAL if you have alternate heating like a Wood Stove which will warm the air but not the floor. The point being an Air Thermostat would not trigger warming the floor if the air is warm but by reading the slab temp, the floor will remain warm regardless. THIS IS THE SOURCE OF MANY COMPLAINTS WITH RADIANT HEATING.
PICS for those interested: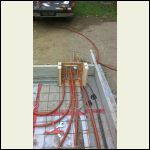
The manifold (2 out / 2 in) + Temp Sensor line to slab centre.
| 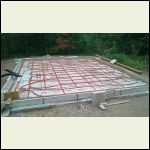
The 7/8's PEX. Single Zone with 2 lines.
| 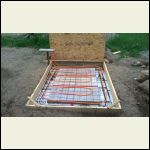
The Powerhouse with 1/2".
|  |
|
|
ColdFlame
Member
|
# Posted: 16 Jun 2015 10:37am
Reply
Looks great, Steve! I'm excited for you (probably not so as excited as you are for yourself! ha!)
|
|
Steve_S
Member
|
# Posted: 16 Jun 2015 05:01pm - Edited by: Steve_S
Reply
Thanks ColdFlame... Yeah getting excited for sure...
Happy to report that the Cabin's Radiant PEX has held @ 50-PSI air pressure for 18 hours. Tomorrow morning I can drop the pressure to 30-PSI which will remain through the pouring & finishing and I may even leave it for a week for the primary cure & set to be real good & solid.
Geez, pricing out the rental of Framing Nailer & Compressor (there is no way I can hand nail the place together as my hands are somewhat messed up)... For 5 days rental I could buy a cheap Framing Nailer & small compressor. I have to really ponder that... as my budget was just hit a bit.
...
More pics & info will follow as I continue... it will be spotty as my days are about to get really long with this build.
|
|
creeky
Member
|
# Posted: 16 Jun 2015 06:58pm
Reply
buy the nailer and compressor. you will use them for many many years. and the prices now are very cheap.
the compressor will help lay floors, do trim etc etc.
a kit with framing nailer, and a 16 gauge nailer if you can. i still don't have a 16, an 18 and stapler are useful too. boy. putting up trim with an 18 compared to what. predrilling and then hand nailing. magic.
that slab looks great. good luck with your pour.
|
|
Steve_S
Member
|
# Posted: 20 Jun 2015 07:57am
Reply
Another Milestone / Watershed day !
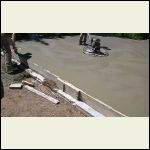
The concrete was poured for the Cabin Pad and the Powerhouse pad...
The lads came in and everything all set and floated everything and finished with the Power Trowel and hand troweling the edges etc... They finished up in 4 hours +/- a bit...
So now we have 3 days of "sprinkling" the concrete and on Monday the concrete guys will be back to finish it and put on Sealer... In the meantime the concrete is curing under plastic.
A few projects in the meantime...
- remove the Temp Tin roof on the Pump House and cut back the West Side to flush (Power House addition is going to blend in)
- pull the OSB off the West side of the Pump House and get it ready to be opened up & joined to Power House. (sure glad I used screws LOL)
- Build some kind of Shelving System in the Sea Can (gotta get the tools and stuff Bettah Organized ! Making this Virgo insane) Gonna make use of those load securing loops for that.
- Maybe frame up the walls for the Power House BUT set them aside so the concrete can cure some first...
- Few other prep things for the next stage of starting the build...
PET PEEVE: I followed all the Radiant Pex installation details and that all went well, concrete guys had no problems with it. Still holding pressure, bang on.! BUT the PEEVE (grrrr) Went to the lumber yard to get materials for Power House and the "expert" asked about my anchoring method (which he disagreed with but not understanding the "why" of it) then he criticized that I laid 7/8's Pex @ 16oc saying that was way too loose and on & on & on... He's done Many Floors like that and asks what the Temp Sensor in the floor is for ? SERIOUSLY... (bang head with BFH) [BFH = Big Frickin Hammer]. He's always "After the Fact" expert and it's really getting under y skin... I like shopping there BUT this guy takes the fun out of it... Maybe I should shop somewhere else...
PICS: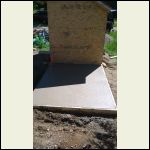
PowerHouse floor slab (hand troweled)
| 
Edges being smoothed before Power Trowelling
| 
The guys Power Trowelling & edging
| 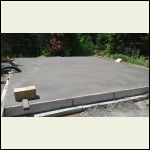
Smoothed and soon to be watered & covered.
|
|
|
neb
Member
|
# Posted: 21 Jun 2015 05:44pm
Reply
Exciting! The fun has started no matter how much work is involved in the build. The planning the progress of a dream in progress. Good for you!!
|
|
Steve_S
Member
|
# Posted: 22 Jun 2015 08:25pm
Reply
The forms were removed today as well as the plastic covering and the concrete guys sealed it.
The concrete is stained from the plastic and we tried to scrub it clean & wash it down this morning with minimal positive result. 5 hours later the concrete guys arrived to pull the forms and put sealer on it... They assured us the sealer would bring it to that "wet look" and resolve the staining... Well it DIDN'T and the guy sprayed it (sealer) on unevenly and it absolutely looks like crap ! Some shiny spots, some flat (no shine) and some without any sealer at all... It's all streaked and spotty.
I could post pictures but to be honest it would just P' me off even more... and I hate being unhappy !
I do NOT want to paint it and grinding/polishing is NOT in budget. I looked at retail sealers but apparently they cannot be used on the commercial sealers. We had intended to leave the floor concrete and not lay flooring as such on there but we may not have a choice now...
|
|
| . 1 . 2 . 3 . 4 . 5 . >> |

