| << . 1 . 2 . |
| Author |
Message |
Don_P
Member
|
# Posted: 2 Jul 2015 08:40am
Reply
Quick look comments;
Are there jack studs under the ends of each header alongside each header's full height end king stud?
Is the foundation giving continuous support... is it on foundation walls rather than piers? The single 2x6 floor rim boards are not beams... same for the bolted together center girder, a double 2x6 is not capable of spanning very far between supports while carrying the floor joists.
The loft joists should be supported on a let in ledger in the end wall not simply nailed to the sides of the studs. The rim beam out in the room needs to be sixed to carry half the loft load, double 2x6's probably too small.
The roof has no tie to keep the rafters from spreading, typically ceiling joists keep the rafters from toggling and trying to "snap through". The other way to support the roof is with a ridgebeam capable of supporting the top ends of the rafters, again a sized beam for the load and span. A post at the loft edge, continuing straight down through the building to a foundation support would shorten the ridge span helping to reduce the needed size of ridgebeam.
If they are bought windows get the rough opening sizes from the product literature, it can be very time consuming to resize window openings after it's all framed. I forced one of ours in to a very snug rough opening after changing my mind on manufacturers, first seal to pop on the thermopane.
|
|
KiwiCabin
Member
|
# Posted: 3 Jul 2015 03:03am
Reply
Hi Don, Yeah those plans I made were in fact to convert the measurements to metric from imperial for me. I am pretty good with imperial but constantly switching was making me crazy.
I'll go through each of your observations. Most are just because of sketch up. Yes there will be jack studs and king studs, there will be collar ties on the five rafters not in the loft, the foundation will be 4 x 6x6 beams on piers - didn't include that on the plans.
There will be a ridge board of 2x8. Using a cool website for all the roof rafter, birds mouth measurements. The windows I thought I would try and build myself - I have watched some Youtube videos on this but there is not too much info on this that is simple, but figure I will give it a go. What could go wrong (don't answer that)... Just wondering if the placement, height size is ok from those of you that have already built. Now is a good time to change them.
Yep I will now let in the 2x6 to the gable wall for the loft. By how much would you suggest? 1/2 inch or more (put that in inches. My head hurts...)
Yes will double up the supporting studs for the loft.
One of the design things for the cabin is that it will be split right down the middle length ways so that worst case we could relocate it in two parts. That is why there is a bit of bolting.
Thanks for your input Don.
|
|
KiwiCabin
Member
|
# Posted: 27 Aug 2015 05:33am
Reply
Ok, so it has been a while really. Wood for the cabin is now dry. I have been milling plenty of boards to line the insides of the cabin. 20mm x 150mm (3/4 x 6 approx). I figure this will never go amiss and can use it for other projects too.
I have been fixing quad bikes too - it seems they seem to like to have bearings bust - but getting very good at replacing them.
Anyway, I have now started building the "shed/bunkie" to go along side the main cabin. I am going to use a pile of Totara wood that had previously been milled from a fallen tree. Really nice wood with a great redish colour. Natural rot resistant too so a bonus.
Foundation is on a layer of stone from the quarry, concrete and then 4x4 sleds. Frame is 2x6 and then will have 3/4 ply.
Going with the shed style roof too. Glad to be building. Will keep things updated.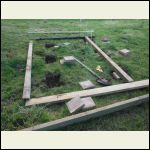
Foundation.JPG
| 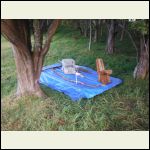
ply_and_chair.JPG
| 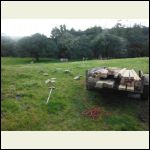
Site.JPG
| 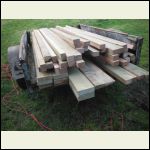
wood.JPG
|
|
|
KiwiCabin
Member
|
# Posted: 27 Aug 2015 05:34am
Reply
more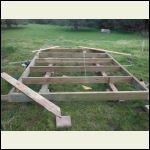
framed.JPG
| 
Framed2.JPG
| 
End_of_day_1.JPG
|  |
|
|
KiwiCabin
Member
|
# Posted: 28 Aug 2015 07:01am
Reply
Day 2 of the shed build. Only had the morning to work on the shed but I got a bit done.
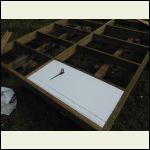
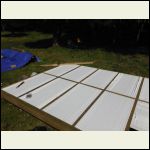
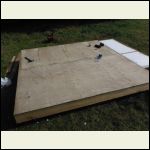
I secured the cabin down with ground anchors, finished the joists, installed the under floor insulation and secured two ply boards. Pretty happy with that.
Tomorrow I hope to get the floor complete and then start on the wall framing. It was a beautiful spring day today.
Shed is 3m x 2.4m (8' x 10' I think). Would like to put a deck on I think too.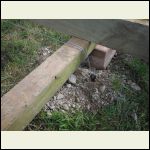
Day2_Anchor.JPG
| 
Day2_Insulation.JPG
| 
Day2_Insulation2.JPG
| 
Day2_Ply2.JPG
|
|
|
KiwiCabin
Member
|
# Posted: 1 Sep 2015 04:30am
Reply
The weather was not so good yesterday so I did not get to the walls. Started today though and it is very satisfying to see the progress.
Having the precut lengths makes it easier too. All went well until the generator would not start and I found that fuel was leaking. Mmmmmm. So off to get the other generator, repair the quad. Sadly it started to overheat on the way back so I shut the bike down and left it  Will start again tomorrow. Will start again tomorrow.
So the progress was one end wall and one side wall laid out. I do enjoy being outside. We had a big dump of rain last night and the stream rose up and over the bridge I built - still standing though so I am happy about that.
|
|
KiwiCabin
Member
|
# Posted: 1 Sep 2015 04:31am
Reply
Photos
|
|
old old buddy
Member
|
# Posted: 1 Sep 2015 10:49pm
Reply
I haven't spent much time on her for the past year or so but found your site as I was looking through the various builds. Welcome! I just wanted to tell you that I know one person from New Zealand or maybe it's Australia...anyway his name is Ken Warby. He is the man with the world's fastest speed record on water. I believe he has gone 317 miles per hour...give or take 1/10 of a MPH. He comes to an annual speed boat festival in Wheeling, West Virginia. I have spoken with him twice in the past few years. Not really cabin related...but I thought you might know him. Old Old Buddy
|
|
|
KiwiCabin
Member
|
# Posted: 2 Sep 2015 04:14am
Reply
Sorry Old Buddy I don't know him. Sounds like a need for speed kiwi though.
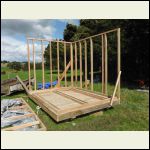
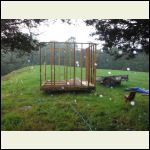
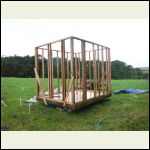
Day 4. Working on the frames for the walls and made some great progress today. All four walls done. Raised them and tacked them together so that I can make them square.
I know it would have been easier to put all the headers etc in before raising the walls, but I have to build the window frames to go around the windows. I figure as I am putting ply over the frames I can cut the holes as I complete them.
Happy with the progress today even with the hail and thunder that came through.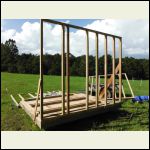
Day_4_Wall_1.JPG
| 
Day_4_Wall_2.JPG
| 
Day_4_Wall_3.JPG
| 
Day_4_Wall_4.JPG
|
|
|
KiwiCabin
Member
|
# Posted: 5 Sep 2015 06:06pm
Reply
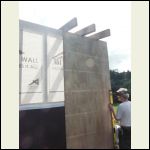
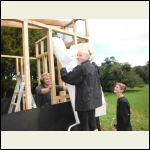
Day 5 of work and what a great day it was. I had some friends come up and they worked so hard and many hands really make light work.
There had been a big rain storm come through the night before and sadly it washed away my bridge I had built  I have not seen it but was told one end has given way. Will be a job when the river goes down to fix it. I have not seen it but was told one end has given way. Will be a job when the river goes down to fix it.
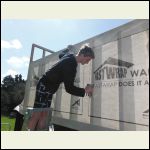
Anyway back to the build. We got the wrap started and quickly ran out so I had to go and get another roll. Thanks to Jess and Nathan for their stapling skills!
Ply was cut and put in place. It really went along well once we got going. Putting the ply in place sure was easier with a few people. Josh was a great help and was a machine on the drill and nail gun.
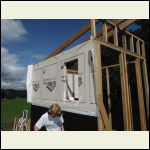
The rafters were cut in and put in place. The fly rafters were put on - again the extra hands were amazing. I was imagining all sorts of ropes and contraptions if I was doing that by myself.
Josh put in one window and we have the space for the door. Nath put on some roof ties too.
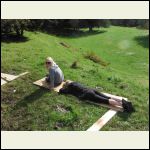
It really went well and now I just have to put on a rood and door to seal it up. Very satisfying and exciting. Building it is one stage of fun, but I think the fitting out will be a ton of fun too.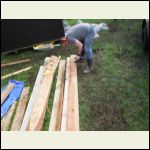
Day_5_Carl.JPG
| 
Day_5_First_ply.JPG
| 
Day_5_Lining.JPG
| 
Day_5_Nath_stapling..jpg
|
|
|
KiwiCabin
Member
|
# Posted: 5 Sep 2015 06:08pm
Reply
More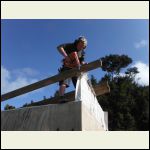
Day_5_Rafter.JPG
| 
Day_5_Top_lined_2.JP.jpg
| 
Day_5_Tiring_work.JP.jpg
| 
Day_5_Rafters_and_pl.jpg
|
|
|
KiwiCabin
Member
|
# Posted: 23 Sep 2015 04:45am
Reply
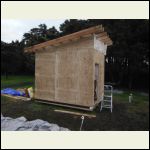
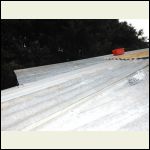
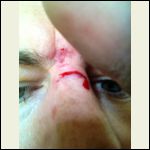
Have not posted for a little while but I have still been doing things on the shed. We got the ply on and put on the roofing. I had to cut down the tin as it was all reused. Turned out alright though.
The piece of ply above the door was the worst bit due to cutting it around the rafters. Bit of a tight fit so I "tapped" it with the hammer and a block of wood. Moved the ladder and lets just say block of wood, moving ladder, gravity and sunglasses. Think I was lucky the glasses took the impact. One of those I should not leave that there moments.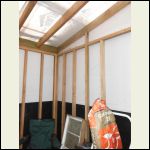
Day_6_on_Inside_wrap.jpg
| 
Day_6_on_Roof_1.JPG
| 
Day_6_on_Nose.JPG
|  |
|
|
KiwiCabin
Member
|
# Posted: 23 Sep 2015 04:52am
Reply
The photos are not all Day 6, but Day 6 onwards as I missed uploading them each day.
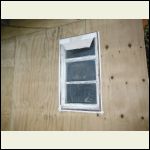
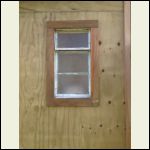
Next step putting in the windows and the door. Again I am using reused windows and doors so I have built around them to fit. The first one on the side is cool as the top one opens to let in air. I have again used Totara around the window.
The door and front window went in well too. I used the router to cut the hole. Using the straight face blade with the bearing on the end it ran around the studs nicely. Point to note though - I did lose the bearing off the first blade I got - used lock tight on the second one before I began and no issue.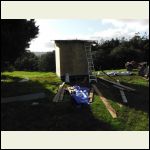
Day_6_on_Outside_roo.jpg
| 
Day_6_on_Side_Window.jpg
| 
Day_6_on_Side_Window.jpg
| 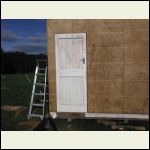
Day_6_on_Door_Closed.jpg
|
|
|
KiwiCabin
Member
|
# Posted: 23 Sep 2015 05:01am
Reply
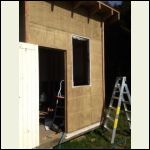
The front Window I did swap around. I did have it swing open across the door - not very safe though so I turned it around - no to mention the friend that gave it to me said the Transformer stickers in the window were upside down.
Happy now though with it.
Started to build a slide out bed with lift up lid as shown on someones thread and link to red van.
Takes a little of thought to ensure it all works, but it is on the way to completion.
I so enjoy being out there. The view from the window is very nice. When the birds start chirping and flying around it is great.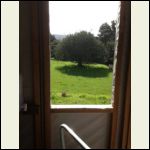
Day_6_on_Tree_View.J.jpg
| 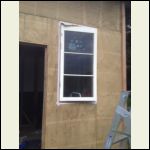
Day_6_on_Front_Windo.jpg
| 
Day_6_on_Front.JPG
|  |
|
|
KiwiCabin
Member
|
# Posted: 30 Sep 2015 01:09am
Reply
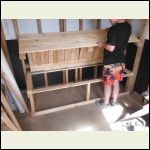
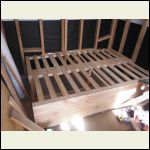
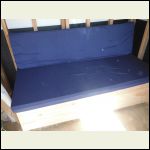
Built the extendable bed. Has turned out really well and extends to about a double. I got a good price on the foams - I had to chop one of them in half.
I put the routed handle in the front to help with lifting up the bed to access storage.
This was a good project to do. I had to think through the different stages a bit to make sure it all worked. It is based on the red van blog.
It is 1950 x 850 with the extension adding a further 480. I might need to add some cushions too.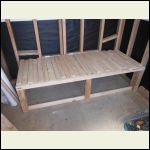
Bed_build.JPG
| 
Bed_lifted.JPG
| 
Bed_Extended.JPG
| 
Bed_squabs.JPG
|
|
|
KiwiCabin
Member
|
# Posted: 30 Sep 2015 01:14am
Reply
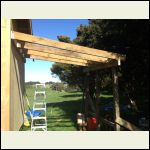
Today I started a lean to on the side of the shed. This is going to be for the BBQ, bench and to store things out of the inside of the shed.
I was thinking of having wood half way up and then shade cloth the rest of the way so it reduces the wind tunnel effect.
Went up pretty well, little tricky lifting the bearer with only me. Creative use of wood, ladder, work horse and lifted it in stages. Will cover with tin as well. Good days work with the sun out and things heating up here in NZ.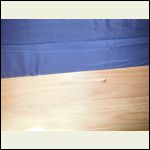
Bed_handle.JPG
| 
Lean_to.jpg
|  |  |
|
|
KiwiCabin
Member
|
# Posted: 5 Oct 2015 03:49am
Reply
Continuing on with the lean to I have now finished with the last rafter and put on the tin. Again I have reused old tin from the barn.
It has worked out well as I just used a angle grinder to cut off the rust at each end and then I was able to use the whole sheet to fit at 2.7m.
Point to note as I laid and screwed the last sheet of iron down and was pleased with the result - It was about then I realised that I had placed the ladder back a few sheets where I climbed up on to the roof. Hmmmm. Luckily I still had the drill with me and I was able to hang over the edge and hook the ladder and pull it along and grab it. Would have been a perfect movie suspense moment as I only just could reach. Made me laugh though which was better than having to jump!
I have made a bench out of a left over slab from milling the wood. Think I will sand and polyurethane it, or oil it maybe??
The tin on the front looks good I think. I will make another bench for the BBQ and then wrap some shade cloth around to reduce the wind coming through.
Sister and her children might be coming up in the weekend for the first sleep at the site. Looking forward to it.
|
|
KiwiCabin
Member
|
# Posted: 9 Feb 2016 05:34am
Reply
Well it has been a little while since an update.
The wood has now all been dried and H4 treated and ready to go. It is out at the site.
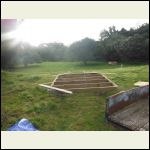
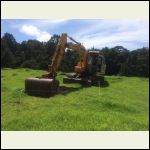
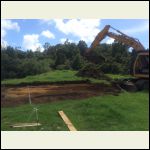
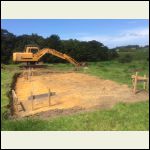
Yesterday we got the digger there to level a site to build. It was soooooo good to see that first scoop. It did take us a little to work out where north is as we have it facing west down here, and we also wanted the bush view.
Once that was done we put up some profiles to give us an idea of the size and to work out some positions for holes. Really hot and humid here at the moment so hot work.
Today we worked on the bearers - have to make joins as not quite long enough - again hot work.
Glad to see the progress!! Trying to get helpers to dig holes but people seem to be busy.... ha.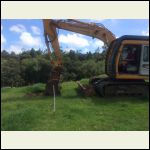
IMG_1701.JPG
| 
IMG_1703.JPG
| 
IMG_1707.JPG
| 
IMG_1710.JPG
|
|
|
adakseabee
Member
|
# Posted: 9 Feb 2016 11:53am
Reply
Hi, KiwiCabin, I just finished going over your thread for the first time. It brought back some memories of the rolling farmland and woods where I grew up in New York State, much of the fields and pastures now overgrown with brush and trees. What was the original use of the grassy fields we see in the photos? When I visited New Zealand (the south island) in March 1972, I saw many sheep farms, in addition to the spectacular scenery in the alpine mountains. I was amazed at the variety of the scenery as I went from the east coast at Christchurch over to the west coast. Lovely country you have there.
|
|
KiwiCabin
Member
|
# Posted: 10 Feb 2016 04:04pm
Reply
Thanks Adakseabee. The land is still on an active dairy farm, but nicely tucked away beside the stream.
It is a really nice spot away from everything - but also just 10 mins from the main house (down the races) - best of both worlds. I read some people's posts and they drive for hours to get to their property. Thinking about that though it is all just part of the journey, and the destination I am sure for us all is worth it.
Building a cabin is very rewarding. Has its moments, but rewarding! I love telling people about the cabin and you can see the interest in their faces and they all say they would love to be able to do that. Are we the lucky few...
|
|
adakseabee
Member
|
# Posted: 10 Feb 2016 09:45pm
Reply
You are soooo right! (Even if I have to drive 507 miles to get to my place!)
|
|
KiwiCabin
Member
|
# Posted: 5 Mar 2016 04:24am
Reply
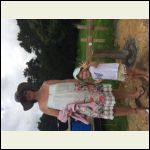
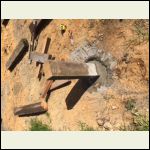
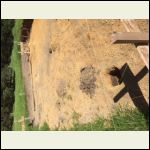
Good couple of days. Dug the holes for the piles... well started to dig and thought stuff this and hired a post hole borer - man was that the right choice!! Although I still needed the second person by the last hole.
Anyway, holes done and then we concreted in the posts. Happy with the result and now we will chop them down. Looking at about 400mm (16") high to give us a crawl space if needed.
Great day at the site and even a little picnic. Also set up the hammock - why are these so amazing??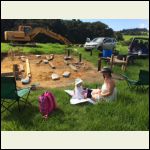
IMG_1732.JPG
| 
IMG_1741.JPG
| 
IMG_1730.JPG
| 
IMG_1729.JPG
|
|
|
KiwiCabin
Member
|
# Posted: 5 Mar 2016 04:25am
Reply
All piles in.
|
|
KiwiCabin
Member
|
# Posted: 5 Apr 2016 04:23am
Reply
Famous last words that - "all piles in".
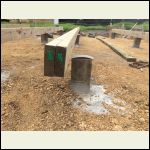
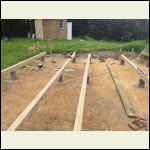
Well I went to line up the skids on top of the piles and uh oh - one pile is out of line. I guess we dug the hole on the wrong side of the string line - bugger!
Luckily we had the digger there still and so we pulled it out and reset it. Could have been worse I guess - one correct and 8 wrong. Ha.
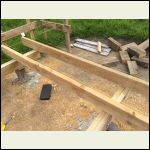
Best deal on the skid timber too. All rough sawn wood was out of stock for six weeks and no date for next lot so I asked about what else was available. Guy gave me dressed timber for less than what it would have been for the other wood. Very happy and is makes the foundations complete and square.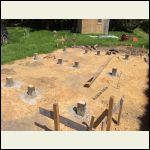
Piles
| 
Wrong place
| 
IMG_1759.JPG
| 
IMG_1760.JPG
|
|
|
KiwiCabin
Member
|
# Posted: 5 Apr 2016 04:30am
Reply
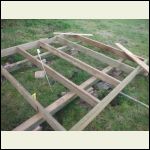
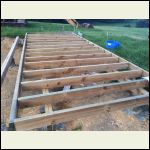
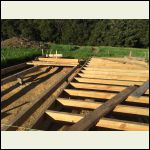
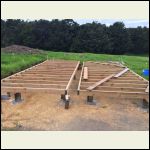
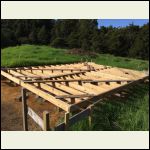
The bearers are now in place and it has turned out great. The wood we milled has stayed pretty true which is pleasing,
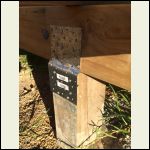
We are building it in two halves so it can be relocated if required so throughout the build it will be bolted together.
Plated skids to piles and now dog wiring to bearers. It is all the little things you forget about to finish this part. Still have to put in the blocking for the floor.
Daylight saving finished here now and autumn is in the air. Hoping to be able to keep going though.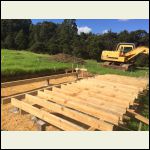
IMG_1786.JPG
| 
IMG_1787.JPG
| 
IMG_1791.JPG
| 
IMG_1792.JPG
|
|
|
KiwiCabin
Member
|
# Posted: 5 Apr 2016 04:32am
Reply
Some more showing the two parts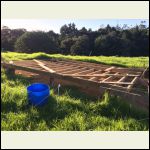
IMG_1794.JPG
| 
IMG_1801.JPG
| 
IMG_1828.JPG
|  |
|
|
Rowjr
Member
|
# Posted: 14 Apr 2016 03:10pm
Reply
looking good
|
|
| << . 1 . 2 . |

