| . 1 . 2 . >> |
| Author |
Message |
KiwiCabin
Member
|
# Posted: 19 May 2015 02:16am
Reply
Hi all. This website is so awesome and many great ideas and people helping others. Here in New Zealand we have been inspired to build a cabin. We are looking to build a 16 x 20 with loft. There is a nice little place on the land near a stream and native bush. It gets the sun all day and is so quiet and relaxing.
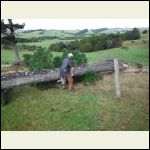
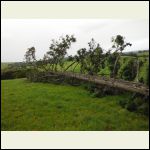
18th May was the day we chopped the first tree down. We are building the cabin from scratch so it will be a project. Now that the tree is down, we are starting to mill the wood. Sad thing is we will have to wait for the wood to dry and then we will get it treated - Sept Oct build start date we think. Winter here now so the wood will take a little longer to dry. Only rains and get cold where we are so no snow to worry about. Build is in Northland (North of Auckland) in the North Island.
I have posted some photos of our starting few days and hope to keep this as a log of our story. I have read many threads on here and I like the photos best as it gives a visual as to how to do things. Looking forward to the progress and to some great times at the build site and cabin.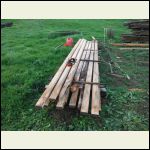
DSCF8993.jpg
| 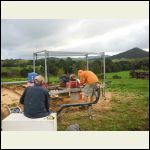
DSCF8991.jpg
| 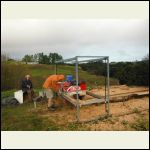
DSCF8987.jpg
| 
DSCF8984.jpg
|
|
|
KiwiCabin
Member
|
# Posted: 19 May 2015 02:18am
Reply
More photos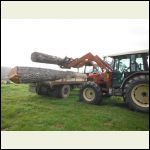
DSCF8983.jpg
| 
DSCF8981.jpg
| 
DSCF8978.jpg
| 
DSCF8977.jpg
|
|
|
KiwiCabin
Member
|
# Posted: 19 May 2015 02:18am
Reply
Couple more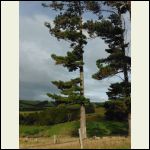
DSCF8971.jpg
| 
DSCF8966.jpg
| 
DSCF8965.jpg
|  |
|
|
bldginsp
Member
|
# Posted: 19 May 2015 02:35pm - Edited by: bldginsp
Reply
Wood doesn't necessarily need to dry before you frame. But if you do frame with wet wood, you need to leave the framing open for a dry season before you enclose any of it or else you will get mold inside the walls.
Nice location. What wood species?
|
|
Don_P
Member
|
# Posted: 19 May 2015 07:16pm
Reply
Cool, I'm not familiar with the mill, a big swinger?
|
|
KiwiCabin
Member
|
# Posted: 20 May 2015 04:43am
Reply
The wood is pine. We managed to get a 6 metre and 2 x 5 metres out of that tree. We also had a number of trees already down that we have managed to cut out some logs from. I am just learning on the mill so that first cut was from a average tree. I will work up to the good tree and bigger cuts.
|
|
KiwiCabin
Member
|
# Posted: 20 May 2015 04:47am
Reply
The mill is two blades which makes cutting pretty quick once you get down to a nice platform. We also have hydraulics on it so it makes it nice and easy to complete the cuts. Just getting used to the best way to cut a log and trying to get consistency. It is probably a New Zealand brand which is why you don't recognise it. Enjoying the learning curve though.
|
|
Gary O
Member
|
# Posted: 20 May 2015 07:28am - Edited by: Gary O
Reply
Welcome to the site, KC.
Man, that's a massive pine (I would've guessed fir).
Please keep the photos coming.
cheers
|
|
|
KiwiCabin
Member
|
# Posted: 20 May 2015 05:17pm
Reply
The pine was about 38 years old I've been told and they grow pretty quick here in NZ.
Below are are a couple of photos of the proposed site. We are planning on putting the cabin on the point looking down to the stream. The cabin will be North facing so we get the sun all day.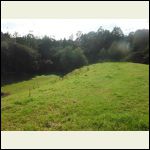
Cabin Site
| 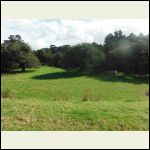
Cabin site with the stream down below
|  |  |
|
|
KiwiCabin
Member
|
# Posted: 21 May 2015 05:20pm
Reply
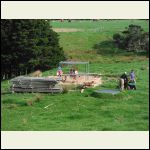
Here is a closer picture of the mill. NZ brand "Rimu". Getting the hang of it now. I have been practicing on the smaller logs and working my way up to the big one. Have Grandpa helping out with little pointers every now and again - so glad they got the hydraulics installed!! Pushing the lever is so much easier than it would have been to push the blades all day  
Mill close up
| 
Wood pile getting bigger
| 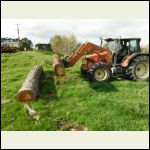
Handy to have the tractor
|  |
|
|
KiwiCabin
Member
|
# Posted: 22 May 2015 03:59am
Reply
Good day on the mill today. Working my way through the felled tree now and the wood is awesome. Also sharpened the saw and so very clean cuts. Nice stack of 2 x 6's out of the two logs today. Having discussions about putting the wood indoors to dry and that might cut down the time until we can get it treated to about a month. Yes!
Also a bit of research done about how much the wood might shrink - seems with the grain there is not too much shrinking, just the width 5-10%.
Deciding whether to shiplap ply the outside and batten, or panel and batten with 1x12's?
|
|
Don_P
Member
|
# Posted: 22 May 2015 07:18am
Reply
Google "shrinkulator" for textbook (USFPL's "Wood Handbook") shrinkage numbers, I've found it tends to overshoot the actual shrinkage a bit but good comparison info.
What species are you working with? and what is the treatment?
I've been doing some board and batten with 1x8's, I don't go over about a 1x10 for shrinkage, cupping etc. I'll try to take some detail pics for more ideas.
Sweet looking mill, I'm thinking it must be more like our Mobile Dimension mills on a beefed up swing mill type frame, like a Lukas or your Peterson's, neat.
|
|
jrbarnard
Member
|
# Posted: 22 May 2015 10:59am
Reply
That is so awesome. How many acres is it? I would have loved getting the knowledge to be able to mill my own wood.. but the wood around me...heh.. might be able to make a nice 2x4 out of one of the trees ;)
R
|
|
KiwiCabin
Member
|
# Posted: 23 May 2015 03:38am
Reply
Thanks Don_P. We have Radiata Pine that we are using. I looked up a NZ site and it would seem they don't shrink too much - 3-5%. We are going to tanalise the wood to H4. It goes in a dip - works out about NZ$100 cubic metre.
The board an battens at 1x 8 has made me think that 1x 12 might be too wide as you say with curling. Photos would be great of your project
Jr the site is on about 300 acres and yes we are very lucky that there are plenty of trees on it. Another one might need to get the chop I am thinking as we always have little projects to do. It is quite rewarding seeing the wood come out of the mill.
|
|
Don_P
Member
|
# Posted: 23 May 2015 09:50am
Reply
Doing a little googling it looks like tanalised is what I would call CA, copper azole, commonly done here as well. From my understanding they want an empty cell prior to treatment. This is visible on the end of a fresh cut. You'll at first see a "dry" shell and a still saturated wet core and then the whole stick will look dry. At that point the wood is below the "fiber saturation point", the free moisture has evaporated from the empty cell lumen although the cell walls still contain the bound moisture within their fibers.
Shrinkage begins as the bound moisture leaves and the cell wall fibers begin to move closer together with the loss of those water molecules. This will happen after treatment as the wood redries.
You mentioned indoor drying speeding things up, what you are really looking for is open walls under a roof. Protected from the sun and rain but lots of airflow to wisk away the moisture as it diffuses up to the surface. My initial drying is usually in stickered piles built up on concrete blocks with 6"x6" stringers run down the length of the pile on each side and then stickers across each layer at about 2' intervals. At the top I sticker and build up a slope of scrap timbers then put used roofing tin and more scrap timbers to weight the tin down. When the free water is gone most fungi and many insects lose interest and getting the bound water excited about leaving it's bound state within the cellulose takes more heat. I can get to about 12% here by shed drying. For construction 19% is our standard so this is plenty adequate. For finish work getting down hopefully to 8-10% a dry kiln is one way. I go indoors, nothing beats a winter in the living room with the woodstove, upstairs in the barn is another way, it gets warmer up there and has moderate airflow. I have stacked green wood up there and without fans providing high airflow the wood molds before the free water can get away. But fans work fine and then you only stack once. In the later stages of drying the wood doesn't need as much air as it does heat to drive the moisture.
Remember the shrinkage values are from green to ovendry...or really from fiber saturation point to ovendry. You won't be going as low as ovendry and anything you do to lower the moisture content below FSP prior to using it will reduce the actual shrinkage even more.
good info on this site;
http://www.woodbin.com/calcs/shrinkulator.htm
I'll try to take the camera to work Monday, my wife manages the local farmers market and promoted me to logistics supervisor yesterday. I got to chauffer sheep for a shearing demonstration  . .
|
|
KiwiCabin
Member
|
# Posted: 24 May 2015 06:35am
Reply
Wow Don that is some amazing information! We have put a test cut in the lounge to see what happens. As you say we could also go below the deck. Poor timing on our part to dry it as it is now getting wetter. We figure the precut of all the parts though to be a good idea. One to make things quicker later on and two to reduce the cost of the treatment.
|
|
Don_P
Member
|
# Posted: 25 May 2015 01:33pm
Reply
And three, anything precut has full treatment.
Here's some wood drying links;
US Forest Products Labs "Air Drying of Lumber"
www.fpl.fs.fed.us/documnts/fplgtr/fplgtr117.pdf
The USFPL is a wealth of knowledge, hit their publications index. The "Wood Handbook", "drying hardwood lumber"," Circular sawmills and their efficient operation" are a few that come to mind right off, free downloads, it is a 100 year old government forestry lab. Your pine here is called Monterey Pine although growing conditions probably make it into another animal.
"Equilibrium moisture content of wood in outdoor locations in the US and worldwide" This goes by city and month, by "outdoor location" they mean protected from rain and sun... sheltered but exposed to outdoor air. It's what you'll get air drying.
http://www.fpl.fs.fed.us/documnts/fplrn/fplrn268.pdf
|
|
KiwiCabin
Member
|
# Posted: 27 May 2015 05:52am
Reply
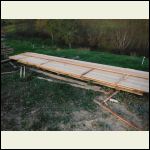
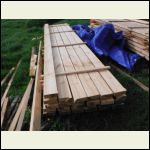
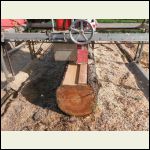
Good day on the mill today. We sawed up the last log - big mama. 6 metres long. Cut 12x1 boards and some 6x2s so far. about half way through the log.
Will cut some trim and 2x4 boards out of the rest. I have included some photos of the growing pile of wood. We are going to cut down another tree too. Figure we will need the wood to complete the indoors from what I have been reading in other threads, and there is another deck on the property that needs fixing. Wood does seem to be drying out already.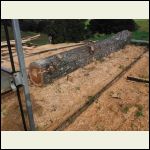
Big mama log 6m
| 
1x8s
| 
6x2s
| 
Mill in action
|
|
|
KiwiCabin
Member
|
# Posted: 27 May 2015 05:54am
Reply
Another of the mill
|
|
Julie2Oregon
Member
|
# Posted: 27 May 2015 06:42am
Reply
OK, as a huge "Seinfeld" fan, I just have to say this. Haha, DonP keeps writing shrinkage!!! 
That's all I have to contribute, except Welcome, Kiwi Cabin! Just ignore me. 
|
|
Don_P
Member
|
# Posted: 27 May 2015 07:23am
Reply
Hi Julie, glad to see you back 
This is a pic of board and batten siding... well without the battens yet. The starter board has a 15 degree angle ripped along its' top edge and the bottoms of the siding boards have a 15* bevel cut on their bottom edges to create a positive drainage angle. The bevelled starter strip helps keep critters from crawling into the gap between the boards. The battens will cover tha gaps between boards and extends to the bottom of the starter strip. This is on a simple post framed ag building with a slab inside.
|
|
KiwiCabin
Member
|
# Posted: 1 Jul 2015 07:02am
Reply
Thanks Don for that picture. We were discussing this further. The studs are 2400mm. Ply sheets are 2400 x 1200. How does this work at the bottom? What about the flooring? Doesn't the moisture get in through the floor ply above joists?
Our thoughts is to get 3000 ply and cut it off. Seems a bit of a waste though.
|
|
Don_P
Member
|
# Posted: 1 Jul 2015 07:44am - Edited by: Don_P
Reply
I'm not sure of your framing details, and then you went all metric  . I'm assuming 2400x1200 is the same as our standard 4'x8' sheet. A conventional wall is built ~8'1" It allows the sheetrockers to hang the ceiling first then put standard 4' or 8' tall sheets of drywall inside without having to trim a sliver off every wall sheet. Anyway, how this relates to the sheathing outside... We usually have a treated mudsill on the foundation, 1.5" thick, a floor system, 6.25-12" or more thick, then the 97" tall wall. We then sheath from the bottom of the mudsill, or even a fraction lower, attach ply to sill well, then up across the floor, attach well to it, then up the wall, attach well to the studs, especially around the perimeter of the sheet. The racking loads from wind or quake concentrate around the perimeters of the sheathing so all edges should be well nailed to framing. The nails in the field of the sheets basically keep the sheet from buckling out of plane when the edges take load. . I'm assuming 2400x1200 is the same as our standard 4'x8' sheet. A conventional wall is built ~8'1" It allows the sheetrockers to hang the ceiling first then put standard 4' or 8' tall sheets of drywall inside without having to trim a sliver off every wall sheet. Anyway, how this relates to the sheathing outside... We usually have a treated mudsill on the foundation, 1.5" thick, a floor system, 6.25-12" or more thick, then the 97" tall wall. We then sheath from the bottom of the mudsill, or even a fraction lower, attach ply to sill well, then up across the floor, attach well to it, then up the wall, attach well to the studs, especially around the perimeter of the sheet. The racking loads from wind or quake concentrate around the perimeters of the sheathing so all edges should be well nailed to framing. The nails in the field of the sheets basically keep the sheet from buckling out of plane when the edges take load.
If you've followed that, I run out of plywood height about a foot short of the top plate with an 8' sheet so end up going around the walls with a row of blocking to support the top edge of the sheathing and to nail the next ripped sheet to that, finishing the wall height. Your 3000mm sheet may not be such a bad deal, everybody hates doing blocking.
Under a house inside a conventional crawlspace or basement foundation we lay down a 6mil or better poly vapor barrier on the soil to keep ground moisture from rising. We either ventilate that space with fresh air or more recently insulate and condition that space, either method is meant to keep that space dry and lower the humidity there. However, try to use floor coverings that allow drying to the top as well, a wood floor, even with finish on it, will allow drying upwards if necessary. A sheet of vinyl on the floor can trap moisture under it in the right conditions... usually running the AC hard in humid weather over an uninsulated floor, moisture condenses on the underside and diffuses into the wood and rises to the rotting level... lots of good reading on the buildingscience website on that. What you see so often here on these websites, less permanent open pier and beam cabins, is normally not vapor barriered to the soil but is wide open to fresh air, this usually works fine, or at least outlasts those houses. Sort of like the post mortem "Due to the heart attack he died with the cancer not of the cancer".
We passed inspection yesterday, I heard the inspector drive up but he didn't come immediately into the basement where we were working. I found him outside checking my sheathing nailing, he commented that he was looking to see that I had nailed well to the sill.
|
|
KiwiCabin
Member
|
# Posted: 1 Jul 2015 07:54am
Reply
So it has been a while waiting for wood to dry, but I have kept myself busy. I have taken up some duck shooting (pests on the farm), built a bridge over the stream to the clay pigeon range, made some decoys too - Paradise Ducks.
Working on fixing a Suzuki DS80 - good fun so far.
Cabin side I have pre cut all the floor joists, wall studs and plates and internal walls. They are now stacked inside the garage. Moisture is down to under 20% in most wood now. Should not be long to treating.
Have found though we are going to have to take down tree number three for the roof rafters. Also another scrap tree for the interior strips - man it sure adds up.
Another project is the Rocket Fire Mass Water heater for the outdoor baths. Looking forward to that one!! Saw it on Youtube.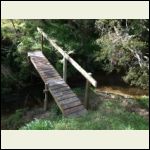
Bridge.jpg
| 
Ducks.jpg
| 
Planter.jpg
| 
Table.jpg
|
|
|
KiwiCabin
Member
|
# Posted: 1 Jul 2015 07:58am
Reply
Bike, tree felling video
Also the plan adapted from the youtube video for the water heater
|
|
KiwiCabin
Member
|
# Posted: 1 Jul 2015 07:59am - Edited by: KiwiCabin
Reply
Tree felling video was too big to load. Will look at compressing.
|
|
KiwiCabin
Member
|
# Posted: 1 Jul 2015 08:22am
Reply
Ugh, that blocking does not sound fun and yes the 3000 ply sounds like my sort of solution. Thanks for the help on that.
Congrats on passing the inspection, sneaky as it was - bet they love doing that.
We won't be having AC in the cabin. Will go with the Expol underfloor insulation (polystyrene) and likely that silver barrier paper.
We have fixed the digger too so can level the site.
|
|
Don_P
Member
|
# Posted: 1 Jul 2015 11:07pm
Reply
Quoting: KiwiCabin Congrats on passing the inspection, sneaky as it was - bet they love doing that.
LOL, It's his job to poke around in dark corners... and the man does enjoy his job 
Keep your eye on the thread titles over the next week or so, my friend with the big chainsaw mill has moved up to a swingblade mill with a slabbing attachment. We looked at a large red oak this past weekend, I'll try to get some pics of it in action.
What moisture content is the treater wanting? I think you're ready to go in.
|
|
KiwiCabin
Member
|
# Posted: 2 Jul 2015 04:51am
Reply
Nice. I do enjoy working on the mill. Quite satisfying to see the wood produced - and sometimes a challenge to get the max usable wood cuts from a log.
We are just waiting for it to be below 20% - which most is now. there are a few sections that are higher, so will wait for them to come down.
Figure we can send the first lotto get treated and then we will be ready for the rafters by the time we get the walls up.
|
|
KiwiCabin
Member
|
# Posted: 2 Jul 2015 04:55am
Reply
Here are the plans I made on sketch up. Few little points I have fixed when I printed but otherwise a good guide. Not too sure about the window sizes, heights etc but figure can always modify those.
That I think is the nice thing about building it yourself. If you don't like it you just change it.
|
|
| . 1 . 2 . >> |

