| << . 1 . 2 . 3 . 4 . 5 . 6 . 7 . 8 . 9 . 10 ... 55 . 56 . >> |
| Author |
Message |
Gary O
Member
|
# Posted: 9 Oct 2010 07:29pm
Reply
Yeah, I hear you guys. However, I'm in a very flat, pumice filled (sand like) area, and I really don't wish to disturb nature's carpet.
I saw a two story cabin (more like a house) that was on just pier blocks. He hadn't put on the skirting yet. Looked pretty professional from a distance. Nobody was there, or I would have walked up and inquired.
Any foreseeable issues or concerns with that?
It's really arid there.
Gary O'
|
|
Gary O
Member
|
# Posted: 9 Oct 2010 08:36pm
Reply
tony, that's what I'm talking about.
How big is your cabin, and how many piers?
|
|
tony
Member
|
# Posted: 9 Oct 2010 08:55pm
Reply
Cabin is 12x28, I have 5 piers on each side spaced 5ft apart. The beams over hang the piers at each end by about 1ft6in.
|
|
CabinBuilder
Admin
|
# Posted: 11 Oct 2010 02:15pm - Edited by: CabinBuilder
Reply
I wonder if this type of foundation will hold well side forces, such as strong wind. I'm not a construction specialist, but it seems there is not much strengths in regard to side-to-side movements.
I would add diagonal beams (see pic below) It wouldn't cost much at this stage.
Good luck with your project.
Keep us posted.
|
|
tony
Member
|
# Posted: 11 Oct 2010 02:42pm
Reply
Yes, sorry I should have mentioned that! I did add diagonals right after that picture was taken... it is crucial !
|
|
Gary O
Member
|
# Posted: 12 Oct 2010 10:07pm
Reply
'Accessible' is a key word...............
Not wanting to bust up the natural decore if I don't have to
|
|
MikeOnBike
Member
|
# Posted: 17 Oct 2010 12:05am - Edited by: MikeOnBike
Reply
Nice build Gary! Enjoy your posts.
I guess I went past your place today. In Roseburg this morning, spent the afternoon at Crater Lake and I'm in Bend tonight.
We are finishing up a 10x12 shed/cabin this fall. It has a loft under the 12/12 roof. We only get about 3ft. of snow in the winter. We used a pier foundation.
|
|
Gary O
Member
|
# Posted: 17 Oct 2010 03:05am
Reply
Thanks MOB.
Yeah, geez, I seem to be a postaholic. Gotta back off, give others a chance.....
Glad you could visit the neighborhood, and scope out the caldron, Mike. We're 15 mi due east. Hope you used your photographic talent while you were there.
Like the piers, considering them for the next build.
.....And a loft. Nice build yourself, bike-man.
Happy Trails
|
|
|
Gary O
Member
|
# Posted: 21 Oct 2010 09:08pm
Reply
BTW Mike, assuming you drove 97 from CL to Bend, were the mushroomers in Chemult ?
If you noticed several tents in the south end of town, that'd be them. The little hamlet swells from 150 to 1000 people during that season.
They're harvesting Matsies, matsutake mushrooms.
A few years ago they were going for $500/lb, about 1/10th that now, but still a good harvest.
|
|
MikeOnBike
Member
|
# Posted: 22 Oct 2010 12:38am
Reply
My wife says OMG yes like a hoard of locusts. There was a huge tent encampment. Seems like late in the year to me but we only have moisture in the spring.
|
|
Gary O
Member
|
# Posted: 22 Oct 2010 09:58pm
Reply
First snows are generally in Nov, of which after the 2nd snow the little woman and I plan to head down and burn the slag piles that we made last visit.
The other big event in Chemult is the dog sled races.
Otherwise, it's truckers drivin thru, renegades, locals, and a few California misplants.
There's a nice trout filled lake 12 mi out of town of which you can yard out 10 pounders by just getting your line wet (if you have a jacked up 4x4 to get there)................
|
|
MtnDon
Member
|
# Posted: 28 Oct 2010 11:54pm - Edited by: MtnDon
Reply
Some random thoughts of mine...
Gary, you have a volcano in the area like we do. We're on a pumice ridge with a dormant volcano 6 miles to the north. The stuff does drain nice.
We have a bunch of slash piles to burn after we have good snow cover as well.
My shed moves ever so slightly spring and fall. It sits on 6x6 'skids' that have 8x16x8 and 8x8x8 concrete blocks set leveled into the pumice/dirt. We're fairly dry but not bone dry so the ground does get hard when it freezes. The shed movement is just enough to require tweaking with a corner to corner turnbuckle on the 2x4 framed and sheathed door I knocked together. That would bother me in the cabin, but it's fine with me in the shed.
I knew there could be a problem but went ahead to see how serious it might be. It could have been completely eliminated, most likely, by digging out and getting rid of the organic matter mixed into the pumice. That's what holds water and freezes causing movement.
I think those blocks would suffice in your case as far as freeze shifting goes. But they fall woefully short on anchoring qualities as was mentioned somewhere further back in the thread. A thought on that follows.
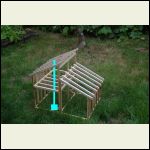
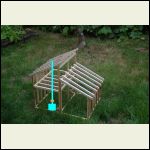
I like the models.
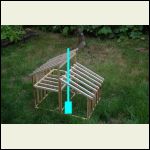
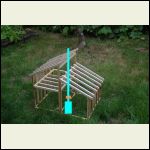
Is the plan to build pretty much just a short distance above ground level with the base beam across the block mounts? Is that high enough? Six inches above ground level is about the minimum to not require PT wood. Some codes spec 12 inches.
Thinking about resisting uplift and sideways forces from high winds... One way on a building like your plan would be to dig some holes, put a good footing in them and drop PT posts. Those could be tied into the wall structure. Beams placed down the long sides to mount the floor to. More work and it involves soil disturbance but it is one way to gain resistance to wind forces.
I'm curious about how to plan to tie the timber components together. The 'old' way with cut locking joints or metal plates?
My thought on wood stove placement is that in a small cabin a corner is best for making use of space. You can use air gapped non combustible wall heat shields to reduce stove to combustible clearances. Portable combustibles (furniture) usually need 36 inches clearance, sometimes more. In a small building I don't think it matters much for heat distribution throughout the cabin. Our 15.75x30 is slightly cooler at the far end, but not much once the interior mass warms up. I haven't given any thought as to floorplan and which corner I'd use for the stove though.
Maybe more later.
Oh. Real stairs or a ladder or...???
|
|
MtnDon
Member
|
# Posted: 29 Oct 2010 12:34am
Reply
Curious about the roof. I imagine the plan is to have open beams from below. ??? Is the plan to deck it over with something attractive from below and then use some sheet XPS to insulate and then the final roofing?
|
|
Gary O
Member
|
# Posted: 29 Oct 2010 07:10am
Reply
Thanks Don, for helping to point me in a decisive direction.
Foundation
That settles in, in the ground I go.
Ht from ground level
Yeah, using PT w/buttered ends for sure. And 6" min clearance, with surrounding deck.
Stove placement
yeah, a corner w/be ideal, but for the length of the exterier pipe.
Strongly considering going out the wall, don't like the bend, but would like to save interier room, especially in the loft.
No ladder
Drop down (attic type) stairs is my thought for now, but may want to experiment with some half sawn natural materials. I mean it's supposed to be a fun project........
Aesthtics play a big role for me.
Exposed beams for sure. Just not the pitch of the last one, so bigger beams for sure. Any thoughts on size/spacing, Don?
Quoting: MtnDon Is the plan to deck it over with something attractive from below and then use some sheet XPS to insulate and then the final roofing?
Yup
|
|
MtnDon
Member
|
# Posted: 29 Oct 2010 11:05am
Reply
Going out the wall has one other advantage. It would allow a cleanout to be placed outside the cabin. out the wall does increase the amount of more expensive insulated pipe required though. Another trade off. I know two people who use the same stove we have (VC Aspen) who have rear exit pipes and their stoves work very well too.
Beams. You show 4x6 roof beams on 24 inch centers. If using DougFir #2 grade that would be rated to span 8' 5" with a 100 pound snow load. More than enough. You could change to 32 inch centers and still make the span with an 80 pound snow load rating. That would depend on what you use for decking the roof. T&G 2x would work okay. I think the 32 inch spacing has more visual appeal with timbers. But that may be just me.
Gotta go do some work
|
|
RnR
Member
|
# Posted: 29 Oct 2010 11:57am
Reply
we're actually replacing some stove pipes this weekend. We have a "through the wall" setup. We've had some problems with downdraft and smoke, and it seems that the horizontal portion of the pipe is not properly sloped ( we didn't know what we were doing at the time when we installed the new stove). The proper slope for the horizontal section is one quarter inch per foot. Also replacing outdoor piping which is just single-wall interior piping (which was already there) with proper outdoor double-wall piping. Outdoor piping essentially has to be higher than the peak of the roof. Expensive, but its a matter of fire safety and will only have to be done once in our lifetime, at least I hope. The T pipe for cleanout is also a good thing to add. Either a through the wall or through the roof setup are perfectly acceptable, as long as they are done according to basic standards. I've seen some "kits" at the hardware store that have all the parts except for the exterior piping that you buy separately according to the length you need. Hope this helps.
|
|
Gary O
Member
|
# Posted: 30 Oct 2010 02:12pm - Edited by: Gary O
Reply
Quoting: MtnDon I think the 32 inch spacing has more visual appeal with timbers.
That it does, and saves a few bucks.
I tend to over build, due solely to my penchant to shun pouring thru code regs, and eng specs (I've successfully been able to do this for twenty some years at the tech firm I'm with).
Quoting: MtnDon T&G 2x would work okay
Looking at car decking, and/or 2x T&G. Built with just #two 2 x 6 spf on the first cabin, but there was a lot of wain (which, come to find out is allowable for #2), along with about 10% warpage. I'll definately need to select each board myself this time.
Quoting: MtnDon 80 pound snow load rating
Would that be enough for the (some years) six foot snow accum?
|
|
Gary O
Member
|
# Posted: 30 Oct 2010 02:49pm - Edited by: Gary O
Reply
up or out the wall;
Probably going out the wall (even though piping expense will greatly increase), and with the clean out for sure.
Quoting: RnR the horizontal portion of the pipe is not properly sloped
Quoting: RnR "kits" at the hardware store that have all the parts except for the exterior piping
Yeah, this aspect will require a ton of inquiring/checking regs before any cash outlay and labor.
As for stoves, the VC Aspens are nice. Definately want a window door.
Thank you Don and R.
|
|
Gary O
Member
|
# Posted: 31 Oct 2010 01:29am - Edited by: Gary O
Reply
Quoting: MtnDon I'm curious about how to plan to tie the timber components together. The 'old' way with cut locking joints or metal plates?
Metal plates this time. However, I plan to paint them black as an acceptable contrast to stained wood (again, aesthetics).
|
|
toyota_mdt_tech
Member
|
# Posted: 31 Oct 2010 02:24pm
Reply
Quoting: Gary O Metal plates this time. However, I plan to paint them black as an acceptable contrast to stained wood (again, aesthetics).
Gary, take those metal plates and put them on an anvil and with a ballpeen hammer, round end, beat a bunch of dents in them before painting them black. This will give you that early blacksmith look.
|
|
Gary O
Member
|
# Posted: 31 Oct 2010 03:05pm
Reply
Same wave length, t-tech.
Peening will add 'the touch' I'm looking for.
|
|
RnR
Member
|
# Posted: 1 Nov 2010 10:14am
Reply
By way of update, our setup did not pan out this weekend, we need a new "though the wall" adaptor (we thought we could use the one that was there) There is a kit for sale at the hardware store that has all the essential parts except for the actual chimney stack, which you buy separately according to the length you need. Also, we were pleased to learn that the insulated pipe is meant to be close to the wall of the structure. No space is really required.
|
|
Gary O
Member
|
# Posted: 1 Nov 2010 03:24pm
Reply
Quoting: RnR we need a new "though the wall" adaptor
Hey R
Got pix?
Gary O'
|
|
RnR
Member
|
# Posted: 8 Nov 2010 11:16am
Reply
Hey Gary O, I put some info and pics on our main "members' projects" thread "just bought a cabin in Canada" if you want to check it out. Hope it helps you decide on the best setup for you.
RnR
|
|
Gary O
Member
|
# Posted: 8 Nov 2010 07:39pm
Reply
Hey R-
That's pretty much exactly what I'm considering.
I'm figuring approx $1500 - $1800.
I have about four quandaries on the stove for position:
thru the lower roof? (but would block upper window views)
thru the upper roof? (but would take up precious loft space)
thru the wall below the loft? (don't want to sleep above the stove)
or thru the wall of the lower roof section? (most spendy, pipe wise)
Decisions Decisions
stove_thru_lower_roo.jpg
| 
stove_thru_lower_sid.jpg
| 
stove_thru_upper_roo.jpg
| 
stove_thru_wall_belo.jpg
|
|
|
RnR
Member
|
# Posted: 8 Nov 2010 09:15pm
Reply
Hey Gary O,
Ya, decisions eh? The total cost for our setup was about $800 plus tax if that helps with your budget estimates. I think my first concern would be most efficient use of floor space.
|
|
project_north
Member
|
# Posted: 9 Nov 2010 09:38pm
Reply
How about a bump out beside your lower roof containing the stove with a straight up chimney which by-passes the main roof?
|
|
Gary O
Member
|
# Posted: 10 Nov 2010 11:08pm
Reply
Not bad, not bad at all!
The place is small enough to not be concerned with loss of the heat radiating from the back of the stove.
The bump out relieves precious space, and no bends!
Thanks project_north!
|
|
seesaw
Member
|
# Posted: 31 Dec 2010 10:12pm
Reply
That is a beautiful cabin! Thanks for sharing. I'm digging the pitched roof.
|
|
Gary O
Member
|
# Posted: 19 Jan 2011 09:32pm
Reply
Thanks Seesaw
There are a lot of great creations on this sight.
Can't wait to see yours.
We're headin' to our camp this weekend (as long as the weather holds).
This next summer is going to be busy.
|
|
| << . 1 . 2 . 3 . 4 . 5 . 6 . 7 . 8 . 9 . 10 ... 55 . 56 . >> |

