| . 1 . 2 . 3 . 4 . 5 . 6 . 7 . 8 . 9 . 10 ... 55 . 56 . >> |
| Author |
Message |
Gary O
Member
|
# Posted: 14 Aug 2010 11:42am
Reply
OK, after ignorantly posting and butting in on other people's threads, and ultimately getting into trouble right off the bat, I thought I better start mine (duh).
Sorry to all that I've offended. Just got too enthused seeing all these fellow builders and their wonderful postings. Please bear with this ol' grey techno ignopotamus as I attempt to communicate 21st century style. But feel free to jump in and set me straight if I breach any protocol.
Last summer the wife and I built our tiny 10 x 12 cabin. It's our 1st in awhile, and we just wanted to prove to ourselves that we could still do it.
I opted on a steep 58° pitched roof since snows are sometimes 6 feet accumulation in that area (15 mi due east of Crater lake).
Having no power hooked up, we bought a 3500 watt generator and commenced our adventure.
Let me say right here, this thread is going to be a tad lengthy as I'm hoping to glean info from those in the know for ideas and considerations of our main cabin (something around 16 x 12).
But, I'm getting ahead of myself.
Since I enjoy the romance and ownership of building from my own design, I build models before hand to prove my fractured theorys, and ferret out things that I hadn't quite figured out, such as a bird's mouth in relationship to the roof pitch and the angles/depths involved.
These models are scale duplicates down to the thickness of the wood (I ripped some 1 x 8 pine down to size) in order to replicate the scene of potential issues. This has proven to save a ton of angst and precious cash.
Here's a few pix. Note; I opted to build without the ridge board due to the severe pitch and choice to use 2 x 6 planks as initial roofing (eave stability).
More next posting.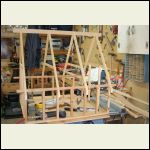
model cabin side
| 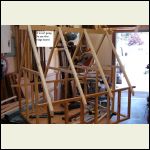
model cabin angle
|  |  |
|
|
Gary O
Member
|
# Posted: 14 Aug 2010 11:53am
Reply
one more pic of the model to show bird's mouth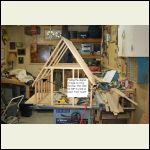
model cabin w/bird's mouth
|  |  |  |
|
|
Gary O
Member
|
# Posted: 15 Aug 2010 11:09am
Reply
To continue............
We got serious with building last year, and commenced to clear a spot for our sight. Took the grand kids.
The entire area there is quite flat, so no serious excavating.
Contrary to popular opinion, I chose to build the floor close to the ground (no piers). Essentially no rain there, but there is snow and ice. We'll see. The cabins we built back in the '70s (in rain country) are still standing...and still good shape.
We dug, leveled and tamped spots for the 12" concrete blocks, 2' apart. Then laid 4 x 6 pressure treated beams, squared them up by equalling the diagonals, and nailed down 2 x 6 kiln dried planks.
Mosquitos were so thick we decided to dub the place Mosquito Flats.
Here's some pix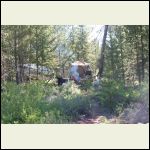
camping w/the grand kids
| 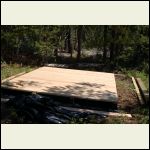
cabin floor
| 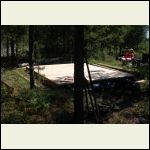
floor with tired wife
| 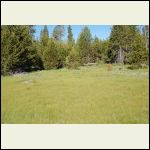
our meadow
|
|
|
Gary O
Member
|
# Posted: 15 Aug 2010 11:21am
Reply
more pix
Clearing land is time limited. No burning until after the first snows. The custom there is piling up slash, covering with tarps, and burning when it's safe.
Crushed camper, unattended. Snow load of 2003...........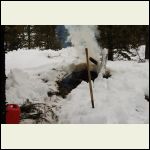
Burning slash piles
| 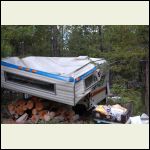
crushed camper, snow load 2003
|  |  |
|
|
islandguy
Member
|
# Posted: 15 Aug 2010 11:29pm
Reply
Gary, I saved a lot of time and trouble eliminating birdsmouth cuts and using metal rafter hangars instead. They are inexpensive, and maintain the structural integrity of the rafters better. Another idea to consider is metal roofing. Not only more permanent, but sheds snow easier than any other kind of roofing. Your model looks really great. good luck, thanks for the pix, and keep them coming. We just got back from our cabin, and I forgot AGAIN to take some pics to post here.
|
|
Gary O
Member
|
# Posted: 15 Aug 2010 11:57pm
Reply
Hi islandguy-
I know hangers are the best route, I just wanted the experience, and for some reason I wanted to see just wood in the interior. However, on the next one, Iwill definitly go with hangers and any metal brackets that can be used. I will paint them black though, to keep with the aesthetics I have in mind.
Yeah, I really wanted to go with metal roofing too, but more questions than answers arose, so I opted with what I already knew.
Thanks for the input though. Saw your cabin/cottage in BC. Looks really professional. Would love to see more pix from your area of God's country.
Thanks again
Gary O'
|
|
CabinBuilder
Admin
|
# Posted: 16 Aug 2010 10:49am
Reply
Quoting: islandguy ...using metal rafter hangars instead
There is also an aesthetic part to it - metal perhaps less costly and more practical, but wooden structure in the forest is more appealing to me and I wouldn't mind spending extra effort on it. Ultimately it's a personal choice.
I love the shape of your small cabin, Gary O'. When my wife first saw it, she asked "Why we didn't built something like that?"
|
|
Gary O
Member
|
# Posted: 16 Aug 2010 07:08pm
Reply
Yeah, aesthics plays a huge part for me. About a mile down the lane is a cabin built with (I'm gonna say) scrounged materials. The guy truly has the knack for putting things where they fit. The interior is even more appealing, yet functional, and his surrounding land is again pleasing to the eye, yet low budget.
So wish I had that talent, and trust in myself...........
Here's the pic of his place (very very nice people I might say).
|
|
|
Gary O
Member
|
# Posted: 16 Aug 2010 08:07pm
Reply
To continue..........
I pre-cut the 4 x 4 trusses and stub wall framework at home (less head beating on trees and gnashing of teeth).
I also pre-drilled, pre-counter sunk, and even pre-tested the lag bolt holes with one size down (1/4 vs 5/16). Glad I did that. It only took the wife and I one morning to put it all together. We kinda psyched ourselves up to prop up the trusses onto the 4' stub walls and then vertical. However, once past the fulcrum we could steady them with our fingers (note to self for next time: really didn't need to scream at the wife all that much......especially while lifting).
I trued the walls/trusses and tacked boards to the studs and trusses to tighten things up for the siding.
More pix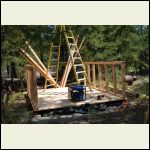
framework start
| 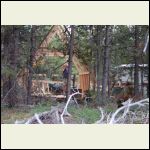
framing almost done
| 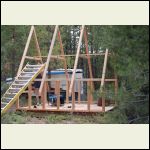
framing done
|  |
|
|
Gary O
Member
|
# Posted: 16 Aug 2010 08:32pm
Reply
The roofing was a bigger undertaking than I'd imagined. It ook us three weekends, but we pressed ourselves to get it done before weather hit.
Note; whoever mentioned that it's not wise to buy property very far from home is right on. This place is 240 miles away (over the Cascade range). Nice scenery though (if you can slap yourself frequently enough to stay awake).
I'd hand selected the 2 x 6 sub flooring planks, but our little trailer could not handle all the 14' x 2 x 6 planks needed for the sub roofing, so against my better judgement, I got a big box store to deliver. Bad move, I knew it. Even with strict admonishment about needing select material, there was lots of warpage and lots of wane. You can see it in the first pic. So, I knew I had to sheathe with plywood before I could felt and roof.
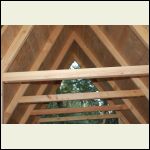
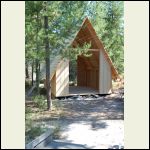
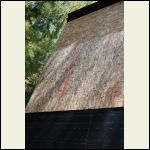
Why planks? Aesthetics, inside...........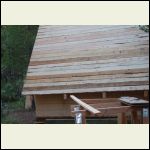
sub roof planks
| 
interior ceiling, happy with it
| 
siding
| 
OSB nailed on
|
|
|
Gary O
Member
|
# Posted: 16 Aug 2010 09:42pm
Reply
To continue............
The felt on this steep of roof, needed to be cut in managable 6' strips, and the architectual roofing started painfully slow, but once the initila courses were on, things went pretty fast. Never roofed a peak this severe before so (as usual) I over built a bit...no regrets however.
I chose unstained T-111, glad I did, as it stained nicely with high penetrating oil based cedar tone.
One day I'll tackle cedar shakes of which I love/hate......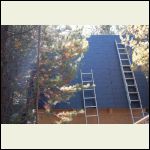
felt
| 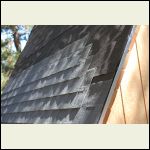
comp roofing going on
| 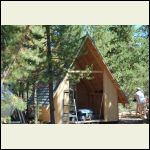
sided and partially roofed
| 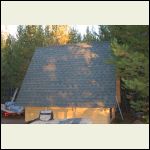
roof is done
|
|
|
Gary O
Member
|
# Posted: 16 Aug 2010 09:51pm
Reply
more pix next few postings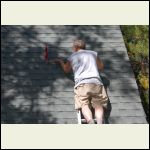
removing jacks, happy, relieved
| 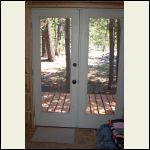
french door is in
| 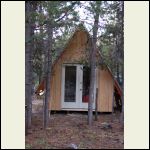
french door
| 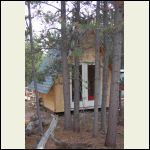
siding
|
|
|
Gary O
Member
|
# Posted: 16 Aug 2010 09:56pm
Reply
more pix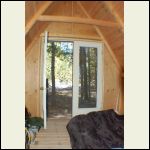
unstained interior
| 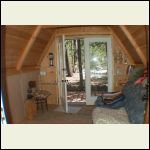
unstained interior
| 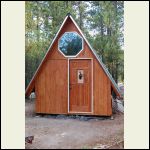
cabin front
| 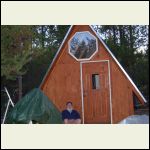
Happy tired
|
|
|
Gary O
Member
|
# Posted: 16 Aug 2010 10:12pm
Reply
We found and purchased the doors and octowindow for a total of less than $150. The framed french door itself listed around $600 or more, and the front door (without the frame) about the same. I was told the octowindow is also in that neighborhood. What a boon Craig's list is.
Well, my thumb-like fingers need a nap (and Jeopardy is on).
yes,more pix
front of cabin at night I call 'Dumb Guy with Smart Camera' (a tad too intense), gotta find the right button.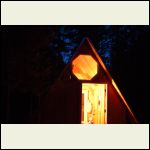
front of cabin at night
| 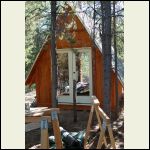
cabin back
| 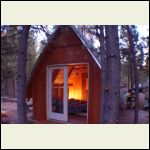
cozy cabin
| 
rare photo of morbidly obese wood butcher on a feeding frenzy
|
|
|
Gary O
Member
|
# Posted: 16 Aug 2010 10:31pm
Reply
amenities:
camp kitchen from scraps
picnic table from tree I fell that threatened the cabin and warped planks
privy from scraps (yes warped planks)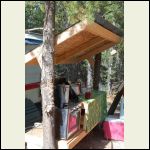
camp kitchen
| 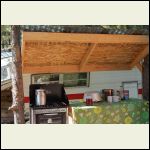
camp kitchen
| 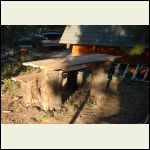
picnic table
| 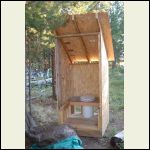
semi finished privy
|
|
|
dk1393
Member
|
# Posted: 17 Aug 2010 08:00am
Reply
Looks like a very nice camp. I enjoyed the pictures, Thanks
|
|
CabinBuilder
Admin
|
# Posted: 17 Aug 2010 09:07am
Reply
Thanks for posting details and pictures of your cabin building experience, Gary O.
Quite interesting and inspirational to follow the progress of your project.
|
|
Xplorer
Member
|
# Posted: 17 Aug 2010 02:39pm
Reply
Very nice. We only drive 1/2 of that distance & find that abit much.
|
|
Gary O
Member
|
# Posted: 17 Aug 2010 09:10pm
Reply
Thanks guys, for commenting.
Yeah the distance is killer. But the tranformation of hectic frenzied bustle, thru the mountains and into the high desert changes me from a desk riding, tensioned filled importer, to a laid back outlander
Now to the next cabin.
Looking at 12 x 16 (under 200sf).
Needing a bit of help before I attempt a model.
Style will still be timber frame, but not such a severe roof pitch.
Two leantos together for natural light at the top, and sleeping loft by the windows........
Thoughts/suggestions?
Gary O'
|
|
fooboo
Member
|
# Posted: 17 Aug 2010 10:59pm
Reply
I love your cabin build and the roof pitch is interesting. You show a horizontal tie about half way between the walls and the ridge board.
Rafter ties are typically in the lower 1/3 of the rafter and collar ties are in the upper 1/3. Yours looks like they are exactly half way. You would get much better wind protection by lowering those horizontal members a bit and then adding a collar tie up high. Is that something you already considered? Just something I thought I would bring up.
|
|
Kramer
Member
|
# Posted: 18 Aug 2010 12:47am
Reply
I'm pretty certain there isn't headroom to lower those ties. Construction on a small scale often means that things can't be built exactly by the book, and there is often no harm in it.
Nice looking little shack.
|
|
Gary O
Member
|
# Posted: 18 Aug 2010 07:05am
Reply
Yup, no headroom.
And small scale such as this one is quite forgiving.
Thanks for the comments guys.
|
|
project_north
Member
|
# Posted: 20 Aug 2010 10:38am
Reply
Hi there,
Your 12 x 16 cabin design is remarkably similar to what I've been building. Here is an in progress shot of my "shaque du bois" near Parry Sound Ontario.
The footprint is 8' x 13'-6" with a sleep loft big enough for a queen size bed. I can actually stand in the loft if necessary. The window placement catches westerly breezes and vents out through the loft nicely.
I think I might start my own stream to share my construction with the group.
|
|
MikeOnBike
Member
|
# Posted: 20 Aug 2010 04:01pm
Reply
project_north, please do share.
|
|
Gary O
Member
|
# Posted: 20 Aug 2010 08:33pm
Reply
yes project_north
Details details photos good bad ugly
This thread is fine if you so choose, but I know what you're saying (ownership/subject direction), then again you've got the same design that has stuck in my head for months now......
You've got some real height going there, and your shack of the woods emerges from the trees as comfortably as an aerie.
Bet you have some real views.
|
|
Anonymous
|
# Posted: 22 Aug 2010 08:10am
Reply
Gary, very very nice, thanks for posting!
LK
|
|
Gary O
Member
|
# Posted: 27 Aug 2010 08:54pm
Reply
Hattie-
What is the name of your book, and what (if you don't mind saying)were your publishing choices?
Gary O'
|
|
hattie
Member
|
# Posted: 28 Aug 2010 10:36pm
Reply
Hi Gary O: My book was paperback, perfect bound, standard paper, black and white (the cover is always in colour even if the inside of the book is black and white). I got my own ISBN number because I am in Canada. If you use Lulu's ISBN number (free), they are considered the publisher. It is very easy to use an ISBN number from them.
You can get 500 copies of a 100 page book printed for about $3,000 (including shipping in North America). That works out to $6.00 per book. Lulu can also make your book available as a download for people who want to save money on shipping costs. If you don't want to buy a bulk number of books to sell, you can make them available for sale at Lulu and other sites (if you buy the distribution package) and Lulu keeps a cut. You won't make as much money this way. My $20 book sold on the Lulu site only gets me $9.80 profit. If the book were sold at another site like Amazon, your profit is even smaller. The way to make the best profit is to buy bulk and sell them yourself. My book will profit $14/book selling it myself.
If I tell you the name of my book, you'll know who I am - and then I'll have to kill 'ya. *grin*
|
|
Gary O
Member
|
# Posted: 29 Aug 2010 10:52am
Reply
All good info, Hattie.
Puttin' some finishing touches on it now.
Thanks for not telling me the name of your book..........
|
|
RnR
Member
|
# Posted: 27 Sep 2010 02:15pm
Reply
So Gary O, what's going to be in this book of yours? is it going to sort of be your tell-all autobiography?
|
|
| . 1 . 2 . 3 . 4 . 5 . 6 . 7 . 8 . 9 . 10 ... 55 . 56 . >> |

