| . 1 . 2 . 3 . >> |
| Author |
Message |
SmlTxCabin
Member
|
# Posted: 7 May 2010 02:14am
Reply Quote
I have been researching and getting inspiration from this site for a couple of years now and I have finally begun to start on my cabin. Today we bulldozed....foundation will be next....Everything is finally coming together. I'm hoping to be done by July! Here are the first pictures of my land as we got it cleared today.
I will post more pics as soon as we get the cabin in place.
|
|
SmlTxCabin
Member
|
# Posted: 9 May 2010 09:43pm
Reply Quote
i think this worked now
|
|
bugs
Member
|
# Posted: 10 May 2010 08:41am
Reply Quote
Hi SmlTxCabin
Always one of the hilights of the process is the clearing of the land whether it is by manual labour, chainsaw in hand, or the easy way out with big machines.
How big is your plot of land? What are your plans for it? Cabin size? etc.
Looks like you have interesting habitat.
Good luck with it all. Although I don't think a person is ever done!!!
bugs
|
|
SmlTxCabin
Member
|
# Posted: 11 May 2010 01:04pm
Reply Quote
I have 4.6 acres in North East Texas. Lots of Cedar and Mesquite trees that I had to clear off. not a lot in the way of shade. So I will be planting a lot once I get settled in. My cabin, starting off, will be 14x36 with a loft. Which is a little smaller than i had originally planned, but i plan on adding a larger master bedroom in the future. But for now it will do, and it is getting me step by step closer to my dream home.
What i hope to create is an non stress and very basic and rustic environment where I can have my animals. I have 5 miniature donkeys, 1 horse, 2 dogs, and I plan on getting some goats, and a few cows at some point.
I plan on purchasing a Natures Head composting toilet for the bathroom, recycling grey water, and installing rain barrels to harvest rain water, and hopefully eventually put in some solar panels, but the solar panels will come much later.
|
|
SmlTxCabin
Member
|
# Posted: 26 May 2010 03:14pm
Reply Quote
here are some more pictures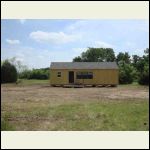
Cabin.jpg
| 
Relax.jpg
| 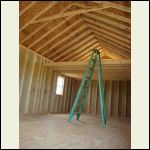
View_of_loft.jpg
| 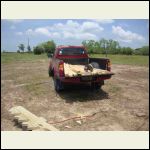
Lumber.jpg
|
|
|
SmlTxCabin
Member
|
# Posted: 26 May 2010 03:25pm
Reply Quote
and more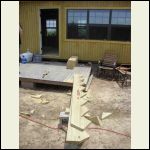
Stairs.jpg
| 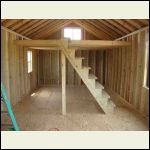
stairs_mostly_attach.jpg
|  |  |
|
|
SmlTxCabin
Member
|
# Posted: 26 May 2010 03:30pm
Reply Quote
Got the bathroom framed out and the steps up, Next the electrical and plumbing, then the insulation. Its getting very exciting.
|
|
CabinBuilder
Admin
|
# Posted: 26 May 2010 04:39pm
Reply Quote
Great work, SmlTxCabin! Cabin seems quite spacious.
Keep us posted.
|
|
|
Kramer
Member
|
# Posted: 28 May 2010 01:47am
Reply Quote
There's nothing tying the rafters together at the roof peak? Or am I missing something?
|
|
SmlTxCabin
Member
|
# Posted: 28 May 2010 10:20am
Reply Quote
there are braces every few feet except for in the loft
|
|
SmlTxCabin
Member
|
# Posted: 28 May 2010 10:20am
Reply Quote
and they are hard to see in the pictures, but there are metal ties at the peak
|
|
SmlTxCabin
Member
|
# Posted: 29 May 2010 01:03am
Reply Quote
done framing out the bathroom
|
|
Rob_O
|
# Posted: 29 May 2010 01:12pm
Reply Quote
With the loft, your "Small Cabin" probably has more floor space than my "City House". Looks about 7' headroom under the loft, is that correct?
Great work, keep posting pics
|
|
SmlTxCabin
Member
|
# Posted: 29 May 2010 08:58pm
Reply Quote
thanks for the encouragement Rob_o! It isn't quite 7' its more about 5', but it it is to be utilized as a sleeping loft and my relaxation station for reading and enjoying being higher than everyone else...LOL We started the wiring for the electrical today. And on wednesday we are starting the plumbing. Then the insulation, and the interior walls go up!
|
|
cabinbasics
Member
|
# Posted: 30 May 2010 06:29am
Reply Quote
That went up quick TX, did you build or was it pre-built and delivered to your site? Looks very nice!
|
|
SmlTxCabin
Member
|
# Posted: 30 May 2010 12:13pm
Reply Quote
Pre-built and delivered. I was going to build from scratch, and my timeline kept getting pushed back, so I said to heck with it and got a guy to build to my specs and they delivered it. I'm extremely pleased with it.
|
|
SmlTxCabin
Member
|
# Posted: 30 May 2010 12:47pm
Reply Quote
and i just realized what you meant Rob_O you said under the loft not in the loft. and Yes that is pretty close it is right at 6' 6". I am 5'5" and my spouse is 5'7" and the tallest person I know that will actually be in my house is 6'3" and he is okay with it. And he will just be a visitor. So it works. I traded out head room in the bathroom/utility room for a little more head room in the loft. I felt it was an important trade.
|
|
Rob_O
|
# Posted: 30 May 2010 06:14pm
Reply Quote
Quoting: SmlTxCabin Pre-built and delivered
I plan to pre-build my cabin in pieces in a friends driveway, and assemble the pieces on-site.
Quoting: SmlTxCabin You said under the loft not in the loft. and Yes that is pretty close it is right at 6' 6".
Do your friend a favor, don't put in a ceiling fan under the loft
|
|
Anonymous
|
# Posted: 1 Jun 2010 05:32am
Reply Quote
LOL I definitely do not plan on putting any light fixtures on the ceiling or a fan under the loft.
|
|
target panic
Member
|
# Posted: 5 Jun 2010 12:16am
Reply Quote
Quoting: Kramer There's nothing tying the rafters together at the roof peak? Or am I missing something?
I thought the same thing............... The rafters just don't look right!
In Michigan we have a huge snow load problem, so the codes are pretty stiff, but those metal tie plates at the peak won't support any weight. Maybe I'm missing something, but for safety reasons, I'd put another cross member in at least a foot from the peak. Rafters usually meet at a ridge board also........here there is none. Were these prefabricated, or did you build them on site? Don't get me wrong.....It looks great, but is it safe enough?
|
|
soundandfurycabin
Member
|
# Posted: 13 Jun 2010 08:15pm
Reply Quote
Don't mix up rafter ties and collar ties. Rafter ties are the cross members used to keep the rafters from spreading under load, and they are generally located on the bottom third of the rafters.
The cross members located near the peak are collar ties. They keep the peak from being pulled apart by high winds. Instead of collar ties, you can also use metal straps over top of the rafters to accomplish the same thing.
|
|
Anonymous
|
# Posted: 15 Jun 2010 12:58pm
Reply Quote
Between the metal ties and braces, it shouldn't be going anywhere. As far as loads go, it does not snow in this part of texas, so there is not a strict load code in these parts. I had the shell built and am finishing it out myself. My brother is an electrician and builds houses and he inspected it and assured me that the cabin was built soundly....i hope he's right!
|
|
SmlTxCabin
Member
|
# Posted: 15 Jun 2010 01:00pm
Reply Quote
i am going to ask him thought if any adjustments need to be made
|
|
SmlTxCabin
Member
|
# Posted: 23 Jun 2010 01:46am
Reply Quote
I spoke with my brother and a few other construction friends. They all said the construction of the roof is more than adequate. So I feel much better now.
|
|
Invictus
Member
|
# Posted: 23 Jun 2010 02:50am
Reply Quote
Nice cabin! How is the inside coming along? Any more pics?
|
|
SmlTxCabin
Member
|
# Posted: 27 Jun 2010 07:01pm
Reply Quote
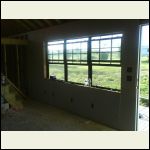
Here are some newer ones.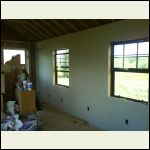
working on getting the drywall up
| 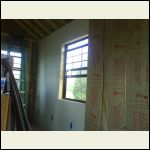
more drywall
| 
drywall_3.jpg
| 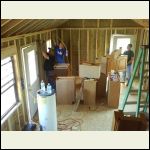
my brother and a friend working on electrical
|
|
|
SmlTxCabin
Member
|
# Posted: 27 Jun 2010 07:04pm
Reply Quote
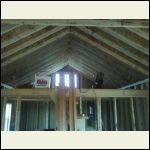
Some more pics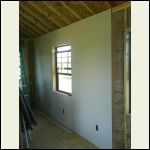
drywall_4.jpg
| 
Insulation.jpg
| 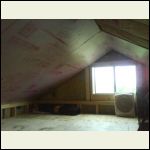
inside_loft.jpg
|  |
|
|
SmlTxCabin
Member
|
# Posted: 27 Jun 2010 07:08pm
Reply Quote
my doggy
|
|
SmlTxCabin
Member
|
# Posted: 28 Jun 2010 04:27am
Reply Quote
I am putting up drywall first due to its ease of installation and inexpensive nature, so i can get moved in. Then I will put up Tongue and Groove Pine throughout everything but the bathroom and utility room. Electricity is done, just waiting for the power company to bring it to my cabin! I'm getting closer and closer every day. Thanks for all the great feedback and support!
|
|
Invictus
Member
|
# Posted: 28 Jun 2010 01:41pm
Reply Quote
Lookin good!
Im going to insulate and just put some kind of tounge n groove up over the insulation.
|
|
| . 1 . 2 . 3 . >> |

