| << . 1 . 2 . 3 . 4 . 5 . 6 . 7 . 8 . 9 . 10 ... 17 . 18 . >> |
| Author |
Message |
rmak
Member
|
# Posted: 17 Jan 2015 06:44am - Edited by: rmak
Reply
I can't understand how I've never seen this thread before, Toyota. The whole thing is just fantastic. You done good.
|
|
toyota_mdt_tech
Member
|
# Posted: 17 Jan 2015 11:35am
Reply
Thanks, it was 5 years condensed down into 3 pages.  I'm glad I took lots of pictures. (I have so many more, but didnt want it to get boring) I'm glad I took lots of pictures. (I have so many more, but didnt want it to get boring)
I was looking back at the beginning where the lumber pkg was setting next to the fresh foundation and cant get over how small the trees in the background look. They are so much bigger now. (doubled in height) Its cold in the winter there, but get 300+ days of sunshine a year which helps my forest out.
|
|
toyota_mdt_tech
Member
|
# Posted: 17 Jan 2015 11:58am - Edited by: toyota_mdt_tech
Reply
Quoting: Julie2Oregon Your cabin is WONDERFUL, Toyota!!!!! You did a smashing job!!!! Love the kitchen, especially!!!!! That's the sort of stove I have selected, as well, so it was a treat to see it installed in a cabin kitchen! I can't recall -- are you using solar? The lighting fixtures look great! What is the size of your cabin? It's such a good design!
Julie, the stove style is called a "trash burner" and it will run me out. Key is good insulation, but have enough windows so you can open them as turning down the heat far enough isn't an option. Once the place is warmed up (thermal mass has absorbed the heat) it stays warm long after the fire has went out.
If you install and RV oven, you will need the custom cabinet to go under the oven unit as they don't go to the floor like a house. And they do not go all the way back at the counter, so the counter needs to be notched for it. There needs to be X clearance on the sides of the oven, so the cabinet company sent me filler pieces to space the cabinets away and I glued and pin nailed then in place. Beef up the counter opening where the unit fits in and I smeared the end grain with wood glue. MY cabinet guy said to do that or water can get under the stove and hit the end grain of the pres board and it will swell up. The glue seals it water tight. Was great advice.
I have no solar, just the Honda EU2000i. Lamps I made, all fixtures use CFL's but will swap them to LED soon.
The footprint of the cabin is 16 wide, 18 deep. I bought the plans from http://www.townandcountryplans.com Mine is the Whitehorse with floor plan change and steeper roof (7'6"/12 pitch). I did buy the plans for Whitehorse-II (same but with upstairs bedroom with dormer) and went with plan B, no upstairs. So if you'd like a set of free Whitehourse II plans, I'd be more than happy to give them to you. I actually have maybe 3 sets total.
|
|
Julie2Oregon
Member
|
# Posted: 17 Jan 2015 05:49pm
Reply
Awesome, Toyota, emailing!!!!!! Thank you!!!!! (I didn't see pics of the bathroom. Do the plans have one inside?)
I wrote "stove" and actually meant oven or range. I'm going with the Pleasant Hearth EPA-certified woodstove (1,200 sq. ft. model) from Home Depot. I don't think it will be overkill and it meets the building code regs that I need. Plus, it has a blower and even includes instructions for a simple do-it-yourself "fresh air" kit so you don't have to buy one. American-made, too!
I had found it when I was looking for a woodstove for my present home but it will be magic for my cabin!!!! At $699, the price is definitely right!
I've been checking out Craig's List regularly to get a feel for prices and things available around Klamath Falls and Bonanza, Oregon, where I will be living. It seems that I can get a decent used RV/camper to live in for a few months while my cabin is being constructed for about $2,500. I will then decide whether to keep the RV for future use and/or guests, sell it intact, or harvest things out of it like the range, refrigerator, cabinets, plumbing stuff and pumps, etc. for use in my cabin and then sell it as is or for scrap.
Your "project" turned out amazing! So professionally done. A toast to you! And thanks for sharing your process, product, insights and ideas!
Julie
|
|
toyota_mdt_tech
Member
|
# Posted: 18 Jan 2015 11:43am
Reply
Quoting: Julie2Oregon I'm going with the Pleasant Hearth EPA-certified woodstove (1,200 sq. ft. model) from Home Depot.
Interesting, its $649 here in my area for the exact same woodstove. I know prices vary by regions.
This was for Model # HWS-224172MH
Did you get the quote from your Texas ZIP or use Kalamath Falls zip?
|
|
toyota_mdt_tech
Member
|
# Posted: 7 Apr 2015 09:23pm - Edited by: toyota_mdt_tech
Reply
OK, working on making the ranch look official. Having fun now. Embroidered patch for my workwear out there and all in the family.
I am asking for the brown version of the same thing (forest service brown) which I think will go better with my black and duck brown Carhartt gear I wear.
Just thought I'd share. 
They will look like the forest service insignia, just the lettering all changes. Otherwise, the same. I will submit a copy of the final product. Its not officially mine yet.  But will be based off these. But will be based off these.
green version
| 
brown version
|  |  |
|
|
toyota_mdt_tech
Member
|
# Posted: 22 Apr 2015 08:38pm - Edited by: toyota_mdt_tech
Reply
OK, ordered the brown version on the patch, matches the color of the cabin. UPS tracking shows they will arrive at my work tomorrow.
Update on my solar well. Just installed it. Had well drilled 9 years ago, just sat with a welded on cap until this last weekend.
My cousin helped me, he has an underwater camera. We sent the camera down to have a looksee. Well casing in 6" all the way to the bottom. I didn't know I bought a commercial well. Good news.  Well was 178 feet deep, we measured 181 feet. Static water level was at 101 feet from the top. I set the solar well pump at the 160 foot mark, 20 feet from the bottom, 60 feet of water about the pump. Should be a safe level. Well was 178 feet deep, we measured 181 feet. Static water level was at 101 feet from the top. I set the solar well pump at the 160 foot mark, 20 feet from the bottom, 60 feet of water about the pump. Should be a safe level.
The water ran gray for a while, the well has been inop since drilled. So the water ran grayish for a while. I let it run for 7 hours first day, about 6 the next. Water is sparkling clear now. Has a tiny mineral taste, was told this is normal, as the water flows through he rock. The more its used, the more it will wash away the mineral taste. I will have a sample tested.
You see my Honda EU2000i, this was not used to power the well, it was used to run a 4" Makita grinder to grind off the well cap and to chamfer the inside edge of the well to keep it from chaffing the pipe at its lowered/raised. The well is running off of just 2 solar panels, no storage battery's etc.
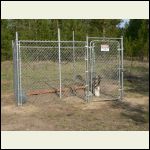
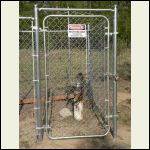
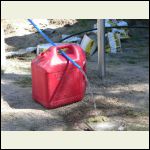
The well area was totally enclosed with chain link fencing. The mast in the middle is for the solar array. I will have to finish wiring it up. Will have a 4X4 post with a switch on it and plastic conduit to house all the electrical. I have a stub hose to direct water into containers. So when I need water, I jsut put spicket/hose into jug, turn switch on. It takes 2 minutes, 50 seconds to fill up 5 gallons. This is a "solar livestock well" purchased from solarpumps.com. I have the 2 panel system.
A few pictures.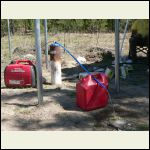
runningwater2.jpg
| 
solar_well_enclosure.jpg
| 
enclosure_gate.jpg
| 
runningwater.jpg
|
|
|
toyota_mdt_tech
Member
|
# Posted: 22 Apr 2015 08:43pm - Edited by: toyota_mdt_tech
Reply
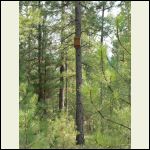
Also installed a pair of bat houses. These were to house a friendly bat I kept finding under a window cover. I did not see him this time. Hope he is OK. I set them up very high in trees.
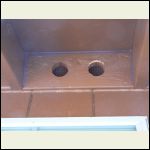
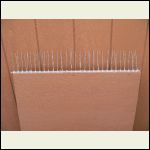
Also, birds perching on top of my window covers trying to get into the bird blocks (I used fine metal screen, but also 1/4" heavy mesh behind it, not a single entry yet. Butt they pecked a bit around the bird block opening. This should deter that.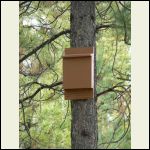
bathouse.jpg
| 
bathouse_zoomout.jpg
| 
birdblock_damage.jpg
| 
bird_deterrent.jpg
|
|
|
|
toyota_mdt_tech
Member
|
# Posted: 22 Apr 2015 08:49pm - Edited by: toyota_mdt_tech
Reply
Added a set of antlers to my cabin decor and a few other items. Also finished driving in last of front 20 acre fence post. Ground was too hard last year, after winter, ground wetter, went easy.
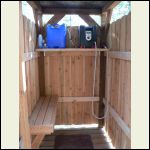
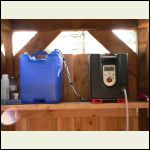
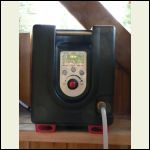
Also, purchased the Mr Heater "Aqua Cube" that was recommended by another member in here, I researched it and bought it. Was spendy, just at $375 with tax and shipping. I love it. Set it up in my outdoor shower which I built and set up last summer. It all works great.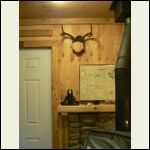
cabin_antlers.jpg
| 
shower.jpg
| 
aquacube.jpg
| 
aquacure_closeup.jpg
|
|
|
DaJTCHA
Member
|
# Posted: 22 Apr 2015 09:22pm - Edited by: DaJTCHA
Reply
toyota_mdt_tech...would you please email me? I've got a few questions regarding your experience with your aquacube and I would like to compare notes.
|
|
toyota_mdt_tech
Member
|
# Posted: 22 Apr 2015 10:08pm - Edited by: toyota_mdt_tech
Reply
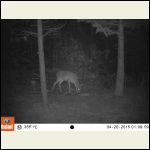
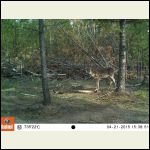
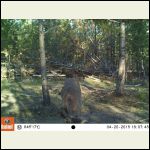
Set out a bunch of deer corn and it was all gone after the 2nd night, so replenished the supply again. I figured a single female doe white tail, I have seen her many times prior and she isnt skittish at all (might be bad for survival) . But was surprised to also see in addition to her, a young buck too.
A couple of shots, the deer was right next to the camera. I wish I had set it a little lower. Next time I will set the camera next to the corn at face level when they are eating. I can also do video.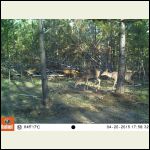
EK000194.JPG
| 
EK000004.JPG
| 
EK000273.JPG
| 
EK000206.JPG
|
|
|
toyota_mdt_tech
Member
|
# Posted: 22 Apr 2015 10:11pm
Reply
Quoting: DaJTCHA toyota_mdt_tech...would you please email me?
Done. Check your inbox. 
|
|
Gary O
Member
|
# Posted: 23 Apr 2015 02:10am
Reply
You've certainly come a ways in these five years.
A long ways.
We're moving to the cabin in two days.
Thanks for the many years of inspiration, my friend.
|
|
toyota_mdt_tech
Member
|
# Posted: 23 Apr 2015 11:30am - Edited by: toyota_mdt_tech
Reply
Gary, many are envious of you moving to your cabin. My goal is to also reside at my property. I will build a larger home, and have a detached shop too. But its a little ways out. Will you have internet access from your cabin? We will miss your wit and humor if not?
My place has been a labor of love. Since I was a kid, I have wanted timberland close to wilderness with lots of wildlife. I wanted a nice cabin and was just telling the wife, we accomplished all that and lots more.
After I leave, my mind is going, making up more projects. I never rest. But I told the wife, I have to be careful. I do not want it to become a huge maintenance project where the care of it consume all my time. So I have to keep that in perspective. One reason I went total solar well, no batteries, more cost, more maintenance, winter care of batteries, heavy...
Take care Gary, enjoy permanent cabin life, we know you will. And for heavens sake, stop by and post pics, updates etc of your cabin life retired. And some witty/humorous post too.
|
|
Gary O
Member
|
# Posted: 23 Apr 2015 06:12pm
Reply
Quoting: toyota_mdt_tech Will you have internet access from your cabin?
Yeah, but doubt we'll dedicate much time to posting for a few weeks.
We'll be on here.
Thanks tech, keep a fire
|
|
littlehouseontheprarie
Member
|
# Posted: 11 Jun 2015 05:44pm
Reply
Toyota do you still happen to have a materials list for the Whitehorse?
I am trying to figure out costing this out.\
Any help would be appreciated
|
|
toyota_mdt_tech
Member
|
# Posted: 11 Jun 2015 07:41pm - Edited by: toyota_mdt_tech
Reply
It never came with a material list. You just take the plans to a lumber store and they look at the plans and its done. I can tell you I upgraded the wall studs from 2X4 to 2X6 and the complete lumber pkg including windows, tyvek, roof felt, gable end vents (basically everything except the front entry door and metal on the roof) and it came to $3700 and I did end up sheeting the attic floor with 1/2 ply wood.
This was a dried in shell, less door and roof metal. I ended up spending another $1000 in material when it was all said and done. I did do HD upgrades throughout the build.
This did not include the foundation. I used a full footing/stemwall. I hired that out, it was $2800 labor, this was forms, rebar, set up, call inspector, pull forms. My concrete was just under $1000.
I used no OSB, only actual real plywood. Flooring was glued and screwed.
I can tell you I have a total of about $14,000 into the total build including all contents etc. and I went way overboard. You can build that thing finished inside economically for 8-10K easily.
|
|
littlehouseontheprarie
Member
|
# Posted: 11 Jun 2015 08:45pm
Reply
Thank you
|
|
toyota_mdt_tech
Member
|
# Posted: 12 Jun 2015 08:58am
Reply
Ok, did get my embroidered patches made, 2 dozen caps with patches on them, Carhartt vest and stocking caps with the patch also. Also have stickers, rubber stamp. It appears its a massive operation, but just fun/hobby/recreation. 
|
|
Steve_S
Member
|
# Posted: 12 Jun 2015 09:30am
Reply
Where did you get the patches etc made up ? Is it an online company or a local storefront ? Got a Link ??
Thanks
|
|
Cowracer
Member
|
# Posted: 12 Jun 2015 03:14pm
Reply
Love the kitchen cabinets. Can you give me the info on them, like were to get some, and style/model?
I have to show those pictures to my wife. I was wanting some natural wood cabinets, but she thought that would be too much 'woodieness' against my T&G knotty pine walls. I think it looks outstanding.
Tim
|
|
toyota_mdt_tech
Member
|
# Posted: 12 Jun 2015 09:17pm - Edited by: toyota_mdt_tech
Reply
Quoting: Steve_S Where did you get the patches etc made up ? Is it an online company or a local storefront ? Got a Link ?? Thanks
Steve, it was online, I had 100 made, it gets cheaper as you go more.
I sent them an email of the original unit and told them how I wanted it and the print etc. So they did the design for free and sent it to me for approval. They cost about $2 each, I added 20 cents each for iron on. It holds it in place while I sew them. 
http://www.signaturepatches.com/
I took the proof and have it cleaned up (vectorized) and then had 250 stickers made for about $70. They are about 2.5" X 2.5", about the same size as the embroidered patch.
Stickers were made by
https://www.stickerguy.com/
I paid $16 to have them cleaned up (vectorized) and made into stickers.
I have a rubber stamp with same logo and text to the right of the logo, same as on the patch.
Stamp came from http://www.rubberstamps.com
I purchased 24 dark brown (chestnut brown) baseball caps for $1.25 each from http://www.buckwholesale.com
Had the patches sewn on, picked up a bunch of Carhartt stocking caps also in chestnut (dark brown), along with Carhartt Sandstone vest in dark brown. So I have an entire line of clothing.
I even have the website domain and have tossed together a little something. 
The demand is high for cammo ones, so I am looking into that also.
|
|
Julie2Oregon
Member
|
# Posted: 13 Jun 2015 06:01am
Reply
Catching up with your cabin, Toyota. Outstanding!!! That well is magic! There are springs literally all over the place where my land is. How I hope there is one on my land somewhere but I fear that I'm at too high of an elevation for that. Actual deep wells tend to go several hundred feet down, grrr. Rainwater harvesting will have to do for a while, besides having water brought in.
Hmmm, with all of those patches, stickers and the like, you could recruit your own version of "scouts" and give the boys a "uniform" and loads of useful knowledge in exchange for, oh, say chopping wood, clearing brush, building fences, and all sorts of free labor!!! Did I say that? I meant, "enriching experiences." Yeah, THAT! 
|
|
toyota_mdt_tech
Member
|
# Posted: 13 Jun 2015 08:58am
Reply
Julie, its been just for fun, I give them to close friends and family. I have lots of pals who volunteered helping me build the cabin. Seems each time I went over there during construction phase, no less than 4 pals minimum, I fed them of course. Always a small army, made the job go quicker. Some task, tough to do by yourself, ie hanging sheeting etc.
I'll take some pictures of all my apparel sometime this weekend and post it up for those interested. Anyone who has seen the logo apparel has said "can I have one" of course, hats are limited and Carhartt gear is expensive. Carhartt work vest are all made on an "as needed" basis.
I am now working on markers like in the park/forest campgrounds, the 4X4 post that reads "Water" and the numbered campspots. I will get those set up this next trip end of this month and trim out the well wiring and take pictures of the well finished with mounted solar array. Julie, wells are pricey. I have in mine total now just over $11,000. 
|
|
Steve_S
Member
|
# Posted: 13 Jun 2015 11:32am
Reply
Just an FYI for Julie. I had my well Cable Drilled last year, it's 230' deep in red/black/white banded granite. Drilling & 22' of casing + seals etc came out to $11,000. Pump, (Grundfos SQ-5 110V soft start [solar system friendly]), 44 gal pressure tank, valves, switches, O-Pipes, etc was another $2700
All in for our water system 13.7K.
There are significant differences between Cable Drilling which fractures the rock as part of the process, versus Bore Drilling which just cuts through the rock and averages going 20% deeper as a result to get the same water flows.
@Toyota; Thanks for the links... I'm gonna follow up on those as I tried using ZAZZLE but that didn't work out. Luckily I have high quality SVG's of what I want and have the ability to do the graphics I would like in correct format.
|
|
Julie2Oregon
Member
|
# Posted: 13 Jun 2015 05:14pm
Reply
That's so cool, Toyota! With the markers, you will have a right proper camp! I'm sure the guys enjoyed the adventures and it didn't seem like "work." I've always inwardly giggled that the sight of an open car hood or some tools in my driveway seems to attract guys from all directions, like they can just "sense" a project or something in the works.
The cabin plans you so graciously sent me will be making their way to Medford in the coming weeks! 
|
|
toyota_mdt_tech
Member
|
# Posted: 13 Jun 2015 06:40pm - Edited by: toyota_mdt_tech
Reply
Quoting: Cowracer Love the kitchen cabinets. Can you give me the info on them, like were to get some, and style/model? I have to show those pictures to my wife. I was wanting some natural wood cabinets, but she thought that would be too much 'woodieness' against my T&G knotty pine walls. I think it looks outstanding. Tim
Tim, well, those were all custom made. I had the dimensions of the kitchen, location of the windows. I have a good pal who is a designer, lives in New Hampshire, he designed it, then he contracted out the cabinet build to a contractor in New York State, who hired DeWills out of Vancouver Washington to actually build the cabinets. I picked them up directly from the mfg. Nice huge facility.
These are all the blue motion drawers and cabinet doors, they all close slowly, so no slamming. All solid wood doors, no partical or chip board, corners all gusseted. The cabinets were all made to look like they were made from 100+ yr old barn wood. They came with custom dings, dents, even wormholes all through them, installed by builder. Not overdone, just enough to really look aged. This would of been close to $6000, I got them for $2100. Install was a dream, came with layout, all cabinets marked. I built the countertop myself, not bad for a first timer in that area.
|
|
littlehouseontheprarie
Member
|
# Posted: 13 Jun 2015 10:25pm
Reply
This is my favorite cabin on this site.
I think it is well thought out.The interior touches are fantastic.
I am seriously contemplating building the WHITEHORSE or WHITEHORSE 2.after reading this thread for the millionth time.
I would have to have the bathroom instead of the bunkroom like you said.And being in the deep south I can do without the wood burning stove.
But those would be the only 2 things I would change and they are only for personal reasons.
Your build is nothing short of awesome.
|
|
toyota_mdt_tech
Member
|
# Posted: 13 Jun 2015 11:18pm
Reply
littlehouseontheprarie, I am humbled by your kind words. It means a lot to me.
Make sure you take loads of pictures and start your build thread. Keep us posted all along the way. Even when completed, then come decor. It never stops.
If you want to email me directly, use my username in here and follow it with the @yahoo.com and I check that email box maybe once a week or two. Sometimes longer. 
|
|
littlehouseontheprarie
Member
|
# Posted: 13 Jun 2015 11:35pm
Reply
Thanks Toyota.I am looking forward to talking with you about this soon.
|
|
| << . 1 . 2 . 3 . 4 . 5 . 6 . 7 . 8 . 9 . 10 ... 17 . 18 . >> |

