| << 1 ... 9 . 10 . 11 . 12 . 13 . 14 . 15 . 16 . 17 . 18 . >> |
| Author |
Message |
toyota_mdt_tech
Member
|
# Posted: 29 Oct 2019 08:49am - Edited by: toyota_mdt_tech
Reply
Item one, clean up floor and trim branches to the 10 foot mark, clear out all small saplings, they stress surrounding trees anyway. Clear back from home 60 feet minimum, 100 feet ideal, think blowing embers, will they get into attic vents? Any trim on house, bevel top so spark roll off. Dont pile any firewood up against house or on porch, treat any porches with fire resistant stain/coating (they make it) if your gable vents can let sparks in, build a baffle. I brought in now about 1000 yards of gravel total. Gravel doesnt burn. Are you on post and pillar, skirt under it with metal. Trees around my place, I cleared branches off to the 20 foot mark. I bought a tow behind DR Chipper 16.0 to drag around with Kawasaki mule to clear smaller stuff.
I almost lost it in summer of 2015, that is when I really went to work. To give you an idea, here is a map. (removed for privacy/security reasons)
The area will burn, its just a matter of time, will yours survive? I bet your state has cost share programs depending on acreage. We have 50/50 splits all the time, I got mine under 75/25, its been 90/10 and even 100. My cost at 25% was still $13,000.
My cabin is now easy to defend, fire crews will evaluate it ahead of a fire, if its defensible, they will preserve it, if not, it will most likely burn. Oregon has loads more fires than we do.
That dot is my 40 acres, this fire was huge. I got busy following summer.
|
|
Nobadays
Member
|
# Posted: 29 Oct 2019 10:54am
Reply
Thanks Toyota! We have been following the Colorado forest service recommendations on firewise work for our property... just what you said. Our place is on piers and the main cabin is skirted in metal. We have a large deck on the back and a porch on the front that arn't skirted. My wife screened around the front porch this fall after racking all the dead leaves out. They will get skirted next year. We have gravel out front and are encouraging green grass lawn around the cabin. Firewood was stacked right by the house, now 40 feet away.... for the winter I do have wood on the front porch, wont during fire season. We still have work to do... lots of low juniper brush that must go.
My question I guess was concerning the rest of our community. Though I know clearing the forest floor is important, I can't help but think the number one thing would be if we could get all the property owners to trim branches to 10 feet.... and saplings, ladder fuels under the conifers. The Aspen aren't really going to burn, even the smaller ones don't have low branches. But, the conifers up there nearly all have branches grow right to the ground. It seems if as a community, and for the community the best thing to start with is trying to keep the fire on the ground. Of course getting the dead fall picked up or at least lop and scatter so everything is flat on the ground to decompose.
We picked up everything on our place but some scattered smaller... thumb sized, a few larger sticks..... and we are going to continue cleaning and keeping the dead fall cleared.
Though we want our place to survive and even if it did, right now most of the rest of the surrounding forest would be devastated... hard to market a cabin set in a black spot of what was a forest... now with just foundations where cabins stood.
Sorry if this is a hijack of your build thread, not meaning to do that... you just obviously have very good knowledge and experience with this work. Thanks!
|
|
toyota_mdt_tech
Member
|
# Posted: 29 Oct 2019 03:29pm
Reply
nobaddays, livestock helps out a bunch, ie cattle, horses or any grazers. They will trim down all the grass, it will remain short and green, fires usually burn up to fence line on a animal pasture, then stops there.
You want to keep it out of the canopy. Many times a fire can burn in the grass, just creeping around and not get into the canopy, having enough spacing between trees will keep canopy fire from spreading. A scared or wounded tree will leak pitch and draw fire, so be careful not to scar them with equipment. About 15 feet spacing between trees. If you do lose a tree from a crown fire, still standing, its no more than 3 to 4 years is when it just falls over. At least the pines go that quick (rot)
Any timber work will bring in bark beetle, but they will hit a few smaller trees most likely. Having a nice healthy forest, resistant to fire and bugs is the key.
My tree clearing guy, Connor Craig was a top notch guy, first class work, ran a great operation, did a nice job and I got a good pal out of the deal too.
Here he is with his 2 girls, holding my cup and notice his honorary lifetime membership ID badge. I blurred the kids face out to protect their identity of course.
It sounds like you have a handle on the firewise stuff, get everyone else on board, maybe a presentation at the next HOA meeting, arm them with info anyway, what they do with that info is up to them I guess.
|
|
toyota_mdt_tech
Member
|
# Posted: 29 Oct 2019 03:50pm
Reply
nobaddays, a quick search, I found a cost share program, not sure how many acres you guys have. Thinning cost about $1,260 per acre total and with cost share, cuts it way back.
Here is just an example of what I found in Colorado.
https://bewildfireready.org/fuels-reduction-cost-share-program/
|
|
Nobadays
Member
|
# Posted: 29 Oct 2019 03:56pm
Reply
Thanks for the information! Great job on your place for sure!
|
|
toyota_mdt_tech
Member
|
# Posted: 29 Oct 2019 09:04pm
Reply
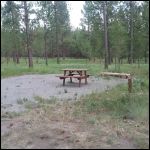
I might add, the thinning sure greened up my pine grass. (before and after pix) I need to get shots of the same spot for comparison, but this will give you an idea. Forest floor after thinning was all mulched wood bits, now lush green grass.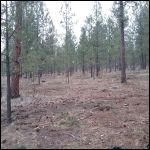
Right after thinning
| 
Greened up after thinning
|  |  |
|
|
toyota_mdt_tech
Member
|
# Posted: 2 Nov 2019 09:40pm - Edited by: toyota_mdt_tech
Reply
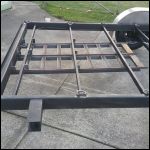
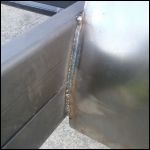
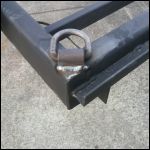
Good trailer progress today.
We are about 95% done. All that is left is ramp locks, ramp stops, one D ring on RR corner, stake pockets (8) trim out all wiring (its all in place) and then decking goes on. Some paint and final inspection.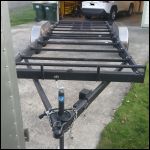
4005.jpg
| 
4002.jpg
| 
4004.jpg
| 
4008.jpg
|
|
|
toyota_mdt_tech
Member
|
# Posted: 3 Nov 2019 09:18pm - Edited by: toyota_mdt_tech
Reply
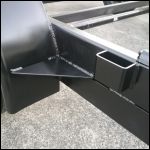
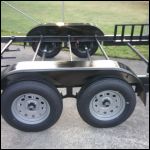
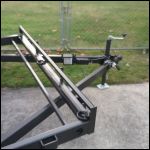
OK, thought it would be completed by now, just about made it. Sun went down earlier today with setting clocks back. Fender gussets in, 10 stake pockets, all wiring trimmed out and lights installed, break away battery and junction plug with trailer plug all trimmed out. Painted with 2 coats, a durable rustoleum flat back for base and same in gloss for final coat.
All that is left is a lock to hold ramps in (not slide out), front marker lamps (10 minute job) and install wooden decking. Should be done next Sat. That will be the 5th weekend. But it has turned out perfect. Never now it was home made.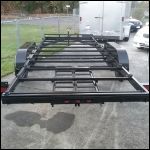
4014.jpg
| 
4010.jpg
| 
4015.jpg
| 
4012.jpg
|
|
|
|
toyota_mdt_tech
Member
|
# Posted: 10 Nov 2019 11:13pm - Edited by: toyota_mdt_tech
Reply
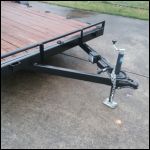
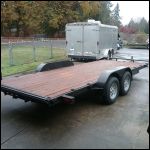
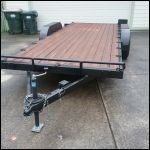
OK, finished my 18 foot flatbed car hauler trailer build. It was an absolute success. It still needs to be weighed at a certified scale then inspected by the state patrol.
I'm guessing scale weight at 1,650 lbs.  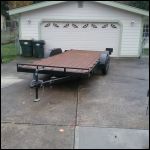
5001.jpg
| 
5002.jpg
| 
5005.jpg
| 
5004.jpg
|
|
|
darz5150
Member
|
# Posted: 10 Nov 2019 11:53pm
Reply
Looks great TMT.
Good quality build. ðŸ‘
How much $ did it take? Excluding labor of course. Lol.
|
|
toyota_mdt_tech
Member
|
# Posted: 11 Nov 2019 08:30am - Edited by: toyota_mdt_tech
Reply
Well to make a short answer long...  , the guy I made it for bought a "kit" which was axles, fenders, coupler, jack etc (all the parts needed minus steel) and lots of the stuff they sent him,he didnt like, so bought again. These trailer retail for about $3000-$3200 and knowing what we know now, we could of done it for $2600, but he is close to retail purchase price now. But we did do lots of extras, ie notice all those D rings down each side, so very versatile. , the guy I made it for bought a "kit" which was axles, fenders, coupler, jack etc (all the parts needed minus steel) and lots of the stuff they sent him,he didnt like, so bought again. These trailer retail for about $3000-$3200 and knowing what we know now, we could of done it for $2600, but he is close to retail purchase price now. But we did do lots of extras, ie notice all those D rings down each side, so very versatile.
He should of gotten just the full axle kits with leafs, mounts, hardware etc and fenders. Rest of small parts, ie weld on stake pockets, tail lamp boxes, lamps, D rings, interface junction box on tongue, break away battery, we all got from Amazon.
Steel was $900, was all 3/16" wall thickness 2X5 for main frame, 2X4 for tongue and 4" C channel from tongue to front of axle. This design was a copy of a factory built trailer I have, we cloned it to a "T", right down to the rear slide out ramps. No since re-engineering everything. I like the fact my scale weight came in at 1,550 lbs, most trailers like this are 2500 lbs, with a 7000lb axle, it eats into payload and makes for a harder pull with tow rig.
The way the decking is attached was also low weight and low cost. Each plank uses one #12 metal screw in the center. Front of decking slid under 1.5" angle iron welded i n place, then across 1X2 thick walled rectangle tubes every 23" which first and last being just 6" from end and once decking in, clamped down rear section and tacked in another piece of 1.5" angle iron, screws are mid way near fender center. It makes for a clean install too and you dont see the cut ends of the 2X6.
I have 4 full weekends of 6-7 hours, day and a half on 5th and final weekend, so about 9.5 days at roughly 6.5 hours a day of actual work time.
I volunteered to help my buddy, I have a garage big enough except once tongue was welded on, no longer fit inside, but we had the end we were working on inside. I do have a nice 220V MIG welder, 60AMP hypertherm plasma cutter, 14" metal chop saw, air grinders, 4" electric grinder, 7" electric grinder and large bench grinder. The workhorse was the MIG, chop saw, bench grinder, plasma cutter and 7" grinder in that order. Went through a 10lb spool of .030 wire
It was work, but very enjoyable and end product was 100% success. This was my first trailer build, but I am no stranger to metal fabbing either.
|
|
paulz
Member
|
# Posted: 11 Nov 2019 09:12am - Edited by: paulz
Reply
Wow, very nice! Love the D rings, I need that.
I had lights similar to yours. I say had because even with the steel surrounds I managed to back into trees, bend the steel and break the lights. Then I put lights on the rear panel. Broke those too. Then I just got one of those cheapo HF kits with magnetic lights. That worked for awhile but last week when I bought a pallet of plywood I hit a bump, one fell off and I drug it down the highway until the wires broke.
I have a real problem with trailer lights. My next idea is to weld foot long sections of 6" pipe on each side and put the lights in there.
|
|
toyota_mdt_tech
Member
|
# Posted: 1 Dec 2019 02:35pm - Edited by: toyota_mdt_tech
Reply
Trailer, done deal:
OK, on trailer, scale weight came in as 2060lbs, about 400 lbs more than mine, I know it was all in the treated wood, that stuff was heavy, so as it drys out, his payload will increase. State Patrol inspected it, commented on how nice it looked and issued him a VIN and a plate, he is done, now a closed issue.
Next Project:
OK, my next project is a 12X16 park shelter made from logs. I will sheet roof with 5/8" plywood, 50# felt and metal roof. I based my design off of a US parks service shelter whose plans I obtained online, with slight changes.
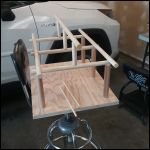
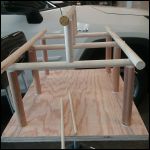
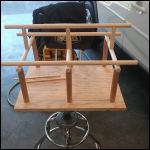
I built a scale model, ie 1" = 1 foot. So I can visually look at it. Plan is to put in footers in spring, try to have it completed next year after footers, gathering logs now and building brackets to support uprights into concrete without putting logs in the ground, but setting on top of a concrete pier held in with large bolts.
Any opinions would be appreciated. This is the framing, rafters every 2 feet. There will be gussets in every corner of the uprights and on each side of the center uprights. They will be "keyed" is a bit to help load vs just racking. I have decided on cementing the columns in the ground several feet, want to avoid the "hinge" joint. I will look into treating the parts buried.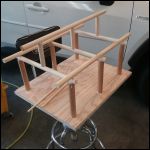
20191130_132637.jpg
| 
20191130_132644.jpg
| 
20191130_132650_resi.jpg
| 
20191130_132658.jpg
|
|
|
Nobadays
Member
|
# Posted: 1 Dec 2019 02:49pm
Reply
Looks like a fun project! Don't know if you have seen this... but the NPS has pictures and drawings of many of their structures online that can be downloaded as pdf's, including a picnic shelter - Plate L-5.
http://npshistory.com/publications/park_structures_facilities/secl.htm
|
|
toyota_mdt_tech
Member
|
# Posted: 1 Dec 2019 03:32pm
Reply
My shelter is based on L5 and L6, a combo of each. I like some features of one, some of the other. I wanted open gable ends. Did go with extra pair of columns to save on log size for purlins, easier build. 
|
|
Nobadays
Member
|
# Posted: 2 Dec 2019 07:45am
Reply
Realizing your model is just to help visualize the building, if built like the model the cross beams will sag. I'm sure you know that. Would an upside down "W" truss help distribute the weight of the ridge pole. In other words, leave your vertical ridge support then add one log on each side of it from the ridge pole to the outer end of the cross beams...? A standard "W" truss design will obviously work here if using a log rafter on each truss as well.
I remember building "W" trusses from logs just like a truss built from dimension lumber... with the exception of steel plates bored into the ends of the logs at the attachment points.
Missing log work! I keep thinking of all the standing dead fir and spruce in the forest not far from the cabin. Alas.... having lost an arm 30 years ago, just too much work without mechanized equipment which I don't have. Helped my Son in law build their 3 sided log home a few years back... his Kubota made easy work out of lifting logs!
Have fun!
|
|
toyota_mdt_tech
Member
|
# Posted: 2 Dec 2019 08:24am - Edited by: toyota_mdt_tech
Reply
nobadays, I will have my Kubota. The span is close to my park design, but they did use gable log wall all the way to the top, so logs all the way to the top. I can still do that but wanted to avoid it, but structurally, might have to add it in. I thought about a large log at the ridge tied into the top plate log forming a rafter triangle on the 3 cross logs that support the ridge log, then the logs will act more like a rafter with cross log acting more like a rafter tie. I would have no issues adding another log in the middle of the gable ends. I have already considered that too. But I would need to do one in the center. But I would have it run right through the picnic table, so it wouldnt be in the way and no one would take the picnic table.
I appreciate all the ideas, anyone else want to chime in. I have till spring to nail it down. I like your "splayed" idea also, it would look good, keep my walk areas open. That would leave me more uprights to gusset and help avoid the racking.
I have a co worker who build one, he didnt sheet the roof, he use metal on strapping strips, so the roof is light.
|
|
toyota_mdt_tech
Member
|
# Posted: 3 Dec 2019 09:43pm
Reply
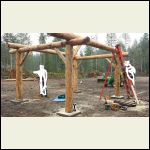
OK, co worker build one, this is a 16X16, he borrowed my "Log Wizard" to peel them. Footers are large 16X16 inch pads with a rebar spike sticking out of it, the spike sets in a hole drilled into bottom of the uprights.
He built his with 2 ridge poles, one higher than the other to vent exhaust from a BBQ etc. The roof is peeler poles every 2+ feet, strapping and vapor barrier and metal roofing, so his roof is lighter than normal. The barrier was to jsut keep dew from dripping on you all the time.
The logs are massive, mine will be 12" on the cross, span of 12 feet, I may not have any sagging. This one is a 16X16 square.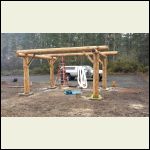
16X16shelter1.jpeg
| 
16X16shelter2.jpeg
|  |  |
|
|
toyota_mdt_tech
Member
|
# Posted: 18 May 2020 05:00pm
Reply
OK, was at cabin for a long weekend, my sister came with me, this is our 2nd year doing this, she wants to make an annual deal. She loves it there. I deputized her and made her a full park ranger, full uniform, badge, cards. She is having a blast.
I changed the solar panel on container, one where the controller is on the inside, so now easy for me to see the LED's to know its gettign enough sun and charging. Its an 8 watt panel, but runs a battery maintainer, to much lower wattage to battery to keep it fully charged.
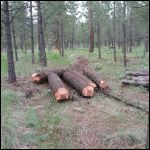
Next, doug fir bug kill. Didnt think I had to worry about the doug firs, so doing research to see on this. So I dropped it, then noticed the bug marks on the dead branches. Skidded the logs out, was 20" across at the base. Some of these logs will end up on my park shelter, I have a load already of the ponderosa pines.
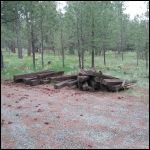
Next, found a source for 16 #2 RR Ties for $300, so bought 2 bunbles (32 ties) and gave a buddy 4 for picking them up for me and another buddy hauled them to my cabin, wantd to try out his new 2020 GMC Duramax with his Allison 10 spd, payload was 3500 lbs plus trailer, he averages 15.5MPG and this is going over 3 mt passes.
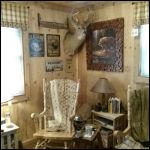
Next is a 7X7 white tail mount I picked up at an estate sale, gal shot it in Montana years ago. They had a mule deer too. But got tyhe white tail, I have both types in my area, turned out perfect addition to the place.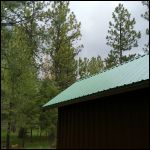
Solar Panel
| 
Doug for bug kill
| 
Rail Road Ties
| 
7X7 white tail
|
|
|
toyota_mdt_tech
Member
|
# Posted: 18 May 2020 05:16pm - Edited by: toyota_mdt_tech
Reply
few more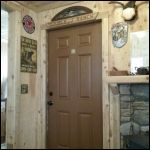
Front Door
| 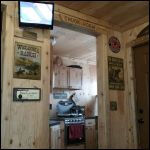
Kitchen/TV
| 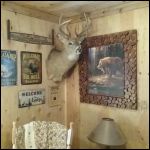
Closer
| 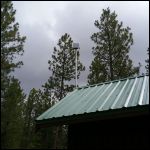
another solar
|
|
|
toyota_mdt_tech
Member
|
# Posted: 11 Jun 2020 11:48pm - Edited by: toyota_mdt_tech
Reply
OK, have a lazer level, a 2 plane self leveling lazer level and now just picked up a 3 plane self leveling lazer with commercial grade Bosch tripod and story pole.
Man, how did I get by so long without one.
This sets on top of the tripod, it self levels, shoots a vertical lazer and another vertical lazer at 90', it forms an X, as it does it in all 4 directions. Not only that, it shoots a lazer pinpoint dot straight down on the ground.
So now I can get 4 corners absolutely perfect and I can now turn on the horizontal plane and with my story pole, set all footers to any height I want and make all of them the same.
Anyway, just gloating about a new toy.
Also picked up a massive new Dewalt right angle 11A 2 speed drill, this is a big unit, heavy, 2 handles on it, plus a 3rd one for torque. It has a special torque limiter to keep from breaking a wrist, it electronically shuts down.
Picked up a TR industries massive electric jackhammer too. I am using this to drive rebar for pinning logs, it will also be used to break out any rocks I encounter digging footers for my 12X16 park shelter. I cant just move my hole over, once laid out, I need to dig a 2 foot hole. So if I rock gets in my way, its done.
Clearing path for the horseshoe pit, sign already made designating the pit area.
Headed over for a ham radio field day event, all my campsites will be occupied, 1 motorhome, 1 38 foot 5th wheel set up, 21 foot camp trailer, 16 foor camp trailer and one tent camper.
What is ham radio field day?
I did add a nice 7X7 white tail mount, taken out of Montana years ago. Photo attached prior post.
Finished painting front door inside too.
Will have plenty of pictures.
DWD460.jpg
| 
Horseshoe pit sign
|  |  |
|
|
toyota_mdt_tech
Member
|
# Posted: 2 Jul 2020 07:27pm
Reply
OK, had a huge group of campers at my place this last weekend and I remained for almost the rest of the week prepping for my log park shelter.
A few pictures of the campground filled to capacity. This is a first. I see a new sign coming, "Campground Full"
A good buddy went up in advance and coordinated the campers, opened the place up, had him a sign made for the site he is in, reads "Camp Host". 
Firs shot, looking at campsite #1, large RV, 38 feet capable. Has water hookup from the solar well.
Campsite 2 is the largest, shown with 38 foot 5th wheel and a 22 foot long RAM 3500 all in the campsite. I special built this one for this pal of mine.
Next photo is looking up from sites 3 on to 7 from the Ranger Station. Its filled to capacity.
Also started on my log park shelter. I have changed the size from 12X16 to 10X16 because of the slope of the grade, would of mean much longer sonotubes and concrete. So this will make my log sizes a big smaller to cover the span which will also be easier on my.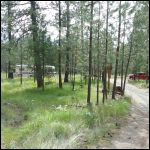
looking at site 1 from Ranger Station
| 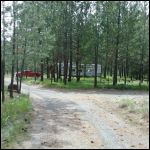
Site 2 from Ranger Station
| 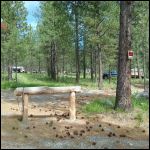
Sites 3 to 7 from Ranger Station
| 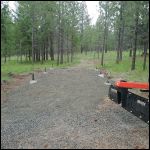
Park Shelter pad with footers.
|
|
|
toyota_mdt_tech
Member
|
# Posted: 2 Jul 2020 07:42pm - Edited by: toyota_mdt_tech
Reply
I had some beetle killed pines I dropped last year and skidded to a log deck. Peeling is tough, so waiting a year, I have the bugs help me. With the aid of a bark spud (was a Ames 4.5" scraper) was able to peel a log in about 10 minutes.
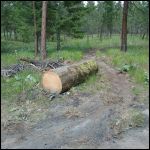
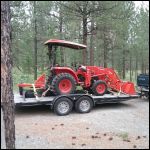
Skidded a few next to the build site. They got dirty dragging them, no big deal, take some bleach into a pump sprayer and mist them and they turn clean yellowish, just like a fresh peeled green log. It happens in minutes. Also last year I dropped a massive old growth snag, with my Kubota on site (good buddy came and towed my flatbed trailer and Kubota up for me as my truck was pulling a enclosed trailer full of tools) we used the Kubota to skid out both sections.
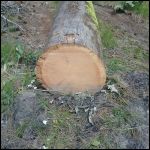
One is laying now close to the Ranger Station. I think I will get an Alaskan Saw mill and make a thick 2" table top for the shelter/picnic area. I show one, but have 2 section, this is about 30 inches through, super tight grain.
Its ponderosa pine that has aged. I suspect its been dead for 50 years. Evidence of lightening struck and burnt. Thought it was a rotten snag till I cut it down.
My plan to build park shelter is to substitute small 12" columns, in other words, I can build the entire roof framing IE, cross logs, purlins, ridge log, plus right log support, includes the notches made by my log wizard, then mark and disassemble, then install taller columns (6) and then use a rotating lazer to mark all logs, cut after all braces in, then rebuild roof on top. This way, I am building roof and fitting all logs while walking on the ground. Super easy and safe.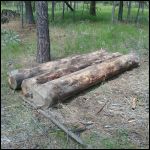
Peeled and skidded
| 
Section of old snag
| 
Close up of old snag
| 
Loaded back on trailer for home trip
|
|
|
toyota_mdt_tech
Member
|
# Posted: 2 Jul 2020 07:54pm - Edited by: toyota_mdt_tech
Reply
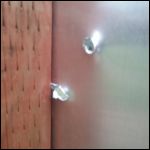
And someone took the liberty of pumping 3 rounds through my main front gate sign.
Its frustrating, its a no outlet road, I know the locals and they watch people going in like a hawk, but some can slip by, this is the first incident I have ever encountered and if this is the worst of it, I will. be fine.
I did order a new sign. I should of kept the fake sticker bullet holes a buddy of mine stuck on it, my reason for taking them off was to not attract more. As it turns out, it had no holes, so someone installed a few. Looks like maybe a 9mm or .40
He did have a nice tight group.
entrance woulds
| 
exit wounds
|  |  |
|
|
paulz
Member
|
# Posted: 3 Jul 2020 09:28am
Reply
Campout party looks like fun TMT. Good thing you have that Woodland insurance. Bummer on the bullet holes.
|
|
toyota_mdt_tech
Member
|
# Posted: 3 Jul 2020 11:37am
Reply
Quoting: paulz Good thing you have that Woodland insurance. Bummer on the bullet holes.
Yes, $160 a year plus the annual membership dues for the National Woodland Owners Assoc, cost me a whopping $195 a year total. Good investment, otherwise, this is no fun if you cant share it with others. Even show it with my membership signage, 4 total.
All my buddies are non drinkers, non smokers. Good wholesome clean bunch. I'm not anti alcohol, I am anti drunk and some people act stupid with too much, some dont know when to quit and this is where trouble can start. My campground rules states no alcohol and no glass containers.
Was a fun time, this was my ham radio field day event. All campers where ham radio buddies.
Back in a month for family and will stay a full week and hope to have the park shelter built. By making temp short columns to build entire structure at ground level should make it go fast. I will post photos. Will use dimensional lumber for roof rafters to speed things up and roof sheeting will use 2X6 T&G for that nice look from the underside and the typical light green metal roof. Suspect I will stain the structure the typical dark brown to match USFS. Keeping it clear and maintaining that is more extra labor I dont want.
|
|
toyota_mdt_tech
Member
|
# Posted: 13 Aug 2020 08:04pm
Reply
OK, some updates, I see my woodland insurance had a spot on there if I wanted to add a structure or a vehicle etc? So it might be possible to cover your cabin and an ATV etc.
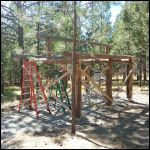
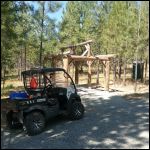
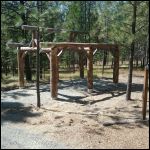
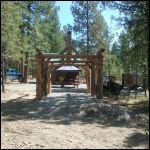
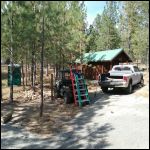
OK, I started on my park shelter. Keeping with the USFS and NP theme, I am giving it a name "The Teddy Roosevelt Shelter", will have sign made. Replaced my shot up sign with a new one.
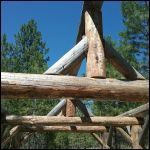
Got the shelter all framed in. My home built brackets worked flawlessly. Literally held the logs upright when slid over them, had to use a large sledge and hammer them down. Then pinned it in place with a 10" ledger lock screw. Wont lift off in the highest wind.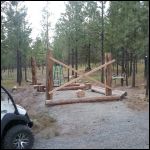
20200808_192220_resi.jpg
| 
20200809_152525_resi.jpg
| 
20200812_135215_resi.jpg
| 
20200812_135253_resi.jpg
|
|
|
toyota_mdt_tech
Member
|
# Posted: 13 Aug 2020 08:07pm - Edited by: toyota_mdt_tech
Reply
I wanted it lined up perfectly with cabin porch, to walk off porch and end up right in shelter. I will wire it up, have 2 outdoor ceiling fans in place, lights and some outlets. I may run circuit underground from cabin tio feed cabin with gennie from the shelter. Not that my gennie is noisy, it will be even quieter.
It will be the typical USFS/NP brown and the traditional green roof. Will use regular dimensional lumber and sheet it with plywood, 30# felt and tin. I am going to finish it in spring. I took all my measurements and will order metal for roof in advance. Have it on hand next trip over.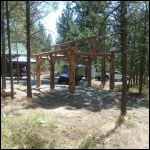
20200812_135349_resi.jpg
| 
20200812_135332_resi.jpg
| 
20200810_160138_resi.jpg
| 
20200811_123412_resi.jpg
|
|
|
paulz
Member
|
# Posted: 14 Aug 2020 08:49am
Reply
Looks great!
|
|
Nobadays
Member
|
# Posted: 14 Aug 2020 09:51am
Reply
Looks great! Love log structures! Your bracing looks spot on.... it will stand for years!
We have so much dead standing spruce and fir around here, I just want to build something.... alas, being one armed and getting up there in age, it's not going to happen. I will get some good firewood though!
|
|
| << 1 ... 9 . 10 . 11 . 12 . 13 . 14 . 15 . 16 . 17 . 18 . >> |

