| << . 1 . 2 . 3 . 4 . 5 . 6 . 7 . 8 . 9 . 10 ... 17 . 18 . >> |
| Author |
Message |
Montanan
Member
|
# Posted: 9 Jan 2012 11:52am
Reply
Love the switch plate covers! And what great examples of space saving techniques- from the dining counter to the mounted TV, to the bunk room/pantry. Nice work.
|
|
toyota_mdt_tech
Member
|
# Posted: 9 Jan 2012 11:04pm - Edited by: toyota_mdt_tech
Reply
Thanks Montanan. Just wish I had more time to do logs. Love the looks of your place and Tom's. The finest looking log cabins I've seen.
On mine, space was a premium, so I had to make it all fit. Original floor plan according was shown in the attachment. It has crooks in the wall which complicated things, a wall that wrapped around the fridge. Shorter counter. I made the counter longer and just angled it. I had all custom build cabinets, so it could be anyway I wanted it. I did the counter top myself. Formica, but looks like granite.
Anyway, I gave it lots of thought, ie small space, but used it well.
2 photos, original floor plan vs my modified version which is the way I built it.
Notice I installed a wider door (36" std frt door) vs the 30" that was shown. Of course, longer door, it opened int he way of the kitchen, so I made it open the other direction. I have a door stop in the fireplace hearth to prevent the door from hitting the woodstove.
Move the back window over some, away from the corner.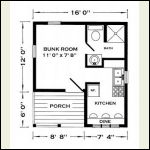
Original Floor Plan
| 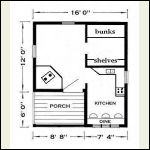
My modifed version
|  |  |
|
|
DaJTCHA
Member
|
# Posted: 22 Mar 2012 07:48pm
Reply
I've been meaning to ask, was one coat of the behr paint enough? We have a T1-11 sided building that comes out to about 600 square feet of coverage and I was thinking about buying the 5 gallon (said to cover 1250) with the thought that the siding will likely need two because T1-11 has a reputation of sucking up paint on the first coat.
Any advice would be most appreciated!
|
|
toyota_mdt_tech
Member
|
# Posted: 22 Mar 2012 10:20pm
Reply
I went there with 3 gallons of paint,. according to my paint guy (in addition to 3 gallons of primer) and I ended up having to zip into town and have 3 more gallons mixed up. My place was 16X18, tall gable ends. We installed it a little thick, wanted it durable. My environment is either real warm in the summer or real cold in the winter. Not sure how many square feet coverage. But it was bare wood, we did the entire thing, ie under eaves etc. So first coat, expect to use more than they said you would. I have a gallon extra, I use that for painting the window covers (we cover them up when we leave) and painting a picnic table to match the place plus any touch up if needed.
|
|
DaJTCHA
Member
|
# Posted: 23 Mar 2012 10:22am - Edited by: DaJTCHA
Reply
I figured you'd say that. I had planned on having to purchase (2) 5 gallon jugs. We're going to paint the every wall, install the windows, trim, soffits, caulk and then the faux board and batten look and then paint again. I'm figuring with the time I have to work and the method I'm likely using to accomplish this task, 10 gallons would be the correct amount.
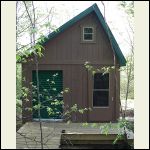
Here's a picture of my project, "The Shed Mahal", which will look almost identical to your's in color scheme when she is completed. The metal roof was installed only 2 days ago and what a difference from the camo tarp that had been strung over the roof for months!
|
|
csperling
|
# Posted: 1 Jun 2012 03:07pm
Reply
toyota_mdt_tech
Where did you buy "forest service brown" paint, and what was the exact name and brand of this color? Thank you.
|
|
DaJTCHA
Member
|
# Posted: 1 Jun 2012 03:13pm
Reply
Home Depot Custom Color for "Forest Service Brown"
Behr Base 9340 Satin
Premium Plus Exterior Satin
Clrnt: 02 384th
C: 4-232
F: 0 380
KX: 0 44
L: 6 120
Lowes:
Valspar Duramax Exterior Satin Base 4 "Chestnut" is the paint I chose for the Shed Mahal.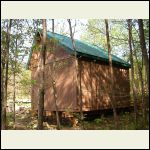
NorthWall1.jpg
| 
EntranceWall1.jpg
|  |  |
|
|
toyota_mdt_tech
Member
|
# Posted: 1 Jun 2012 03:53pm
Reply
Nice work, great color too! I posted my color code from my can (this thread, page 1) on this thread (for csperling) and it was the same thing DAjtcha used. I see you went with the green roof to. Green roof looks so good with that forest servcie brown. Nice job. I just love that color too. It reminds me of the national parks lodges too. 
|
|
|
toyota_mdt_tech
Member
|
# Posted: 1 Jun 2012 03:55pm
Reply
I guess I need to update this thread too. I have all engineered wood flooring in. Its basically done now.
|
|
DaJTCHA
Member
|
# Posted: 1 Jun 2012 04:28pm
Reply
Toyota_mdt_tech- My piece of heaven just happens to be within the Allegheny National Forest, so the colors you've inspired me with fit just perfect!
|
|
toyota_mdt_tech
Member
|
# Posted: 3 Jun 2012 06:26pm
Reply
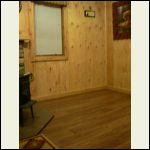
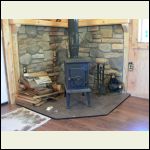
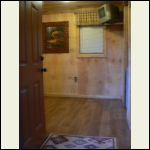
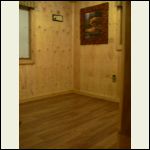
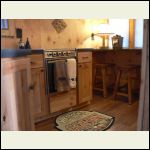
Ok, I have finished my hardwood floors. Its actually engineered stuff. Looks almost plastic. It snaps together, no nails or glue, it sets on a thing blue foam pad. I still need to trim out the crawl space door. Still trying to figure out a real durable set up.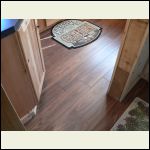
flooring_017.jpg
| 
flooring_021.jpg
| 
flooring_010.jpg
| 
flooring_023.jpg
|
|
|
toyota_mdt_tech
Member
|
# Posted: 3 Jun 2012 06:28pm
Reply
More interior flooring photos.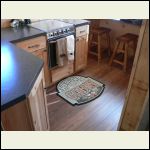
flooring_016.jpg
| 
flooring_022.jpg
| 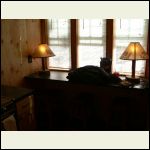
My home made rustic lamps.
| 
flooring_018.jpg
|
|
|
toyota_mdt_tech
Member
|
# Posted: 3 Jun 2012 06:32pm
Reply
At this stage, I'm technically done. But I will always find an improvement I can make. First one comes to mind is a cover to go over the 3 windows at the dining counter. I'd like a overhang to keep sun out when its high int he horizon (summer) and allow it in winter when its low, plus this is the weather side, ie wind and rain and it will better protect the windows. I would like to build it with an enclosed soffit, so no birds nesting, bees etc and same green metal roofing.
|
|
turkeyhunter
Member
|
# Posted: 3 Jun 2012 06:32pm
Reply
your cabin looks great!!!!!
|
|
neb
Member
|
# Posted: 3 Jun 2012 06:43pm
Reply
Very very nice!!!!!!!!!
|
|
SonnyB
Member
|
# Posted: 11 Jul 2012 10:28am
Reply
Looks great! 
|
|
tsvoyager
Member
|
# Posted: 19 Oct 2012 03:48am
Reply
Your bunk room looks like the bunks on the ship I was on in the Navy! LOL
Love the cabin and how you did it up. I'm looking for ideas and yours is close to what I'm looking for. Can you tell what kind of a price tag you have for materials for the shell?
|
|
toyota_mdt_tech
Member
|
# Posted: 19 Oct 2012 09:28am - Edited by: toyota_mdt_tech
Reply
TS voyager, I'd say I'm in it about 14K total. I sub'd out the concrete and metal roof. I did have expensive cabinets made by a good buddy for way less that retail. (7K, got for 2K all blue motion, made to look 100 yrs old, ie worm holes, dings etc)
Had a pro framer work with me on the build, paid him $40 per hour, on it 9 days for the shell. The price above is the total, ie permits everything and builders labor.
Concrete was 9 yards, it was 2800 for concrete guy, ie formed, rebar, inspection plus 900 for the concrete. So about 3700.
Lumber package was $5000 but I added more lumber, ie sheeted the entire attic space in plywood. I used NO OSB, all genuine plywood. Cut no corners, 2X6 studs.
(included in total price along with concrete)
I think if I'd contracted this out, it would of been 35-40K area guessing.
I pulled the permit myself. First time. Went real smooth. The county was great to deal with.
Interior is all sheeted in plywood, but only 3/8" thick. Attic plywood was 1/2" as was my roof sheating. Flooring was 3/4" T&G, nailed and glued. R19 in floors, ceiling and walls.
|
|
DaJTCHA
Member
|
# Posted: 19 Oct 2012 11:43am
Reply
I love your cabin! My only concern, and it this is my problem and not your's, is when you have a triple bunk (had one growing up with two brothers in a two bedroom condo) and then add a heavy snoring machine (that would be me) the bunk room isn't a place for rest and relaxation except for one (me)...Hope that isn't a concern with your arrangement!
Looking at your expenditures, isn't it amazing that with a little frugality, favors from friends and doing things yourself that you can have such a spectacular place for so little?!
When I think about our place and what we've spent and consequently saved...I'm all smiles! 
|
|
toyota_mdt_tech
Member
|
# Posted: 19 Oct 2012 12:07pm - Edited by: toyota_mdt_tech
Reply
Yes, on the snoring, but so far, no snorers, if they do, I make them roll on their sides. Snoring seems to only happen laying on your back. 
Lots of buds helping, the older you get, the more people you know in the business and yes, they all help you out. I had a regular crew of about 4 that woudl volunteer, they loved the place and loved working on it. Most freinds, one son in law. I completed it in about a year and a half. Would just make 2 to 3 long weekends with a small crew. All done in about 6 weeks total working time, but spread over a year and a half. It was fun, I'm at a bit of a loss now with nothing to do except small projects and I can make up. (enjoyed it so much)
|
|
TomChum
Member
|
# Posted: 19 Oct 2012 12:21pm
Reply
Quoting: toyota_mdt_tech I'm at a bit of a loss now with nothing to do except small projects and I can make up.
I hear THAT. I just keep starting more projects, I have about 3 rollin' & none finished. Not sure if this is good or bad, but pushing for done before snow. Your cabin looks great, do you have Fall pics?
|
|
stpauligirl
|
# Posted: 1 Nov 2012 10:25pm
Reply
Thank you, thank you, thank you!!! I've been waiting to see the inside of this cabin for years! Ever since I saw your exterior photos on Cherokee Cabin plan's web page, I've been dying to see what the inside of this cabin looked like!!
It is BEAUTIFUL! You did such a great job. It was worth the wait to see these photos!
I have to ask - I've often thought about modifying the floor plan to put a small bunkroom/bedroom where the kitchen is. Would a twin bed fit horizontally across the three window wall - where your dining space is located?
Again, just a great job. Thanks!
|
|
toyota_mdt_tech
Member
|
# Posted: 1 Nov 2012 11:12pm - Edited by: toyota_mdt_tech
Reply
Quoting: stpauligirl I have to ask - I've often thought about modifying the floor plan to put a small bunkroom/bedroom where the kitchen is. Would a twin bed fit horizontally across the three window wall - where your dining space is located?
Thanks for the kind words St Paul girl. Yes, a bunk would fit perfectly. In fact, the width is basically the length as a std mattress, same length as the bunk room (see my earlier post, ie floor plan). My bunks are 6'4" long, it would be the same length there too, so you coudl get another bunk in there and sleep 4 easily. You could rig up a flip down bunk under the dining counter. Make the dining counter flip up, then the bunk flip out. 
|
|
toyota_mdt_tech
Member
|
# Posted: 1 Nov 2012 11:17pm - Edited by: toyota_mdt_tech
Reply
I got a picture where I was there late April, getting ready to head home that AM and woke to a heavy snowfall. It made it a pain to pack my gear up as I had to sweep the snow off of everything to keep my borrowed trailer from getting all wet inside. I will borrow my buddys smaller trailer when I dont need to bring that much. I have a 7X16, it consumes more fuel to tow it.
Here is my snow picture. I had the fire going, so it was nice and warm inside.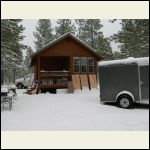
Suprise snowfall
| 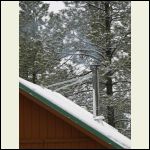
Fire burning
| 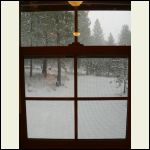
View from kitchen window
|  |
|
|
toyota_mdt_tech
Member
|
# Posted: 1 Nov 2012 11:21pm
Reply
Quoting: TomChum I hear THAT. I just keep starting more projects, I have about 3 rollin' & none finished. Not sure if this is good or bad, but pushing for done before snow. Your cabin looks great, do you have Fall pics?
Tom, my fall pix looks the same. All evergreens (ponderosa and doug fir) so it looks the same year round. Grass is greener in spring is all.
|
|
stpauligirl
|
# Posted: 2 Nov 2012 12:38am
Reply
what a great idea! well done - it is a cabin I've long admired!
|
|
toyota_mdt_tech
Member
|
# Posted: 25 Apr 2013 09:20pm
Reply
OK, its all but completed. I have been adding furniture and decorations. I only need to build some trim to trim out the crawl space trap door. I'm using flat bar, hammering on it to make it look like a blacksmight hammered it out. I will install it next trip.
I have some pictures of the finished unit. I just spent 5 days there and just got back today.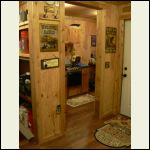
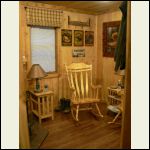
Looking from my chair to the kitchen
| 
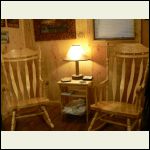
My spot!
| 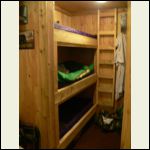
Bunks
| 
cabin_0413_015.jpg
|
|
|
toyota_mdt_tech
Member
|
# Posted: 25 Apr 2013 09:22pm
Reply
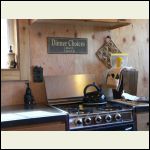
A few more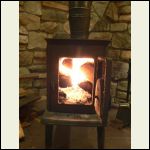
cabin_0413_016.jpg
| 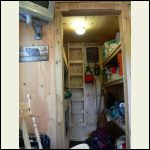
well stocked pantry
| 
Ham gear I set up there last visit.
| 
cabin_0413_005.jpg
|
|
|
toyota_mdt_tech
Member
|
# Posted: 25 Apr 2013 09:25pm - Edited by: toyota_mdt_tech
Reply
This was my first ever real construction project. I only sub'd out the foundation and metal roof. I did sub out the stove pipe install, because I didnt have time to do it at the time, so paid a pro to install the pipe. It was a blast, I picked up all the necessary tools to basically become a builder. I would like to build my final home, on the same 20 acres as my cabin, then it can be used as a guest shack and ham radio shack.
|
|
hattie
Member
|
# Posted: 26 Apr 2013 12:34pm
Reply
Beautiful work! Congratulations!!!
|
|
| << . 1 . 2 . 3 . 4 . 5 . 6 . 7 . 8 . 9 . 10 ... 17 . 18 . >> |

