|
| Author |
Message |
jeepv8pwr
Member
|
# Posted: 29 Sep 2013 06:14pm
Reply
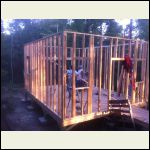
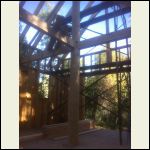
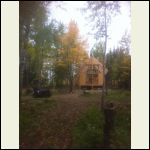
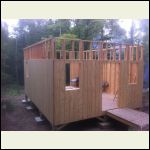
Here is my project so far. 10 ft. walls, 16x12 Loft with 3 foot knee walls. Local Tamarack Log Center Support for loft and continuing to peak. 8 ft. sliding glass door on one end. Undecided on how to route stairs to loft to maximize space on floor level. Also undecided on windows in loft area. What to use for flooring is also a decision Im unsure about. How to run wiring and where to put switches and lights, fans etc ? Roof will be on next weekend along with finishing walls, installing doors and windows on floor level. Then I am unsure about where to start? Who would recommend stain for exterior? I like to wood color. Any ideas or input on this project would be useful. Thanks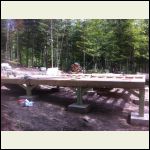
IMG_0761.JPG
| 
IMG_0797.JPG
| 
IMG_0912.JPG
| 
IMG_0930.JPG
|
|
|
jeepv8pwr
Member
|
# Posted: 29 Sep 2013 06:21pm
Reply
few more angles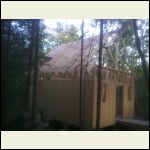
IMG_09051.JPG
| 
IMG_08421.JPG
|  |  |
|
|
redbeard
Member
|
# Posted: 29 Sep 2013 09:14pm
Reply
Looks good, I'm doin one similar. Good job, looking forward to your progress.
|
|
Nirky
Member
|
# Posted: 1 Oct 2013 12:17am
Reply
10 ft high walls leaving a 3 ft 2nd story knee wall means 7 feet downstairs but then have to have at least 6" for 2nd story floor so does this mean a 6 1/2 ft 1st floor ceiling?
I'm planning a similar 16x12 and love the 3 ft knee wall and am curious as to what you will actually have left for 1st floor height.
|
|
SFCLYNCH
Member
|
# Posted: 1 Oct 2013 06:44pm
Reply
Looking good. Ours is the same setup. Keep pics coming. Love the leave changing.
|
|
jeepv8pwr
Member
|
# Posted: 3 Oct 2013 03:15pm
Reply
Nirky there will be approximately. 7 ft. ceiling under loft and about 2 foot 3 inch knee walls after accounting for the 2x8 loft construction and flooring over that. I was hoping to have it over 3feet but this worked out better. It will still allow me a ton more space over 8 ft walls with no knee wall in loft area. I agree the colors are beautiful outside especially the maples. Just hope the snow holds off for a few more weeks, I see highs in the mid to low 30s for the weekend here in MN.
|
|
Nirky
Member
|
# Posted: 3 Oct 2013 05:54pm
Reply
Jeepv8pwr, it looks like a very cool cabin already. Sounds like you had a design in your head and you've done this before. I think the loft is going to be a special place.
|
|
OwenChristensen
Member
|
# Posted: 6 Oct 2013 08:18am
Reply
It may not look like it , but mine has a 2' knee wall too. It's only 12' wide so my center height is about 7' 6''. I have a full floor instead of a loft and a hinged ladder stair. The second floor is mostly for kids and sleeps five. They love the spot to play in on rainy days. Speaking of rain, sure nice to have a roof, Right?
Owen
|
|
|
jeepv8pwr
Member
|
# Posted: 7 Oct 2013 11:37pm
Reply
Well the rain pushed off the roofing project until next weekend. As of now I finished the walls from the 10 ft. point up to the peak on each end, framed in 24x36 windows. Started to put up purlins to mount roofing to, and did some much needed clean up and sweeping. This week sounds like its going to be much nicer than last. I will post some pics of the cabin with roofing on hopefully next week. Im debating doing the whole interior with tongue and groove but that would cost close to 1200 bucks. Anybody got any ideas or pictures of what they used? I looked into some 1x8x10ft. long t and g. I surely want to do the whole interior ceiling with t and g but am still debating what to do for the walls that would still look rustic and all. Sheetrock kind of sucks in my opinion. Any ideas? Im basically spending every penny I have on this cabin and could use some ideas that would cut some costs. How about wiring and lights any suggestions? recessed lights in ceiling or what? I have approximately $3700 into this cabin so far, that is everything to get it enclosed, doors, windows, insulation, sheeting, flooring, concrete, green treated lumber, nails, screws, etc. etc. I figured it would cost around $4500 total but the numbers are going up quicker than expected. O yeah, I am also in a dilemma with bow season upon us. I bought to land to deer hunt and am so preoccupied with this cabin I haven't even bought a license. Is there something wrong with me?? Guess their is always rifle season. Thanks for any input, I love this site. I am basing this cabin mostly on Marcs Canadian cabin on here, I seen it and fell in love. I did a few things differently but not much.
|
|
jeepv8pwr
Member
|
# Posted: 11 Oct 2013 10:20pm
Reply
Got purlins all up before thunderstorm tonight. One window installed. Bought new 14 ft green steel roofing that will hopefully be up tomorrow. Still lots to do but the light at the end of the tunnel is getting a bit brighter. Pretty scary day with 40 mph winds up toward the peak without a harness and nobody else around if I was to fall. Just tried to concentrate on the job and not look down too much. I will post pics tomorrow if I remember.
|
|
OwenChristensen
Member
|
# Posted: 14 Oct 2013 07:59am
Reply
Looks good. Boy will that be loud in a rain.
|
|
trollbridge
Member
|
# Posted: 14 Oct 2013 08:43am
Reply
Glad you didn't blow off the roof....winds were fierce!
|
|
jeepv8pwr
Member
|
# Posted: 6 Nov 2013 01:06am
Reply
Yup its kind of loud in the rain, like most steel roofs are.
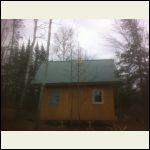
Got roofing on, cap installed, woodstove plumbed and hooked up, finished sheeting, installed windows, trimmed doors and windows, insulated walls, and am working on insulating interior of roof now. Deer opener is this Saturday so my goal was to be able to have a warm place to stay by then. I accomplished that, so after deer season comes interior projects. Insulating that steep pitch on the interior is not very enjoyable but its coming along. Not pretty yet but it will do for the winter or until the funds are replenished. Any ideas about doing the stairs to loft to maximize usable space on both levels?
|
|
jeepv8pwr
Member
|
# Posted: 6 Nov 2013 01:12am
Reply
a few updated pictures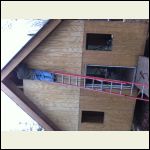
siding to peak
| 
first fire
| 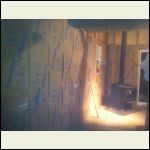
insulating
| 
ridge cap on
|
|
|
OwenChristensen
Member
|
# Posted: 6 Nov 2013 07:40am
Reply
I take a 2x6 and draw 10 deg. line every foot across them, nail a cleat of 1x2 under the line, then nail another 16'', 2x6 on end into it.
|
|
|

