| . 1 . 2 . 3 . >> |
| Author |
Message |
missouriboy
Member
|
# Posted: 14 May 2013 08:55pm
Reply
Okay, after reading many posts and dreaming for several years I have finally started my hunting/relaxing cabin. Here is a little about it. It is 12 x 24, 6 ft. of which is a front porch. The interior is 12 x 18 with a loft over the porch. I put it on posts so it is off the ground and set it up so it is about 2ft at one end and 4ft at the other. Mainly this height was so I would not have problems with skunks and groundhogs wanting to dig under it. I hired the framing done as I don't have time to do it and I don't think I could have done nearly as good a job as they did. I plan on doing all the rest myself along with my wife. The cabin will have power but no running water. I plan on heating with a an electric heater since I probably will not stay in it that often when it is real cold except during hunting season. I do have a well near the cabin so will have water. I am going to put some cabinets in it with a sink so we can use that with a water jug for simple cleaning and cooking inside. I will put a microwave and may thing about an electric skillet or something at some point. We also already have a barn and a picnic shelter with a campfire ring so can do some of our cooking there.
So far it is framed and I have the electrical done. Still to do is painting, insulation, sheetrock on the walls, add plugs and switches to the outlets, flooring, cabinets, etc. I will try to post occasionally my progress. Thanks for looking and for all the other posts for the many ideas to contemplate as I do this.
|
|
Swamphunter
Member
|
# Posted: 14 May 2013 09:39pm
Reply
Looks great! You going to put a railing around your porch?? Looks like it would be a fairly good tumble if not....
|
|
missouriboy
Member
|
# Posted: 14 May 2013 09:43pm
Reply
Yes. Waiting to paint first. Still trying to decide how we want to do it. My wife is worried it will block the view!
|
|
Purplerules
Member
|
# Posted: 14 May 2013 10:14pm
Reply
great looking cabin! Lots a fun ahead...
|
|
Popeye
Member
|
# Posted: 14 May 2013 10:26pm
Reply
I've seen were people have used plexiglass between the posts in order to preserve most of the view. Nice place by the way.
|
|
countryred
Member
|
# Posted: 14 May 2013 11:02pm
Reply
Very cool design, what part of Mo?
|
|
missouriboy
Member
|
# Posted: 15 May 2013 05:12pm
Reply
Thanks for the comments. I am in Central Missouri near Truman Lake.
|
|
countryred
Member
|
# Posted: 15 May 2013 06:59pm
Reply
Cool, great looking cabin.
|
|
|
MJW
Member
|
# Posted: 15 May 2013 07:14pm
Reply
The Lake of the Ozarks area is beautiful.
We almost bought a place there in Ivy Bend a couple of years ago. No high speed internet connection is the only thing that stopped us. We both work from home and must have it. 
|
|
missouriboy
Member
|
# Posted: 19 May 2013 01:49pm
Reply
So yesterday my wife and I went to the cabin to paint it. Not sure if everyone else is as bad as I am at this, but I always underestimate the amount of time I think a project will take. As we were driving down we discussed how long we thought it would take to paint it. 12 x 24 is not that big. It shouldn't take more than 5 hours, right? Visions of getting a few more things done while we were there crossed my mind. Needless to say, 8 hours later and totally exhausted we were finished. The picture above is before painting. Here are a couple pictures after painting.
|
|
knock
Member
|
# Posted: 19 May 2013 07:44pm
Reply
The paint looks good, I like the color choices.
Did you do the roofing yourself or hire that out? If you did it yourself was it hard and where did you purchase the material.
|
|
missouriboy
Member
|
# Posted: 19 May 2013 08:57pm
Reply
Thank you. The crew that framed it put the roof on. I watched them do it and it really did not look that hard. They waited until it was framed and I had decking and roof felt on it. Then they measured so the metal roof came to the correct dimension. We ordered it from the local lumber yard. It took about a week to get it. Basically they just started at one end and worked their way across then did the other side and added the cap across the top. They just made sure all the screws were put in the same place across it so it looks nice.
|
|
missouriboy
Member
|
# Posted: 29 May 2013 07:34pm
Reply
Over the Memorial Weekend we got insulation added to the walls and floors, painted the front door and added a ceiling fan and porch light on the porch. Of course the power is not turned on to them yet. I only have one outlet powered up in the cabin now. Once I add sheet rock to the walls I will power everything up. Still lots left to do and time to work on it is going to be harder to come by in the next few months. We would like to get the sheet rock on the walls before long to power everything up and make it a little easier to spend the night.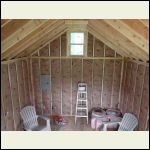
Wall insulation
| 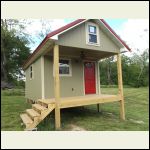
Painted door
| 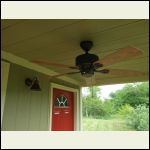
Ceiling Fan
|  |
|
|
trollbridge
Member
|
# Posted: 29 May 2013 10:38pm
Reply
Welcome!
Your painting efforts were well worth it, your place looks fabulous! I like your red door. 
We always underestimate how long projects will take too. Oh well 
|
|
Kudzu
Member
|
# Posted: 30 May 2013 05:03am
Reply
Looks great, you will enjoy the ceiling fan, I know I do.
|
|
missouriboy
Member
|
# Posted: 9 Jun 2013 01:14pm
Reply
After another long day we got the walls covered with Sheetrock. Once again I underestimate the time. My mind is faster than my physical abilities. Kind of like good food, my eyes are bigger than my stomach! Unfortunately, it will be at least two weeks before we can get down there again. That weekend my goal will be to get the outlets and switches wired up so we will have power throughout and the inside ceiling fan installed. Surely I can do that in 4 hours, right?
|
|
countryred
Member
|
# Posted: 9 Jun 2013 01:31pm
Reply
I think its like firewood. It always takes 5 times more than you think, or 5 times longer.
About 10 minutes per box. Much longer for the fan.
|
|
missouriboy
Member
|
# Posted: 9 Jun 2013 01:54pm
Reply
Let's see, 17 boxes plus a ceiling fan, that equals 4 hours, right? ha. I'm figuring a couple of hours each, boxes and fan. We'll see. I'm not the fastest when it comes to doing this stuff, or I should say if there is anything at all that can slow you down I will find it. Pliers, oh on the other side of the room, wire nuts, oh in that box over there, and so on. It's still all good, get to enjoy the outdoors.
|
|
turkeyhunter
Member
|
# Posted: 10 Jun 2013 08:17am
Reply
fine job on the cabin looks Great!!!
|
|
missouriboy
Member
|
# Posted: 24 Jun 2013 05:56pm
Reply
We went to the cabin this weekend. Got all the sheetrock taped and mudded. Also got all the electrical outlets and lights wired up. Still need to hang the ceiling fan. Kind of did all this between mowing. We have about 10 miles of paths we keep mowed. We have had so much rain this year, which is good, that the grass has gotten ahead of me. I had mowed the paths once in mid May and had not had time to do it again until this weekend. Some of the paths had grown so much you could not even tell I had mowed once. It was good weekend. I feel like we got a lot done.
|
|
missouriboy
Member
|
# Posted: 7 Jul 2013 06:39pm
Reply
Weekend update. We got the ceiling insulation done and the ceiling fan and lights put up. We plan on getting Beetle killed pine in Colorado this fall to put on the ceiling and to use for trim around the floors and windows. Still have the a lot left to do but we are making progress.
|
|
missouriboy
Member
|
# Posted: 11 Aug 2013 07:26pm
Reply
I made a small coat rack for the cabin. This is the first piece of "decorating" I have done. Still have a lot to do to finish the cabin. The wood is beetle killed or blue stain pine I got while on vacation in Colorado. Planning on going back in September to get more for the ceiling and all the trim in the cabin.
|
|
neb
Member
|
# Posted: 11 Aug 2013 08:23pm
Reply
Looks very nice and the dream a has come true. Well done!
|
|
missouriboy
Member
|
# Posted: 1 Sep 2013 08:44pm
Reply
This weekend my wife and I put in our reclaimed pine hardwood floors. These floors came out of a house a friend was tearing down that was over 100 years old. So it was a lot of work tearing them out of the old house, cleaning them somewhat prior to putting them down and will be a lot more work sanding them and sealing them. It will take a lot of sanding as they have some variation in thickness and some of the cracks are not as tight as I would have liked but at the same time I kind like the rustic look I think it will create.
|
|
missouriboy
Member
|
# Posted: 6 Sep 2013 09:15pm
Reply
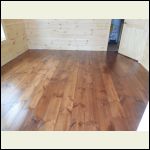
This week I went to the cabin and sanded the floors and put a semi gloss varnish on them. The sanding was much more time consuming than I thought. Mainly this was because these are recycled floors and there was more variation in the thickness of the boards than I thought. So it took a lot of sanding to get most of the old varnish off. I say most as you can see in the picture. But I figured that would add to the rustic look of it along with some gaps in the boards. Anyway the second picture is with two coats on. I added a third coat but left before it was dry enough to be able to get a picture.
|
|
missouriboy
Member
|
# Posted: 6 Oct 2013 04:39pm
Reply
This past week my wife and I got the Beetle killed (or blue stain) pine tongue and groove installed on the ceiling. We are going to use it also on the floor of the loft area and also for all the trim around the windows and baseboards. I also have one picture of the ladder I made to get to the loft. I wanted it to be against the wall to use up less floor space. Being vertical it is a little harder to climb but it is sturdy and made out of 2 x 6.
|
|
MJW
Member
|
# Posted: 6 Oct 2013 05:46pm
Reply
Nice work. I really like the look of that blue wood.
We used our T & G for all of the interior as well as the flooring (turned over) and ripped it to use on all the window & door casings, too. It worked well.
We also ripped it up and used it for the loft railings and to side the pump house/solar shed. None of it was wasted! haha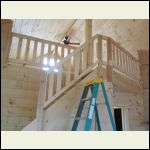
Loft Rails
| 
Shed
| 
T & G Used for Flooring
|  |
|
|
rockies
Member
|
# Posted: 6 Oct 2013 06:40pm
Reply
Hi, I'm trying to understand how you got the loft stairs in? I see a front door and a window on one end with the loft above them jutting out over the porch. Did you put the stairs there, or build a second loft at the other end because I don't see the red door in the loft stair picture? Also, how did you ventilate the roof?
You can get railing systems that have glass panel inserts at a big box hardware store (42" high by code if you are more than 18 inches off the ground). Some systems can be ordered that have a tempered glass panel bolted to the side of the porch deck and don't need posts or railings touching them at all.
|
|
missouriboy
Member
|
# Posted: 6 Oct 2013 08:30pm
Reply
MJW, That looks awesome. Your cabin looks very inviting.
|
|
missouriboy
Member
|
# Posted: 6 Oct 2013 08:36pm
Reply
Rockies, I'm not sure I understand your question. The ladder between the door and window are what you climb to get to the loft that overhangs the front porch. There are no stairs. It is pretty tight up there as I only have an 8/12 pitch but it will be mainly for storage or an extra sleeping area. Can't stand up in the loft, only sit up.
|
|
| . 1 . 2 . 3 . >> |

