| << . 1 . 2 . 3 . 4 . 5 . |
| Author |
Message |
RnR
Member
|
# Posted: 18 Sep 2011 10:57pm
Reply
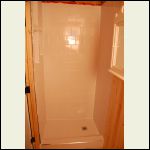
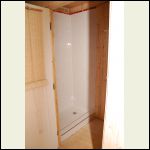
As for the size for the shower, it is about 23 inches by 39 inches (interior size). R used cement board, cement screws. Make sure you get the right mortar for a shower floor, which you shape with a slope towards the drain. The shower will of course drain into the new drain pit, as well as a little sink that will go under the mirror, which was given by a friend and which I painted white. The composting toilet is going on the other side of the washroom. Water will come in shower bags or some other vessel because of course there is no running water, but just the ability to shower indoors will be awesome.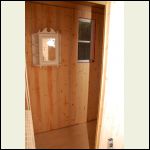
bathroom1.jpg
| 
bathroom2.jpg
| 
bathroom3.jpg
|  |
|
|
RnR
Member
|
# Posted: 18 Sep 2011 11:01pm
Reply
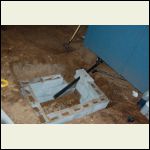
photos of the drain pit and shower. The old drain pit is in the upper left corner of the photo. It was lined with logs and was caving in, but it did last a good long time though since I think it was built in the 80's. The new drain will be about 26 by 42 inches (interior), R is using 3 rows of 10 cinder blocks that are 6x8x16 inches that will be dry-stacked. And then for the cover, there will be 3 pieces of 2x4 pressure treated lumber to support two 24x30 inch patio stones. The bottom of the pit will be 6 inches of gravel, and the top should be topped off with 6 inches of top soil.
|
|
dk1393
Member
|
# Posted: 19 Sep 2011 07:02am
Reply
Love the color of the camp, The shower looks really nice.
|
|
hattie
Member
|
# Posted: 19 Sep 2011 12:48pm
Reply
Your place is looking great. I love the bathroom cabinet!!
|
|
Montanan
Member
|
# Posted: 19 Sep 2011 03:21pm
Reply
Looks great! I love the color of the cabin and the bathroom is coming right along. Did you tile the shower, or is that an insert?
|
|
RnR
Member
|
# Posted: 19 Sep 2011 04:31pm
Reply
Thanks everyone! It's real porcelain tile, just plain white, the least expensive you can buy, laid out in a brick pattern, and the walls were all built from scratch with quality cement board. This was built to last, so that it could withstand usage and temperature differences and not need to be redone anytime soon. It was R's first tiling job ever after watching countless bathroom reno shows and asking for advice in-store, and using nothing more than a hand tile-cutter. If he can do it, you can too!
|
|
bugs
Member
|
# Posted: 19 Sep 2011 05:51pm
Reply
Hey RnR
Thanks for the updates. The shower/bathroom looks absolutely terrific. How much capacity do you think your drain pit will have? (ie how fast will the grey water run/seep away... (Hopefully it runs away from the cabin and not under the cabin!!!) Will the setup work during the winter?
Great colour for the cabin. It blends into the shadows but doesn't. It fits into the surroundings.
I looked back over your posts. Your first images of the cabin and interior were so dark, gloomy and dank.... A person could almost smell the mold and mildew. The "new" cabin is so incredibly bright, cheery and welcoming. You should both be very proud of what you have accomplished in such a short time.
Hope you are not too concerned about the bear. If there were no bears and other wildlife around, the place would not have the same wild feeling that is part of being at the cabin..... too sanitized.
|
|
RnR
Member
|
# Posted: 25 Sep 2011 11:19am
Reply
Hey Bugs! great to hear from you, sometimes I feel like we're old friends since we've been following eachother's projects from the beginning. Without the small-cabin forum gang, life would not be the same.
Anyhow, you are supposed to perform a percolation test to determine your soil's drainage capacity which influences the size the of the pit, but we didn't bother because everywhere we have dug we find nothing but sand and rock, so our soil is as porous as it gets and I know it drains like you would not believe. This corresponds to a class 2 sewage system in Ontario for instance (you can find instructions for this if you google that), suitable for any dwelling that does not have a pressurized water system (connected to a municipal water system), and produces under 1000 litres of greywater per day. This will be more than enough for our needs. We based it on the instructions and plans from the book Cottage Water Systems. Since we don't even have running water this system is overkill, but it is built to last and can accomodate future expansion. This is not an expensive poject. R estimates this ran about 80 dollars for the 30 blocks and two large patio stones, we got the rocks for the bottom of the pit for free from our own property (sifted from the sand we dug out, we had to find some way to use those rocks), and maybe nother $40 for pipes. We got the sink for free, it was salvaged from the town dump before it closed. It is actually really difficult to find sinks that small at the hardware store so I feel that we really scored there. This project mostly consisted in lots of digging and transporting the blocks ten at a time to not overload the vehicle. Photos to come!
About the bear, we're just going to be extra careful with garbage. I just know that lots of people in the hood are really spooked.
|
|
|
RnR
Member
|
# Posted: 25 Sep 2011 11:34am
Reply
the drain pit photos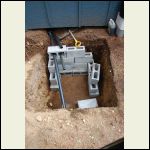
loosely stacked to make sure everthing fits right
| 
almost done, make sure first run is level and the rest will be fine
| 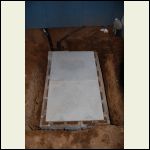
capped off with large patio stones
|  |
|
|
RnR
Member
|
# Posted: 25 Sep 2011 11:44am
Reply
more cabin photos. As you can see the front eaves still need to be reaplaced, we have the lumber for it, just a matter of doing it, and that will make a dramatic difference.
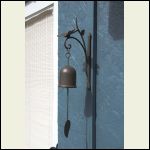
I found an amazing dragon fly bell at a country store, I think it gives the place a lot of personality. The sun face at the peak is something I found at homesense 2 years ago for $10 and it finally got installed on the cabin now. I thought another cool thing to put up at the peak would be one of those outdoor garden clocks you see at garden centres, that could really look great especially with a higher peaked roof.
I repaired and painted the old front door as best as I could. It now has a new doorknob and a proper deadbolt instead of a padlock. It sort of looks a lot less like a large garden shed and more like a little house to me now that is actually loved by its owners.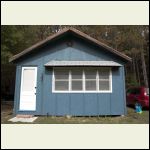
front view
| 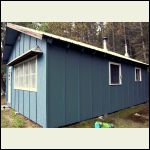
perspective view
| 
ring my bell
| 
close up of sun
|
|
|
hattie
Member
|
# Posted: 25 Sep 2011 12:32pm
Reply
I love the little bell. You've done a great job on your place. It looks wonderful!!!
|
|
neb
Member
|
# Posted: 25 Sep 2011 12:58pm
Reply
Looks very nice and you have a great place.
|
|
RnR
Member
|
# Posted: 24 Oct 2011 11:18am
Reply
Thanks for your feedback... attached are final pics of the drain pit being covered up. R sprinkled pine needles over the area and it looks like nothing ever happend. The mound of earth was just enough to fill the old drain pit and cover up the new one. One month ago I let the municipality know about the new pit before it was completed and they said they would look at it that day and get back to be if there was a problem and they never called me, so I figure all is fine, there is no reason why it wouldn't be. Shower and sink are working perfectly.
Bear update: he has not been seen in at least 3 weeks.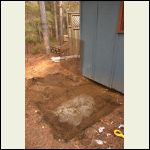
in the process of covering up the drain pit
| 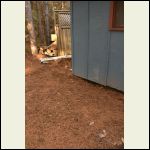
like nothing ever happened
|  |  |
|
|
RnR
Member
|
# Posted: 24 Oct 2011 05:19pm
Reply
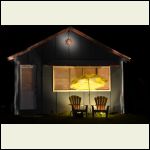
just a few nice photos R took with his new fancy camera special lighting effects.. the cattails look especially interesting... last two are tiki lanterns in front of the stream area.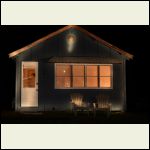
_DSC1179.JPG
| 
_DSC1182.JPG
| 
_DSC1207.JPG
| 
_DSC1209.JPG
|
|
|
RnR
Member
|
# Posted: 2 Mar 2012 02:13pm
Reply
I'm just throwing a winter photo out there. This camera angle makes the snow bank, which is pretty high, seem even more impressive.
|
|
Sustainusfarm
Member
|
# Posted: 8 Jul 2012 08:42pm
Reply
RnR...just read through your thread....nice stuff! My partner and I have a place in Central Wisconsin that we have been building for the last 17 yrs....NOPE it is still not done! Our thread is under Central Wisconsin Build....thanks for inspiring us to keep going to the finish line. DnJ 
|
|
RnR
Member
|
# Posted: 17 Sep 2012 02:17pm - Edited by: RnR
Reply
Thanks DnJ and everyone else who has been so inspiring.
I thought it was time for a further update. We upgraded the kitchen with Ikea cabinets and I figured out how to pump water from the stream. We had to move the countertop to extend the flooring underneath as it substantially strengthens the sagging floor, so it was the best time to do a revamp of the kitchen.
There was already a 1.25 inch pipe going to the stream so all I had to do was buy the pump and the proper connectors and adjust it to connect a pump. It was near impossible to find information on this type of installation on the Internet, so if anyone is looking to do something similar I recommend you go to a water pump specialist in your area, in addition to reading the info below.
I got this pump, a Monarch which was made in Winnipeg, Canada from a small hardware store in Northern Ontario who still had some of these left, as they were discontinued in the 80's. If anyone wants contact info for one of these let me know. On the internet and elsewhere you can still find these listed as cistern pumps, such as on the Home Hardware web site. I elected to buy a Monarch because I have childhood memories of these, plus they have a nicer finish than a lot of the ones currently on the market that are made in China. Also, a lot of these are now open spout, and I prefer the closed-spout look. You may be thinking that iron rusts, and yes it does, and these pumps will rust for a while however I am told that they eventually form a calcium-like scale and they will eventually stop rusting or it will be substantially diminished.
I painted it blue myself with Tremclad Medium Blue rust paint.
Their installation has dropped off in recent years as most cottages have electricity and therefore install electrical pumps with a full water-distribution system but they are still in usage in lots of older cottages. I have found replacement parts and fittings in all the hardware stores I have been to in my area, or they can be ordered online or bought at specialty water pump businesses. The piping, sold in rolls of 100 feet, and adaptors were all easily found at hardware stores as well. You basically need one 1.25 (inch and a quarter) screw adaptor, and two elbows.
Their capacity is 25 feet vertical, however substract 1 foot of pull for every 50 feet of horizontal distance. The stream is about 60 feet away, with a drop of about no more than 10 feet altogether (remember to consider that it's also sitting 3 feet above the floor). You will need a foot valve (photo below) at the intake which keeps the water from spilling out of the pipe when not in use so you don't have to re-draw water from the start point. It is a good idea to relax the spring in the foot valve because these are mostly designed for powerful electric pumps today.
We absolutely love this water pump and it has changed the functionality of the kitchen. Whenever someone comes to visit they want to try it and are fascinated with it.
In terms of installation tips, I would say make sure you get proper screws to secure the base that will go right through the countertop with washers and locking nuts on the bottom for extra stability. Also, spread caulking along the inside of the hole in the countertop before installing it so that if water ever leaks through, your countertop (presumably made of wood or particle board) won't soak up water like a sponge. Also, caulk along the base of the pump where it meets the counter to avoid water seeping underneath and rust on the underside, and of course use teflon tape on the threading and hose clamps at the tension seals. Have a set of replacement gaskets and other parts (usually sold in a kit, not expensive) on hand for eventual replacement. These parts, like the washer and leather seal, eventually wear out and need replacing. Removing them before they freeze will prolong their life to a couple of seasons but some people replace them every spring for optimal performance. Take the pipe out of the water before the winter, and remove and store the foot valve.
If the pump has not been in use for a while, you may need to "prime" it, which consists of pouring water into it from the top so that it has a bit of water inside the cylinder to get some pull. it is not unsual to do this and have to pump 20 to 30 pumps before you get it going again if it hasn't been in use for a couple of days. After this, the pipe stays filled with water and just a few pumps are required to draw water.
I have been told by a pump expert that these pumps can be used during the winter in a heated dwelling as long as the intake and the whole pipe are buried below the frost line, and you have to remove the foot valve as well for winter use so that all the water drains out between uses. It would have to be buried at least 4 feet under a drive or walkway where the snow gets removed, and you can probably get away with 2 to 3 feet anywhere else.
If anyone has any questions please let me know, would be glad to respond.
Otherwise, the composting toilet is connected and working (hallelujah!) and we also fixed the roof, photos and advice to come.
All the best!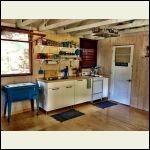
new Ikea kitchen
| 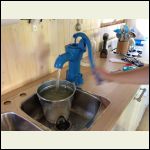
Cistern pump for running water!
| 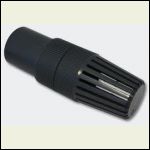
standard foot valve
|  |
|
|
bugs
Member
|
# Posted: 17 Sep 2012 03:51pm
Reply
RnR
Isn't great when things work!!!!
Thanks for the update. The place is really looking wonderful.
We had one of those pumps on the farm to pump water to the sink from the cistern. It is now being used as a water feature in our back yard.
I suspect our water lines would have to be a tad deeper in SK to get below the frost . .
|
|
RnR
Member
|
# Posted: 17 Sep 2012 04:21pm - Edited by: RnR
Reply
Hey Bugs! great to hear from you, love the nature photos you keep uploading. Yes, there was definately a moment of jubilation and "OMG its working!" after months of sourcing parts and figuring out how to make it all fit together and hoping it would work, especially AFTER we drilled a hole in the countertop. I think this pump is a great solution for off-grid cabins for domestic water for washing if you have access to a stream or river. I love solutions that are simple and robust without over-engineering everything. It's shocking how little drinking water you need once you have water for all other uses. It's pretty much easier for us to bring our drinking water from home, or refill a jug at a potable water-station in the municipality. I was kind of disappointed that the book on cottage water systems didn't discuss these pumps in any real manner.
With regard to winter use, if we were to spend a stretch at the cabin it would be great but it would be quite the job given our rocky soil to go down 4 feet. At least we can use it from April to October, maybe longer due to global warming...
Glad you're keeping well!!
|
|
hattie
Member
|
# Posted: 18 Sep 2012 03:10am
Reply
LOVE your place!! The pump looks amazing. It is a lot like the old Beatty pumps from wayyyyy back. *S* Your kitchen is beautiful! Keep the photos coming!!
|
|
trollbridge
Member
|
# Posted: 18 Sep 2012 03:48pm
Reply
Agreed! The pump looks great as does the whole kitchen!! Is your floor plywood that you've finished off? It looks good! Yay for IKEA...always a fun store to visit!
|
|
RnR
Member
|
# Posted: 18 Sep 2012 05:38pm
Reply
Thanks Hattie and Trollbridge!
In response, yes, it is plain 5/8 inch birch plywood that has been screwed down and finished with 5 coats of semi-gloss water-based floor vanish. It looks awesome in real life in a rustic kind of way, and cleans up great. It's an inexpensive way to have a wood floor while at the same time reinforcing a bouncy floor. I would say it is of about medium toughness, it will dent when hit with really heaving objects, but every day walking, dropping a utensil or moving chairs or tables is not a problem. The price of these sheets seems to vary a lot, but figure around $50 each.
If anyone wants to duplicate this, just know that you need at least 4 to 6 coats or more of varnish and it will likely be necessary to sand a bit after the 1st or 2nd coat to knock down some roughness. I don't recommend a mat finish, it doesn't seem to protect as much. No need to get full-gloss, semi-gloss is plenty glossy, unless you want a real mirror finish. I used a roller and a varnish brand that claimed it offered ultimate diamond strength protection and was "super fast drying"; I could recoat between 2 and 4 hours later, and I wasn't cheap with my coats. Also when laying down the plywood, make sure you stagger them to not have continous seams.
All the best!
|
|
beachman
Member
|
# Posted: 18 Sep 2012 06:24pm
Reply
Great set up for water. We have he exact same plans that I hoped would be operational by now. Also, we put in the same drain pit and expect it will work fine. Looks great and appears to work fine as well. Love it!
|
|
TomChum
Member
|
# Posted: 19 Sep 2012 01:21am - Edited by: TomChum
Reply
Quoting: RnR It sort of looks a lot less like a large garden shed and more like a little house to me now that is actually loved by its owners.
Looks great RnR.
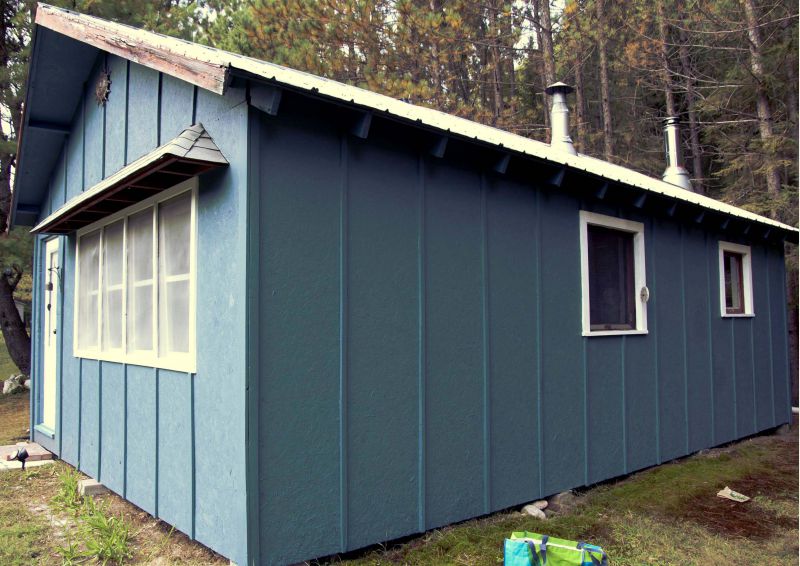
Idea: it would be easy to add a couple battens between each of what you've got and it will look like classical Board and batten. And you can put a band at the base too. If you like B&B (which its obvious that I do).
|
|
RnR
Member
|
# Posted: 24 Sep 2012 10:28am
Reply
Thanks Beachman and Tomchum;
I totally agree Tomchum, board and batten is in the future plans. It looks great and is cost-effective. I used an opaque or solid stain to just give the place a facelift and also protect the exterior in the meantime. I initially wanted something a bit more blue, but the grey ton in this blue is nice as well. We just fixed the fascia board at the peak of the roof on the front as well, need to post a pic of that, I can't believe the difference that made. We used pressure-treated lumber which I also stained the same colour for hopefully some extra durability. One of the 2x4's behind it was also rotten out and it was also replaced with pressure-treated. The rest of the structure is sound which is nice to know.
Putting some kind of substantial 2x6 horizontally accross the "foundation" would also make the cabin look more solid. I'm also conflicted about whether or not to put a window in the front or keep it open as a screened-in porch.
|
|
trollbridge
Member
|
# Posted: 24 Sep 2012 10:40am
Reply
Quoting: RnR I'm also conflicted about whether or not to put a window in the front or keep it open as a screened-in porch
I vote for the screened porch! We absolutely LOVE ours! How were you thinking about doing it?
|
|
2BarA
|
# Posted: 26 Sep 2012 01:54pm
Reply
R&R--I love what you are doing with your cabin. You think like I do.
Love the shower--reminds me of how I used to shower many years
ago. Sounds like you are having fun with this little piece of heaven.
Good for you! Enjoy.
|
|
In the Hollow
Member
|
# Posted: 2 Jun 2014 12:40pm
Reply
RnR I have been looking for the perfect size kitchen for my cabin, I think I found it! I love your place!
|
|
| << . 1 . 2 . 3 . 4 . 5 . |

