| << . 1 . 2 . 3 . 4 . 5 . >> |
| Author |
Message |
RickandRandy
Member
|
# Posted: 30 Mar 2010 02:25pm
Reply
Sanford & Son... oh the memories... Good point Larry.
|
|
ericdj
Member
|
# Posted: 2 Apr 2010 12:57pm
Reply
Let's just say it's LESS deep.... { ;o)
|
|
bugs
Member
|
# Posted: 20 Apr 2010 10:19pm
Reply
Hi R and R
We came across an interesting "drink" at a little SK resort we stayed at over Christmas: hot buttered wine--- glass of Merlot or equivalent (my wife is a superior home wine maker so we use her latest vintage of chokecherry or saskatoon berry wine) an dollop of butter and an ounce of good Cdn maple syrup (have to adjust the last two to taste) warm until the butter melts and serve.
Very enjoyable in front of the fireplace on a cold/cool winter/spring evening.
All the best
bugs
|
|
SmlTxCabin
Member
|
# Posted: 23 Apr 2010 02:46am
Reply
Love your cabin...It is looking great. Can't wait for more pics!
|
|
waldenpond
Member
|
# Posted: 4 May 2010 11:39pm
Reply
LOL..okay have a question (love the upside down shower). i am re-doing a small bathroom off grid. i can use a bucket, did that plenty. but can see others complaining no shower. how would one set up a decent size shower and how would it be drained (water). i need some ideas. the room is very small.
|
|
RickandRandy
Member
|
# Posted: 5 May 2010 10:35pm
Reply
Thanks SmltxCabin!
Bugs: the drink sounds oddly yummy, like perfect mix of fat, sugar and alcohol! must make you feel all warm and fuzzy :-) thanks for sharing.
Waldenpond: there are a few options. Our ultimate plan is to install an actual shower stall in the bathroom, there are many very small ones at hardware stores; we would install a drain at the bottom that leads to our drain pit / leach field (which we need to redo, the town inspector said he would show us how to do it). We would use solar shower bags from Canadian Tire, since we don't have plumbing, but do have a water source.
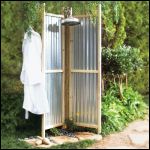
Another alternative for summer use only, which is actually our next project, is an outdoor shower arrangement using those same shower bags. You would build a sort of a shower enclosure out of pressure treated lumber of your own design. I would put a large flat stone in the centre surrounded by pebbles for drainage and runnoff. We used those shower bags under a tree last weekend and they are truly awesome. They are sold at all kinds of camping supply stores. The water is heated by the sun. Again for either of these solutions you need a water source of some kind. We even got a small propane water heater so we could heat water that way also to fill the bags.
I've attached some photos found online for ideas. Let us know what you think,
all the best with your projects, love seeing your pics as well!
R&R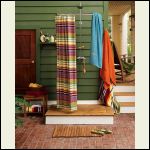
outdoor_shower.jpg
| 
shower.jpg
|  |  |
|
|
bugs
Member
|
# Posted: 6 May 2010 09:08am
Reply
Ummm Hope I am not dating myself too much but the more elderly of the readers will remember the shower they had on the tv show Green Acres. Liza looked very lovely in it. Come to think of it there is a lot on Green Acres that the members here are trying to recreate!!! Sadly my building skills are akin to Oliver's porch railings.
|
|
MikeOnBike
Member
|
# Posted: 6 May 2010 04:27pm - Edited by: MikeOnBike
Reply
Uh, yeah I remember that scene, er uh shower.
R&R, really like your kitchen makeover. I also like the tongue/groove pine but it has been expensive around here. Might go with 1/4" luan panels. I really don't want sheetrock.
Here is our solar shower. Something I tacked together from extra deck lumber. I didn't have anything to use for the windscreen so I pressed and old piece of light canvas into service. At some point this will be moved to a more permanent location and rebuilt.
We don't have a cabin yet, just a small tent but we do have the shower. Priorities!

|
|
|
RickandRandy
Member
|
# Posted: 6 May 2010 07:10pm
Reply
Hey Bugs, I actually remember Green Acres playing on French stations up here (Arpents Verts) when I was a kid, and I do remember watching a few episodes... but I don't remember the shower scenes... I was more of a Gilligan's Island child I guess...
Very ingenious MikeonBike! it just goes to show that you don't need a ton of materials to make something functional, and yes, showering is a priority!
Thanks for the kitchen comments. We actually got that pine stuff on sale at the RONA hardware store, it cost about $300 for enough to (hopefully) do the whole cabin. It was B GRADE, which explains the price, they have lots of knots, therefore you must sort through them to place them strategically. Hopefully you could find some on sale also if you want that, but I'm sure whatever you use will look great, and I agree on avoiding using sheetrock if possible.
We're off to the Cabin this weekend to hopefully do a whack of work and finish the interior walls and painting. Its supposed to be a rainy weekend so it will be perfect for staying in and working. Wish us luck...
Keep us all posted!
Rick
|
|
RickandRandy
Member
|
# Posted: 11 May 2010 11:22am
Reply
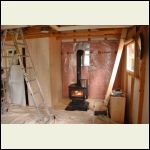
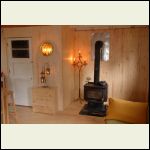
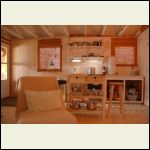
Well we got another whack of work done. It was a cold wet weekend and it even snowed! so it was perfect for just staying in and working. 50% of the walls are done, and the ceiling has been completely painted with primer, while it could use an extra coat of paint, I will get back to that another time and we're both going to just focus on the walls. It is amazing how a white ceiling changes the whole atmosphere, it feels alot brighter and the ceiling even seems higher. And finishing the wall behind the wood stove is a dramatic change because it's the wall you tend to look at a lot.
We also got 2 amazing battery LED lights that I mounted under the bottom kitchen shelf to light the workspace and stove. They are super bright and really do let you see what you are doing at night. They were $9.99 each at the hardware store and use 3 AAA batteries. I highly recommend them. Also got an extra kitchen cart from Walmart for $99 which is beside the stove. The cabinet doors are still being repaired and painted.
For the first time we actually see a finish line with the major interior work.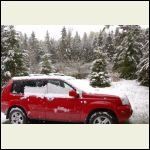
snow in May... who would have thunk.
| 
working away
| 
wood stove area done
| 
View of the kitchen. Notice the LED lights under the shelf.
|
|
|
dk1393
Member
|
# Posted: 11 May 2010 11:42am
Reply
Nice job, It's looking really good
|
|
MikeOnBike
Member
|
# Posted: 11 May 2010 06:49pm
Reply
R&R,
Is that tongue/groove boards on your wall or some kind of paneling? I like the look and have wondered if the boards need something more than support at the top and bottom of the wall but it doesn't look like you put up any kind of backer for them.
Love the way your cabin is coming together.
Michael...
|
|
RickandRandy
Member
|
# Posted: 11 May 2010 08:06pm
Reply
Thanks DK!
Micheal: it is indeed tongue and groove, and if you look at the kitchen pics earlier in this thread you'll see the wood one by ones used as bracing at every quarter length which are screwed into the 2x4's. You can use more or less bracing, but I think it would be prone to breaking if there were less and someone were to lean against it. In some areas Randy used extra 2x4's inside the wall studs as braces inside the walls instead of the one by ones. As I mentioned earlier, the paneling was grade B, so it was cheap and there are lots of knots, and it is time-consuming to cut them (with a hand saw cause we got no electricity) and lay them all in one at a time, but it does look very authentic. I am whitewashing and varnishing them with a latex varnish as well because I don't like how natural wood seems to go yellow over the years, and the whitewashing makes it look more finished as well. We also use a sort of stapler that shoots finishing nails to nail them to the braces. Let me know when you start something similar!
|
|
MikeOnBike
Member
|
# Posted: 14 May 2010 11:55pm
Reply
I would think that a clear coat like Minwax Polycrylic would prevent the yellowing but I haven't used it on pine.
|
|
RickandRandy
Member
|
# Posted: 18 May 2010 04:41pm
Reply
Got another wall insulated, vapour-barriered, and finished ... getting there...
|
|
dk1393
Member
|
# Posted: 19 May 2010 08:02am
Reply
Your place is looking really nice. I like the white ceilings. It seems to brighten it up a lot.
|
|
RickandRandy
Member
|
# Posted: 21 May 2010 03:36pm
Reply
Thanks so much dk1393. It really has made the atmosphere so much lighter. Worth all the work, for sure.
|
|
bugs
Member
|
# Posted: 23 May 2010 02:13pm
Reply
Hey R&R
Red sure looks striking against fresh white snow!!!! Hopefully you won't have to face snow again for awhile.
Great job on your place. Can't believe the difference between your first pictures and now. Are you planning anything for the exterior? Or is it time to sit back and enjoy the place?
I was wondering how your water filtration system is working out? It sounds like something that we may be able to use at our place. Sure would be great not to have to haul gallons of water just for washing.
bugs
|
|
RickandRandy
Member
|
# Posted: 24 May 2010 11:24pm
Reply
Hey Bugs!
Thank you very much,
Well we thought we had a plan for the exterior but I find as you go you start to re-evaluate your grand ideas. My dream has always been to have a blue cottage/cabin, like a country blue, hard todescribe the shade but I think you get the idea. I also bought this super cool wrought iron bell to hang next to the door. We were going to re-face the outside with 4x8 pine sheets that look like board and batton and stain it blue but now we are wondering if we should just re-paint instead, especially when you start considering the budget and where you really want to put your hard-earned money. I dunno. I'm leaning towards re-painting with a good quality exterior paint and and make any repairs with wood putty, and just see how that looks, because you know how true the expression 'it"s amazing what a coat of paint can do" is, ya' know, we could be really shocked at the difference and happy with that, and it would be relatively inexpensive... and if we hate it we can just redo it with the pine sheets. What do you think?
And then the weather is just getting so much nicer and I just feel like sitting outside and get stuff done around outdoors at my leisure, like I want to clean up some branches from the stream and stack some rocks to make steps to get into the water and such...
I think in the end we are gonna wind up slowing down a bit and paint the exterior later this summer when I'll be more up for it... right now we're really enjoying the lack of constant mess of paint and wood work, and its a personal thrill for me to make coffee in the morning in our very small yet very functional cabin kitchen, where everything has its place.
Oh about the Katadyn brand water filter, its really been working for us. We fill it up at night and by morning there is a full reservoire of clean water. I have not had to clean the ceramic filters yet. So if you have a supply of water, of even rainwater collected in a barrel, you can have clean drinking water. I just wipe down the top reservoire with a paper towel and an eco-friendly disinfectant every now and then. You can order one from mec.ca if you want to try it. Their web site says it is no longer carried, but if you call they will tell you its just a special order. REI.com also carries them in the U.S..
Sorry for rambling!
R&R
|
|
hattie
Member
|
# Posted: 28 Jun 2010 12:55pm
Reply
Absolutely beautiful inside! GREAT WORK!!!
|
|
RickandRandy
Member
|
# Posted: 4 Jul 2010 12:04pm
Reply
Thanks Hattie! love your pics as wel.
So here is an update, and some pics. the final wall is done! there are just some paint jobs to do now, and the addition of some finishing mouldings, and also finish the bathroom.
Had some friends over, had a wonderful time, and summer is actually just officially beginning!
Best of luck with all your projects.
the bands of lights are actually fireflies. Absolutely magical.
| 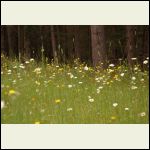
un-mowed areas turned into wildflower meadows.
| 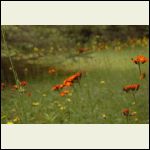
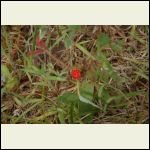
several different types of flowers in the meadows
| 
wild strawberries! discovered by Marie-Josée. Thanks MJ!
|
|
|
RickandRandy
Member
|
# Posted: 4 Jul 2010 12:05pm
Reply
some photos of the interior now.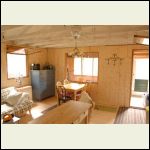
final wall finally finished
| 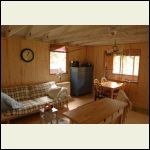
final wall, different view.
|  |  |
|
|
Rob_O
|
# Posted: 4 Jul 2010 07:04pm
Reply
Cabin is looking great.
Do you have any insulation under the roof?
|
|
RickandRandy
Member
|
# Posted: 5 Jul 2010 10:16am
Reply
Thanks Rob_O, no insulation in the roof yet, we'll try to figure something out in that regard by winter. The challenge is insulating, vapour-barriering and finishing the ceiling in a way that preserves the height. We're thinking of that spray-foam insulation as it simultaneously creates a vapour barrier, and then finishing with in-set panelling held-in with quarter-rounds between the roof beams. I believe you can rent the tanks of spray-foam yourself, or conversely, I have even heard of people buying those little hairspray-sized cans of spray-foam insulation and just using several of those to do a large area.
Any suggestions?
R&R
|
|
Rob_O
|
# Posted: 6 Jul 2010 12:56am
Reply
Spray foam is rather expensive per ft^2. I'd be inclined to use a 1/2" maximum layer to create the vapor barrier and fir out the rafters if necessary to get at least 6" of fiberglass under the foam. Put 1/2" foam board strips between the bottom of the rafters and the surface finish to create a thermal break.
That will allow you to keep most of your ceiling height, and have an adequate amount of roof insulation.
|
|
dk1393
Member
|
# Posted: 6 Jul 2010 09:50am
Reply
Your place is looking really nice. You can order the spray foam kits on line to do it yourself.
|
|
nathanprincipe
Member
|
# Posted: 7 Jul 2010 10:18pm
Reply
Hi, new here, I have followed your progression pics and must say your cabin is turning out nicely, I admire the spacious feel.
|
|
bugs
Member
|
# Posted: 29 Jul 2010 02:06pm
Reply
Hi R and R
Hope you are enjoying the cabin.
The fireflies (actually beetles in the family Lampyridae) are likely coming from moist areas in your woods and along the stream banks. The larvae seem to prefer this habitat where they feed on other insect larvae and snails.
The adults flashing are always a treat to see. Trying to follow them and catch them for a closer look is something to try.
|
|
RickandRandy
Member
|
# Posted: 4 Aug 2010 09:49am
Reply
Thanks for the info Bugs! I somehow knew that you would likely have some info, and thanks for feedback Nathan and DK! its greatly appreciated. Painting that ceiling was the toughest job ever, but what a difference, its like the ceiling is 10 feet higher. Thanks for the tips Rob O.
During our most recent weekend there a bunch of friends and R's teenage daughter and her friend joined us and it was just great. We went to the stream at night with a flashlight for the first time and saw tons of fish and frogs, and the crayfish's eyes glowed red! freaky! it's also so dark out there that you can see satellites go by if you look carefully, so we watched them flying through the night while speculating on the existence of aliens.
We're heading there for a whole week next week, and we just can't wait. It will be a new experience to be there for a long stretch without feeling like you just unpacked and already have to leave. We also hope to get a bunch of little jobs finished. It will be nice to not be rushed.
Now I can't wait for the crip air of the fall!
R&R
|
|
bugs
Member
|
# Posted: 4 Aug 2010 01:37pm
Reply
Hey R and R
Your area sure has been getting some heat lately. At least you have the cooling trees around your place.
Painting ceilings is close to torture as I want to get........ Isn't that what teenagers are for????? Hee hee. But as you say the change in your place has been incredible. You have resurrected that little cabin from being derelict and decay to having a whole new life.
Were you able to see any northern lights after the solar flare this week? They say the lights are going to be visible much further south than norm. Hope we see some on our next trip.
|
|
| << . 1 . 2 . 3 . 4 . 5 . >> |

