| << . 1 . 2 . 3 . 4 . >> |
| Author |
Message |
bldginsp
Member
|
# Posted: 13 May 2014 05:01pm
Reply Quote
A lot of hard work really paying off. Nice project Raz.
That foundation work you did looked like murder, but after a hard freeze winter like this I bet you are glad you sunk it so deep. Do you see evidence of the soil heaving in between your piers?
|
|
knock
Member
|
# Posted: 13 May 2014 05:19pm
Reply Quote
What type of laminate flooring did you use?
|
|
razmichael
Member
|
# Posted: 13 May 2014 05:20pm
Reply Quote
Quoting: bldginsp That foundation work you did looked like murder
Thanks bldginsp. I can't take credit for the foundation - one of the two things I brought in outside help for (foundation and part of the metal roofing due to time issues - oh and the spray foam insulation). I'm not sure I could have done the foundation myself cheaper. Not sure if you can tell from the posted photo but the piers sit on a perimeter poured platform so it is really solid. The soil has a lot of clay and would have caused a problem if I went an easier route. Because the space between the piers was back filled with sand and includes a drain pipe there is nothing that should ever move!
More detailed photos on picasa at Photos
|
|
razmichael
Member
|
# Posted: 13 May 2014 05:26pm
Reply Quote
knock, "kaindl 12 mm Traditions - Alpine Oak hand scraped" - picked up last year at Homedepot for about .80 sq ft - nothing special at all but we both liked the look. and the price was right. Doesn't compare to a real wood floor but quick and easy to install.
|
|
razmichael
Member
|
# Posted: 20 May 2014 09:19am
Reply Quote
We managed to head up late Saturday to enjoy at least 2 of the 3 days of the Canadian long weekend. This was the first time the family saw (other than photos) the walls and flooring I put in couple of weeks ago (see a few posts back). They all approved with flying colours!
I decided to relax and only planned one job. I had ordered this Screen-Eze framing stuff to re-do the bug screen on the deck as I figured we have days left before the black flies and mosquitoes hit (I think I was being overly optimistic on this). I got everything cut and pre-drilled the hole only to find that the supplied screws use a T-25 star bit. Did they supply one? No. Did I have one in my great big toolbox? No! Thus ended the one project.
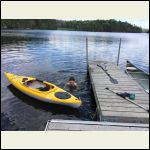
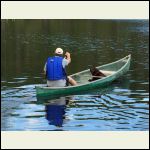
This left more time to relax and enjoy the weekend. My eldest son got some early morning fishing in. He also is likely the first person to swim this year (considering the water is probably around 45F). I had some quality time canoeing with our 85lb Lab who is only now really maturing and calm enough to understand that he cannot jump around in the canoe (or I would have been the second person to swim in the lake this season.
Question: My wife did agree after seeing the floor and T&G pine that she did not want to white wash/pickle the walls but keep them natural. Any suggestions on the easiest and best protection to use on them so they do not grey or yellow? I was considering a thin coat of minwax wipe on poly but not sure the best approach.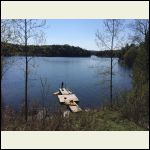
Early Morning Fishing
| 
Cold Swim
| 
Canoe
|  |
|
|
razmichael
Member
|
# Posted: 24 May 2014 11:59am - Edited by: razmichael
Reply Quote
Got to spend a couple more work days at the cabin this week. I finished screening in the porch using a framing system that, although a bit tricky to get the miter cuts at the corners, allowed for a large screen area that was easy to get very tight )and replace in the future if needed).
I also put up cheap screen doors on both sides of the deck. You get what you pay for and I don't think these will last but I do love the BANG BAng bang sound of screen doors closing!
Then came the furniture. I hate to admit this but we did a big ikea purchase. As anyone in a small place will agree, storage is vital. The couch pulls out to make a bed and the far end lifts up with storage. A few more pillows and throws (so my wife tells me) and it will look much more appropriate in a cabin.
For our loft we also went with storage. Nice comfortable Queen size be that lifts up for storage. It will be really nice to have a real bed up there rather than an inflatable mattress.
Slowly the cabin is looking less like a construction zone and more like a place to live! Kitchen cabinets next (when I find the time to finish making them).
|
|
razmichael
Member
|
# Posted: 24 May 2014 12:08pm - Edited by: razmichael
Reply Quote
Pictures of the bed - still having problems embedding the photos from picasa.
|
|
razmichael
Member
|
# Posted: 2 Jun 2014 05:11pm
Reply Quote
Update 2 Jun 14
Wife, kids and father in-law (my co-builder) up for the weekend. I went up a day early with a full trailer to put in some furniture and complete a few other projects. First photo shows, on the left, an old Bakers table we picked up a year or so ago. It needs some repair work but fits really nicely in the cabin. The partially finished lower cupboard and counter I made and put in place to make sure everything fits. Naturally things did not go as smoothly as I hoped - the corner piece would not fit through the front door. I figured I could fit it through the screen door to the deck if I took the door off - half way through taking off the screen door, I realized it still would not fit through the sliding doors into the cabin. Plan C was to take it partially apart and then back together inside - something I did not design it for when I built it. Oh well!
Wife loves the colour. Home made "chalk" paint. Obviously still need to finish the two doors and drawers. On the right side I am partially through building a long single drawer on big slides where the cooler will go. This will keep the cooler out of sight but easy to get into (as well as add more insulation). It will also provide lots more counter space.
Minor but very useful stuff on the deck - I put in a sliding platform for the coleman two burner so it can be pushed out of the way (second two photos below). I also modified our "big bubba" water cooler with hose connection and added a manual foot pump and spout over the sink to provide the drinking water as the main water supply comes from the lake and is used for washing and showers only (I do chlorinate it). Really nice to have ice water easily available for the kids so they drink enough on the hot days.
It is amazing how quickly the cabin is turning into a living area rather than a construction zone. Also amazing how comfortable a 16x16 space can be.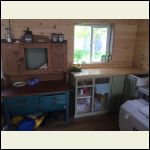
Kitchen Area
| 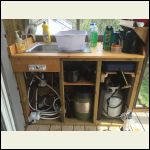
Outdoor Kitchen
| 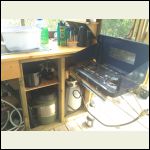
Stove Slide
|  |
|
|
|
stickbowcrafter
Member
|
# Posted: 4 Jun 2014 07:43am
Reply Quote
Looking great raz! Wow, beautiful place, awesome cabin and some great ideas.
-Brian
|
|
razmichael
Member
|
# Posted: 4 Jun 2014 08:23am
Reply Quote
Thanks Brian- appreciate the comments. I got lucky - in a way - during May. My previous contract ended and I knew I had a month break before the new one would be in place. Rather than try to fill in the gap with other work I decided to take advantage of the break and dedicate some time to the cabin. If I had not done this I suspect it would have been next year before I got to the stage I'm at now trying to do the work on weekends. Not to mention, when up with the family I have time to actually spend time with them!
|
|
razmichael
Member
|
# Posted: 6 Aug 2014 11:59am - Edited by: razmichael
Reply Quote
Well, here it is August and I note that back in early June I stated Quoting: razmichael I am partially through building a long single drawer on big slides where the cooler will go
We had an extended weekend there and I did paint and put in upper cabinets as well as one of the two cupboard doors that was missing. I made the drawers but realized I was missing the drill needed to mount the drawer fronts that I had made - it can wait. I also added an 8 ft ramp to extend the dock out further. Most important - hung a new hammock in the shade and tested it out! I suppose that was enough for one long weekend.
With more use I have become happier than ever with our small but more than big enough solar system. We have more lights than we need and can easily run (for limited lengths of time) things like a hair dryer, blender, vacuum,(even a small toaster) etc. I'm still thrilled to see that during the day, with the cell phone booster going, ceiling fan running at full, a Ryobi 18V battery being charged, I can run the vacuum for 10 minutes and see the charge controller just up the output and top up the batteries in a couple of hours. It all feels like I'm cheating the utility company and I love it (I get how you guys with much bigger systems must feel).
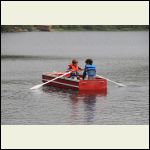
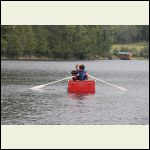
I've added a couple of photos, of the boys (and the dog in one) rowing around in the plywood "Jon" boat their grandfather made for them. I'm not sure how long it will last but, while it does, they are loving the freedom of rowing around by themselves.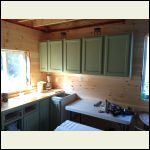
Cabinets
| 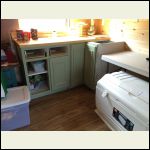
Cabinets2
| 
Jon Boat
| 
Jon Boat 2
|
|
|
ChuckDynasty
Member
|
# Posted: 6 Aug 2014 05:14pm
Reply Quote
Really nice pics and diary. Great cabin and features. You must be tired mentally as well as physically...Awesome solar setup! Plywood boat reminds me of something that might have been in Popular Mechanics magazine with plans to build way back when, very cool, the kids will always remember the boat that Grandpa built for them. Did I say awesome solar setup! I love solar stuff, pretty cool that solar stuff can become a guys hobby. Oh ya almost forgot, beautiful Location, location, location! Congrats
|
|
creeky
Member
|
# Posted: 6 Aug 2014 05:28pm
Reply Quote
just picked up your latest updates. nice work as always. that outdoor kitchen should be in a book on small kitchens. i'm racking my brain trying to think when I've seen so much utility in so small a space. gotz nuthin'
and grandpas boat made me laugh. my gramps and I fixed up an old boat (new transom made of old boards, black goo for caulking) one summer and i remember rowing around with my younger brother. we had some adventures for sure.
thx and congrats
|
|
razmichael
Member
|
# Posted: 6 Aug 2014 09:44pm
Reply Quote
Thanks both ChuckDynasty and Creeky for the kind words. Memories are what this is very much about - part of the reason I wanted to build it mostly with just my father-in-law and myself. Hoping some day my boys can tell their kids that the cabin was made by their grandfather and great-grandfather. I'm not counting on the Jon boat to still be around then 
Creeky, I've enjoyed reading your adventures. Don't take this the wrong way but always fun to also read when things don't go according to plan - makes me feel better about my mishaps. I've really discovered that doing things an extended period of time can lead to some entertaining mistakes. You build something at home sure that you have the measurement right but for some reason, things don't match.
Putting in the upper cabinets I also intended to add an under cabinet LED strip with a dimmer. When I put up the inside paneling a few months ago I had run two wires to the general area so I run these up the inside of the wall and did a rough install where the switch would be. After getting the cabinets in last weekend I stuck up the LED strip and did a quick power check with the 'loose' wires - sure enough the LEDs lit up - but the water pump also started!! Tracing them back to the junction box they came from, I found the very clear label "Water Pump Inside Kitchen". I use micro switches on the faucets and had originally ran these wires from the junction box with the pump relay in it but that slipped my mind when paneling and I assumed it had been for the cabinet lights. Damn. Oh well, a little modification and the pump no longer starts when you turn on the lights.
|
|
creeky
Member
|
# Posted: 7 Aug 2014 08:08am
Reply Quote
I enjoy my "adventures" at least as much as my triumphs. just the way I'm built I guess.
No experiment is without mishap and, once in a while, you do get that bonus "happy accident."
And you're right, nothing is funnier than a good mistake. er. happy accident.
|
|
razmichael
Member
|
# Posted: 23 Aug 2014 08:50am
Reply Quote
Cabinets are in!
This is our longest family stay at the cabin - hitting 8 days now. The only major project I wanted to handle was completing the building and installation of the kitchen cabinets and counter tops - which I did! I did learn a few things along the way:
a. If I built cabinets for a living I would starve;
b. I cannot for the live of me cut large sheets into accurate sides/bottoms. I put this down to a number of factors. To steal a term used on another post (think from rmak) - this was skillsaw cabintry. I do not have a workshop so most of the building was done on a 6ft folding plastic table in the backyard. Tarps employed for raining days and storage under the covered deck. Add to this that the builds took place over months with some bits and pieces installed at different times, I was constantly trying to remember things like 'how far back did I put the kick plates' - apparently my memory is not what it used to be.
c. Given b, plastic wood is your best friend.
d. Given b, trim is even a better best friend.
e. Given b, shims will forever be in my heart!
Full disclaimer - the upper cabinets are cheap Home Depot stuff that I primed and painted with my DIY "chalk" paint.
In the end, although far from perfect, they look good (if you squint) and function great. The large pull out drawer for the cooler was a risk but works great. When I point out flaws to my wife she replies "these are cabin cabinets - they are not supposed to be perfect". I love her attitude. She has a running blog and recently posted about the terms cabin vs cottage.
Blog for an average runner
last photo - boys and dog with their grandfather in the boat that he built for them. What could be better?
|
|
creeky
Member
|
# Posted: 23 Aug 2014 02:07pm
Reply Quote
raz my brother makes his living building custom cabinets and he used "insert swedish brand name here" for his cottage. so you're in good company.
once again I am awed by your creativity. that cooler drawer is awesome. and the dog platform on the front of your (what looks to be) rapidly melting boat. classic.
seriously. good work gramps.
okay. maybe I was influenced by the fact I have the same round kitchen table.
|
|
ChuckDynasty
Member
|
# Posted: 23 Aug 2014 02:34pm
Reply Quote
Cabinets look great, love the color. Very cool idea for the cooler. Wonder what's going through the dog's mind!
|
|
razmichael
Member
|
# Posted: 26 Aug 2014 08:07am
Reply Quote
Thanks Guys.
Quoting: creeky I have the same round kitchen table
Quoting: ChuckDynasty Cabinets look great, love the color
Quoting: ChuckDynasty Wonder what's going through the dog's mind!
|
|
razmichael
Member
|
# Posted: 18 Oct 2014 07:59pm - Edited by: razmichael
Reply Quote
I hate this time of year!
Sadly it is that time of the year again - closing up the cabin for the winter (sorry for using the 'winter' word). It is always possible we will be back up one more time this fall but the schedule is so busy and I needed to make sure I had the dock in and the water (and heater) drained and closed up before the freezing started. I went up Friday night by myself and spent a peaceful evening sipping scotch and reading a book. Saturday was spent taking down the covered working area, closing up the water system and getting wet and cold pulling the pieces of the dock as far up on shore as I could. I ended the afternoon by topping off the batteries and locking everything up.
There is still a lot of work left on the interior - I estimate I completed about half of what I planned to do this year and about twice what I thought I would get done!
Lucky timing or a farewell gift? Took this shot just before I left....
|
|
creeky
Member
|
# Posted: 17 Dec 2014 06:47pm
Reply Quote
nice pic.
|
|
Scott G
Member
|
# Posted: 17 Dec 2014 08:41pm
Reply Quote
Man..what a beautiful cabin, location, view. Living the dream. I know I'm late to the thread but had to congratulate you. Very, very cool.
|
|
razmichael
Member
|
# Posted: 17 Dec 2014 08:55pm
Reply Quote
Thanks Scott - you are well on your way with your build!
|
|
nscampgirl
Member
|
# Posted: 2 Jan 2015 10:18am
Reply Quote
Gorgeous cabin and thanks for the great entries about your progress!
|
|
razmichael
Member
|
# Posted: 4 Aug 2015 02:15pm - Edited by: razmichael
Reply Quote
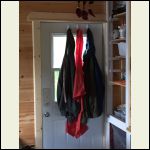
Been a while since I posted any updates but I have not really had a lot of time to do the few remaining big projects (loft floors and ceiling are left). We have not been up as much as I would like this summer so I have focused on enjoying the lake and doing the smaller trim jobs on the main floor. I finally got the window and door trim complete. Lots of small gaps if you look really closely but that comes from lack of experience, rush to get finished so I can get in the canoe, and only having my Ryobi 18v circular saw and 18 volt brad nailer. The former works great but not the best tool to be ripping trim (especially given that the work table is actually our picnic table. The latter - the 18V brad nailer, has been a fantastic piece of equipment, having put up all the interior T&G, multiple cabinets, trim and more. I had my doubts when I first added this to my tools but I'm fully sold!
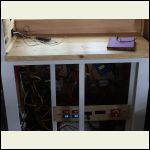
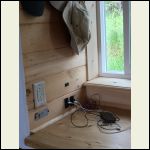
I have had a good start at trimming my "electronics" cabinet, battery cabinet (vented - before you ask) and the closet. The cabinet doors are also made (this took longer than I planned because the boys wanted to help). These are all only primed - next week will be the painting. I also built and put on the counter top (matches the kitchen counter I made). I moved a few things that had been situated down below up to the side wall of the closest - the inverter controller panel, a couple of 12V charging ports and the cell phone booster switch. Eventually I'll also move the four status displays you can see lit up. The main power switch will likely remain below behind the doors as moving this would require building some new really thick cables!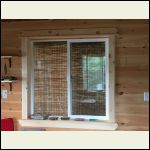
Window Trim
| 
Door Trim
| 
Counter
| 
Controls
|
|
|
razmichael
Member
|
# Posted: 4 Aug 2015 02:17pm
Reply Quote
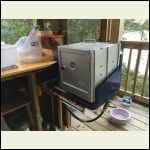
To tie into the post just above, I'll add two more photos - the boys and a friend enjoying the lake by the light of the recent Blue Moon. Also the latest edition to my outdoor kitchen - a Coleman oven that I picked up new at a garage sale for $10. We baked out first biscuits in it - bit burned on the bottom so some more experience will be needed. Not the best piece of kit but for the odd use it will do (plus it folds down for storage). If anyone has any pointers on how to use this please speak up. I've seen suggestions like putting a small pizza stone in the bottom and covering the side with foil. Regardless, with the oven, along with the new Can Cooler, we will be having some easy, quick and great meals by the lake.
Moonlight Swim
| 
Coleman Stove
|  |  |
|
|
kdrtk
Member
|
# Posted: 4 Aug 2015 02:32pm
Reply Quote
What brand name is that Couch Bed?
|
|
razmichael
Member
|
# Posted: 4 Aug 2015 05:29pm
Reply Quote
Quoting: kdrtk What brand name is that Couch Bed?
Ikea. Can't remember the modelo. The end piece opens up for storage as well.
|
|
razmichael
Member
|
# Posted: 23 Aug 2016 09:10am
Reply Quote
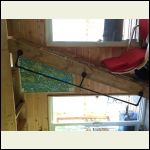
Update 1 of 2: Been over a year since I posted on Cabin progress - most likely because everything (but one thing) left is small and has no impact on how we use and enjoy the cabin! Biggest job left is to cover the ceiling as it is currently the exposed spray foam. Given the height and shape (Gambrel), this will not be an easy job so I'm in no hurry! This spring I did put down laminate flooring in the loft areas (cheap stuff from HD on sale). More recently I added handrails to the alternating step ladder (used black pipe). This runs up the ladder and some more pieces at the upper section just to make things easier.
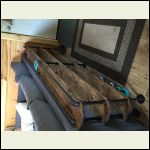
Couple of weeks ago I threw together a table for the narrow space behind the couch. Again I used black pipe and various fittings - fun stuff to work with. I was at one of the big stores to get the pieces and they were out of a bunch - the guy mentioned that nobody buys the stuff for what it is meant for but for all sorts of other projects.
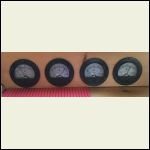
My electronics cabinet is complete and I moved most of the switches up to the wall above for easy access. I was going to move the four digital displays for amps/volts (from panels and main system) but my wife said no way was she going to have digital displays showing. Sadly this forced me to have more fun and purchase some analog dials with a more retro look! I did keep the digital ones but they are in the "closet".
... Part 2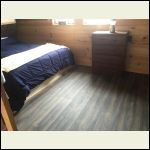
Loft Floors
| 
Ladder Rails
| 
Couch Table
| 
Dials
|
|
|
razmichael
Member
|
# Posted: 23 Aug 2016 09:12am - Edited by: razmichael
Reply Quote
Update 2 of 2: Previously, for water, I was filling up a jerry can from the lake and dumping it into a rain barrel as our source of washing water (with some chlorine added). We would bring up our drinking water. I finally picked up, on sale, a small gas water pump from Princess Auto and now use this to fill the rain barrel when needed - so much easier! I also got fed up with needed to go into town for more drinking water so re-looked at the Berkey filters. I have a Sawyer purification filter which is small and can have water forced through it (also extremely efficient getting rid of viruses) and still use this for hiking and camping. A couple of years ago the Berkey filters, although great for getting rid of smells etc, did not really do a great job of purification - I realized that they have upped their game and the new black filters are for purification now. Based on this I bit the bullet and purchased a unit with four filters. Initially I used it as a complete system and dumped the purified water into our "Big Bubba" water cooler (that is connected to a foot pump and separate tap to provide drinking water. The Berkey is slow (even with four filters) and, especially with four filters, does not hold a lot of water in the upper section. Next step was to skip the bottom container and hook up a collector from the four filters and run this directly into Big Bubba. This certainly saves space in my small deck kitchen but I still need to fill up the Berkey a lot.
Next plan (which I should have started with and saved money by only buying the filters) is to fit together using food grade pails (as per dozen of youtube videos out there) a much bigger initial container and collector and feed this into Big Bubba. This setup will need to be outside the kitchen with lines in and out but should allow a much faster flow of drinking water with a larger reservoir available.
|
|
| << . 1 . 2 . 3 . 4 . >> |

