| . 1 . 2 . 3 . >> |
| Author |
Message |
Josh
Member
|
# Posted: 11 Apr 2009 01:49pm
Reply
I built this when i bought my hunting land i needed a nice place to take it easy. I came here for ideas and here is what i have build so far. It still is in the process of being finished i only have a few more things left to do from interior paneling to completing the woodstive install and then siding.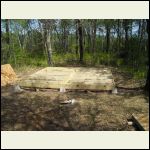
Josh_more_pics_005.J.jpg
| 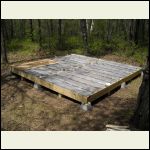
Josh_more_pics_006.J.jpg
| 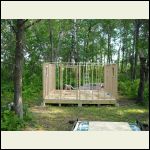
random_013.JPG
| 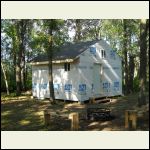
cabin_progress_013.J.jpg
|
|
|
gmcgreg
Member
|
# Posted: 12 Apr 2009 02:46am - Edited by: gmcgreg
Reply
Nice cabin and I like Your setting as well. It looks like 16'x16'. a good size. Is it too late for gable end overhang to protect Your window and door?
|
|
CabinBuilder
Admin
|
# Posted: 12 Apr 2009 01:39pm
Reply
Nice cabin, Josh!
Surroundings also look comfortable and private - looks like a good location for the cabin.
I wonder what is your interior layout... I see window above the door - do you have a loft?
|
|
Josh
Member
|
# Posted: 12 Apr 2009 10:01pm
Reply
Thank you for replying, I do plan on putting a front porch on the front so that when i come in from hunting i can leave all of the mud from the boots out there rather than in the cabin. I do not have a loft in this cabin due to time restraints i was only able to do a scissor truss to gain a vaulted space. Those windows are just for extra light. I will also try to post more pics up of what it looks like on the interior. I have a 1,000 square foot woodstove for it though it is only 250 square feet. i only really had one location that was good enough to build on. The property is a 40 acre tamarac swamp and there is only a small 5 acre section of oaks with a creek running between the tamaracs and the oaks. I went with the pyramid foundation due to the fact that when i went to do the post sort of foundation i lost 3 concrete cookies in the ground at 48" because the water table is so high that the holes collapsed in and the water filled in the wholes with wet sand and my last resort was a concrete cookie with a pyramid on top.
|
|
Josh
Member
|
# Posted: 12 Apr 2009 10:15pm
Reply
Here are some pics of the interior, im working on it little by little week by week. I am a cabinetmaker and i am only able to chip away at it in small parts. I get alot of crap because i designed it after the outpost cabins i stay at in canada on flyin fishing trips but yet i have 100 amp service that i had barried under ground. Because if i put in a power line they require 15' clear of each side and i dont want a 30' hole into the cabin. In the summer it is so thick and secluded in there no one that drives by even knows its there.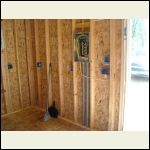
100 am service
| 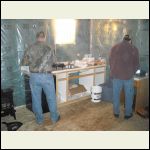
kitchen
| 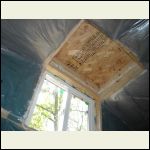
those upper windows with a window box
| 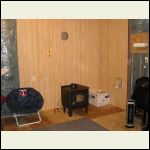
wood stove with dryer vent for air intake in the pic to the right
|
|
|
Josh
Member
|
# Posted: 16 Apr 2009 10:35pm
Reply
Here are some more pics of it!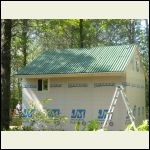
more_cabin_pics_066..jpg
| 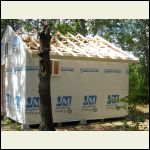
more_cabin_pics_061..jpg
| 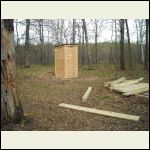
more_cabin_pics_011..jpg
| 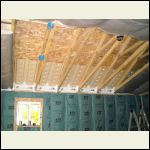
installing the vent chutes and insulation and poly
|
|
|
Josh
Member
|
# Posted: 26 Jul 2009 10:05pm
Reply
These are some updated items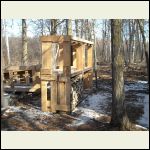
Wood storage for woodstove made from glass crates
| 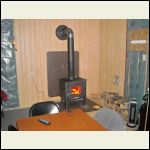
Woodstove fired up and heating away
| 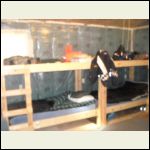
Bunk wall on West wall of cabin
| 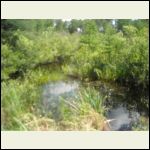
Donut shaped pond with a spot cleared away on the north Berm for a food plot
|
|
|
CabinBuilder
Admin
|
# Posted: 27 Jul 2009 09:46am
Reply
Thanks for the update, Josh.
I like your simple firewood storage shelf - I was thinking of something similar, you gave me some ideas.
I'm curios - on the picture you have a wood stove with electrical power cord going to it... what is it for?
|
|
|
bugs
Member
|
# Posted: 27 Jul 2009 02:33pm
Reply
Hi Josh
Thanks for posting your project. I was wondering about the details of your stove. What type is it? The heat protection and clearances you are using? Stovepipe diameter, through the wall "thimble" and outside clearances? A pic of the outside stove pipe setup would be great.
We are putting a through the wall stove pipe too for our place and need some suggestions and ideas.
|
|
Josh
Member
|
# Posted: 27 Jul 2009 09:04pm
Reply
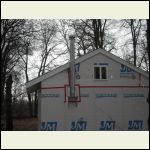
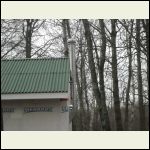
Yes the woodstove has an electric motor with a heat sheild that blows the heat throughout the room. Its a frontiersman woodstove that can heat 1000 square feet. The thimble is an 8" thimble and they wanted me to be 3' from the wall to the right and 3' from the back of the woodstove to the wall. But with the heat sheild that i installed i was able to go 1' from the wall. The Surround covers 18" off each side as well as the front. Also that little silver thing to the right is a dryer vent snaked down the wall in J so that its like an air intake to keep fresh air coming in for the woodstove or the woodstove would suck the oxygen from the room. I venteded it out just below the soffit outside and it comes down creates a J and comes in. So cold air comes in but heat wont escape. I used a 6" single layered pipe on the inside but was required to use a double insulated 6" pipe outside. The pipe is required to vent higher than the ridge line of the roof so that it does not fill up with snow. That wood rack is made from glass crates we ship mirrors in for the hair salons we do at the cabinetshop i work at. I have it all filled up now and it will last for i hope about a season or two since i dont have to fill my woodstove all that much to heat the cabin.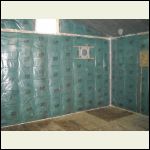
Here is the thimble set up before i started the process of installing the woodstove
| 
Picture of the double insulated pipe
| 
Another one
| 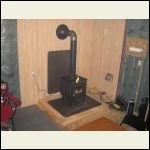
Here is another picture of the woodstove installed with the platform i was required to sit it on
|
|
|
Josh
Member
|
# Posted: 27 Jul 2009 09:09pm
Reply
Oh and they wanted me to go 18" down from the ceiling For the thimble as well
|
|
bugs
Member
|
# Posted: 27 Jul 2009 09:37pm
Reply
Thanks for the info about the stove Josh. Sounds like you had lots of regulatory hoops to go through. Good idea re the dryer vent much better than opening a window.
As our little shed is less than 80 sq ft we are looking at something on the line of CabinBuilder's stove when the time comes to put one in.
Thanks again for the info.
|
|
cabingal3
Member
|
# Posted: 4 Aug 2009 05:50pm
Reply
Josh.this is so wonderful.i have to tell my hubby about this site.the small cabin building site.it is wonderful to see what others can do and are doing.thanks so much for sharing.this is wonderful.cabingal3
|
|
backwoodsbuilder
Member
|
# Posted: 18 Oct 2009 01:09am
Reply
this is looking great. What size are the windows? and about how much are they?
|
|
Josh
Member
|
# Posted: 22 Oct 2009 05:41pm
Reply
The windows are 2'x 2' windows and they are placed high up for a reason so that when people walk by outside they can't look in. For security reasons mostly. They were 69.99 dollars each and i got them from a local home improvement store. I have more pics that i can put up now that i have completed the siding.
|
|
Josh
Member
|
# Posted: 22 Oct 2009 05:52pm
Reply
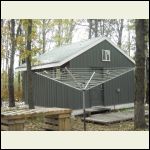
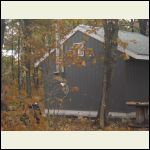
Here are the new pics of the cabin sided. I went with steel siding. It is the type you would put on a shed with the vertical ribs and can last around 50 years. It is charcoal grey.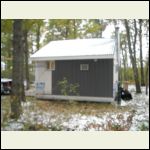
during installation
| 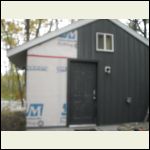
during installation
| 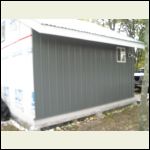
during installation
| 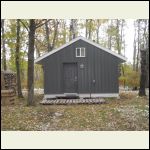
siding after installation was complete
|
|
|
Josh
Member
|
# Posted: 22 Oct 2009 06:02pm
Reply
More finished siding pics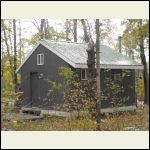
finished_siding_on_c.jpg
| 
finished_siding_on_c.jpg
| 
finished_siding_on_c.jpg
| 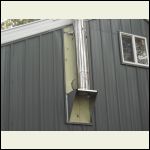
siding installed around chimmeny pipe with treated wood behind it
|
|
|
MikeOnBike
Member
|
# Posted: 14 Dec 2009 09:18pm
Reply
Josh, can you explain the purpose of the 'window box'?
I'm going to start a 16x18 cabin in the spring and am struggling to fit a small stove into our space. The Frontiersman is reasonably price but seems like overkill for such a small space. How has yours worked out?
|
|
Josh
Member
|
# Posted: 6 Jan 2010 05:46pm
Reply
The window box is there because of how the windows fit into the roof trusses. With the angle that the roof truss was at i had to build it back like that so that it wouldn't be in the way of the window. One thing though is make sure that it will be ok in your area to do something like that. Sometimes they dont like you cutting into a roof truss like that.
The frontiersman woodstove is a 1,000 sqft. woodstove. Though the cabin is only a 1/4 of that at 250 sqft i have to make the logs smaller. For instance i cut them at about 10 to 12 inches long and split them even smaller. I also make sure to watch how much i fill it and what i put in there. i find that the fluffy dried poplar and birch logs that i had laying around in the woods burn well and maintain a comfortable temp. The oak logs however i only put in when its absolutly cold because those put off major heat. I have accidently heated the place up to 97 degrees before lol! without watching what i was doing. But its actually pretty nice because there are times when its 20 to 30 below zero here and after out hunting for snowshoe haires its nice to come in to a warm cabin.
|
|
Josh
Member
|
# Posted: 6 Jan 2010 05:48pm
Reply
There are small stoves called Box woodstoves that are longer and narrower. That might heat a small cabin well. I heat with wood because i have a 40 acre woods with oaks and tamaracks and there is enough wood laying on the ground to heat the place for a lifetime.
|
|
MikeOnBike
Member
|
# Posted: 6 Jan 2010 06:24pm
Reply
Thanks, Josh!
We have juniper on our place. It burns hot like oak. Smells great too.
It seems from a lot of owner reports on the smaller stoves that they don't hold a fire overnight because of the capacity and can be difficult to dampen down. I also don't have room for a larger stove because of the small cabin space. I hope with wall shielding I can fit the stove into a 3x3 ft space in a corner.
I just noticed that there is a different stove showing in the kitchen picture. Did that one not work out? What make/model is it?
I'm really nervous about a stove purchase. They are expensive, impossible to test drive and every model seems to have about as many detractors as supporters.
|
|
elkdiebymybow
Member
|
# Posted: 6 Jan 2010 06:45pm
Reply
Nice Job Josh! Looks like a great place to hunt out of!
|
|
Josh
Member
|
# Posted: 9 Jan 2010 10:25am
Reply
That stove in the kitchen picture is just an electric heater that looks like s woodstove. That is what i had for a while before installed the woodstove.
|
|
Anonymous
|
# Posted: 16 Jan 2010 08:51am
Reply
Hello,
Can you explain in detail your venting process for the stove. We have a ventless wall heater in our cabin and it goes out alot because it has a low oxygen sensor.
Thank you
|
|
Josh
Member
|
# Posted: 17 Jan 2010 12:11pm
Reply
Well as it shows in the pics there is a thimble installed in the wall for the double insulated pipe to pass through. Then it goes out to a t pipe that has a clean out on one end that sits on the bracket. the other end points up and from there i added a few other sections of pipe to get the chimmeny up past the ridge on the cabin.
|
|
Anonymous
|
# Posted: 17 Jan 2010 08:09pm
Reply
Sorry Josh,
I meant your venting with the J and having outside fresh air come in. Can you tell me how long your pipe is and where is the j at. Do you use regular dryer vents or something else. We have problems venting our cabin and preventing the ventless wall hearter from going out is a big concern of mine.
Thanks
Vance
|
|
Josh
Member
|
# Posted: 23 Jan 2010 04:24pm
Reply
yeah it is a regular dryer vent system. that is an 8 foot wall and it pops out of the wall just under the eave outside so that the air can flow right in. i then pit a outdoor cover with a screen over it so that bugs dont get in. then on the inside you run it down the wall toward the floor and i came up about 2 to 3 feet from the floor with the j part and taped it in. with the vent on the inside. i will upload a better pic of it.
|
|
Josh
Member
|
# Posted: 23 Jan 2010 04:30pm
Reply
here are some better pics of it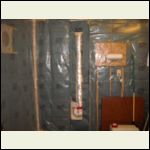
this is the view of the dryer vent in the wall
| 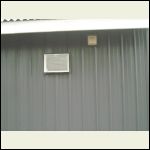
on the right of that air conditioner is the little vent on the outside
|  |  |
|
|
Josh
Member
|
# Posted: 23 Jan 2010 04:48pm
Reply
that then allows new fresh air to come in while the woodstove is going. so that it wont take oxygen out of the room.
|
|
Josh
Member
|
# Posted: 23 Jan 2010 04:50pm
Reply
I haven't been there since early december so im sure the snow is waiste deep by now. i will try and take some new pics and post them when i go there in a few weeks
|
|
| . 1 . 2 . 3 . >> |

