| << . 1 . 2 . 3 . >> |
| Author |
Message |
lawnjocky
Member
|
# Posted: 23 Oct 2009 09:14am
Reply Quote
The permit issue is interesting, I looked at a property in the Pecos and I called the county about permits and I was told that none were needed. The property had a 1000 sq ft cabin partially constructed. I guess there is a lot of flexability between counties.
Back in the 90s I had a place in Baja and we had problems with our concrete using water from a stock tank. There seemed to be something about the brackish water that the concrete didn't like.
In my area the city has a fire hydrant where people living off the grid can buy water cheaply. I have a 210 gal dome like tank that is made to fit in a pick up bed. It costs about $200 and is well worth it. Filling jugs is a pain and time consuming. If you are going to use jugs check out Ceaper Than Dirt for the Austrian military surplus water bags. They don't always have them so stock up when they do. They are black rubber and hold about 5 gals. They heat up nicely for bathing on warm days. I have been using some for almost then years so they last. When not in use the lay flat. I also have a 4' hose that I keep in the truck that makes filling water jugs easier.
Jocko
|
|
Moontreeranch
Member
|
# Posted: 23 Oct 2009 11:45am - Edited by: Moontreeranch
Reply Quote
Keith the mixing was done in a plastic mix tray one bag at a time, I use a garden hoe to mix (better than a shovel)
The beams are 2 x 8 pressure treated (triple, staggered joints with ledger lock lag type bolts, then face nailed with 3" framing nails)
the beams are resting on 6 x 6 pressure treated posts, these are anchored with J bolts set in the concrete and a heavy duty "L" bracket which is lagged into the post, the beams are tied to the post with hurricane ties. Our cabin area in not too windy (compared to here in Colorado) so my uplift concerns were pretty minimal.
the post anchor shot also show detail on the insulation bottom support.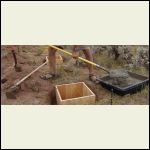
mixing.jpg
| 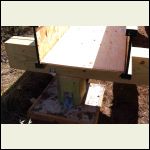
post_anchor.jpg
|  |  |
|
|
Moontreeranch
Member
|
# Posted: 23 Oct 2009 11:45am - Edited by: Moontreeranch
Reply Quote
shot on the beam detail
|
|
JRanch
Member
|
# Posted: 24 Oct 2009 10:06am
Reply Quote
Moontree,
Thanks for all the info, it will be very helpful.
I am thinking about using the sono tubes for my piers, I'm not quite sure how deep I will have to go yet.
Watching your progress get me fired up so, I hope you dont mind when I have questions for you.
Thanks,
Keith
|
|
Moontreeranch
Member
|
# Posted: 24 Oct 2009 12:21pm
Reply Quote
Ya I know how you feel...I've been back a week...and it will be near a month before I head back...just seems tooooo long. In the mean time I have been working on "cabin stuff" here at home to take down next time...
I got some special crimp fittings yesterday to work on the wiring for the charge controller, got the battery and 80 watt panel last week, the controller is due in a few days...I'm going to wire up a "test bench" and test some of the 12 volt LED lights, battery, disconnects etc.
I also hope to get the wood stove chimney parts together...It will be another full truck of stuff heading down...but this time Tori is coming so we will have two set of hands working and the ability to keep each other warm at night ;)
|
|
lizard
|
# Posted: 26 Oct 2009 06:28pm
Reply Quote
looks cool trantulas in peru are bigger than your hand. fyi those are the males we find wandering this time of the year mater last walk before demise! hope you can cook turkey dinner in your new cabin!!!
|
|
JRanch
Member
|
# Posted: 16 Nov 2009 09:59pm
Reply Quote
Moontree,
I am looking forward to more pics. ;-)
Keith.
|
|
Moontreeranch
Member
|
# Posted: 17 Nov 2009 01:39pm
Reply Quote
Tori and I are heading down next week for thanksgiving, we hope to get the wood stove rigged and the solar system installed.
I have spent the last couple weeks getting the solar "modules" prepped to speed up the install. I modified some 120VAC 50 watt halogen lights to run on 12 VDC using 1 watt LED bulbs...should be able to light the whole cabin for under 20 watts...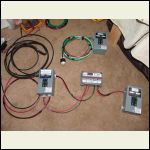
charge control module / ac dis-con
| 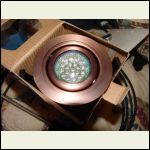
12 VDC mod LED light
| 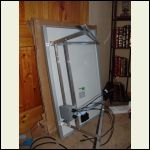
80 watt panel and aluminum mounts
|  |
|
|
|
Moontreeranch
Member
|
# Posted: 2 Dec 2009 09:09pm
Reply Quote
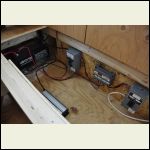
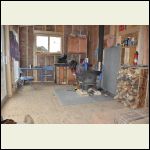
Well .....we came we installed...the wood stove is in and the 80 watt solar is up and cranking. We had a short coming with the stove pipe, actually about 18" short. I was able to cobble together some of the pipe we got when we picked up the stove. It was larger diameter, thin and too long. With my handy tin snips and some wire, I was able to connect the elbow to the adjustable main pipe. Then after it fell apart once I got aggressive and screwed the parts together. I was hoping to wait until we got the rest of the real stove pipe, spending a bunch of our valuable time there on such a critical task in the cold. Next up on the shopping list is a two foot section of black pipe and a damper control. The first night we slept with the propane heater...then for the rest of our stay we ran the wood stove, amazing what a real heat source can do with some insulation installed. As the morning sun cleared the horizon we started to feel the effects of our passive solar design.
Aside from installing the stove we got about 80% of the wall insulation in and 100% of the ceiling insulation in. I had about half the ceiling insulated from before. The solar panel is up and running and I got 2 more windows in (little ones up in the loft) which work great for controlling temps up there.
Sat night we were visited by my brother and his wife, our first guests at the cabin. We shared some wine and our first snowfall, there was some residual snow in some shaded areas, from snow weeks before, but this was our first snow fall while we were there. It dumped hard and heavy for a couple hours, with about 2" by the time it stopped. Lucky for us, as we were running low on water (we started with 5 gallons for
Tori + I for our extended weekend) With 3 dogs and 2 humans sucking it down...we needed some more, harvesting snow off the picnic table (and then melting it on the wood stove worked great).
Tori was sad to have to leave, come Sunday, It was her first time there since we put in the footers. We are now making plans the head back for New Years. After living there for a few days we are beginning to see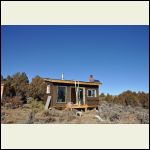
solar install
| 
pv system
| 
working stove
| 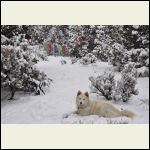
maybelle in the snow
|
|
|
RDLong70
Member
|
# Posted: 4 Dec 2009 02:02am
Reply Quote
It's starting to look really nice out there MR. Great pics.
|
|
JRanch
Member
|
# Posted: 10 Dec 2009 12:10am
Reply Quote
Moontree, Where did you go to school (college) in the UP?
Thats where I am from till we moved to AZ about 6 yrs ago. I'm actually from Iron Mountain.
Small world,
Keith
|
|
Moontreeranch
Member
|
# Posted: 10 Dec 2009 12:25am - Edited by: Moontreeranch
Reply Quote
jranch/keith say ya to the U.P. eh?
grew up in Kalamazoo, 2 years at NMU, then 2 more at WMU then got my masters there. Moved to Colorado in 91...only been back for three visits since then. I miss the big lakes....but mountains and 300+ days of sunshine make up for it...but this week's long cold spell is starting to be a drag...last night 7 below zero...add 30-40 mph wind and its a bit harsh....looking forward to a cabin visit for new years. If the forecast holds...sunshine and mid thirties..will seem like t-shirt weather.
kevin
|
|
stack
|
# Posted: 7 Jan 2010 09:27pm
Reply Quote
Hello Kevin!
Great to read your story tonight, and nice to see someone has similar ideas as myself...I was in home depot today looking at recessed lighting and CFL's along with sliding glass doors; I've been thinking about a *very* similar design, and was pleasantly surprised to see pictures of it :)
couple questions:
I don't know if its ok to ask, but could you give us a rough idea of how much you've spent so far and what your planning to finish?
any pictures of the roof installation?
are you on the front range? (I'm in Denver)
Please do keep us updated of your progress with more pictures!
thanks for posting up your project, I'll be checking back with hopes of more info.
-Jeff
ps. diggin' the prayer flags
|
|
flatwater
Member
|
# Posted: 7 Jan 2010 10:12pm
Reply Quote
Nice digs for sure. We have about two junipers on our place and I'm not sure how they got there because we have mostly doug fir , a few tameracks, some birch and a small bunch of pine.
|
|
Moontreeranch
Member
|
# Posted: 8 Jan 2010 11:30am - Edited by: Moontreeranch
Reply Quote
We did get down to the cabin over new years, rang in the new year pioneer style. We did not get as much done from our "punch list" as I was feeling pretty crappy with a head cold, just now getting over it. Tori was at the clinic before we left and had Pneumonia...So we pretty much hung out inside and stayed warm with the passive solar and wood stove. We brought down another 2 feet of stove pipe and a damper section, I think we can get more burn time out of the scandia 150 with the damper in. Since I was up every few hours to blow my nose or take a leek from drinking tons of fluids, tossing a log in the stove was not that big of a deal...we got some 4 hour burn on a few of the pinyon logs...nice coals, nice smell. Despite relaxing most of the time and tending the girls, a full time job in itself, we did get the rest of the firewood into the shed and got the Granite slab set on the cabinets. The cabinets look so much nicer out of the boxes...the slab is just sitting on the cabs, I won't "mount" it until I can get the tiling down and actually set the cabs. It pretty cool to have a nice looking surface in the kitchen...I'll need to trim the slab down and polish the fresh cut edge...but that can wait. We are probably one of only a handful of cabin people that have a Solid Granite Slab in a 200 sq ft cabin...I traded a guy on Craig's list for a custom overhead cabinet.
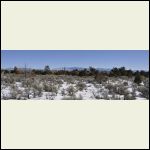
Stack / Jeff I'm in Nederland west of Boulder, the Roof is 9 1/2" BCI I joists set on the pitched (12 degree) front and back walls, R-30 insulation 1/2 ply sheathing, Grace style roof membrane throughout then Galvanized metal sheeting. We have a bout 8k in so far, including solar, generator, wood stove etc. We easily have a few k to go for exterior siding, interior T&G, tile etc. Tori and I want about 400 sq feet of wrap around deck...but that may take a year or two...the soil is a bit muddy...and it sucks tracking it in all the time. You can see some of the roof framing details in the "sat morn" photo posted back on sept 24.
I've got more info about the lights and such on my blog. KMS Woodworks blog
Some Recent pics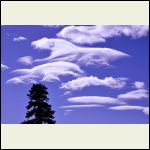
ice cold clouds
| 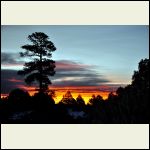
New year sunrise
| 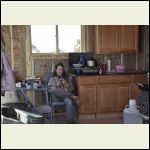
Tori + granite on cabs
| 
view NE from along our road
|
|
|
elkdiebymybow
Member
|
# Posted: 8 Jan 2010 01:33pm
Reply Quote
Great Job! Looks like that will be a fun place to hang out and relax once you get all the hard work done! I would expect the stars are amazing on a clear night.
|
|
LGraceP
|
# Posted: 25 Jan 2010 02:13am
Reply Quote
Howdy. Have y'all checked out shelter-kit.com
Awesome and affordable little kits.
Best,
LGP
|
|
paulsonlaw
Member
|
# Posted: 26 Jan 2010 01:16pm
Reply Quote
Where at in NM, I have a spot near Fence Lake, 70mi south of gallup.
|
|
Moontreeranch
Member
|
# Posted: 29 Jan 2010 01:01pm
Reply Quote
Paulsonlaw...we are just south of Tres Piedras...NW of Taos by about 30 miles
|
|
lawnjocky
Member
|
# Posted: 29 Jan 2010 04:47pm
Reply Quote
Paulsonlaw, I'm west of you outside Magdalena.
Jocko
|
|
hbarker1
Member
|
# Posted: 29 Jan 2010 10:01pm
Reply Quote
Really nice work,, !!
Tell me,, are the floor trusses cheaper than 2x10's?
I like the light part,,
|
|
Moontreeranch
Member
|
# Posted: 30 Jan 2010 11:54am
Reply Quote
The I-joist cost more (they run from 1.70 to 2.10 a foot...nice thing is you can get them really long 20+ feet easy) than regular lumber but the ease of use is worth it...the primary reason i went with them was for how I set up my insulation bays for the floor...the light weight was a super bonus working alone for the roof.
|
|
Moontreeranch
Member
|
# Posted: 5 Apr 2010 06:52pm
Reply Quote
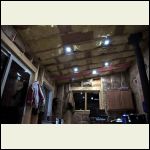
Got down to the cabin for a few days last week. Installed the rest of the LED lights in the ceiling, and got started on the T&G Blue stain pine ceiling.....
need more time and money...time when I got the money and money when I got the time...the latter seems to be the norm.
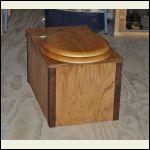
we also got the Sawdust toilet box built + stained, need to pick up an old reg toilet tank for sawdust storage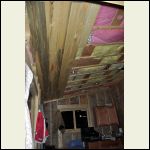
Blue stain pine ceiling
| 
ceiling leds
| 
sawdust toilet box
|  |
|
|
lawnjoky
|
# Posted: 29 Apr 2010 10:22am
Reply Quote
I've read the Humanure book and all that stuff but the idea of keeping a bucket of poo and sawdust around just doesn't do it for me. I am still using the outdoor john.
I just got back from 3 weeks in NM and I framed, sheathed, wrapped and roofed and bath and bedroom addition. I am going to use a flush toilet and a septic system. What do you guys do for preventing flash toilets from freezing?
Jocko
|
|
dk1393
Member
|
# Posted: 29 Apr 2010 05:03pm
Reply Quote
My friend shuts off the water to the tank and flushes it to empty it then pours some RV antifreeze in the bowl before leaving. He has had no problems. We are in upstate NY
|
|
lawnjoky
|
# Posted: 30 Apr 2010 03:02pm
Reply Quote
I wonder what that anti freeze does inside the septic tank in regards to inhibiting decomposition?
|
|
Kramer
Member
|
# Posted: 1 May 2010 04:15pm
Reply Quote
Quoting: lawnjoky I wonder what that anti freeze does inside the septic tank in regards to inhibiting decomposition?
There is septic safe antifreeze (check the RV stuff, normally it is), and it will not adversely effect anything unless you're using huge quantities of it.
|
|
bugs
Member
|
# Posted: 10 May 2010 09:09am
Reply Quote
Hi Moontreeranch
Have enjoyed reading about your progress. Thanks for all the pix and notes sharing your experiences they have been very helpful and given me some good ideas.
I was wondering how you have found your LED lights? Are they bright enough to light up your room? How many did you eventually use? Could you provide more info/specs on your adaption from Halogen to LED? I was thinking of the same thing but without the dc adaptation just stick to ac.
bugs
|
|
Moontreeranch
Member
|
# Posted: 1 Jun 2010 09:58am
Reply Quote
Bugs
I wrote a blog post about the lights at our cabin you can read it here
http://kmswoodworks.wordpress.com/2009/12/29/to-build-a-better-light-bulb/
The trouble for me was trying to find the LED's in 12 V DC, I found a lot at 120 v ac. The first set I got had a screw base, But I later found some in the GU10 base. I got them on ebay direct from a Chinese manufacturer.
If you look around you can find some good deals there.
I set the cabin up with some general lighting and some specific "task" lighting.
In the dinette area we have 4 Leds positioned in the bottom of the loft bed, these shine down where the table is or where the bed is when we have it set up that way. I set 6 lights in the main body of the room on two circuits, in opposing "v" paterns. I also set up two lights over the cabinets for cooking + prep.
I set up a three way for a single light above the ladder gos to the loft. this will allow minimal light to get in and out of the loft. Also in the loft are 2 lights set in the ceiling with a ceiling switch to provide task lighting for reading in bed.
Finally I set another single light in the "bath" room this is set into the bottom of the loft like the dinette lights.
With everything on its about 38 watts...and you can see very well.
If you need more info just ask
|
|
Moontreeranch
Member
|
# Posted: 30 Nov 2010 11:03am
Reply Quote
It seems like its been forever since we were down to our cabin...last time we were there was over he 4th of July..On that trip not much work got done...I had hoped to put in more of the T&G for the ceiling but ended up playing with the girls more...(their mom...my ex...had a Serious DUI earlier in the summer and I had been going through some custody shit...expensive and draining)
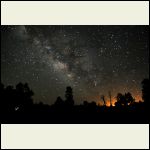
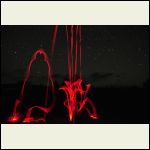
We got to play with some glow sticks, for our fire works and there is also the incredible desert star-scapes.
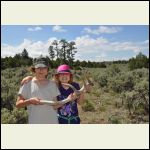
For actuall work I did get the metal up on the wood shed roof and built a simple door for it.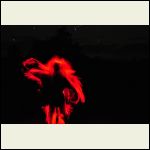
back_lit.jpg
| 
elk_shed_1000.jpg
| 
milky_way_1000.jpg
| 
glowstick.jpg
|
|
|
| << . 1 . 2 . 3 . >> |

