| . 1 . 2 . >> |
| Author |
Message |
fthurber
Member
|
# Posted: 30 Nov 2011 08:14pm - Edited by: fthurber
Reply
Here is the start. For the first time ever I am using plywood but only for the underfloor since I have some solid cherry to go over it (a sawmill friend gave the cherry to me after taking him out striper fishing).
The rest of the cabin is green sawmill pine. The frames are 4x6 and the lesser beams are 4x4.
Hope to raise the ridgepole this weekend and start the roof joists. The sawmill is cutting some custom 4x3 for the roof joists.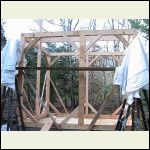
4x6 frames
| 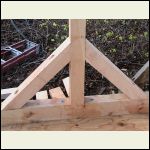
center post
| 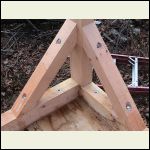
corner
|  |
|
|
fthurber
Member
|
# Posted: 30 Nov 2011 09:02pm
Reply
It started as a simple cabin in our woods but my wife the art student girl has been embellishing it. It is so tall so it can have a sleeping loft with skylights. Wood stove and porch also; we will see how much of that I get done.
|
|
Nirky
Member
|
# Posted: 30 Nov 2011 09:19pm
Reply
Looks good, love learning about other methods of construction as I am a construction novice. So am wondering the reason(s) you chose this method of construction over say 2x4 or 2x6?
|
|
fthurber
Member
|
# Posted: 30 Nov 2011 09:42pm - Edited by: fthurber
Reply
I much prefer the look of post & beam so there is no room for 2x4 in a post & beam. I like to over-build since I do not want to be on a wonky structure when I do the roof and want something that can withstand limbs and heavy snow. These are real 4x6 and 4x4 from the sawmill ).i.e they really measure 4x4 and 4x6).
Using sawmill wood looks nice and it is cheaper than the garbage from the Big Box stores. I hate plywood and hate OSB even more. I had to use plywood this time however for the floor but got it from our local family-owned building materials place after being burned at Lowes.
|
|
Nirky
Member
|
# Posted: 30 Nov 2011 09:58pm
Reply
Thanks for the info. I share your desire to overbuild. Since you say there is no room for 2x4 in post and beam, how will you be finishing the walls, using 4x4 or 4x6's? And what will you be covering those beams with if not plywood or OSB?
|
|
fpw
Member
|
# Posted: 1 Dec 2011 08:31am
Reply
Very nice. I think you will like th extra height once you get the loft installed. Be careful raising the ridge!
Any reason you put the knee braces on the bottom? I have not done post and beam construction. But in a timberframe structure, knee braces at the top are plenty to keep the structure from racking in the wind.
I, too, like real dimensional lumber off the sawmill. Took me a while to get use to looking at 2" x 4" that was truely 2" x 4". Now, I can't cut or use anything else.
|
|
trollbridge
Member
|
# Posted: 1 Dec 2011 03:34pm
Reply
Congrats on getting started!!! What size are you planning on building? I agree with fpw that you will most likely enjoy the extra height in the end...though it is more difficult to build. Enjoy the process, and keep the pics coming!
|
|
fthurber
Member
|
# Posted: 2 Dec 2011 07:16am
Reply
Why did I put braces on the bottom? Because I am nuts I guess! I was up top recently and tried shaking the building; it is like rock--no movement at all.
|
|
|
fthurber
Member
|
# Posted: 2 Dec 2011 07:17am
Reply
I will be covering the beams with ship lap from the sawmill or maybe board & batten. On the outside only so that I can see the beams on the inside.
|
|
fthurber
Member
|
# Posted: 3 Dec 2011 09:00pm
Reply
I had the sawmill cut some 4x3's for my rafters and am putting them up now (my wife does not want 2x6 because they eat into the loft space). My son and I are very slow but I hope to get them all up by the end of the weekend. This is going to be a massively strong structure....overbuilt but we do have wicked winter storms.
I will be putting 1x10 on for the roof and then the weather-seal and the shingles. I am going to see if the sawmill can kiln dry the 1x10s so there is no shrinkage factor!
|
|
fthurber
Member
|
# Posted: 4 Dec 2011 07:15pm
Reply
We started to put the roof rafters up this weekend. We are using 4x3 from the sawmill.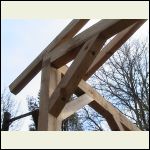
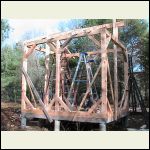
Upper corner showing knee braces and bird's mouth notch
| 
Sawing up a rafter
|  |  |
|
|
steveqvs
Member
|
# Posted: 4 Dec 2011 08:00pm
Reply
Wow, impressive. How did you learn to build with post and beam. Seems like a lot is going on in each picture! That looks like one strong cabin!
|
|
fthurber
Member
|
# Posted: 4 Dec 2011 09:11pm
Reply
I don't really know what I am doing; I just picked up some tips from a classic shed book. I previous build a couple of shed and my wife's pottery studio (post & beam also).
The structure is over build but I prefer it that way...
|
|
neb
Member
|
# Posted: 4 Dec 2011 09:43pm
Reply
I like the look. Would you share some pictures of the inside of the studio you biult for your wife? It loks strong and very nice construction.
|
|
fthurber
Member
|
# Posted: 4 Dec 2011 09:53pm - Edited by: fthurber
Reply
Sure. Here is the interior with a door being prepared. We were snookered by Home Depot on one this door--we thought it was solid pine but it delaminated when it got wet--we should know better than to trust that a Big Box would deliver solid wood. It was not described as an exterior door but it looked like solid wood--what could go wrong? Ha
|
|
fthurber
Member
|
# Posted: 4 Dec 2011 09:57pm
Reply
Here are some more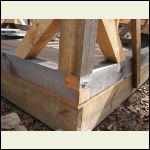
corner post
| 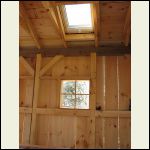
wall with home-made window
| 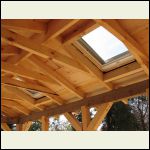
rafters with skylight
|  |
|
|
neb
Member
|
# Posted: 4 Dec 2011 10:05pm
Reply
SquidLips
Thanks again for the pictures. I just found the post that you had pictures of the inside and the inside looks great. I also like the open beam look and great construction. Thanks
|
|
fthurber
Member
|
# Posted: 5 Dec 2011 08:29pm
Reply
The insulation question has not been answered. In my wife's studio we put in a second layer of wood on the outside. I was sort of thinking of doing this with some sheet insulation such as cork!?
|
|
fthurber
Member
|
# Posted: 10 Dec 2011 10:50pm
Reply
My son and I got the rafters finished today. I will post pix tomorrow I hope. I had some 8 foot 4x3's cut at the sawmill for the rafters; they look really neat. I used 4x4 on the ends.
Hope to start the roof tomorrow. I am using 1x10's from the sawmill. Unfortunately they are as green as grass but I do not have time to season them; the weather is overdue to turn bad and I need a roof on quick to protect the rest of the cabin.
I plan to put ice and water shield over the whole roof and then tack on asphalt shingles. Not very elegant considering the rest off the structure but it lasts a long time. I have done shingles in the past and they only last for about 10 years
|
|
Nirky
Member
|
# Posted: 11 Dec 2011 01:12am
Reply
Is asphalt more cost effective than metal?
|
|
fthurber
Member
|
# Posted: 11 Dec 2011 07:42am
Reply
I have not tried metal yet. My wife and I did build a tin shed from Sears and it was terrible. It leaked and the water could not evaporate. The mold ruined everything inside. Never again. We should have know; their tin sheds were on sale but it was still a few hundred dollars down the drain and all the stuff in the shed ruined. I will never to metal again; I know that quality metal roofs last but never again for me.
Metal roof are very popular here in the northeast but I am too conservative; my last two buildings have been asphalt over ice/water shield over solid pine planks and they have held up beautifully. Besides the wood planking on the inside looks nice.
|
|
fthurber
Member
|
# Posted: 12 Dec 2011 06:26pm - Edited by: fthurber
Reply
We got all the rafters up and half the roof planks.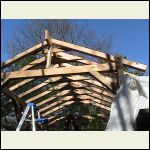
The rafters and the collar ties
| 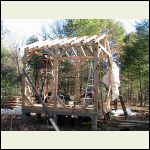
Was made tall to support a loft.
|  |  |
|
|
fthurber
Member
|
# Posted: 13 Dec 2011 07:40pm - Edited by: fthurber
Reply
We have started to add planks to the roof. These are just 1x10's from the sawmill and will act as underlayment.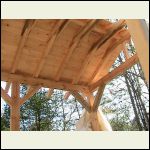
Start of the roof
| 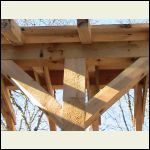
The roof will extend over the rafters of course
|  |  |
|
|
turkeyhunter
Member
|
# Posted: 13 Dec 2011 08:16pm
Reply
looks GREAT!!!!!!!!!!!!!!
|
|
fthurber
Member
|
# Posted: 14 Dec 2011 01:27pm
Reply
but it is going sooooo slowly and the clockis ticking; I have to get the roof finished before the bad weather sets in and the bad weather is overdue...
|
|
trollbridge
Member
|
# Posted: 14 Dec 2011 03:19pm
Reply
keep plugging away-you'll get there.
|
|
Bevis
Member
|
# Posted: 17 Dec 2011 12:59am
Reply
I think you'll make it in time. Looks good and sturdy so far.
|
|
neb
Member
|
# Posted: 17 Dec 2011 08:31am
Reply
Looks good. Keep us posted would like to see more pictures once you get the roof on.
|
|
sweet75
Member
|
# Posted: 19 Dec 2011 11:51am
Reply
I can't wait to see it. It already shows so much promise.
|
|
fthurber
Member
|
# Posted: 19 Dec 2011 08:39pm - Edited by: fthurber
Reply
We worked on the roof today. The first step was to build (actually "cobble" is the correct word) some scaffolding.
Progress is unbelievably slow but we got most of the ice & water shield on (we cover the whole roof with ice & water shield). Hopefully we do not get too much rain between now and the next weekend.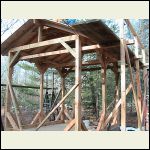
Scaffolding
| 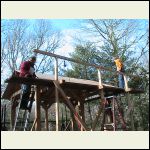
Me and my son. Note the safety line on him.
| 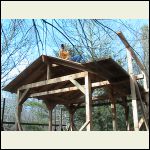
My son on top
|  |
|
|
| . 1 . 2 . >> |

