| << . 1 . 2 . 3 . 4 . 5 . 6 . 7 . 8 . 9 . 10 ... 17 . 18 . >> |
| Author |
Message |
Tim
Member
|
# Posted: 16 Dec 2011 06:48pm
Reply
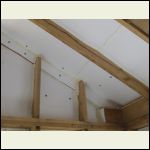
I am sooooooooooo excited! Today, I insulated all day. I started with the ceiling in the bedroom. First, the styrofoam, the the "great Stuff" to seal all the edges. Then I worked on the walls of the bedroom for a while.
After a friend got there to help, we changed to working on the loft while I had help to hand up materials and write down mesurements.
We sure got a lot done today, but there is a long, long way to go too.
Here are some pics.
Tim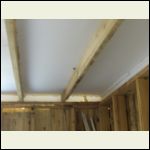
styrofoam on the bedroom ceiling
| 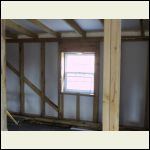
styrofoam on the walls of the bedroom
| 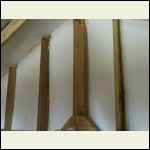
styrofoam on the gable, up in the loft
| 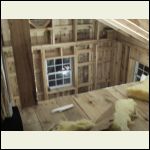
looking down from the loft
|
|
|
Tim
Member
|
# Posted: 16 Dec 2011 06:51pm
Reply
more pics: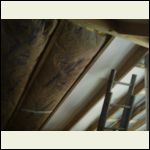
starting the fiberglass in the celing in the loft
| 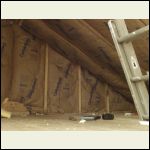
fiberglass on the gable in the loft
| 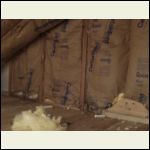
Zi6_6421.JPG
|  |
|
|
fthurber
Member
|
# Posted: 16 Dec 2011 08:27pm
Reply
Wow. Very nice. I like all the natural wood.
|
|
Bevis
Member
|
# Posted: 17 Dec 2011 12:48am
Reply
Tim, what thickness is the styrofoam ? and then the fiberglass right ontop of the foam? Coming along.
|
|
Tim
Member
|
# Posted: 17 Dec 2011 08:20am - Edited by: Tim
Reply
Bevis
The foam is 3/4". It is on the inside of the nailing purlins, so that leaves a 1" gap between the foam and the siding. Yes, the 6 inches (actually 5 1/2) of fiberglass is right against the inside of the foam. I could only use both inside due to the fact these are rough sawn (full 6") studs.
To do this with standard lumberyard lumber, I would have had to use "2X6's with the foam and only 3 1/2" fiberglass.
Remember, you never want to compress the fiberglass or you loose a bunch of "R" value.
Tim
|
|
neb
Member
|
# Posted: 17 Dec 2011 11:53am
Reply
Very nice. Keep us posted.
|
|
madmo
Member
|
# Posted: 19 Dec 2011 08:43pm
Reply
looks like it will have no problem keeping the heat in. Very nice place. Congrats.
|
|
Bevis
Member
|
# Posted: 19 Dec 2011 09:30pm
Reply
Tim,
I understand about not compressing the bats...I just didn't know if you had put something in between the tow or not. Looks good though...
|
|
|
Tim
Member
|
# Posted: 24 Dec 2011 08:28pm
Reply
MERRY CHRISTMAS EVERYBODY!
I haven't been on for a while. I have been busy insulating. Wow, is that time consuming. Yeasterday I got a load of gravel to make a parking area off the road. It has rained for 9 consecutive days and everything is a total mud hole.
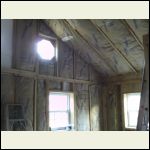
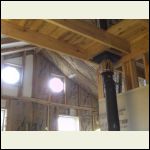
Here are some progress pics of the insulation: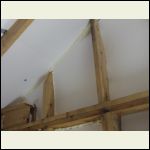
Zi6_6432.JPG
| 
Zi6_6430.JPG
| 
Zi6_6433.JPG
| 
Zi6_6438.JPG
|
|
|
Tim
Member
|
# Posted: 27 Dec 2011 08:57pm - Edited by: Tim
Reply
Insulation is coming along! It is getting so warm and cozy in there. I actually took my coat off today and rolled up my shirt sleeves to work. Here are some more pics:
|
|
Tim
Member
|
# Posted: 28 Dec 2011 06:23pm
Reply
DONE! THE INSULATION IS DONE!!!!!!!!!! Wow, what an amaizing difference. I worked all day in a sweatshirt with the sleeves rolled up. It was about 70 degrees in there all day. Outside was a high of 26 degrees and spitting snow flakes.
I had to watch not to get too big of a fire going in the stove or it would get misserably hot working. The last of the insulation went in aroung 4 this evening just before the sun set.
Normally I would have done the wiring first, but now I can have the comfort of a nice warm cabin in which to work while doing the electric and plumbing. Heat in the winter is SWEET!
Tim
|
|
turkeyhunter
Member
|
# Posted: 28 Dec 2011 06:36pm
Reply
cabin looks great--really like the B & B.....if ya can ------try to get the sofit done as soon as ya can--trust me!!!! had a critter get in my insulation about 3 weeks ago ....had to stop doing other things on the cabin---- and do the sofit , got it done last week.
|
|
Tim
Member
|
# Posted: 28 Dec 2011 06:39pm
Reply
turkeyhunter
hhhmmmmm.......never thought of a critter getting in there. Good point! I just might have to tend to that a little sooner than planed.
Thanks! Tim
|
|
turkeyhunter
Member
|
# Posted: 28 Dec 2011 07:21pm
Reply
Quoting: Tim turkeyhunterhhhmmmmm.......never thought of a critter getting in there. Good point! I just might have to tend to that a little sooner than planed.
yes they will looking for a warm place for winter.......
|
|
ErinsMom
Member
|
# Posted: 28 Dec 2011 08:23pm
Reply
Tim,
You have come so far since I last looked at your post. The insulation will make a world of difference and you can really move ahead with the interior. If we don't pass messages again before the !st, have a happy new year!
|
|
oldbuddy
|
# Posted: 29 Dec 2011 08:52pm
Reply
I'm very envious of you being DONE with your insulation! Hopefully, Saturday, Old Buddy and I will get the ceiling done...and maybe a little more. Your cabin sure looks warm and I can't wait until all I have to worry about is putting too many logs on the fire or we'll sweat terrible! You've done a lot of work in a short period of time.
Take a break....you deserve it. Have a great new year and good luck next year on the cabin!
Old Old Buddy
|
|
Tim
Member
|
# Posted: 29 Dec 2011 10:38pm
Reply
Old Old Buddy,
You guys have worked hard as well! You will have insulation before you know it. Once you get the ceiling done, you will see a difference already. The more you get up, the warmer you will start to notice it to be. It gives you great incentive to keep going and get all the insulation in so it will be cozy. Good luck with your insulation. Keep us posted!
Tim
|
|
Tim
Member
|
# Posted: 31 Dec 2011 03:40pm
Reply
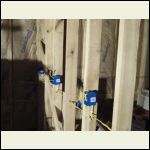
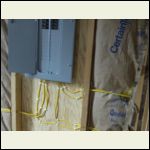
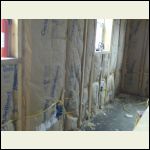
I have been working on the wiring. I have the kitchen, bedroom and living room roughed in now. I got a heck of a deal on a 200 amp box. It came as a value pack with 10- 20 amp breakers, a 50 amp, and a 30 amp for $109.00. I thought that was a really good deal! Here are some pics: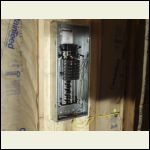
Zi6_6454.JPG
| 
Zi6_6455.JPG
| 
Zi6_6460.JPG
| 
Zi6_6462.JPG
|
|
|
customrunner
Member
|
# Posted: 31 Dec 2011 07:51pm
Reply
Wow Tim, really coming along now, great job keep the picks a coming..
|
|
tnky03
Member
|
# Posted: 3 Jan 2012 08:16pm
Reply
Tim, the pic of what your cabin will look like is just like a cabin I (with help from my elderly dad and a few good friends) built many years ago. I collected recycled building materials over a year, also used lots of green rough sawn lumber for floor joists and upstairs flooring, and seasoned oak reclaimed from a large shed for siding. I still have, not pleasant memories of pulling all those nails and then nailing the siding up. Lots of bent nails doing that. Let me say now I am a gal and had NO building experience, drew up my own houseplan on graph paper, but guess what, it went together and proved to be a great home. I was so proud, it was mine and debt free. Now middle-aged and married to a builder (great idea) we are seeking to find the simple life. We've bought a few acres and plan to build a small shed/house using mostly rough sawn lumber from the Amish mills. We are learning much about solar, rain collection, and composting. These are areas neither of us had much knowledge of. Thanks to all on this forum for your posts and ideas shared. I am so excited and feel a part of a real movement of so many seeking to simplify and really enjoy their lives. Good luck to everyone on your endeavors.
|
|
Tim
Member
|
# Posted: 3 Jan 2012 09:32pm
Reply
tnky03
Wow! Great story. You made me think of my daughters, who hated this kind of stuff as kids. My youngest (now 32) built he own horse barn a couple of years ago. She can carry shingles with the best of 'em!
Glad you found the perfect "builder" too. I am wondering where you are located. We are in Ohio, not far from Amish country here.
Keep in touch and get you drawings finelized soon. Spring will be here before you know it.
Tim
|
|
Bevis
Member
|
# Posted: 10 Jan 2012 05:34pm
Reply
Any updates Tim ?
|
|
TimJ
|
# Posted: 11 Jan 2012 05:34am
Reply
Bevis
Just more wiring going in. I did the survice entrance last weekend and the inspector was there last night and signed off on it. Now, I have to fill out, and fax in forms they left to schedule hook-up.
Since the weather has been incredible for January, I have been thinking of going ahead with the front porch. It would be really nice to have all the outside stuff done. We will see.
Thanks for asking,
Tim
|
|
Tim
Member
|
# Posted: 16 Jan 2012 04:58pm
Reply
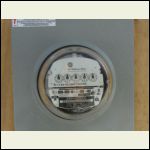
Today, they came and hooked up my electric service! Wow, it sure will be nice having light to work with, without firing up the generator. I have been working on the interior wiring. Here are some progress pics:
Tim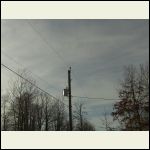
My very own transformer! :-)
| 
I'll never see zeros again!
| 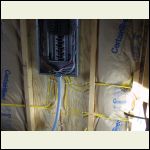
Zi6_6509.JPG
| 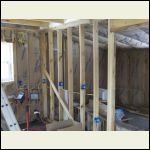
Kitchen counter top area outlets
|
|
|
shakes head
|
# Posted: 26 Jan 2012 05:37pm
Reply
Green wood? Full of water green wood?
This thing is gonna shrink, crack, bend... there won't be straight board on the whole thing.
|
|
Tim
Member
|
# Posted: 26 Jan 2012 06:07pm
Reply
shakes head
You know, before you jump up and down and pretend you know what you are talking about, you need to do a little research. There are books and lots of means of educating yourself. You should take advantage of some of these things.
Try reading "The Green Wood House" by Larry Michael Hackenberg. Actually, if you google it, you might still find it available in a pdf file for free. It was available a while back.
Another great read is "Green Woodwork" by Mike Abbott.
This will be the third house I built using these methods. The first one was in 1987. When it was finished, I had about $28,000.00 in the house and sold it 9 years later for $135,000.00. The buyer still lives in it today. But one of these days I will stop buy and tell them your fears.
There are methods used for dealing with shrinkage and warping that have been passed on by only a few. It knowledge of building with green wood is nearly lost, and sadly, people like you who know no better will probably never have an open mind enough to learn. Houses throughout history were built with rough sawn green lumber for the framing.
While buiding the cottage, I am living in a victorian home, built in 1860 that has rough sawn 4X4 Oak wall studs. They were no doubt put in while still green.
Go read a book!
Tim
|
|
Tim
Member
|
# Posted: 26 Jan 2012 06:22pm
Reply
shakes head
Here are some links that may help you.......
URL
URL
URL
|
|
Tim
Member
|
# Posted: 26 Jan 2012 06:24pm
Reply
shakes head
THE GREEN WOOD HOUSE
by Larry Michael Hackenberg.
"This book," says the author, "is written for those who have already decided that they cannot afford the cost, either financially or aesthetically, of a $30,000 (plus!) suburban (crackerbox, mass-produced, ticky-tacky) house. It is a book for those who seek more." And "more"-according to Hackenberg--means a dwelling built wholly of green (fresh-from-the-tree) wood, which costs only a small fraction of what kiln-dried commercial lumber costs. With the aid of more than 60 photographs and diagrams, author Hackenberg explains in detail how to design a house, select a site, buy green wood, and use the wood to construct a beautiful, dur able residence . . . all at a cost of well under $10,000. If you enjoyed Hackenberg's article in MOTHER NO. 39 ("The Green Wood House", pages 84-86), you'll love this book.140pages.Paperback. 64071 $4.95
|
|
MJW
Member
|
# Posted: 27 Jan 2012 09:31am - Edited by: MJW
Reply
Here is a link to "The Green Wood House" by Larry Michael Hackenberg.
http://raincentre.in/The_Green_Wood_House.pdf
|
|
Tim
Member
|
# Posted: 27 Jan 2012 09:35am
Reply
MJW
Yeah, there it is! Thanks for posting that.
Tim
|
|
| << . 1 . 2 . 3 . 4 . 5 . 6 . 7 . 8 . 9 . 10 ... 17 . 18 . >> |

