| << . 1 . 2 . 3 . 4 . 5 . 6 . 7 . 8 . 9 . 10 ... 17 . 18 . >> |
| Author |
Message |
scout100
Member
|
# Posted: 27 Oct 2011 09:30pm - Edited by: scout100
Reply
Hi Tim,
what you call " dry cement " I call a " dry pour " I usually do a dry pour using concrete... But anyway, good luck to you.. Its your money and your labor of love... Do it the way the old-timer taught you and have fun.. Because at the end of the day, I'm sure the roof will shed water and you will be high and dry.. Its all about calling your own shots and having fun anyway. IMHO, once its built all the fun is gone..
|
|
concretefire
Member
|
# Posted: 28 Oct 2011 12:58am - Edited by: concretefire
Reply
The 'piers' part was my bad. Saw those pics on another post. Lol. But the dry cement comment was still valid for your thread. I understood your statement about the wood swelling and I agree with that. On the other hand, I can't imagine non properly mixed cement (with traditional water) ever being as strong as it should be. And, Like I said before and I want to be perfectly clear about this....I have virtually zero real world experience pouring concrete. All my knowledge is by learning on the phone and taking a few concrete 101 type classes they sent me to.
So in essence, I'm trying to say your theory of real world vs computer puke I agree with. Or as they say, there's more than one way to skin a cat. Also, I do understand your footers were poured wet and 'correct.' Still not sure I understand the concept of pouring dry cement around the base though. Was it used in place of dirt to protect against rotting? That makes sense to me....
Again, I'm not one of those guys trying argue with you, I'm just here to learn. Thanks.
|
|
Tim
Member
|
# Posted: 28 Oct 2011 05:42am - Edited by: Tim
Reply
concrete,
To me, the dry cement acts more like an anchore around a newly set post. No matter how well you tamp the soil around the post, it could be moved or bumped out of line. By using the dry cement, a couple of days after setting the posts, you could back a truck into them and not move them. They would break off before they would move out of line.
I drilled the holes for my posts, with a 12" auger, down about 4 feet. The poured concrete in the bottom is about 8" or so deep. Then, after placing the post in the hole, about a foot of dry concrete around it. So, there is about 2 1/2' of compacted (in my case hard clay) on top of all of the cement. I rammed it as much as I could with a spud bar as I back filled the hole a few inches at a time.
Tim
|
|
concretefire
Member
|
# Posted: 28 Oct 2011 03:01pm
Reply
Ohhhhh.......Ok. I think I'm getting it now. You are talking about the holes for the footers. That's vertical thinking. UP and DOWN. In my head I was thinking horizontal. (left and right) I couldn't figure out why you would pour dry cement the whole length of the outside frame. Lol.
Anyway, Yes, I get it now. I had to turn my brain 90 degrees but I got it. With moisture over the years inevitably getting into the dry cement, that 'anchor' will just get stronger and stronger. That is one thing I did learn. Properly mixed concrete will continue to get stronger as the years pass. It's fairly marginal the strength gain but it is there none the less. Keep posting pics man. :)
|
|
Tim
Member
|
# Posted: 29 Oct 2011 07:48pm
Reply
Well, I was a busy boy today! I will post some pics. The first one is when I first got there at 8:00 am this morning. The last one is just before I left.
Tim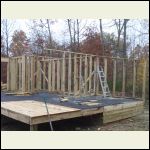
The beginning of the day Oct. 29th
| 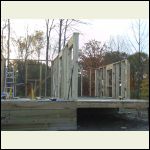
More walls up!
| 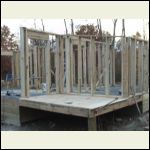
Zi6_6005.JPG
|  |
|
|
Tim
Member
|
# Posted: 30 Oct 2011 05:31pm - Edited by: Tim
Reply
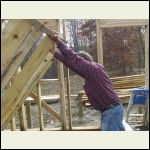
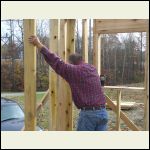
YIPPY SKIPPY! lol.....All of the walls are now up! I finished the north east wall today, added the top stiffener sill and started the box sill for the loft. It sure is nice to have walls! :-)
Tim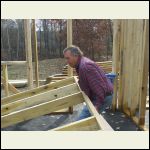
Raising the last wall!
| 
GGrrrrrrrrrrrrrrrrrrrrr
| 
Phewhhh!
| 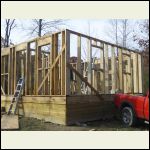
WALLS DONE!
|
|
|
Tim
Member
|
# Posted: 2 Nov 2011 08:16pm
Reply
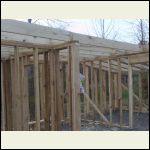
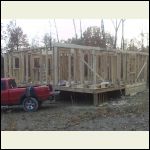
I took a vacation day today. It was so beautiful outside! 65 degrees! I got the rest of the rafters up over the back bedroom and back porch. Then in the afternoon, I got the floor joists up for the loft over the bathroom and kitchen.
Here are some pics:
Tim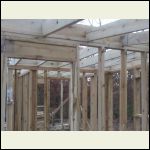
Zi6_6064.JPG
| 
Zi6_6060.JPG
| 
Zi6_6070.JPG
| 
Floyd and Gunther were there to help today!
|
|
|
concretefire
Member
|
# Posted: 2 Nov 2011 10:52pm
Reply
keep em' coming
|
|
|
Tim
Member
|
# Posted: 3 Nov 2011 05:36pm
Reply
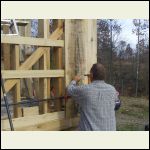
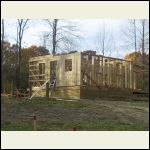
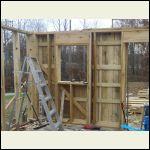
I started the siding today. Here are some pics: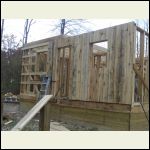
Zi6_6076.JPG
| 
Zi6_6072.JPG
| 
Zi6_6078.JPG
| 
Zi6_6074.JPG
|
|
|
Tim
Member
|
# Posted: 3 Nov 2011 06:59pm
Reply
In case anybody is wondering why I didn't use Tyvec, or some other "house wrap", here is the reason. In a small house, there is a huge amount of humidity from cooking and general breathing. That humidity will eventually work its way through the insulation, and hit the Tyvec, which being on the outside layer, is cold. Then you get condensation collecting inside the wall.
A much better way is to use the Tyvec, or other plastic on the inside so the humidity never enters the wall at all.
|
|
neb
Member
|
# Posted: 3 Nov 2011 09:15pm
Reply
Very nice
|
|
MtnDon
Member
|
# Posted: 3 Nov 2011 10:05pm - Edited by: MtnDon
Reply
Or you use good old #15 building felt (tar paper). Moisture that may make it through from the inside may condense on the felt. But the liquid water will be absorbed by the felt and it will wick through and evaporate. No problems.
In a cold climate a vapor barrier on the warm (inside) side of the wall should be installed even with building felt.
Problems with mold started with the introduction of the synthetic wraps. In theory they work well. IF the moisture, as vapor, comes through from the inside it is supposed to pass through the Tyvec, Typar, etc as a vapor. Problems do arise when the moisture does condense.
Without a weather resistant barrier, like building felt under the exterior sheathing/boards/panels there is no barrier to any water that leaks through the exterior siding. Given time and wood shrinkage that will more than likely occur at some point.
In a hot and humid climate however, like our South, a vapor barrier should never be used on the inside of the walls. When there is A/C in use for the hot and humid part of the year, water vapor from the outside air will migrate through the wall and condense inside the wall on that inside vapor barrier.
|
|
jrbarnard
Member
|
# Posted: 4 Nov 2011 06:37am
Reply
MntDon, yet again.. great idea on the Felt. I was thinking of that issue when planning my cabin and will be using that instead.
R
|
|
Martian
Member
|
# Posted: 4 Nov 2011 08:38am
Reply
Tim,
Its your house! Build it anyway you want!
Tom
|
|
jrbarnard
Member
|
# Posted: 4 Nov 2011 08:46am
Reply
I do not think anyone told him how to build it, he was giving advise.
But yea, build it the way ya want.. heh
Still looks like a hell of a nice job! ;)
Russ
|
|
Tim
Member
|
# Posted: 4 Nov 2011 09:23am
Reply
Quoting: jrbarnard I do not think anyone told him how to build it, he was giving advise.
OMG! Let me rephrase that!
"The way I am going to do it is", use the Tyvec, or other plastic on the inside so the humidity never enters the wall at all. But you should do it your way!
|
|
MtnDon
Member
|
# Posted: 4 Nov 2011 10:07am - Edited by: MtnDon
Reply
I tried to present that information as a text book. That's why I threw in the info about hot and humid locations requiring a different approach.
And I missed a point I wanted to make about tyvec and similar products. They would not be my choice for an interior vapor barrier. Plastic sheet would be better. Read the manufacturer info and you will see that tyvec and the like are vapor permeable and liquid resistant. It made that way with microscopic pores. The pores are small enough to prevent liquid water from passing through but small enough that the vapor can pass through. Hence it is not a vapor barrier. But of course anyone can use the product any place and any which way they choose. Some things, some methods simply make more sense and produvce better results than others, IMO.
I could point to references on all that but I don't have the time this morning to find them, but everything I stated can be backed up by manufacturer info and independent sources. In my experiences there is a lot of misconceptions regarding weather and vapor barriers. One very good resource for information of all types regarding this and other building energy products and techniques is a website called Building Science.
|
|
MtnDon
Member
|
# Posted: 4 Nov 2011 10:36am
Reply
I always look as the information I post as hopefully being useful in three ways. To the original poster, to another person who reads this as a current topic and to another reader or readers weeks, months, maybe years down the road. Nobody should take something such as me providing a caveat about vapor barriers in different climates as a personal attack. It is provided as information to help somebody make a better informed decision.
I know that sometimes a reader grabs a thought and runs with it as a good idea without having all the facts at hand. So sometimes my explanations may get wordy.
|
|
CabinBuilder
Admin
|
# Posted: 4 Nov 2011 10:51am
Reply
Much appreciated, MntDon.
|
|
Erins#1Mom
|
# Posted: 4 Nov 2011 07:37pm
Reply
MtnDon,
Question: when you talk about the hot and humid south, just how far south? I'm in Northeast TN and it gets quite hot and humid in the summer with temps in the upper 90s. In winter, temps in recent years in the 10s. Which would you think best for outer wrap, tyvac or the tar paper? I agree with the plastic wrap for the interior vapor barrier (one of my classes at Home Depot University).
|
|
Erins#1Mom
|
# Posted: 4 Nov 2011 07:43pm
Reply
Tim,
I am impressed that you seem to be the only worker for this project. You are building a very solid looking cabin. I know you have mentioned this is not your first build. My question is: do you seen any differences in using the raw sawn woods straight from the sawmill rather than treated/seasoned?
|
|
Tim
Member
|
# Posted: 4 Nov 2011 08:13pm
Reply
Erins#1Mom,
I have been in construction for over 40 years. In the past, I mostly built additions, remodeled kitchens, and built storage barns and buildings. I mention that because I have had a lot of experience with regular dementional lumber.
But....I also have built alot of buildings with rough sawn lumber. The biggest difference I find of course is the cost. I am building this cabin for about 1/3 the cost of dimentional lumber.
As far as working with it, there are techeniques you have to follow. For example, when you nail, you angle the nails. This allows for shrinkage. Things are also overlapped in some cases to allow for shrinkage.
There is an excellent book on the market I have mentioned before called "The Green Wood House" by Larry Michael Hackenberg. He goes into great detail on the long lost skill of working with unseasoned lumber. Things that were once common knowledge in the carpentry trade that are now deemed unimportant and unnecessary.
Yes, I am working alone most of the time. I hired a younger guy to help auger the holes for the posts, but that is all the help I have had.
I enjoy the process, and have pounded every nail. Nope....no air nailer being used on this house! ;-)
|
|
MtnDon
Member
|
# Posted: 4 Nov 2011 08:45pm
Reply
Quoting: Erins#1Mom MtnDon, Question: when you talk about the hot and humid south, just how far south?
 not a very big map but it should help. not a very big map but it should help.
You are in a "Mixed - Humid" climate.
There's a load of info at the end of THIS LINK
and more HERE
|
|
Bevis
Member
|
# Posted: 5 Nov 2011 12:19am
Reply
I'm in the hot-humid climate...LOL Thanks MtnDon for the info.
Tim, if I lived near by, I'd come help you for free...
|
|
Tim
Member
|
# Posted: 5 Nov 2011 08:01am
Reply
Quoting: Bevis Tim, if I lived near by, I'd come help you for free...
Bevis,
I will have the coffee on! lol...Bring your coveralls.
|
|
Erins#1Mom
|
# Posted: 5 Nov 2011 02:27pm
Reply
Tim and MtnDon,
Thanks for everything. Do you two contract out?
|
|
Tim
Member
|
# Posted: 6 Nov 2011 06:06pm - Edited by: Tim
Reply
Sorry Erins#1Mom,
I have a cabin of my own to get finished!
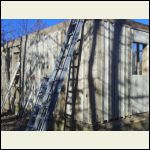
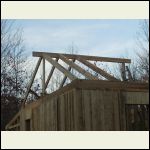
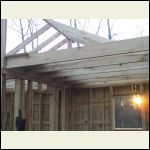
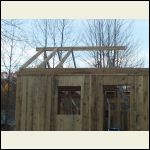
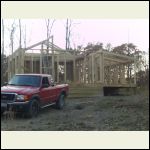
I worked most of the weekend on nailer strips and siding. This morning, I was almost out of nails for the siding and didn't want to waist the time to run to the store. I still had plenty of framing nails, so I decided to work on rafters for a while.
NOW it is starting to look like a cabin! Here are some pics: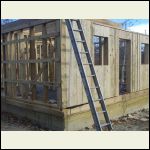
Zi6_6085.JPG
| 
Zi6_6086.JPG
| 
Zi6_6104.JPG
| 
Zi6_6107.JPG
|
|
|
Tim
Member
|
# Posted: 6 Nov 2011 06:11pm
Reply
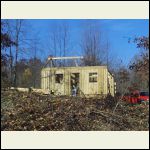
More pics..........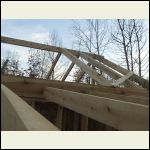
Zi6_6110.JPG
| 
Zi6_6101.JPG
| 
Zi6_6103.JPG
| 
Zi6_6112.JPG
|
|
|
MtnDon
Member
|
# Posted: 7 Nov 2011 08:10pm
Reply
Quoting: Erins#1Mom Thanks for everything. Do you contract out?
Not any more. Sorry.
Too bad too; never been in the TN area.
|
|
concretefire
Member
|
# Posted: 7 Nov 2011 10:57pm
Reply
I like it. Keep em' coming.
|
|
| << . 1 . 2 . 3 . 4 . 5 . 6 . 7 . 8 . 9 . 10 ... 17 . 18 . >> |

