| << 1 ... 9 . 10 . 11 . 12 . 13 . 14 . 15 . 16 . 17 . 18 . >> |
| Author |
Message |
trollbridge
Member
|
# Posted: 30 Apr 2012 12:34pm
Reply
Quoting: Tim Leave it to old "tight wad" here....if there is a way to save a buck without it showing.................... lol
LOL...I'm right up there with ya on that!!!!
Thanks for the info. I knew someone else who did that years ago. It must still be cost effective! We will have to check out the mills around here. I look forward to doing the floors-such a huge impact they have! How long was each board? They look longer than 8 feet. Thanks again for the info!
|
|
Tim
Member
|
# Posted: 30 Apr 2012 12:45pm
Reply
Quoting: trollbridge How long was each board? They look longer than 8 feet
They are 10' boards. The cottage is 20X20 not including the bedroom, which will be carpet. Each row of flooring has 2 - 10' boards. First row, a 2', 10' and 8'. Second, 4', 10' and 6' Third, 6', 10' and 4'. Fourth, 8', 10 and 2' ,then 2- 10's..... then start over....
Just make sure the joints are staggered in what ever pattern you want.
Tim
|
|
trollbridge
Member
|
# Posted: 30 Apr 2012 03:09pm
Reply
yep gotcha! Thanks!
|
|
Tim
Member
|
# Posted: 1 May 2012 06:00am
Reply
More pictures.................
|
|
trollbridge
Member
|
# Posted: 1 May 2012 07:54am
Reply
Wow! Spectacular looking!!!! What stain did you use? Is it a stain poly combo?
|
|
Tim
Member
|
# Posted: 1 May 2012 12:51pm - Edited by: Tim
Reply
It is MinWax, Provincial 211. It is a stain and sealer. I still plan to put 2 coats of high build urathane over it when finished.
The stain:
http://www.minwax.com/wood-products/stains-color-guide/
The urathane:
http://www.minwax.com/wood-products/interior-clear-protective-finishes/
|
|
hattie
Member
|
# Posted: 1 May 2012 04:54pm
Reply
Beautiful work!!!
|
|
customrunner
Member
|
# Posted: 1 May 2012 05:27pm
Reply
Tim your place looks great!!!!!
|
|
|
manny
Member
|
# Posted: 1 May 2012 07:08pm
Reply
wow!!! Beautiful!!!
|
|
Tim
Member
|
# Posted: 1 May 2012 09:35pm
Reply
Thanks everybody. Here are pics from this evening. The first coat of High Build Urathane is on.
|
|
Swamphunter
Member
|
# Posted: 3 May 2012 12:47am - Edited by: Swamphunter
Reply
Awesome blog and even better video series! I just have one question though Tim, maybe its been covered here, but if so I've overlooked it... I did not see where you used any house wrap, or exterior sheathing and in the video the wood siding had some shrinkage which I realize is to be expected... are you worried about insect or rodent infiltration being a bit easier or is it not possible or a concern? Thank you sir
I love Love LOVE your flooring!!!!!!
|
|
Tim
Member
|
# Posted: 3 May 2012 06:26am
Reply
Quoting: Swamphunter I did not see where you used any house wrap, or exterior sheathing and in the video the wood siding had some shrinkage which I realize is to be expected
Here is the quick answere:
First of all, a rodent would chew right through house wrap if it wanted in. Second, the styrofoam I used just inside the wood siding is a solid burrier against insects. All of the edges of the styrofoam are sealed with spray foam. I think the largest advantage house wrap has, is to make a huge billboard with the manufactures ad plastered all over the side of your house before you put the siding on. Most people use it, just because somebody said they should....
Just my opinion.
|
|
Tim
Member
|
# Posted: 3 May 2012 07:13am - Edited by: Tim
Reply
lol....I just have to add more. So, here is the "LONG" answere. Tyvek is my pet peeve.....
Stop, just for a few minutes and keep an open mind. Use common sense, and forget all the millions of advertising dollars telling you what you should think.
ALL of the moisture that contacts your house lands on the roof first. Dew on the roof, a drizzeling rain...all land on the roof. The walls stay dry under the overhand unless the wind blows it against the siding. If house wrap is that critical....if it does that much, then why have I never seen it put on a roof?
Secondly.....Out of curiosity, I calculated the number of nails per pound and added it all up. I put over 3,000 siding nails in.
That perfectly sealed membrain, that is so carfully taped at every seam, and tucked in around every window, would have over 3,000 holes poked into it from installing the siding.
Does that really make sense to anybody?
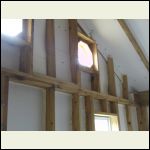
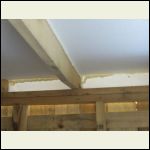
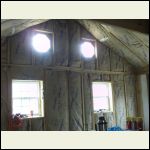
And....the styrofoam I put in, seals out moisture, drafts, and insects, but also adds to insulation in the walls AND celiling. Tyvec does NOT! Just sayin'
Again, just my opinion.
Tim
Here is the styrofoam I refered to. Not all of the spray foam had been done yet in the pictures, but was done before the fiberglass insulation was put in.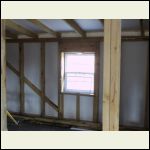
Here is the styrofoam I refered to.
| 
4756355_orig.jpg
| 
7942790_orig.jpg
| 
3035343_orig.jpg
|
|
|
Swamphunter
Member
|
# Posted: 3 May 2012 09:00am
Reply
Was just asking... 
|
|
Rifraf
Member
|
# Posted: 3 May 2012 09:22am
Reply
wow tim , those floors are amazing.. what color stain did you use?
And may I ask, why not stain them after they are down.. with a mop type system ? I dont ask because I think you did it wrong, I was going to do the mop staining thing but perhaps I shouldnt ??
|
|
Swamphunter
Member
|
# Posted: 3 May 2012 10:00am
Reply
I wasnt asking because I thought he did it wrong either.. 
Im new to cabin construction and was curious as to why was all...
|
|
Tim
Member
|
# Posted: 3 May 2012 10:27am - Edited by: Tim
Reply
No worries anybody.
I was not, and am not offended by anybodys questions. And....the way I did/do it isn't always the "right" way, but it works for me.
As for the reason for staining the boards first, is in case there is any slight shrinkage, there won't be any light wood showing in the seams.
As for the stain color:
It is MinWax, Provincial 211. It is a stain and sealer. with 2 coats of high build urathane over it.
|
|
Swamphunter
Member
|
# Posted: 3 May 2012 11:05am
Reply
Love the build Tim!!! Excellent. Only hope my cabin turns out half as detailed as yours!!
|
|
Rifraf
Member
|
# Posted: 3 May 2012 03:42pm
Reply
Tim,
Thanks for the info on the floors, just ordered enough for my cabin. Did you put these right on your sub floor or lay some type of felt/barrier down first ?
My floors are just plywood, I was thinking straight onto those would be ok
|
|
trollbridge
Member
|
# Posted: 3 May 2012 03:57pm
Reply
DFosson had an excellent tip for staining-he used a very nappy paint roller and just slid it along the boards. Way faster than brushing and wiping. He did all his walls and ceiling before being hung too but I know Montanan finished her floors after they were down. You make a good point about shrinkage Tim....if there is likely to be some and you have a darker stain it may be best to stain before installing.
your floors look fabulous with the urethane applied! Thank you for the information on stain colors!
|
|
Tim
Member
|
# Posted: 3 May 2012 09:09pm
Reply
Quoting: Rifraf My floors are just plywood, I was thinking straight onto those would be ok
What I did was this: Every 16 inchs I put a heavy bead of panel glue across the grain of the wood. I then just slipped the tongue and groove together and went to the next board. There were only about 6 boards in the entire floor that were slightly warped so I had to pole them over on one end to get them tight. For those, I used a finishing nail on each end to hold them in place. There are a total of about 12 or 14 nails in the whole floor. They are glued right to the plywood sub floor. If you are worried about wood spitting, I don't think it is a problem. I would think it is less risk than if there were nails. Panel glue has a little flex that I think will give enough to prevent splitting. Just counter sink and fill the few nails that are needed.
|
|
Rifraf
Member
|
# Posted: 4 May 2012 01:17am - Edited by: Rifraf
Reply
hm, Tim what is Panel Glue.. is this like Liquid Nails?
I did a search on lowes and home depot without success.
My floor is a single plywood layer, under that is the joists. I dont have a secondary plywood layer of any kind. Do you think the wood will move well enough glued to a single plywood layer
I ask because some information out there suggests the hardwood planks and plywood have different of movement ratios and a secondary layer should be added.. thoughts on that ? I dont mean to mess with your topic with my questions.. I promise ill stop now 
|
|
Tim
Member
|
# Posted: 4 May 2012 06:01am - Edited by: Tim
Reply
Quoting: Rifraf My floor is a single plywood layer, under that is the joists. I dont have a secondary plywood layer of any kind. Do you think the wood will move well enough glued to a single plywood layer
That is what mine is too. Well, actually, my floor is 3/4" T&G particle board on the joists. Then the barn siding glued right on top of that.
I just don't think there is going to be that much movement indoors to be a problem.
And, yes, liquid nails, PL200 etc. is what I used. Mine was Tight Bond brand, but all the same thing.
Tim
|
|
Tim
Member
|
# Posted: 5 May 2012 10:47pm - Edited by: Tim
Reply
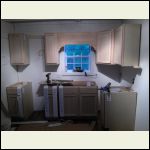
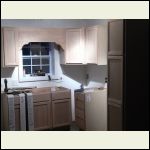
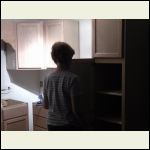
Today, I went and got the kitchen cabinets. For many years, I designed and installed kitchens for a living. Later, I designed kitchen for both Lowe's and Home Depot. I never thought I would ever buy cheap cabinets. lol.....
But, this is a shoestring budget cottage. I also have learned a lot of tricks over the years about how to install cheaper cabinets and have them look very high end when done. I am going to see how many tricks I remember and work some magic on these cabinets. They are just the cheap "in stock" oak cabinets you see at Lowe's etc. I got these at Menards because they were about 20% cheaper than Lowe's.
The entire kitchen cost about $800.00 not including counter tops. But that DOES include all the drawer pulls, crown molding, and appliques to fancy them up.
Stay tuned for more!  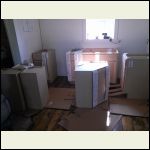
012m.jpg
| 
016m.jpg
| 
019m.jpg
| 
020m.jpg
|
|
|
Tim
Member
|
# Posted: 6 May 2012 08:54pm - Edited by: Tim
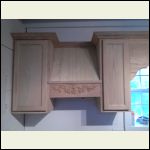
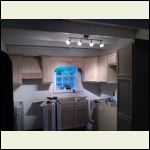
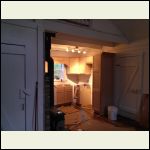
Reply
I started working on some of the trim and details today. Here are some pics: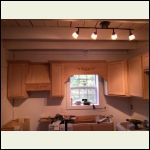
0506121756a.jpg
| 
0506121756.jpg
| 
0506122001.jpg
| 
0506122001b.jpg
|
|
|
trollbridge
Member
|
# Posted: 6 May 2012 09:50pm
Reply
So nice Tim......you know you could stop working at record pace.......making the rest of us feel bad! LOL!!! Your kitchen will be beautiful...I wonder what the first home cooked meal will be????
So had to tell you Tim........was paging through the Menard's Sunday ad and the car-siding (barn board) is on sale for .50 cents a lineal foot for the 8" wide boards!!!! I don't know if it will ever get lower than that so I think we will scrape together the $$$ for it. Need to cover the whole ceiling too but that will have to wait.
|
|
Tim
Member
|
# Posted: 7 May 2012 05:38am - Edited by: Tim
Reply
Quoting: trollbridge for .50 cents a lineal foot for the 8" wide boards!!!!
That is an awesome price! Just be sure they are smooth on the back. At the Menard's here, there is a bevel on the back at the tongue that makes a "V" at the seam. I had to pay a little more at a lumber yard to get the smooth back stuff. But I'm sure that isn't true at all the Menards.
Keep us posted!
Tim
|
|
trollbridge
Member
|
# Posted: 8 May 2012 10:25am
Reply
We will have to find time to get to Menards and check. I was scrutinizing the ad photo and it is hard to tell- I know they don't have the groove down the middle but not sure about the bevel at the T&G.
I'll keep ya posted.
|
|
Tim
Member
|
# Posted: 12 May 2012 10:00pm
Reply
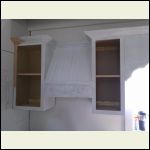
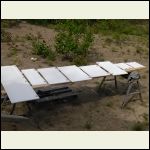
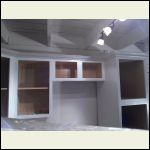
We started painting the cabinets today. One coat of primer, and 2 coats of high grade cabinet paint. White on the top, "morning dove" on the pantry cabinet and crown molding. The base cabinets will also be "morning dove".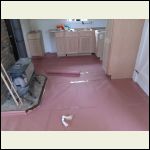
cab1.jpg
| 
cab5.jpg
| 
cab6.jpg
| 
cab15.jpg
|
|
|
Tim
Member
|
# Posted: 12 May 2012 10:02pm
Reply
More pictures...................
|
|
| << 1 ... 9 . 10 . 11 . 12 . 13 . 14 . 15 . 16 . 17 . 18 . >> |

