| << . 1 . 2 . 3 . 4 . 5 . 6 . 7 . >> |
| Author |
Message |
unixfmike
Member
|
# Posted: 8 Aug 2009 06:03pm
Reply
09. A picture of my handy work. I cant wait to stain and varnish that wall. I also have another pair of oddball deer antlers to mount and put up.
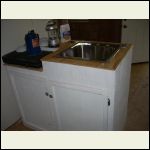
10. I finally put in my "damaged sink". When I bough it the price was marked down due to damage. Apparently someone stepped on the box, and it was easier to sell it as damaged. Heck, I bought it, and there wasn't a darn thing wrong with it.
So that was my weekends worth of effort. I probably could have done more work, but I chose to come home since I ran out of materials. I was going to go buy more but its almost time to send the kids back to school and I have to do the responsible thing as a parent and use the money to buy them school clothes and supplies.
Next weekend I hope to do more roofing and finish paneling in the bathroom. I also want to plumb in my kitchen sink and maybe get a faucet hooked up. We'll see what the budget and goals allow for.
--MikeW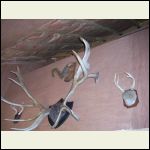
week_17_09.JPG
| 
week_17_10.JPG
|  |  |
|
|
unixfmike
Member
|
# Posted: 15 Aug 2009 08:41pm
Reply
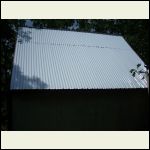
Another weekend has come and gone. I got all the PVC roof panels on. I only have to put on the ridge cap and some flashing at the edges. I added an outside light fixture and it's switch. I ended up leaving early because my son was getting bored. 2 paint ball guns, 3 bb guns, 5 acres to play in and he was bored?
01. My last set of oddball antlers.
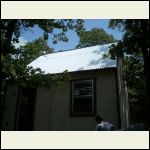
02. The front of the cabin roof complete.
03. The back of the cabin roof complete.
--MikeW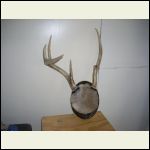
week_18_01.JPG
| 
week_18_02.JPG
| 
week_18_03.JPG
|  |
|
|
Anonymous
|
# Posted: 16 Aug 2009 02:57am
Reply
Very nice...This is similar to what I want to build. Around how much has it costed thus far?
|
|
unixfmike
Member
|
# Posted: 16 Aug 2009 09:33pm
Reply
All of the building materials and basic hand tools and levels is just over $3,200. I got another $10,900 in the 5 acres it sits on. In all reality I only have to put in 13 more interior panels @ $162, 3 gallons of paint @ $24, my shower walls @ $75, interior trim @ $75, and my flooring (undecided and price unknown). I'm guessing I can get away with about $300 or less for my flooring. For under $700 more I can be complete with the base unit, and ready for my outside decking and "I want's" (maybe a room addition or water catch/purification system, possibly a wind or solar electric supply too) . My original estimate was $5,900, but I will finish around $4,000 because I purchased the "out of season" items at a much lower cost than normal, and I made my big purchases at inventory tax time, saving almost $1,500 from the whole build in one month alone.
For my comfort I already have a flushable home-brew composting toilet system, a campstove, a bed, a battery and power inverter electrical system, and a generator. I also purchased a little "room sized" air conditioning unit that needs to be permanently mounted. Not to mention the whole building's exterior is insulated against the local temperature.
Since it is mainly for spring and fall use, I'll be able to get away without a water heating unit, or a wood stove/fireplace. Even during the cold nights when we were staying up there with and without insulation was tolerable.
May 5 : "The first time without insulation was 45 degrees outside and 48 inside. This last time with partial insulation was 56 outside and 62 inside the loft. That was just from body heat and breathing.
"
I appollogize for running on and making a short answer long. I just tried to be thorough in my explanation so you can see my cost and what I have for that cost. Thank you for following along long enough to ask that question.
--MikeW
|
|
CabinBuilder
Admin
|
# Posted: 17 Aug 2009 09:46am
Reply
Thanks for sharing those details, MikeW. This provides good point of reference in terms of cabin cost.
|
|
unixfmike
Member
|
# Posted: 17 Aug 2009 06:05pm
Reply
I think the big lessons I learned when doing this are :
1. If it is in the front of the store "on sale" a similar product is less expensive sitting on the back wall. (ex. $1.19 2x4 stud on the back wall vs. $1.49 on sale up front)
2. The air conditioner was $97 once the store already sold them for 5 weeks, in the first 4 weeks the same unit was $168.
3. Does it matter what the name brand is when the price is 25%-30% of the big name brand?
4. Shop around, shop around, shop around. 8 stores, 8 different prices for the same exact item or similar functioning item. I wasted 10-15 hours over a few months in 8 different stores writing down prices. I purchased different items from different stores, cutting around 30% of the cost from my overall expense. That is a HUGE savings.
5. This is the big one. Buy what you need when it comes to building materials and measure multiple times before you cut. I could have bought all 96" wood, and cut it to fit. In studs alone, I saved $80 alone on the ground floor.
6. Ask questions to yourself and others of your needs. Listen to logical replies.
Oooh gotta run, the kids said the UPS guy is coming down the road, and I got an ebay purchase coming in!
--MikeW
|
|
cabinbasics
Member
|
# Posted: 19 Aug 2009 09:59pm
Reply
Hey Mike, you said those are PVC roof panels? I.e., plastic?
|
|
unixfmike
Member
|
# Posted: 20 Aug 2009 08:26am
Reply
Yes. I put them on over asphalt paper. I will also be putting silicone over all the screws that hold them in. One awning that I did this way has held up in moderate to high winds for almost 17 years now. This is going to allow me to put a water catch system in so that I can store the abundant rain and not the chemicals. I also won't have to worry about corrosion as found with galvanized steel or aluminum roofing. So far it has lasted through 2 small storms and 1 light one.
--MikeW
|
|
|
unixfmike
Member
|
# Posted: 29 Aug 2009 11:52pm - Edited by: unixfmike
Reply
Here's why I did not go up this weekend. I have spent my week doing the labor of love and building cool things for the cabin over the last 2 weeks. Wow, and it has been busy.
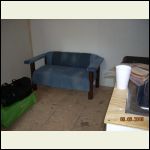
week_19_p01. My loveseat. It's big enough to fit two (big) butts. It's 4 feet wide, at the perfect seating height, and comfortable. It is the result of me and my family outgrowing many pairs of jeans. We have all collectively "donated" to make this projected a reality. God knows I can't just thrown away anything, I have to make it have a second life. This is two 4 foot landscape timbers and scrap wood, and extra polyurethane from other projects, and some old blue jeans. It's about US$6.00 in cost, and about 4 hours of build time. The foam cushion came from the tops of old toy box lids my Mom made for my daughter.
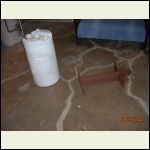
week_19_p02. This is my 15 gallon water tank and holder/ tank mount. However you choose to look at it. It is just some scrap wood cut to size and circumference of the container. I painted it brown.
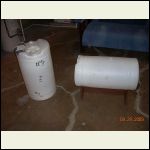
week_19_p03. The same as the previous picture, but saddled with my "refill" container.
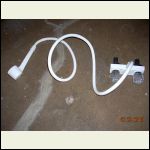
week_19_p04. That was my previous ebay purchase that UPS guy was delivering. I bought a shower assembly for a motorhome. It is by far the easiest to plumb in.
--MikeW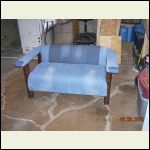
week_19_p01.jpg
| 
week_19_p02.jpg
| 
week_19_p03.jpg
| 
week_19_p04.jpg
|
|
|
unixfmike
Member
|
# Posted: 30 Aug 2009 12:07am
Reply
Last weeks project was cool too. I built a cabinet for my 75 watt TV. What a nightmare in itselt. When my HAM radio's dont work, I will take them apart, blah, blah, blah. What do I do when a TV doesn't work, you are right, I take them apart too. My son's TV was trash by his standard, not working, broken, ready for the trashman. I desoldered 3 capictors from the circuit board, looked them up online, and then purchased the similar product at Radio Shack, and soldered them in place. Whooooaaa! The replacement components actualy worked. I fixed them as well as the coax jack, and the RCA inputs. I surprised myself.
week_19_p05. I built this neat old cabinet from basement scrap. This was leftover from "other projects". It is a cabinet to match my lower cabinet at the cabin. This will fit the TV in it, and I have the room to add the doors if I so desire.
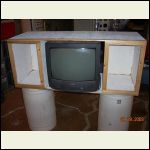
week_19_p06. This is a picture of the cabinet mentioned, but with my frankenstein TV in it. Even after fixing the TV it still works just fine, and the RCA jacks actually work too! Now to find me a remote.
Next weekend is a 4 day weekend for me. My freind came in from Hawaii, and I hope he can go up to help me out a little and drink beers and laugh while I shock myself, cut my fingers, bang my elbows, trip on trash, and laugh at all that other stuff "we don't do". Untill then, keep the cabins building, the hopes mediocre, and the fun at an all time high.
--MikeW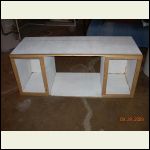
week_19_p05.jpg
| 
week_19_p06.jpg
|  |  |
|
|
CabinBuilder
Admin
|
# Posted: 30 Aug 2009 01:20pm
Reply
MikeW,
I like your idea of reusing things and finding alternative inexpensive solutions for the cabin. I think this is an underlying thought that runs trough this entire thread.
Getting it to the level of soldering TV circuit board yourself... I just couldn't resist to compliment.
|
|
cabinbasics
Member
|
# Posted: 31 Aug 2009 02:02pm
Reply
Ain't as pretty as Ethan Allen Mike, but I bet a lot sturdier! Love that jeans couch!!!
|
|
unixfmike
Member
|
# Posted: 4 Sep 2009 10:45pm - Edited by: unixfmike
Reply
CabinBuilder, everything can be reused in some way. Having a little knowledge of electrical circuits is helpful when it comes to electronics, but most people can follow simple guidelines of "look at a broken part number, locate number, replace number". The only bad part is most of us are afraid to try. I figured a dead TV was a dead TV, and it only cost about US$9.00 to fix it. If it worked, then I was a genius, if it didn't it was still headed for the trash, and I was only out a week's worth of soda. The other ideas, like the home brew composting system, well that was just using different items in different ways. As has been a lot of the cabin.
Cabinbasics, it's not Ethan Allen by no means. It was just a good use of a couple warped landscaping timbers, some recycled materials, and some leftover materials. The couch itself is more than comfortable. My son got his behind stuck to it quite well during the trial run down in my basement. I made a quilt for my wife in the same manner using ripped and torn jeans, and a US$5.00 fleece blanket from "The Dollar General" store. Guys, don't be afrain to use a sewing machine!!!
For everyone, recycle, reduce, and reuse. The next time you get ready to throw out a 2 liter soda bottle, imagine that being a giant "Aqua Bulb" with the help of a couple PVC fittings and a short stem of PVC pipe. Almost everything has a second life as something else. Go back to thinking like a kid, where our children haven't learned the boundaries of our "disposable" society. "It's not a stick, it's a staff, or the corner post for a fort". Unfortunately, as we get older we are falling into the trap of "acceptable limitations", which is not acceptable.
For everyone who has been following this thread, thank you. My Suburban is loaded with this weekends projects. I'm going to pick up my friend who flew over an ocean, and we are going to have a good time this weekend. Build away, but don't forget that cabin is for laughing, having fun, and getting away from the daily grind. Have fun this weekend.
--MikeW
P.S. I went down to the basement and took a picture of my Wife's quit to share. Here's the picture. The top is folded over for bragging rights.
|
|
unixfmike
Member
|
# Posted: 6 Sep 2009 09:48pm
Reply
Here are some progress photos from the weekend.
week_20_01. New smaller water barrel. Had to remove the leaking one, and make room for a second bed.
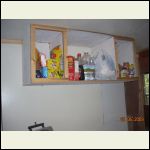
week_20_02. My upper cabinet is hung! The food in the middle was removed, I'll be placing a TV in that spot.
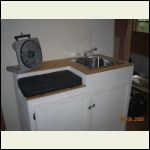
week_20_03. My faucet got installed and plumbed in.
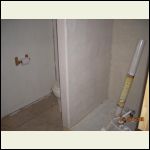
week_20_04. I finished the first wall in the shower. I ran out of liquid nails otherwise I would have finished that too.
More to follow...
--MikeW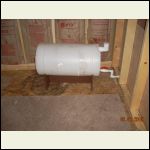
week_20_01.JPG
| 
week_20_02.JPG
| 
week_20_03.JPG
| 
week_20_04.JPG
|
|
|
unixfmike
Member
|
# Posted: 6 Sep 2009 09:53pm
Reply
...The rest of the pictures.
week_20_05. I have running water! Wow this is so nice. I also have the drains all plumbed in too. This is nice being able to wash my own dishes and be able to cook a nice big breakfast like today.
week_20_06. The denim couch finally found it's spot.
--MikeW
P.S. Breakfast was scrambled eggs, polish sausage, hash browns, pancakes, and grilled cheese's.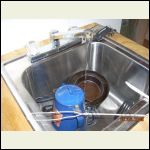
week_20_05.JPG
| 
week_20_06.JPG
|  |  |
|
|
unixfmike
Member
|
# Posted: 4 Oct 2009 10:39pm
Reply
Another weekend at the cabin. The temperature inside was perfect. It is much nicer staying up there with a bed, stove, cool temperature, tv, and plenty of food! I was able to get a little work done too.
01. My shower complete with fixture!
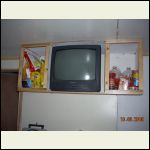
02. The tv snugly fit into it's cabinet.
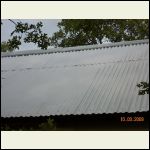
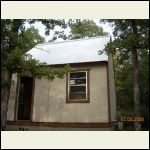
03. A close up of the ridge cap.
04. The ridge cap and view from the front with the door wide open.
--MikeW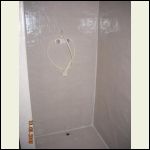
week_21_01.jpg
| 
week_21_02.jpg
| 
week_21_03.jpg
| 
week_21_04.jpg
|
|
|
islandguy
Member
|
# Posted: 5 Oct 2009 09:49am
Reply
Lookin good Mike.
|
|
lex
Member
|
# Posted: 6 Oct 2009 05:09pm
Reply
Mike,
How did you address the septic/drainage? How are you getting your water, from a well?
It's been great following your progress! Keep it up.
|
|
unixfmike
Member
|
# Posted: 6 Oct 2009 10:11pm
Reply
I am using a composting toilet system. That solved the septic problem. The grey water will be drained into a flowerbed of mint. It has a nice aroma to it and it's one of those plants I haven't been able to kill.
--MikeW
|
|
JRanch
Member
|
# Posted: 18 Oct 2009 12:26pm
Reply
unixfmike,
Thanks for all the insight, I just bought land in NM and am inspired by your cabin and the progress you have to date.
On you 15 gallon holding tank, is it interchangable or do you simply fill it up with another tank?
Your an insiration for my project, keep it up.
Thanks,
Keith
|
|
unixfmike
Member
|
# Posted: 18 Oct 2009 01:24pm
Reply
I fill it using another 15 gallon tank. I don't recomend and probably won't cary another 15 gallon drum filled with water up my stairs (a shipladder). It's around 125 pounds full. Maybe I'll get a garden hose and make use of the transfer pump I bought.
I am so unbelieveably anxious to go up and finish off the ceiling, windows and my handrails on the stairs. I've been stuck at home with pneumonia for the last week and a half. Spread over two weekends it is driving me coo coo I am less than 500 bucks away from finishing everything and I just can't go up feeling this sick.
Thank's for following along, I'll post more pics as soon as I get up there.
--MikeW
|
|
JRanch
Member
|
# Posted: 20 Oct 2009 10:06am
Reply
Mike,
What size sheathing did you use for the floor, walls and roof?
Thanks,
Keith
|
|
unixfmike
Member
|
# Posted: 20 Oct 2009 04:44pm
Reply
Keith,
For the floor I used 1" T&G subfloor, and a whole bunch of construction adhesive (to prevent it from squeaking in the future). On the outside of the walls I used 9/16" exterior plywood, and 1/4" sanded paneling inside. Covered with clear enamel it does look pretty nice, and looks just as good with white paint (Quick Hide). For the roof I used 19/32" OSB.
I'm not sure what pitch roof you plan on building, but let me advise against the 12/12 or 45 degree roof. Those 19/32" panels seamed to have weighed 200 pounds when I was pushing, pulling, lifting, or just holding them in place for a moment. Even using the little tricks of edge blocks, roof jacks, etc., you still have to manhandle them up and after 12 I did feel like the good old boys put a good whoopin' on me.
I have not finished the floor inside yet, it is still rough plywood. The outside walls were painted with 2 coats of cheap exterior paint (the $7.00/gal kind) and show no signs of mold, flaking/chipping or bubbling. The roof was finished with 30# asphalt roofing felt covered with PVC roofing panels and a galvanized steel ridge cap. The outside and flooring have managed a good beating through the Oklahoma wind festival, for as light as the little structure is built, it definitely is holding up. No squeaks in the floor, no weak spots, no shifting walls.
--MikeW
|
|
JRanch
Member
|
# Posted: 24 Oct 2009 10:10am
Reply
Mike,
Thanks mike, I am going to go with 10' walls and a 6:12 pitch on the roof. The cabin will be 12x16 with a loft spanning 12' wide.
Did you use a footer for your blocks?
Thanks, Keith
|
|
unixfmike
Member
|
# Posted: 24 Oct 2009 10:54am
Reply
There is a minimal footer. For the most part is is built on huge boulders. I just had to clear the topsoil to find massive stone platforms. The one on the north and east side is almost 10 feet by 14 feet long and I know that goes deeper than 2 feet.
--MikeW
|
|
Anonymous
|
# Posted: 7 Nov 2009 05:56am
Reply
Great job on the estimate. I built a small 8X8 cabin here in Alaska and have the siding up, door hung and roof on and it only cost me $1000 so far. Should be about $1600 by the time I'm done. Everything here in Alaska is crazy expensive but this wasn't so bad at all.
|
|
JRanch
Member
|
# Posted: 10 Nov 2009 09:46am
Reply
Hey Mike,
What type of cook stove are you using and where did you find it?
Thanks,
Keith
|
|
unixfmike
Member
|
# Posted: 10 Nov 2009 10:30am
Reply
I am using an Ozark Trail camping stove that I bought at walmart about 3 years ago. I love it. If you read the reviews on Ozark Trail products you will hear more bad then good. Your experience will depend on how you care for your goods. It has plastic knobs on the burner regulators, and as much as I have banged this around and the times my kids dropped it I still have not broke them. The seals are still good. Other than being a little dirty, it's great. If I needed another one I would gladly replace it with the same product line. Here is a link to a similar product line at a rediculously low price.
http://cgi.ebay.com/OZARK-TRAIL-2-BURNER-PROPANE-CAMP-STOVE-NEW-NICE_W0QQitemZ1303431 68842QQcmdZViewItemQQptZLH_DefaultDomain_0?hash=item1e590eeb4a
--Mikew
|
|
unixfmike
Member
|
# Posted: 31 Dec 2009 08:50pm
Reply
Now that the holidays are over, I'm counting down the next 14 days before I can go do some building again! Looks like the ceiling will finally get hung!
--MikeW
|
|
cabingal3
Member
|
# Posted: 14 May 2010 02:07am
Reply
VERY GOOD.I LOVE THIS.GOOD LUCK TO U BOTH.U ARE DOING A WONDERFUL JOB.
|
|
| << . 1 . 2 . 3 . 4 . 5 . 6 . 7 . >> |

