| . 1 . 2 . 3 . 4 . 5 . 6 . 7 . >> |
| Author |
Message |
unixfmike
Member
|
# Posted: 21 Dec 2008 09:52pm - Edited by: unixfmike
Reply
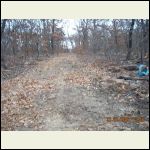
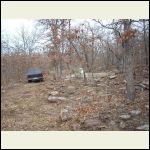
Well, three weeks ago I finally got back on to my land. I walked it with the family and a GPS finding and marking all of my corners. Step one complete. Step two, two weeks ago, I marked out the location for the cabin (centered on 4.9 acres). A recent wildfire burned off most of the tall grass and most of the undergrowth. The previous owner had already cleared a road through the property, I didn't find this on two previous visits last spring due to overgrown vegetation. The spot I originally picked on the satellite map was just feet off the road. Talk about extreme luck. When we walked the land, it was the spot the wife picked out too!
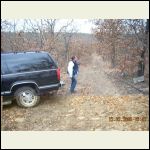
My wife is in the picture with the suburban, and from her looking up towards and behind me I spent about 5 hours cutting small undergrowth in the road that didn't burn.
In the second picture, looking behind me up the hill you can see the road I had to cut clear. It was about 100 yards of two inch or less sticks. I don't think they rated a large enough size to be called sapplings. My daughter is the little light blue ball hiding from the camera.
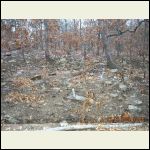
The third picture is the spot I am going to clear for the cabin. I was able to get the corners staked and the ground marked. With the temp falling below 11 degrees fahrenheit, I decided it was too cold to work. Me and the family left for the weekend.
We didn't go up this weekend, and most likely won't go on New Years weekend. Now I am stuck at an eager standstill. I'm ready to dig the ground and get my foundation in. I'll keep posting pictures from all the visits.
--MikeW
.
DSCN0235.JPG
| 
DSCN0236.JPG
| 
DSCN0238.JPG
|  |
|
|
islandguy
Member
|
# Posted: 2 Jan 2009 09:46pm
Reply
Looks great Mike, I'll look foreward to following your progress.
|
|
unixfmike
Member
|
# Posted: 3 Jan 2009 11:28am - Edited by: unixfmike
Reply
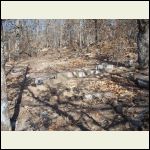
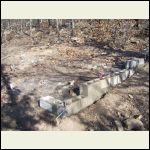
Week 3, Day 1. I was able to move the build site about 30 feet to the north of where I had originally planned. This allowed me to not cut down as many trees. I only had to cut 3 small trees, and one of those was dead and broken above 7 feet. It was quite a bear with a dull chainsaw blade. I made it through. I also dug 1 of the 4 footing trenches too.
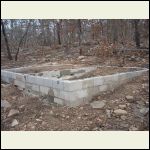
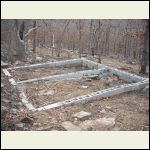
Week 3, Day 2. I was able to start laying and filling block. I got in about 20 percent of the perimeter footing. Digging in and chipping at rock is a nightmare. the first 2-4 inches of earth here is soft sand,ash, and fine roots. Beyond 4 inches is rock, boulders, and exhaustion from all the extra work.I spent alot of time getting the footing nice and tight. It's been about 13 years since I did a footing mixing by bucket.
I also cut a tire on a rock. We ended up leaving early to get the a new tire. Looks like I'll be back Jan 15-18 too!
--MikeW
DSCN0356.jpg
| 
DSCN0361.jpg
| 
DSCN0362.jpg
| 
DSCN0365.jpg
|
|
|
Dustin07
Member
|
# Posted: 6 Jan 2009 01:33pm
Reply
This is a great learning experience for me, looking forward to watching your project!
|
|
unixfmike
Member
|
# Posted: 18 Jan 2009 08:17pm
Reply
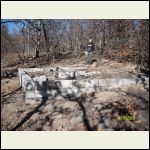
Day 1. After a good morning 5 mile run, I put in the 3 hour drive up to the build site. It would have been 2 1/2 hours if I wasn't hauling an extra 1400 pounds of masonry, and driving a little slower than normal. I was able to finish the south perimeter knee wall. After 1 hour and 15 minutes I was racing to get back towards the block shop before it closed. I made a second drive 1 hour back down the freeway to reload for the next day (today). Then drove the family an hour back towards the build site to get a meal and a room for the night.
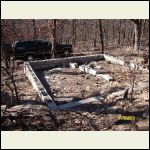
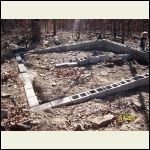
Day 2. After a short 10 mile drive I was unloading block again. I spent a countinuous 6 hours digging, mixing mud, and laying block. I had to get creative in a few spots due to massive boulders that were in my way. I am so greatful most of the digging is done. I am so tired of digging in rocks. I should have stuck with the initial build site.
The majority of the digging is done and there is only 14 feet 8 inches left to trench out. Looks like I have 1 more trip up for foundation work and solid filling the empty cells in the block. At least the 58 degree weather was a welcome change from the recent 8 to 12 degree temperatures (oh, degrees in Fahrenheit). I look forward to the next trip.
--MikeW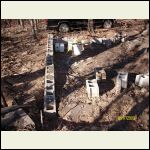
SANY0247_day_1.jpg
| 
SANY0251_day_2.jpg
| 
SANY0252_day_2.jpg
| 
SANY0253_day_2.jpg
|
|
|
swanugly
Member
|
# Posted: 18 Jan 2009 11:54pm
Reply
good stuff . keep the pics coming
|
|
Westwood
Member
|
# Posted: 6 Feb 2009 12:24pm
Reply
Mike
What location/state are you doing this?
Westwood
from MI
|
|
unixfmike
Member
|
# Posted: 6 Feb 2009 06:05pm
Reply
I'm building this is Hughes Co. Oklahoma in between the two towns of Dustin and Weleetka. I haven't been able to get up there in a few weeks. Might be going tomorrow after I get the wife off to the airport.
--Mikew
|
|
|
jo_yo
Member
|
# Posted: 6 Feb 2009 10:42pm
Reply
i hope to get pics of my land in mcintosh co oklahoma on soon.... im not much farther than u well bout the same but i do have a leanto roof lol
|
|
unixfmike
Member
|
# Posted: 7 Feb 2009 05:08am
Reply
I'll get the little building up soon enough. I was waiting for a break in the weather to take a week or so off work just to build.
--Mike W.
|
|
jo_yo
Member
|
# Posted: 7 Feb 2009 11:02pm
Reply
lil less than 2hrs just over into arkansas. i got a lil room add on project going at the house now but as soon as i finish this up and the weather breaks enuff to camp i hope to get started back on mine again
|
|
unixfmike
Member
|
# Posted: 8 Feb 2009 12:26am
Reply
I got 2 1/2 days off next weekend and I am going to build. I found a local lumberyard that has prices that are about 35%-40% cheaper than what I had expected to pay. I'm glad that little storm hit us and I had some time to shop around before commiting to the higher prices.
--Mike W
|
|
jo_yo
Member
|
# Posted: 8 Feb 2009 05:49pm
Reply
thats pretty cool sometimes u can jsut hit it lucky... i ussually just take my lumber with me but i think im gonna look for some where in muskogee for the stuff i forget and i always forget somethin
|
|
unixfmike
Member
|
# Posted: 11 Feb 2009 08:57am - Edited by: unixfmike
Reply
I'm trucking my lumber up from Sutherlands in Lawton/Fort Sill. It's going to cost an extra US$73 - US$80 in gas, but will cut the overall cost down by US$1,430 + tax for materials. Shopping around on the block, rebar and mortar cost me US$278.44 as compared to the US$518.90 that was calculated. Overall The project should come in around US$2,780 now (due to shopping around for price and not convenience). I'm going up again this weekend to finish the subwall in the middle.
--MikeW
hmmm...that was just over 46% savings from the bigger box store's "bulk order discount", and that was at shelf price.
|
|
jo_yo
Member
|
# Posted: 11 Feb 2009 09:38pm
Reply
yea i thik im goin up sunday to check everything out and maybe do a lil work i hope the last few weeks of bad weather left my shanty intack if i can get the floor finished and the soft side up ill be ready to start stayin a few night out there im so excited ... but man u are right if u got tiem to shop around it saves money in the end for sure
|
|
jo_yo
Member
|
# Posted: 11 Feb 2009 09:41pm
Reply
you got any plans on water and elec im tryin to stay off grid my property has everything to it but i dont want to use it
|
|
unixfmike
Member
|
# Posted: 12 Feb 2009 08:52am - Edited by: unixfmike
Reply
I do have plans to eventually drill my own well. Until then, I'll be trucking up my own water and storing it. For electricity, I'm going to use 6 marine batteries wired in parallel with a 2000/4000 watt power inverter with a solar float charger. I also have a small generator from Big Lots as a secondary (backup).
--Mike W
P.S. Looks like I'll be headed up tonight to do some work again. Here's some links that I have found useful.
Making power
http://www.harborfreight.com/cpi/ctaf/displayitem.taf?Itemnumber=95596
Drill your own well.
http://www.borzit.com/sandpointswelldrilling/item.nhtml?profile=sandpointswelldrillin g&UID=107
http://www.fdungan.com/well.htm
http://ok.water.usgs.gov/gis/aquifers/
http://www.owrb.ok.gov/wd/search/search.php?type=county
|
|
unixfmike
Member
|
# Posted: 13 Feb 2009 04:35pm
Reply
I was able to get in to my land again, finally. The rain had washed the dirt roads nice and flat, never seen that happen. Anyway, the last few blocks have been set, and the cells that had to be solid grouted are complete. I can't wait to take time off work to go build!
I think I'm going to go buy my rim and floor joists, and get them all marked for the next trip up, I might even go back on Sunday if the family permits me to.
--MikeW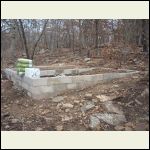
week_5_pic_1.jpg
| 
week_5_pic_2.jpg
| 
week_5_pic_3.jpg
| 
week_5_pic_4.jpg
|
|
|
jo_yo
Member
|
# Posted: 13 Feb 2009 11:14pm
Reply
lookin good man how big is the cabin gonna be .. im tossin a few desgns and sizes around im gonna keep it small most likely with a sleeping loft
|
|
unixfmike
Member
|
# Posted: 14 Feb 2009 09:07am
Reply
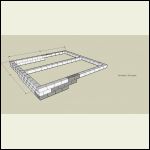
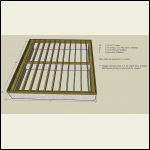
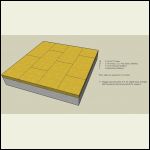
It is going to be 16'x16' with a 10'x16' loft. The loft is going to have nice headroom in front of the bed and that is about it. I'll build cabinets into the one side just to occupy the semi-unuseable space. Here's a couple pictures from the plans I am making. You can see what it is going to be eventually, and a few of the steps in between.
--Mike W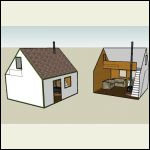
000_model.jpg
| 
001_foundataion_note.jpg
| 
002_subfloor.jpg
| 
003_subfloor.jpg
|
|
|
jo_yo
Member
|
# Posted: 15 Feb 2009 07:48pm
Reply
well i went out to my land today and the weather man was wrong.. it started rainin and got bitter cold it happens to me all the time i hardly ever get to work once i get out there maybe ill get soem work done next time... hope your keeps goin good for ya.... think im goin to make mine 14x24 with a 12x14 loft not sure yet ... your plans look pretty sweet that cabin's gonna rock
|
|
unixfmike
Member
|
# Posted: 16 Feb 2009 09:37am
Reply
Sorry to hear the weather took for the worse. I'm going to buy more building materials in a few minutes, getting ready for next weekend. Thank you for the compliment on the plans, Google Sketchup (the free version) is a very impressive product that I used to create them.
--MikeW
|
|
unixfmike
Member
|
# Posted: 21 Feb 2009 11:35pm - Edited by: unixfmike
Reply
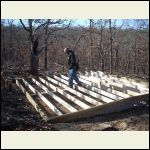
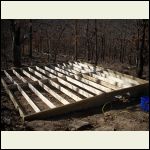
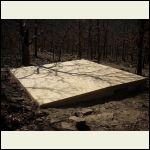
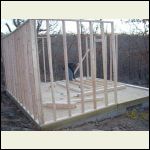
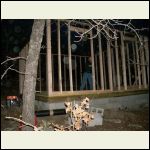
So I spent the day building with my son. We did the subfloor in 3 hours. Then we made the made a run (68 miles) to Shawnee to buy more lumber. Then we came back and built the 4 outside walls. Then we made the second drive to Shawnee to buy even more lumber. We decided to get some food at Braums (oh yeah, great burgers and fries). Now I'm here at the hotel updating the pictures from the day. I'm also going to catch a shower and some sleep before we head up to build the gables, bathroom, and loft tomorrow. Have fun looking at the pictures. I'll update again after tomorrow and that short 172 mile drive back home.
--MikeW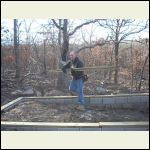
week_6_01.jpg
| 
week_6_02.jpg
| 
week_6_03.jpg
| 
week_6_04.jpg
|
|
|
unixfmike
Member
|
# Posted: 21 Feb 2009 11:36pm - Edited by: unixfmike
Reply
Here's a couple more pictures.
--MikeW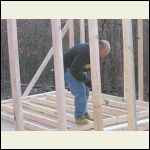
week_6_05.jpg
| 
week_6_06.jpg
| 
week_6_07.jpg
|  |
|
|
CabinBuilder
Admin
|
# Posted: 22 Feb 2009 01:58pm
Reply
Nice progress, MikeW. Cabin is starting to take shape...
How did you mount subfloor to the concrete foundation blocks?
|
|
soundandfurycabin
Member
|
# Posted: 22 Feb 2009 04:43pm
Reply
Framing is fun. You get a lot of visible progress in a short time compared to the other building stages.
|
|
unixfmike
Member
|
# Posted: 22 Feb 2009 07:09pm
Reply
The subfloor is mounted to the kneewalls using J-Bolts . The kneewalls are built using 8"x8"x16" blocks with rebar in between courses. I solid filled all the cells in the block with cement (red bag). At 4' intervalls I put the J-Bolts in the wet concrete and let it set for a week. I drilled holes through the sole plate so that I could bolt down the wood to the cement. I've included a 3d view (from Google Sketchup of course) so that you could see what I'm trying to explain.
--MikeW
P.S. MY kids just brought in the camera, I'll post more pictures.
|
|
unixfmike
Member
|
# Posted: 22 Feb 2009 07:17pm
Reply
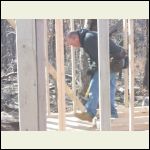
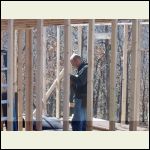
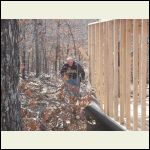
Here's some more pictures.
--MikeW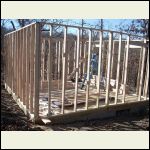
week_6_08.jpg
| 
week_6_09.jpg
| 
week_6_10.jpg
| 
week_6_11.jpg
|
|
|
unixfmike
Member
|
# Posted: 22 Feb 2009 07:19pm - Edited by: unixfmike
Reply
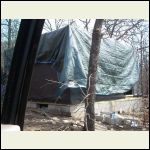
A couple more pictures. The last one is the cabin wrapped with 15# asphalt paper. I was going to use Tyvek but I prever some of the older methods for construction. I threw on the tarp to help eliminate possible moisture problems through the week. I'm going back on Friday night.
--MikeW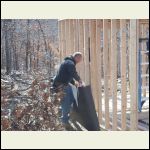
week_6_12.jpg
| 
week_6_13.jpg
|  |  |
|
|
unixfmike
Member
|
# Posted: 1 Mar 2009 09:31pm
Reply
So this weekend was productive. I was able to get the siding up and frame in most of the roof. I have 4 sheets left to put up on the roof and my gables to frame in. The door is installed with locks and all, perfect fit and it's plumb and level! So I have a few new pictures to share.
Next weekend I won't be going up, I have to have a weekend of sleeping in late (6:30am - 7:00am, the life of a soldier starts early). I'm also going to fish for the early spring catch since I've spotted a few huge fish from the shore.
--Mike W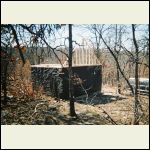
week_7_01.jpg
| 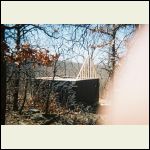
week_7_02.jpg
| 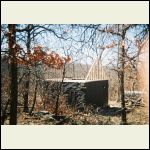
week_7_03.jpg
| 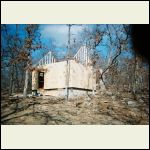
week_7_04.jpg
|
|
|
| . 1 . 2 . 3 . 4 . 5 . 6 . 7 . >> |

