|
| Author |
Message |
ADK_26
Member
|
# Posted: 2 Oct 2023 12:20pm
Reply
Hi there,
Got a dream piece of property in the southern Adirondacks, completely undeveloped, remote. Somehow still has fios and power at the road. Eventually planning to build a cabin on the property, as far back from the road as possible, but living 3 hours away necessitates a few steps prior to starting the cabin build.
Put in a 200' gravel driveway with conduit trenched underneath to run possible solar, 240v AC, fios, whatever without having to tear up my road in the process. No plans for any of that now though...
Next we needed a place to camp comfortably for weeks at a time while staying there. We built a 16 x 16 platform out of rough cut lumber from a sawmill down the road. I only had a chainsaw, hammer, a bubble level, and hardware at the time; minimal cutting required.
Came back in the spring after the snow had melted and it was all still there. Stained the platform and set up our upgraded tent. Having a nice level place to set up my cot is a major game-changer.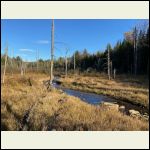
Creek on the property
| 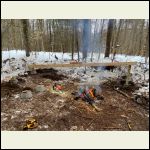
Platform building in March
| 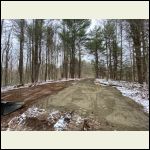
novice excavation
| 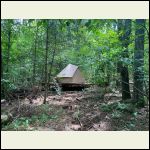
glamping setup
|
|
|
ADK_26
Member
|
# Posted: 2 Oct 2023 12:52pm
Reply
This summer we started on the shed. My dad had built a pole barn as the first building on the 10 acre farm I grew up on when my parents first bought it. He gave me the book he had read prior to building that barn. I read it cover to cover and jumped in. (Low-Cost Pole Building by Wolfe).
Paid a few of my college buddies in deer-hunting opportunities to come help us dig the holes by hand. The soil is very bouldery for the first 36†then it’s sand. I grew up in the south, so digging holes deeper than 36†was new to me. A few of those boulders were right where I wanted to put my poles. A jackhammer and sore hands solved the problems.
I used post-protector sleeves over structural-grade 6x6 PT timbers for my poles. Set my concrete footers at 60†from grade. I had read on this forum about some other Adirondack builders talking about this sand and not needing to put the footers down so far despite the frost line…. I played it safe, but like everything here, I’m learning as I go.
Garage door (also a work in progress) is 9’6†x 9’ and flanked by 4 x 4’s set at 60†deep as well. Had to piece together 2 post protectors to get the right depth. I had planned for a 10 x 9 door but one of those college buddies had one too many (or maybe too few?) before digging those holes. I had nothing to do with it, obviously.
I had originally planned to use the platform as a level surface to build trusses on, but kind of last minute went with built trusses and now I’m glad that I did.
I made it 9’ high from finished grade in case I wanted to add floor joists and convert it into a cabin in the future… Throughout the process, we’ve been trying to make design choices so that if we ran out of steam/money/time we could stop and use what we’ve already finished or repurpose things we’ve already built to still achieve our long-term goals.
This was my first time using rough cut lumber (also my first time building anything larger than a coffee table). I hear mixed things, but the consensus seems to be that it is stronger and cheaper but requires a little extra work picking the right pieces. I used rough cut for the girders, girts, purlins and siding. I hope the ‘stronger’ part makes up for any errors I made in choosing my lumber. So far my building has stayed straight, but maybe it will start twisting in a few years…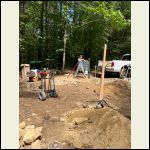
Hole digging party
| 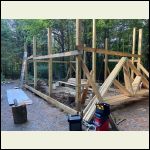
Trusses arrived
| 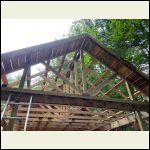
Front gable overhang
| 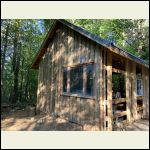
salvaged window on backside
|
|
|
Brettny
Member
|
# Posted: 2 Oct 2023 07:14pm
Reply
The place looks great. We used alot of rough cut on our cabin build I'm still doing also. Mice can climb on that so make sure your cuts are dead on and any holes are filled. One thing about rough cut lumber is when your connecting two together 3in screws and nails arnt enough.
The driveway dosnt look like a novice did it. Nice job.
|
|
ADK_26
Member
|
# Posted: 12 Jan 2024 11:44am - Edited by: ADK_26
Reply
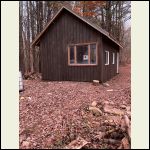
Quick update. Got the shed roughed in and a coat of stain on before freezing temps hit. Thought I could get the garage door on before winter, but coordinating the delivery was such a hassle, it won't happen until the spring.
I did reverse batten siding. In order to prevent splitting of the wood as it dries, I nailed the boards (which are overlying the battens on one end). It makes me a little worried they will cup over time since the battens aren't pinning them down like in traditional b&b, but so far so good. I may go around next fall after they have dried for a year and throw a nail in the other side of the boards to keep them tacked down against the battens.
Won't be making another trip up there for a few weeks... and when I do, it'll just be relaxing.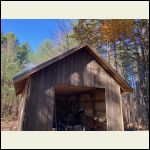
A78C835F2E00435DA.jpg
| 
87028FBC25744ABAB.jpg
|  |  |
|
|
gwindhurst
Member
|
# Posted: 12 Jan 2024 03:10pm
Reply
Looks great! Can't wait to see how everything evolves...
|
|
Brettny
Member
|
# Posted: 12 Jan 2024 06:36pm
Reply
I think after a few months they will be dry enough to fully nail those boards. I used green perlins under my metal roofing and have seen no movement and metal shows any movent under it. I also used green window/door trim and havent noticed any movement. I used 2.5in ring shank galvanized nails.
Place looks good. What's the plan for the spring becids a garage door?
|
|
gcrank1
Member
|
# Posted: 14 Jan 2024 01:15am - Edited by: gcrank1
Reply
 YA NAILED IT! YA NAILED IT!
|
|
ADK_26
Member
|
# Posted: 8 Jul 2024 06:45pm
Reply
Some Spring/Early summer progress. The last 10% of progress is taking more time than the first 90% haha.
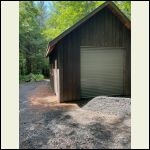
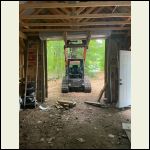
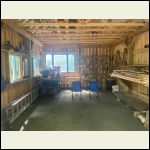
Finally put up the roll up door. Rented the skid steer and put in the compacted gravel floor on the same day. Cleaned up the inside so it finally feels finished (on the inside).
Now I just need to pour concrete pads at the man-door and garage door transition and it'll be 100%.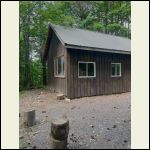
6EC33D1424324599A.jpg
| 
134EB43A641547578.jpg
| 
B37ED733630649ADA.jpg
| 
4B4B8CED73C349518.jpg
|
|
|
|
ADK_26
Member
|
# Posted: 17 Sep 2024 11:10am
Reply
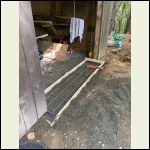
Finally finished! Poured some pads (another first). Started small with the man-door transitions and then poured the garage door pad. I think they turned out nicely... except for the part my dog walked through.
And I built a bathhouse. Scrap wood, extra salvage window, and some T1-11 made it a quick build. It has composting toilet inside. Going to put up some vertical 1 x lumber for privacy on the "shower" side. Still working on how I'm gonna make the shower part.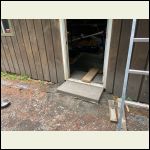
pad 1
| 
pad 2
| 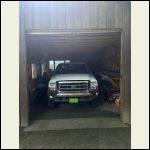
truck (barely) fits!
| 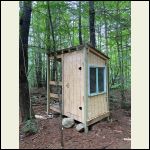
outhouse with composting toilet
|
|
|
Brettny
Member
|
# Posted: 17 Sep 2024 01:54pm
Reply
Looks great. Dont forget vapor barrier under your slab.
|
|
gcrank1
Member
|
# Posted: 17 Sep 2024 01:59pm
Reply
Looks great!
Do you get to relax now? lol
|
|
ADK_26
Member
|
# Posted: 28 Jan 2025 01:49am
Reply
Quoting: Brettny Looks great. Dont forget vapor barrier under your slab.
haha... definitely did forget. I was following instructions in this book I have, which did not mention it for small slabs. Guess we'll see if it makes a difference after a few winters.
|
|
ADK_26
Member
|
# Posted: 28 Jan 2025 02:31am - Edited by: ADK_26
Reply
Delayed post, haven't been up to camp since Thanksgiving.
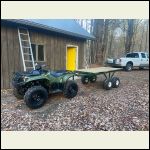
But before thanksgiving, my wife painted the door and I finally installed the gutters. We also made a major purchase - our first ATV!
I built the trailer. Used a mix of youtube videos and commercially available ATV trailers to design one for my primary purpose: hauling building materials (it has a 4x8 flat surface) to the site of future cabin over bumpy trails. It has a subframe and dump frame that can be manually dumped. I designed it to accept vertical log holders at the periphery; assuming I'll gather firewood with it in the future. But for now, it just needs to move materials from my shed to where I want to build the cabin. We gave it a test run and despite not having the vertical log holders to secure the dead wood, it made quick work of a downed tree. Such an upgrade from the wheelbarrow!
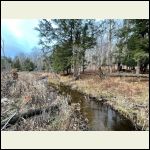
In other news, I have been working on approval to build a small bridge across The Brook on my property. My ideal cabin location is just on the other side. Now, there are tons of logging roads with access via neighbors' properties to this part, but I want to secure my own access in case of ownership changing hands, etc. The issue is that the stream is flanked by wetlands. I submitted my first proposal in early 2023 and since then have been going back and forth with the APA. Things are looking promising, though. After their site visit around Thanksgiving, I just need to get signed off from department of conservation and US Army Corps of Engineers. I'm one email reply away from building the darn thing. Worst case scenario, I build the cabin on the near side of The Brook, but I gotta give it a college try first or I'll just regret it.
Other items on the to-do list:
1) electricity at the shed
2) build the bridge
3) finalize my cabin plans; seemingly much more straightforward than this darn bridge.
4) Quoting: gcrank1 Looks great! Do you get to relax now? lol
... soon haha
5) make more mistakes... err, learning opportunities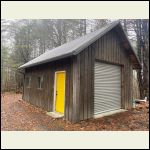
Looking good
| 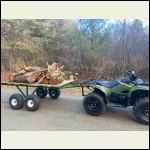
Quick work hauling dead tree chunks
| 
Trailer
| 
The Brook (red tape not shown)
|
|
|
jsahara24
Member
|
# Posted: 28 Jan 2025 09:03am
Reply
Looking good! What's the plan for the bridge if approved?
|
|
ADK_26
Member
|
# Posted: 28 Jan 2025 11:16am - Edited by: ADK_26
Reply
I'm just trying to make a walking bridge. It would be nice to build something strong enough to take my ATV over, but I really just need a walking path that doesn't get my feet wet.
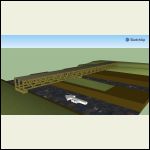
So my initial plan was nothing fancy: two pine trees felled with planks on the top to make a walkway. After seeing all the information I needed to submit, I thought, "better make this thing last for all this effort". So I drew up a simple design with a ~18' span using laminated 2x6s for girders and some concrete footers.
The APA came back and said it has to be longer to span completely over all saturated soil and at least 18" over any water. They said I can't add concrete into the ground. Fair.
But, that means it would have to span a lot farther. I moved a little upstream where they suggested, but the span is still 27' at the wide part when taking into account the soil saturation. They also said it cannot be wider than 4'.
The only way I found to construct a 27' wide span using easily available lumber dimensions is a truss system. I chose Warren Trusses for their simplicity (just isometric triangles). Honestly, would still be happy with felling two pines across The Brook and nailing some rough cut planks to the top... but I'm clearly in too deep haha. Attached file: Original Attached file: Original
| 
Updated Using Warren Trusses
|  |  |
|
|
paulz
Member
|
# Posted: 28 Jan 2025 12:41pm
Reply
Quoting: ADK_26 Got a dream
And the dream comes true. Very nice!
|
|
gcrank1
Member
|
# Posted: 28 Jan 2025 04:28pm
Reply
How about a 'pontoon bridge' just tied off on each side? Nothing permanent, basically a boat you can walk across on 
|
|
DRP
Member
|
# Posted: 28 Jan 2025 07:54pm - Edited by: DRP
Reply
A truss like that should be no shallower than 15:1 but... You are driving on the truss. Think about an old camelback or pratt or covered bridge drive thru truss. You drive on the bottom chord and the sidewalls are the rest of the truss. Then it is much deeper, the joint stresses are much lower.
White and red pine are not great structural timber. It grows 2-3' per year and throws out a whorl of branches. There is a major weakness every 2-3'. It is also an easy way to age a white or red pine, count the scaffolds of branches.
That is not to say the log bridge idea is wrong. A log that is lightly flattened on the top only is far stronger than a sawn timber is. The fiber is uninterrupted along most of the length. The allowable stresses for round and SRTB's, sawn round timber beams, are higher than for 4 side sawn timbers. That was more for info, I'd use treated timbers and at that span a kingpost or queenpost drive thru truss with a lower aspect ratio and lower joint stress. I've always wanted to build a covered bridge.
|
|
Brettny
Member
|
# Posted: 29 Jan 2025 10:39am
Reply
Only allowing 4' wide really is going to limit what you can drive across that. Your wanting to build a cabin that needs that bridge for acess?
|
|
gcrank1
Member
|
# Posted: 29 Jan 2025 11:04am
Reply
I have a friend with a 'footbridge' across a gully, his rig's outside edge of the tires is right at the edge of the bridge boards. He hasn't gone off it yet but has had a few close calls when 'things didn't go JUST RIGHT'
Stuff like that is a killer
|
|
DRP
Member
|
# Posted: 29 Jan 2025 10:58pm - Edited by: DRP
Reply
Doodling and thinking how easy it would be to keep on and put a roof over it  . This is just the guts of what was in my mind as far as a drive thru queenpost truss. At 27' I broke it into 9' "panels". "Deeper is cheaper" The truss is ~9' tall, it is effectively a deep beam. In #2 treated SYP using 6x6's it looked good for ~1759 lbs of concentrated load in any panel ...but as I write that I'm realizing there is a 15% derate on that for wet service, so anyway ~3/4 ton max. It needs tension straps across the joints in the bottom chord with the combined straps one either side capable of greater than load in tension. The bottom 27' chord is a bowstring in tension so 1/4" strap and a row of ledgerlocks adding up to the load on each side . This is just the guts of what was in my mind as far as a drive thru queenpost truss. At 27' I broke it into 9' "panels". "Deeper is cheaper" The truss is ~9' tall, it is effectively a deep beam. In #2 treated SYP using 6x6's it looked good for ~1759 lbs of concentrated load in any panel ...but as I write that I'm realizing there is a 15% derate on that for wet service, so anyway ~3/4 ton max. It needs tension straps across the joints in the bottom chord with the combined straps one either side capable of greater than load in tension. The bottom 27' chord is a bowstring in tension so 1/4" strap and a row of ledgerlocks adding up to the load on each side
|
|
ADK_26
Member
|
# Posted: 30 Jan 2025 11:38am - Edited by: ADK_26
Reply
Quoting: gcrank1 Stuff like that is a killer
For sure. My APA overlords have dictated it be nothing more than a walking bridge and I designed it as such. My first design (the PDF I posted above) was hopeful for an ATV every once-in-a-while, but with the 4 foot stipulation and immense span they stipulated for me, that is unlikely. My ATV is like 43" wide and my home-made trailer is like 55". I don't want to be wet AND have a broken neck...
DRP's contribution might be able to change that though...
Quoting: Brettny Your wanting to build a cabin that needs that bridge for access?
Sort of, not exactly. I have access via crossing my property line, where there is a county road and bridge across The Brook. I would take construction materials that way. But, I want to have the legal ability to construct a foot bridge on my own property so I have the access in case of my neighbor's property changing hands. I have access (little bit longer of a trip) via my neighbor on the other side as well.
The folks who came out for the site visit told me that the APA heavily disincentivizes the building of new structures in wetlands, but the modification of old structures is not as difficult (so they say). Hoping, but not counting, on being able to widen the bridge 5 or so years down the line if I'm able to get this approved officially. The next option would be an easement with one of my neighbors...
In the grand scheme of things, I truly appreciate the dedication of the APA to protecting, conserving our natural resources, especially wetlands. All of my research on this prior to buying the property did not indicate it would be THIS hard though haha.
|
|
ADK_26
Member
|
# Posted: 30 Jan 2025 12:00pm
Reply
Quoting: DRP A log that is lightly flattened on the top only is far stronger than a sawn timber is.
When they came back to me and told me what the span would have to be, I discounted whole timber idea because I just couldn't think of a way to manipulate it. For one, felling trees is pretty nerve-wracking to me and then I realized once it is on the ground, I wouldn't be able to move a 27' long timber.
Quoting: DRP I've always wanted to build a covered bridge.
Me toooo! I love this idea. Are you using a software to calculate loads? Which on? I'd love to play around with something.
When I was reading about bridge trusses, the queen truss seemed too complicated, but the way you have it drawn out doesn't seem so bad. Might solve my width problem as well by effectively putting safety railings on the sides.
Each footer would have to be rated for 3/4 ton max as well? I wanted to put block footers on either end originally, but they stipulated "minimal" excavation. There are some boulders lying around, but again the manipulation of those things becomes a big issue.
|
|
DRP
Member
|
# Posted: 30 Jan 2025 07:45pm
Reply
This is an online truss calc,
https://garrettsbridges.com/design/johns-hopkins-bridge-simulator/
I just grabbed one on a quick search and hung 1750 lbs from nodes 2&3 and it spat out axial forces in the members. Notice you can solve this graphically, geometrically or with trig...
1750 x 1.414=2474.5
1750/ cos 45=2475. So there's the max compressive, column, type load. good there just from memory a 6x6 is good to over ~15,000 lbs at that span, part of engineering is knowing what to check. Do check that you have 1750 lbs tensile strength throughout the bottom chord, all splices and connections need to be that or stronger.
I then checked bending of a SYP 6x6 with a 9' span and a 1750 lb point load at midspan on an online beam calc.
|
|
paulz
Member
|
# Posted: 31 Jan 2025 05:29pm
Reply
Quoting: gcrank1 I have a friend with a 'footbridge' across a gully, his rig's outside edge of the tires is right at the edge of the bridge boards. He hasn't gone off it yet but has had a few close calls when 'things didn't go JUST RIGHT' Stuff like that is a killer
One of our guys responded to this today.
|
|
|

