| << . 1 . 2 . 3 . 4 . 5 . 6 . >> |
| Author |
Message |
Timberjack
Member
|
# Posted: 22 Aug 2011 08:49am
Reply
I've been watching this thread closely and it just keeps getting better and better. What a marvelous job you've done so far! The night pic with the stars is amazing! Your creek looks cool and refreshing, looks like the kids and the dog are having a great time.
I'd like to see a pic of your wood stove chimney as it passes through the ceiling from the inside of the cabin. I'm about to tackle this job and am looking for some ideas. Again, awesome job!
Thanks!
|
|
Montanan
Member
|
# Posted: 22 Aug 2011 11:30am
Reply
Thanks everyone!
Timberjack- attaching a photo that I hope will show the support box as it goes through the ceiling into the roof. For some reason, when I upload vertical photos to this site, it cuts off the top and bottom of the photos.
Putting in the stove pipe and chimney ended up being a much bigger headache than we expected (largely because we didn't have the right flashing the first time and basically had no instructions for how to mount the support box.)
How steep is your roof pitch? Ours is a 12/12, so we had to use a deep cathedral support box. It needs to be deep enough to be fully exposed inside the ceiling and also fully exposed on the roof. Our roof is comprised of true hand cut 2x6 pine boards as the ceiling, topped with foam panel insulation and then steel roofing. Once we had the right materials and some info from wood stove installer, we were able to get it put in pretty quickly. The most time consuming part was cutting the hole to size. Let me know if you have specific questions.
|
|
trollbridge
Member
|
# Posted: 22 Aug 2011 12:33pm
Reply
I just laugh when I read your stove woes cause we can totally relate! It was definitely one of the hardest projects we did.
Timberjack, this may help you as well. We have 2x12 roof rafters with a 12/12 pitch. This ended up being how we had to do it. The benefit in the end was that it will be super easy to clean out. Good luck!
|
|
Montanan
Member
|
# Posted: 22 Aug 2011 02:53pm
Reply
Looks good trollbridge! Your chimney looks as tall as ours. I was amazed at how many segments it took to get to the required height/distance from roof.
I should add that our support box is secured from the top (roof side) of the 2x6s with horizontal 2x4s. Wow- those boxes have to hold a lot of weight!!
|
|
Timberjack
Member
|
# Posted: 22 Aug 2011 04:46pm
Reply
Our roof is also on a 12/12 pitch. Where did you get the box and chimney pipe? I've lookd at some of the big box stores here in MS with no luck.
|
|
Montanan
Member
|
# Posted: 22 Aug 2011 05:07pm
Reply
We got ours at a local hardware/building supply store that also sells wood stoves. You can get them at any wood stove dealer- or order them online. Hope that helps.
|
|
old buddy
Member
|
# Posted: 23 Aug 2011 09:45am
Reply
Your place is beautiful...
|
|
Montanan
Member
|
# Posted: 28 Aug 2011 12:41pm
Reply
We haven't been back up to the cabin (we'll be going Friday for the long weekend) but I finally got the photos of my husband's camera, so I am attaching a few.
We're basically waiting on power now, so this weekend will be more flooring installation, counter tops, and one side of the interior walls. I've started to buy furnishings, which is my favorite part!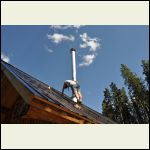
Me holding up the chimney while the husband got the supports ready...and took a photo!
| 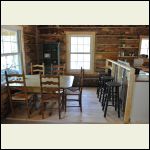
Dining area getting close to done: flooring in (no poly though) and framing for the bar installed.
| 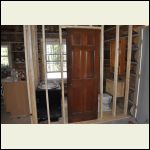
Great bathroom door I found at the Habitat for Humanity store.
| 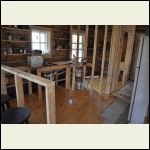
Flooring in kitchen/bath: 8" pine planks. One coat of poly so far.
|
|
|
|
trollbridge
Member
|
# Posted: 28 Aug 2011 12:59pm
Reply
AAAWWW...it looks so nice Montanan! I like the flooring you decided on! Is it carsiding turned upside down? I wish we were closer to this stage(little jealous). I was always fine with the speed of things until we started with our interior walls and now I just want to finish the inside so badly! My husband is up by himself this weekend while I hold down the fort at home. It is hard not to go with him, but hopefully he is making lots of progress.
Hope you have a smooth start to your school year. My youngest 3 start this week and I'm not sure I am ready! Good luck!
|
|
hattie
Member
|
# Posted: 28 Aug 2011 06:13pm
Reply
Montanan - One word - BEAUTIFUL!!
|
|
Montanan
Member
|
# Posted: 28 Aug 2011 07:07pm
Reply
Thank you!
trollbridge~ no- the flooring is just pine planks- no T&G. We're doing our walls with carsiding though...never thought of turning them upside down. DOH! Thanks for the tip! I know what you mean about wanting to get done. We have a construction loan so we'd prefer NOT to be in such a rush...but at least it means we'll get it "done-ish" sooner. I have spent a few weekends at home with the kids while my husband has been up there working. It's hard not to be there, but he's always so productive without all of our distractions. ;o) I'm sure it will be the same with yours.
Good luck starting the school year! My 3 started last Wednesday...counting down the days til we can go back to the cabin (especially since our time will be limited once the fall sports start- we have one in football, another in soccer, and a third in gymnastics. Yikes.)
|
|
trollbridge
Member
|
# Posted: 28 Aug 2011 08:42pm - Edited by: trollbridge
Reply
Quoting: Montanan I have spent a few weekends at home with the kids while my husband has been up there working. It's hard not to be there, but he's always so productive without all of our distractions. ;o) I'm sure it will be the same with yours.
Yes,that is one reason I did not go. He always feels guilty working while the kids sit and look bored-I say they can help or find something to entertain themselves with but their idea of entertainment seems to be picking on each other which does get frustrating to listen to.
Sounds like you will be going from one fall sport to the next-we just have football and luckily the freshman play their games on Thursdays, so for now we only have to stick around every other Friday for varsity home games(the freshman have to watch and clean the stands afterwards). Going up north Saturday mornings seems like we lose so much valuable work hours. Oh well.
|
|
Montanan
Member
|
# Posted: 10 Sep 2011 12:29pm
Reply
Here are a few more photos taken over Labor Day weekend. I spent a lot of time "moving in" (dishes, bedding, furniture, etc.) but also worked some on the flooring. Husband finished all of the plumbing and one side of the bathroom wall up, as well as more flooring and a bit of electrical. It took some real ingenuity to get 2 8' grounding rods into our insanely rocky soil (and by rocky, I mean essentially a buried boulder field!) My husband welded a drill bit to the end of the grounding rods and stood on a ladder and drilled them in.
The good news is that the rods and meter box are in and ready for power...the bad news is that the power company was up there yesterday and said they won't put in the pole and transformer and run power until the interior wiring is in. Grrrr. So, my husband left this morning and is hoping to finish the wiring this weekend.
We had our first guests last weekend- my parents- and had a very nice time. Grandparents helped keep the kids busy and grandpa worked on building our wood pile for the winter. We tried out the wood stove and it worked GREAT!! What an improvement to have heat- and plenty of space on the top for heating water/cooking/etc.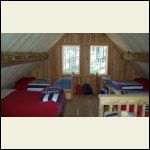
Upstairs sleeping loft- aka the kids area
| 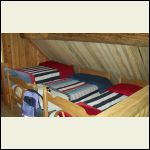
Another shot of the sleeping area and bedding
| 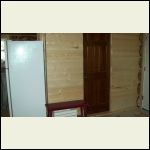
Pine T&G wall for the bathroom, and door finally hung
| 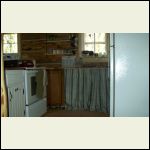
Kitchen- though the cabinetry is now all painted white
|
|
|
Montanan
Member
|
# Posted: 10 Sep 2011 12:33pm
Reply
And a couple more: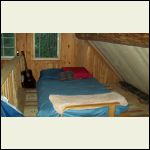
"Master bedroom" -used as a sitting area during the day (futon turns into a couch)
| 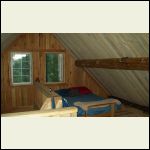
Another angle- taken from the rear of the loft
| 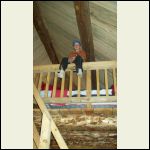
Looking up to the loft from the front of the cabin by the wood stove.
|  |
|
|
hattie
Member
|
# Posted: 10 Sep 2011 01:00pm
Reply
Your place just keeps getting better and better. I absolutely LOVE the bedding in the kids room!
|
|
trollbridge
Member
|
# Posted: 10 Sep 2011 10:11pm
Reply
Looks wonderful! I was waiting for you to post pics from the long weekend! It looks absolutely beautiful and I too love the bedding in the kids area. I'll bet your parents were quite impressed with all your hard work...and very proud of you :)
|
|
neb
Member
|
# Posted: 17 Sep 2011 09:04am
Reply
Montanan
Very nice and you should be very proud of the work you have done. That is what I call a cabin great job.
|
|
jrbarnard
Member
|
# Posted: 18 Sep 2011 06:32pm
Reply
Wow.. that is beautiful. We do not have that sorta wood around SW Texas...it'd cost me an arm and a leg down here.. heh, but I sure wish we did after seeing that.
VERY Nice job!
Russ
|
|
canadian girl
Member
|
# Posted: 18 Sep 2011 07:55pm
Reply
your place looks fantastic :) great job I have enjoyed reading your post and looking at your progress:) Love the sleeping area it reminds me of a photo I saved a while back and saved for inspiration
|
|
Montanan
Member
|
# Posted: 19 Sep 2011 03:42pm
Reply
Thanks All!
Canadian Girl~ I LOVE that inspiration pic! Wish we had room for the benches at the end of each bed...we had to get creative with under-bed storage, as the fit is tight. I also love how the windows open in that photo. I also wanted to do that, but the pitch of our roof is too steep.
|
|
Montanan
Member
|
# Posted: 26 Sep 2011 11:59pm
Reply
Hallelujah! My husband finished up the wiring work over the weekend and we got a call today from the power company- WE HAVE POWER!! It's about killing me to wait until the weekend to go up there and check it out. Mostly I am nervous about the (electric) water pump. Hope it works!!
A few photos from the husband's weekend up there;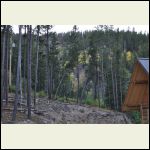
Power line!
| 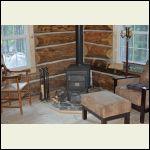
Flooring going in around the stove
| 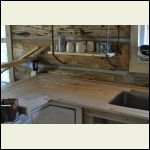
Counters going in
| 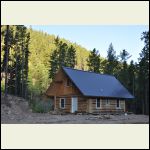
Exterior shot- morning sun from the approach road
|
|
|
hattie
Member
|
# Posted: 27 Sep 2011 12:40am
Reply
Beautiful!!!!
|
|
trollbridge
Member
|
# Posted: 27 Sep 2011 10:02am - Edited by: trollbridge
Reply
Yeah electricity!!!!! Finally! So happy for you! Just think...you will pull up and open the door and wha laa-lights :)
Thanks for posting more pictures Montanan-I have a few questions for you.First what is your counter made from? How thick are your boards? Did you glue them together? What will you use to seal them? Also, what is your shelf above the counter hanging from? I have noticed it in past pics too. I like it. Your counter is exactly what we are planning in our kitchen but we want to make our own not order from a store.
My last comment has to do with your floor lamp. The top is cut off but it looks neat. Did you find it at a thrift shop?
What will you be working on this weekend? Make sure you take lots of pictures ok?
|
|
Montanan
Member
|
# Posted: 27 Sep 2011 11:46am
Reply
Hi trollbridge. =)
The counter is just 1x4 pine. In the photo they have not yet been secured to the plywood underneath but yes, they are now glued and are sitting all week with heavy boards and rocks on top. They are just glued to the base right now, not to each other. The main reason was just that we didn't have the right clamps to hold them tight. We're going to see if there are gaps that develop between the boards and cross that bridge when we come to it. We're planning to seal them with a heavy-duty polyurethane...but we're also considering a clear resin option. Unfortunately, that is quite expensive so we'll see. Basically, we felt like you- we wanted to make our own counters. Plus, we needed them to be CHEAP. So, we thought we'd try this and if they don't hold up well, we can always replace them down the road.
The shelves are actually secured to the logs and the chains are decorative. They are motorcycle chains. =) My husband is a former motorcycle mechanic so he had lots laying around. We got the idea from our builder, who uses chains in their turn-key cabins. I'll see if I can find a photo for you.
Finally, so glad you like the floor lamp! I actually have 2 of them and I promise to take photos of both when we are there this weekend. They came from an antiques consignment shop near where my parents live. My mom and I went antiquing and I fell in love with them!
This weekend my husband will be trying to get the water pump operational (it's not yet wired) and stringing more wiring for our interior and exterior lighting. We're also planning to sand and poly the counters, nail down some more flooring, and put the car siding on the breakfast bar. Last, but certainly not least, my goal is to clear out the living room area that is currently the construction staging area (all of our tools, materials, etc.) My other parents will be coming to visit the following weekend (the ones who came before are my mother and step-father...this time it will be my father and step-mother.) They live out of state and haven't seen the cabin at all so I am very excited to show them. I want to have a real living room by then...though I have no idea where we will store all our "stuff" since we likely won't have a shed until next summer.
That was probably way more than you wanted to know. ;P Are you going to the cabin again this weekend??
|
|
Montanan
Member
|
# Posted: 27 Sep 2011 11:49am
Reply
Here's a photo of shelves with chains (from our builder's gallery.)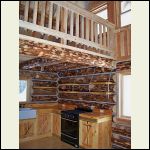
kitchen shelves with chains
|  |  |  |
|
|
dstraate
Member
|
# Posted: 27 Sep 2011 12:11pm
Reply
Are those shelves fixed on the backside, or do they just fit into the chinking? I like that idea.
|
|
Montanan
Member
|
# Posted: 27 Sep 2011 02:34pm
Reply
I'm not sure how they did those ones- perhaps the chains are actually functional and holding them in that photo. If you look at the photo of ours, you can see that they are secured in the middle of the logs with a wood brace underneath. Hope that helps.
|
|
TomChum
Member
|
# Posted: 27 Sep 2011 03:00pm
Reply
Idea.... If you wanted to get rid of the bright zinc color, dip the chain in muriatic acid to remove the bright Zinc coating, leaving gray iron color. It works almost instantly. Muriatic acid is used to etch concrete, available everywhere, and not expensive.
And when done, you can soak a few pennies in muriatic acid, it will eat out all of the zinc leaving the copper plating shell, so light it will blow away in the wind. A fun thing to do with the kids.
When you dump it out be sure there is a LOT of water. The ground will neutralize the acid, but the more water the better, like during a heavy rainstorm.
|
|
Montanan
Member
|
# Posted: 27 Sep 2011 05:42pm
Reply
Here are a couple more photos taken last weekend: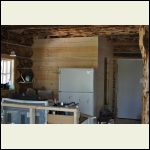
Almost done with the kitchen/bathroom wall!
| 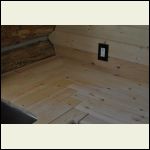
Another shot of the counters- and electrical outlet!!
| 
Couldn't resist posting this one- incredible starry night
|  |
|
|
trollbridge
Member
|
# Posted: 27 Sep 2011 05:47pm
Reply
Good to know TomChum! Montanan I was thinking it was chain not rope but did not recognize motorcycle chains :) Dare I say I like your kitchen better than the builders model?!? They need to dip their chains in the acid-they are way too shiny! IMO. Also, I like the break in wood that your cabinets provide. I like a lot of wood, it is nice and cozy, but too much for me and my eye just does not know where to rest.
Thanks for the info on your counters. I love the fact that we can do them ourselves too and cheap makes it that much better :) I want our counters to be light, so just a sealer will be good.
I would love to see your floor lamps, thanks for the future pictures you'll post. I just don't think you could have found anything any better for your cabin. They are going to look very warm and cozy with a warm glow coming from them.
You must be very excited to show your dad and step mom your cabin. It is a truly beautiful building sitting on equally beautiful land. Someone would have to be nuts not to enjoy spending a weekend there!! Good luck getting your living room set up. I know what you mean about having a ton of stuff for building (and we take our more expensive stuff home each time too). We also need to build a woodshed/ storage shed but there is just not enough weekends left before winter I fear :(
I think we will go up again...these darn teenagers are putting a kink in my cabin time! HA! :/
It is Homecoming weekend and my 17 year old daughter works every weekend but does not drive yet so we rely on our 20 year old daughter(sometimes have to resort to bribery) to drive her and house her at her place while we are gone. We may have to go for just the day again but that is better than nothing. There is a fine line between them missing each other and wanting to kill each other :) It was much easier before our 20 year old moved out to her own place last May. Can't fault her for wanting a little independence-she is a 40 year old in a 20 year old's body!!!
|
|
| << . 1 . 2 . 3 . 4 . 5 . 6 . >> |

