| . 1 . 2 . 3 . 4 . 5 . 6 . 7 . >> |
| Author |
Message |
WILL1E
Moderator
|
# Posted: 20 Sep 2021 08:45am
Reply
Well, finally time to start my own official build thread!
Went up this weekend and first order of business was to get the camper relocated out of the build site.

Once that was done i used rebar to roughly mark out the cabin footprint so i knew where to install the batter boards. Once the batter board posts were in, i used my latest Amazon purchase of a self leveling laser to set my line heights. Gotta say i was pretty impress at the brightness of this thing in the daylight for something that's probably more intended for indoors.


Once that was done i got all my strings pulled to mark the cabin outside as well as the centerlines for the footers and block work that the built up beams will rest on. The 24" dia. and 6" thick precast pads were a blessing (less concrete i had to deal with) and a PITA. Moving the 280lb pads took alot out of me having to lift them in and out of the holes to get those things level...definitely gonna feel that in the glutes and hammies well into this week!


Most of the topsoil was scraped out of this area before the gravel was put down so i didn't have to dig far before i hit virgin sand. On day two i focused on getting the pads level to where i was content and stacked the blocks. You'll notice the site slopes down from right to left and that back right corner is slightly higher than the rest. It slopes more than i had originally thought as i didn't realize this when the camper was sitting there. So my original plan of only going (1) 8" block high now had to go to two. With this setup, the two back right pads only have a 4" solid block on them. When i mocked up the 2x10"s on this setup, i made the decision that i did not want to go any higher...it's already higher than i'd like it to be.
Once i had all the blocks laid out, i started filling the stacked hollow ones with concrete. Unfortunately i didn't have enough concrete as i was only intending to go 1 block high and i had already made the 2hr round trip to a "local" Menards for more block but sleep deprived me forgot to get more concrete.

So this is all i managed to accomplish this weekend. I'll be back up next weekend to finish pouring the concrete, assemble the built up beams, get the joist system built and the subfloor down....at least that's the goal 
|
|
gcrank1
Member
|
# Posted: 20 Sep 2021 10:35am
Reply
Warning
Once ya start life will never be the same.....
Opps, yer already there (lol)
Fwiw, maybe save somebody else some trouble, when you buy supplies buy more than you think you need to 'just get by'. You can return stuff you didnt use next trip around.
|
|
BRADISH
Member
|
# Posted: 20 Sep 2021 01:00pm
Reply
Nice! Glad to see the 'official' thread kicked off!
Remember, foundation is one of the slowest, most tedious and arduous parts of the whole build. Take your time and do it right and it will pay off in spades down the road. Looks like you're already on the right path.
|
|
ICC
Member
|
# Posted: 20 Sep 2021 02:47pm
Reply
I will have to look later. Just a heads up... When images arr included in a post as these are the large embedded images force the text to be very small. When images are embedded the widesr image sets the screen width and the text is shrunk so small the reader has to do the two-fimger expand, move sidewats, etc in order to read. I don't take a large screen device most of the time when I travel especially with the superCub. So I don't usually bother reading posts with big embedded images. The system cabinbuilder uses where we upload an image file and a thumbnail is created works great onsmall screens.
Please excuse the typos I have probably made. I fixed some but small screens and my fingers don't get along together well.
|
|
WILL1E
Moderator
|
# Posted: 27 Sep 2021 08:32am
Reply
I missed this in my original thread, but at the end of that weekend I had around 20 actual man hours in doing everything solo. Approximate cost for everything i completed (excluding the stack of wood) at that point was around $600. That's the footer pads, block and bagged concrete.
|
|
WILL1E
Moderator
|
# Posted: 27 Sep 2021 08:52am - Edited by: WILL1E
Reply
9/24/2021 Update
With last weeks fiasco of finding sufficient supply of 2x10x16' kild dry lumber, i ended up taking a half day on friday to get the last of my materials for the weekend and to beat the incoming rain. Friday night i was able to finish pouring concrete in the blocks and get some things tidied up around the build site before mother nature showed who's in charge!


Saturday was pretty darn productive with a 7am start. First thing was removing the dirt piles form the pad holes i dug. Then I was able to get the beams built up and squared up. Just a reminder to anyone building, keep your strings up until at least this point, makes getting things dialed in much easier on yourself. With the beams done i started cutting and setting all the joist. Instead of installing the H1 brackets first, i instead set the joist and toe nailed them in, then installed the rim joist. Found this easier to get everything tied together. Finally ran out of light and called it quits for the night.


Ignore the crooked stairs. I built those for the camper and repurposed them for getting up and down on the cabin deck!
Sunday i started at 630am (sorry for the hammering neighbors...pay back to your nightly firework rituals!). Let me tell ya, hammers in 46 H1 brackets it's is pure punishment. Pretty sure i pounded in more nails in that 1.5hrs than i have in my entire life. Body is still feeling it this morning as i'm trying to type this!

So idiot me thought my pancake compressor would be enough for the subfloor, but needless to say i spent alot of time waiting for that thing to keep up. Needless to say i brought it home with me and will be bringing my big one up for the remainder of the build. I also had some mechanical issues with my Ridgid framing nailer. Kept jamming up with the Pasaload (Sp?) nails i was using. Anyways, finally got into a rhythm and was able to get all the subfloor down, glued and nailed.
Question...are bees attracted to lumber, subfloor adhesive or something about pneumatic tools? I've never had a bee issue up there and they were harassing me the entire time unless it has something to do with the time of the year.

Tarped everything up and headed home.

This weekends worth of work was about 25 man hours going solo. Cost for all the materials used this weekend was around $2000. Thats for beam materials, joists, rim boards, brackets, sheathing and fasteners.
|
|
Aklogcabin
Member
|
# Posted: 27 Sep 2021 09:21am
Reply
Hey man that's looking great. Kinda seems like you're going to have to beat ol man winter to the first snow fall for drying your cabin in.
You may want to consider a conex or storage shed as buying extra becomes more of a habit. And you buy extra supplies. You will be needing them and shutting down the job costs more than a bag of cement. At least for me anyhows.
I'm proud for you. You have been working on this for a while, bet it feels great to start.
Do you have family that can help build your cabin ?
|
|
WILL1E
Moderator
|
# Posted: 27 Sep 2021 09:40am
Reply
Thanks Aklogcabin! I have an 18' enclosed trailer that we keep our wheelers in. I may bring the wheelers home so that i have that trailer for overflow. Fortunately Menards is only an hour away, so I plan to do any material runs at the end of the day when i'm out of light that way i'm not missing any valuable build time.
Nope, no family to help and I don't have any friends that are into this sort of thing or that i would trust around a build site.
Yes, it feel great to be started especially in the fall as i've always wanted to do. However knowing i'm up against mother nature isn't the greatest feeling.
|
|
|
gcrank1
Member
|
# Posted: 27 Sep 2021 10:17am
Reply
Fantastic start! Well thought out and executed.
The pic so reminded me of our '83-84 build (funny how rectangular cabin decks pretty much all look the same). Things went way faster after the deck; ie, once walls start going up the place takes on 3 dimensions you 'see it'.
Rock On!
|
|
jsahara24
Member
|
# Posted: 27 Sep 2021 10:49am
Reply
Looking good! I love that part of the build process, so much satisfaction seeing a building there when there was nothing a month ago.....When I built we pushed really hard to the get the roof installed then you can relax a bit..... Hopefully you have a few vacation days to burn over the next month! And don't forget to enjoy the process!
|
|
WILL1E
Moderator
|
# Posted: 27 Sep 2021 11:14am
Reply
This Saturday kicks off a 2 week build marathon for me. I've taken the time off work and fingers crossed i can get her built and dried in during that time!
|
|
Nate R
Member
|
# Posted: 27 Sep 2021 11:21am
Reply
Good start!
Might be the time of year on the bees.......
And a 2 week marathon!? Awesome, you'll need to sleep well each night.....you'll be feeling it after day 3 or so! 
|
|
Nate R
Member
|
# Posted: 27 Sep 2021 11:23am
Reply
Also, I'm planning on being up the 9th through the 17th or 18th... On my own mini-marathon to get things done on my place. Hoping for good weather for us both!
|
|
snobdds
Member
|
# Posted: 27 Sep 2021 11:35am
Reply
I just shut my cabin down for the season this past weekend. Snow has already come and is starting to stick at the lake up the road and about 600ft higher in elevation. I might make it up one more time, but once October hits, there is no guarantee that you will be able to make it in anymore.
Winters coming fast, hope you get it dried in.
|
|
Aklogcabin
Member
|
# Posted: 27 Sep 2021 01:20pm
Reply
Hey snobdds you maybe could do winter eh,
|
|
Brettny
Member
|
# Posted: 27 Sep 2021 01:22pm
Reply
Looking good Will. Did you end up useing the 3/4 tongue and geove dryply for the sub floor? A fix for the compressor not keeping up can be to screw it. Less squeaks possible too if you didnt use ring shank nails.
|
|
Aklogcabin
Member
|
# Posted: 27 Sep 2021 01:27pm
Reply
Nice n thanks but you're the one who started this. Maybe just maybe if you asked around folks may want to help. I'm picky but if I knew folks would leave things better than they find them I would invite them to share our cabin if they help invest some time to help build it.
For me around our cabin there's a kazilloin ways to get hurt n no help. I guess don't get concerned about others getting hurt. And maybe having others show up at different times would help with burglary.
Hey its your dream. Have fun , believe in what you're doing n don't look back. Always forward , have fun man
|
|
WILL1E
Moderator
|
# Posted: 27 Sep 2021 01:41pm
Reply
Quoting: Brettny Looking good Will. Did you end up useing the 3/4 tongue and geove dryply for the sub floor? A fix for the compressor not keeping up can be to screw it. Less squeaks possible too if you didnt use ring shank nails.
Yes to the dryply and the ring shanks.
|
|
snobdds
Member
|
# Posted: 27 Sep 2021 01:44pm
Reply
Quoting: Aklogcabin Hey snobdds you maybe could do winter eh,
I ski and snowboard in the winter.
The cabin is just my summertime thing.
|
|
Aklogcabin
Member
|
# Posted: 27 Sep 2021 02:00pm
Reply
Yeehah. Hey W maybe you share what some of your dreams are. Construction questions are good n so are cabin stories. Your there
|
|
WILL1E
Moderator
|
# Posted: 2 Oct 2021 09:04am
Reply
Well it’s build day and Mother Nature decided to show up and rain on my parade. Guess I’ll wait her out a bit and then get at it.
|
|
gcrank1
Member
|
# Posted: 2 Oct 2021 09:59pm
Reply
8:55 pm, dark in south central Wisconsin, dark in the north too. Is he sleeping? Did he get any work in today?
Stay tuned for tomorrows report by our intrepid cabin builder!
|
|
WILL1E
Moderator
|
# Posted: 3 Oct 2021 07:18pm
Reply
Unfortunately yesterday was only a 1 wall day by the time Mother Nature finally let me get to work. Today she was supposed to rain off and on all day but thankfully she spared me until about 30min ago…now she’s making up for it by pouring. Was just about to wrap up the 4th wall when she showed up. Now I just sit and wonder how my plywood subfloor is gonna hold up  
|
|
Princelake
Member
|
# Posted: 3 Oct 2021 07:35pm
Reply
I left my plywood floor to the elements with no tarp or anything for a couple weeks it’ll be fine
|
|
WILL1E
Moderator
|
# Posted: 3 Oct 2021 08:47pm - Edited by: WILL1E
Reply
The rain stopped for about 30min so I went and checked and there was about .5†of water standing on the entire deck. I managed to pull the tarp off and get about 95% off the deck. Then I leaf blew as much water as possible off. No sooner did I do that and the rain started again. Supposed to rain for another 2-3hrs 
|
|
BRADISH
Member
|
# Posted: 5 Oct 2021 04:03pm
Reply
I'm thinking you might need to throw your slickers on and get out there rain or shine! Don't let mother nature bully you around 
|
|
WILL1E
Moderator
|
# Posted: 5 Oct 2021 10:47pm
Reply
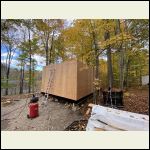
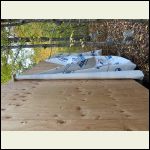
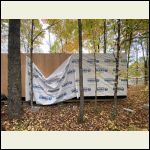
Made some progress the last couple days. As I type this the cabin walls sit sheathed and wrapped. Unfortunately I ran out of light to get final pictures but here’s what I can upload now. Like my 1 man wrapping fixture?!
84FC64695B0841B88.jpeg
| 
EE2BFFD93CC34D208.jpeg
| 
5C9BD602368D44FD9.jpeg
|  |
|
|
gcrank1
Member
|
# Posted: 5 Oct 2021 10:53pm
Reply
Genius!
How is your energy level holding up?
|
|
WILL1E
Moderator
|
# Posted: 6 Oct 2021 04:53am
Reply
Depleated. Im taking the day off to head home to resupply on materials, food, shower and clean clothes and hopefully have a meal with the family to rejuvenate me. Plus the body is taking a beating, bee stings itch like crazy, arthritis in the arms and hands are keeping me from sleeping decent. Blah blah blah…good thing I’m only 41!
I think I’m going to add the loft or at least the first 8’ of it to hopefully make the first couple rafter sets that will start on that end a little easier.
|
|
Brettny
Member
|
# Posted: 6 Oct 2021 06:08am
Reply
Nice job. That's alot to do for a 1man show. Make sure you plumb up and square the walls real well. I would even measure diagonally across the top plates too. Then put plenty of 45* bracing on the walls to keep them there then nail/screw the bottom plate down real good.
|
|
| . 1 . 2 . 3 . 4 . 5 . 6 . 7 . >> |

