|
| Author |
Message |
justinbowser
Member
|
# Posted: 21 Jul 2019 11:49am
Reply
We have had our off-grid cabin for about a year and a half and the battery bank has been right on the verge of being under-paneled so the generator had to be ran a couple hours per day. Also, we only ran the AC at night for a couple hours before bedtime to cool things off enough to sleep! I bought 9 310 watt panels and a new Midnite Solar charge controller so hopefully that will keep the batteries happy and allow AC use during the heat of the day.
On our last trip I was hooked up with a very helpful person who brought his tractor out and dug the holes for the solar array mounting poles. They are made from 2 7/8" drill stem and set into the ground with two bags of "redi-mix" per hole. I figured this would be an easy job but it took just about all day due to the hazards of digging holes on a mountain! Out of six holes two went smoothly and the other four required busting rocks, digging out rocks, etc.
We will be heading back up in another week to installing the Iron Ridge racking and the panels, electrical run, and new CC.
The Iron Ridge app said to use 4 posts but I felt better using 6. Instead of the top rails being pipe I will use treated 18' 2x6 attached to the poles with 3" U-bolts meant for attaching trailer axles. The racking will then be attached to them. Pics of install after next trip.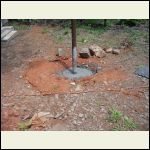
Hole number one
| 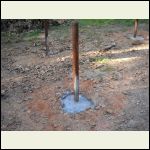
First hole of front row
| 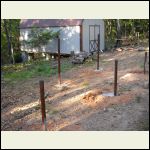
Finally all finished
| 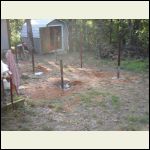
Time for a brew!
|
|
|
Steve_S
Member
|
# Posted: 21 Jul 2019 12:46pm
Reply
Regardless of the type of PT wood you use, please do yourself a HUGE favour, use ONLY STAINLESS STEEL bolts, nuts etc. If your going to have any metal touching the PT wood, a good idea is to put some "rubber" between the wood & metal feet the racking attaches to. The best & cheapest answer is an old used tire tube cut into 2" squares.
My solar is mounted to the side of my Sea Container with heavy galvanised hinges which are bolted to the Pressure Treated wood that makes up the entire framing. My racking is from Kinetic (quite similar) which provided aluminium "feet" which hold the rails that the panels mount on. Under the feet I put the rubber and torqued it all down with the supplied Stainless Lag Bolts.
While the brown PT says Galvanised etc is OK, I have witnessed & experienced that this is not really true. Lessons learned dept. A used rubber tube from a tire shop = free, 5 minutes cuttings square (a coffee break) peace of mind, priceless.
|
|
justinbowser
Member
|
# Posted: 21 Jul 2019 09:52pm
Reply
Probably will use green PT lumber. That's all the local yards seem to carry. I have SS lag screws to attach the mounting feet to the rails but good tip about rubber pads.
|
|
Pjh
Member
|
# Posted: 2 Aug 2019 06:16pm
Reply
Looking for feed back on running 10 2 buried wire from my 9 265 watt panels about 100ft to my cabin. I'm using 2 3000 watt inverters going to 2 separate breaker panels. Will 10 2 wire be enough ?
|
|
ICC
Member
|
# Posted: 2 Aug 2019 09:49pm - Edited by: ICC
Reply
Pjh, how are the panels connected... that is how many in series, how many in parallel? All into one charge controller? Which model Classic? Plus the volt and amp ratings for the panels could be useful and reduce the amount of guessing.
To determine wire size needed one must know the distance, the voltage of the run, and the amperage.
|
|
ICC
Member
|
# Posted: 2 Aug 2019 10:17pm
Reply
Second question... you mention inverters.... it sounds like you are asking about running 10 awg wire from panels to charge controller is that correct? Then the inverters do not enter into the question about wire gauge from panels... that is slightly confusing.
Are you running a ground wire as well as the positive and negative between panels and the Classicm
|
|
Steve_S
Member
|
# Posted: 3 Aug 2019 03:42pm
Reply
@Pjh. I have 8 CSP260's (4 per string) combined @ rack. I ran 10/2 That goes 60' underground to my powerhouse. Single Midnite Classic-200 & Samlex 4024 Inverter/Charger. The voltage drop is about 2% over that span which is fine. BUT (yep there is a BUT) in hindsight I should have run a pair of them, or better yet, 8/2 or 6/2 (those are not common) to be able to add more capacity. Not particularly interested in having to dig up lines again, not a job to do twice.
Go bigger wire because the future just happens and your guaranteed that Copper will not get any cheaper .
|
|
creeky
Member
|
# Posted: 5 Aug 2019 09:20am
Reply
There are some good 450v solar controllers coming. Going higher voltage can be cheaper than putting copper in the ground.
This is another advantage to 48v systems. You'll get more out of your solar controller.
|
|
|
Steve_S
Member
|
# Posted: 5 Aug 2019 10:04am
Reply
2 different issues here:
1) Battery Cables to Inverter & from Controller.
2) What AWG to bring Panel Power to Controller.
|
|
justinbowser
Member
|
# Posted: 11 Aug 2019 11:04pm
Reply
I finished up my solar upgrade last week and I'm now able to run the air conditioner in the cabin for about 6 hours during the heat of the day! I put up 9 310 watt panels, a Midnite Solar combiner with circuit breakers, and a Midnite Solar Classic 200 SL charge controller. The panels are wired as three strings of three and wired to the combiner with 10 AWG. I ran 8 AWG through conduit to the cabin.
Pictures as soon as I get unpacked and everything sorted...
|
|
justinbowser
Member
|
# Posted: 12 Aug 2019 12:22am
Reply
Here's a few pics of the racking and panel install. The Iron Ridge racking system and hardware made installing the panels a breeze...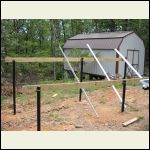
Cross beams installed to poles
| 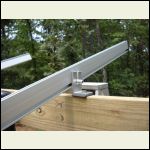
Iron Ridge rail attachment
| 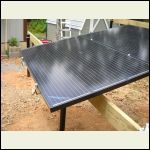
First 2 panels installed
| 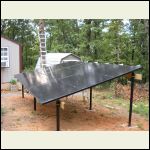
All nine panels installed
|
|
|
justinbowser
Member
|
# Posted: 12 Aug 2019 12:23am
Reply
A couple more...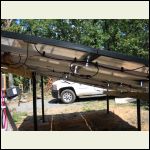
Underneath wiring
| 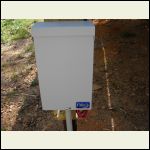
Combiner box
| 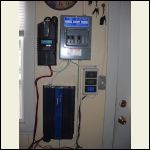
Power "wall" with the Samlex inverter and the new CC
|  |
|
|
|

