| . 1 . 2 . >> |
| Author |
Message |
Old_Skewler
Member
|
# Posted: 14 Oct 2021 06:03pm
Reply
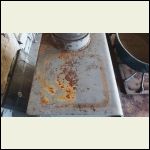
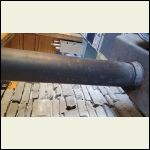
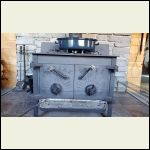
This is my first fire wood stove and I have zero experience with wood stoves for heating.
Could someone with more experience tell me if they see anything wrong with the installation or what I should be careful with or watching for?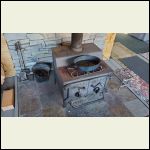
Kodiak_01.jpg
| 
Kodiak_02.jpg
| 
Kodiak_03.jpg
| 
Kodiak_07.jpg
|
|
|
Old_Skewler
Member
|
# Posted: 14 Oct 2021 06:04pm
Reply
Some more photos of the installation: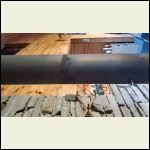
Kodiak_04.jpg
| 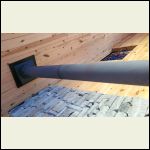
Kodiak_05.jpg
| 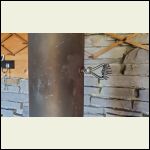
Kodiak_06.jpg
| 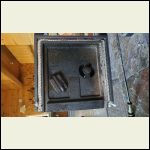
Kodiak_08.jpg
|
|
|
Nobadays
Member
|
# Posted: 14 Oct 2021 06:50pm
Reply
It looks like a decent old school wood stove. My concern would be any creosote buildup in the chimney. Looking at the joints it has been taken apart in a long time... I don't even see a slip-joint, and with the damper in there you couldn't clean from the bottom so has it been cleaned from the top? At least downnto the damper.
|
|
Tim_Ohio
Member
|
# Posted: 14 Oct 2021 06:55pm
Reply
It looks good to me. You seem to have plenty of clearance from combustible surfaces. Keep in mind, you will have to clean your chimney pipe once a year to prevent an excessive build up of creosote. If it builds up, it will cause a chimney fire and that can be a big problem! They do have a kind of flare that you can throw in if you hear a fire is burning in it. Keep those on hand for an emergency. The other thing that is important is that your chimney outside the roof is two feet higher then the ridge, if it is located within 10 ft. Otherwise, you will have problems with the draw in certain weather conditions.
Other members, did I miss anything?
Good luck.
Tim, Ohio
|
|
scott100
Member
|
# Posted: 15 Oct 2021 01:51pm
Reply
What's behind the stone on the wall, and what's under the tile on the floor. Distance to combustibles on an old stove like that would likely be 36". If there's anything combustible behind the stone, the stove would be too close (ie, the stone doesn't count as wall protection by itself).
|
|
Brettny
Member
|
# Posted: 15 Oct 2021 03:34pm
Reply
Looks fine from what we can see..but for the most part what you dont have pictures of is where there could be issues. A fire in the attic is my worst nightmare and very hard to put out with a frozen garden hose.
Judging by the rust on the joints it dosnt have a chimney cap and rain in getting down the chimney. Can you take more pictures?
|
|
scott100
Member
|
# Posted: 15 Oct 2021 10:58pm - Edited by: scott100
Reply
Also, to clarify what I mentioned above. A solid brick wall will cut the 36" clearance down by a third, but to get it down much further requires a vented wall protection. I'm assuming you have studs or a combustible wall behind that stone.
Below is a link to some info (see table 1). You might also want to check out NFPA 211 for whatever the most recent version of these requirements are. If you can find an owner's manual online for that stove it may mention the clearance requirements for it and also the r value you're supposed to have underneath the floor protection. The installation looks ok from your pics provided the clearance measurements are ok.
https://heritagemutual.net/documents/Safety%20Guidelines%20for%20Solid%20Fuel%201163% 20(GMRC)%200909.pdf
|
|
Old_Skewler
Member
|
# Posted: 23 Oct 2021 05:48pm
Reply
Quoting: Nobadays My concern would be any creosote buildup in the chimney. Looking at the joints it has been taken apart in a long time... I don't even see a slip-joint, and with the damper in there you couldn't clean from the bottom so has it been cleaned from the top?
Thanks for the reply. As prefaced before, this is new to me and I don't have a lot of experience. I went on the roof and took some photos.
But I don't know when it was last cleaned up and I don't know how to clean it up. Is this something that I should be able to do it or does it take a contractor?
Alternatively, is there a way for me to check for the buildup or test if everything is flowing correctly?
Right now I am using the wood stove to heat up the cabin and everything seems fine. But I don't know the possible symptoms...
|
|
|
Old_Skewler
Member
|
# Posted: 23 Oct 2021 05:51pm
Reply
Quoting: Tim_Ohio Keep in mind, you will have to clean your chimney pipe once a year to prevent an excessive build up of creosote. If it builds up, it will cause a chimney fire and that can be a big problem! They do have a kind of flare that you can throw in if you hear a fire is burning in it. Keep those on hand for an emergency.
Thanks for the information, I actually did not know I had to clean it up but it makes sense.
How is the cleaning job and is this something anyone could do or better to call a contractor?
Also, what is the correct name for these emergency flares? I definitely need to get a few in here. I am terrified of fire.
Thanks for the reply.
|
|
Old_Skewler
Member
|
# Posted: 23 Oct 2021 05:52pm
Reply
Quoting: Brettny Judging by the rust on the joints it dosnt have a chimney cap and rain in getting down the chimney. Can you take more pictures?
You could tell all of that from looking at the joints?
More photos of the chimney cap below.
Thanks!
|
|
Old_Skewler
Member
|
# Posted: 23 Oct 2021 05:56pm
Reply
Quoting: scott100 I'm assuming you have studs or a combustible wall behind that stone.
Behind the stone wall is a studded stairwell to the basement.
I have the manual and the clearances are in compliance.
|
|
Old_Skewler
Member
|
# Posted: 23 Oct 2021 06:00pm
Reply
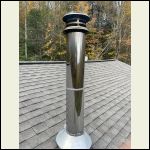
Here are the photos of the chimney.
Is there a way to gauge how bad the soot is and how urgent it needs the cleaning?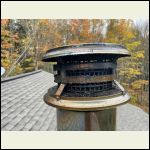
chimney_01.jpeg
| 
chimney_02.jpeg
| 
chimney_03.jpeg
|  |
|
|
Tim_Ohio
Member
|
# Posted: 23 Oct 2021 06:39pm
Reply
Hi Old_Skewler.
It looks pretty bad based on the first picture. The cap should come off easily, then you can either look down it with a flash light, or if you can’t see down it, maybe a mirror with a flashlight, or even take a pic with a cell phone down inside. Those sections on the roof probably unscrew at the seam and you could get into that way as well.
As for flares, here is a link:
https://www.amazon.com/dp/B002RRIKT2/ref=cm_sw_r_sms_api_glt_fabc_YNJAVTM14HKZGTM6Z9A 3
Tim-_Ohio
|
|
Old_Skewler
Member
|
# Posted: 23 Oct 2021 07:02pm
Reply
Quoting: Tim_Ohio It looks pretty bad based on the first picture.
Geez man... don't say that!
And to clarify, what needs to be cleaned up: the chimney cap or the pipe inside? And which part of the cleaning should I normal person be able to do, if any?
I still don't know if this is something that I should attempt myself or find a contractor to come clean it.
Do you happen to know?
|
|
Tim_Ohio
Member
|
# Posted: 23 Oct 2021 07:33pm
Reply
Old_Skewler,
If it were my chimney, I would take it apart inside. If it was properly installed, there will be a slip joint/telescoping section that will slide into itself and shorten the inside pipe so that it can be removed. I have a plastic bag ready to cover the lower end to prevent a mess inside. Once you have it outside, it’s pretty easy to take a piece of light weight chain and swirl it around on the inside. Then, dump out the loosened creosote and you are done with that section. On the roof, the cap has to come off and cleaned with a stiff bristle brush. I cover the bottom of the double wall pipe inside the house and run a brush down from the roof.
Once again, you really won’t know how bad it is until you can look inside it. It all comes apart pretty easily.
Tim
|
|
Old_Skewler
Member
|
# Posted: 23 Oct 2021 07:48pm
Reply
Thank you Tim.
|
|
gcrank1
Member
|
# Posted: 23 Oct 2021 08:48pm - Edited by: gcrank1
Reply
What I used to do was discon at the stove, tape a garbage bag around the pipe, go on the roof, twist off the cap and run my 6" chimney pipe brush (mine was a 6" pipe, they make em for all sizes) down/up a few times.
All the loosened crud falls into the bag. By the time Id get the cap back on and back down the bag was ready to give a couple twists, untape and take off.
Bein as it is your first cleaning and you dont know how crusty it is you should support the bag bottom on something in case you get more weight than the hanging bag alone can bear.
If you are not comfortable on the roof but get all the stuff ready for the job you can probably find somebody local to do it without calling a 'high priced pro'.
|
|
ICC
Member
|
# Posted: 23 Oct 2021 10:24pm
Reply
I have done what gcrank1 does, for years. I find the reinforced type of kitchen trash bags to be ideal for me.
I use a telescoping black pie above the stove. I also have "rungs" screwed to the metal roof ribs that act as a permanent ladder. I used the snow stop folded metal strips the roofing supplier sells in matching colors to all the other roof materials. That simplifies the job with only needing me to get the ladder on the ground to the first eve. And to make removing the cap easier I riveted a S/S bar on the top of the cap. It's a built-in handle for twisting loose the locking lugs.
|
|
gcrank1
Member
|
# Posted: 23 Oct 2021 10:37pm
Reply
That cap-handle is genius  , gotta beat doing the 'hug & twist method'. , gotta beat doing the 'hug & twist method'.
|
|
snobdds
Member
|
# Posted: 24 Oct 2021 12:38am
Reply
That stove is older and doesn't have secondary burning, so you're always going to have creosote. Burning well seasoned wood helps, but frequent cleaning is going to be necessary. So I would learn how to do it.
It's not hard and invest in some decent cleaning tools for longevity.
You should clean it sooner rather than later.
|
|
Old_Skewler
Member
|
# Posted: 24 Oct 2021 08:32am
Reply
Quoting: Tim_Ohio If it was properly installed, there will be a slip joint/telescoping section that will slide into itself and shorten the inside pipe so that it can be removed.
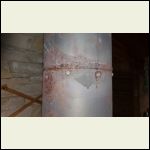
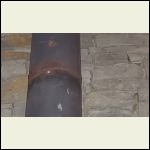
Either I am not recognizing the telescopic section of the flue pipe or the installation was not properly done.
Inside the cabin the pipe has (2) 48" sections and one 30" at the top connecting to some sort of roof penetration bracket.
|
|
Old_Skewler
Member
|
# Posted: 24 Oct 2021 08:36am
Reply
Quoting: gcrank1 What I used to do was discon at the stove,
I am stuck in this very first step, no screws at the flue pipe connection to the stove and it looks almost welded - not really, just some superficial rust.
I think my best game plan will be to pay someone to come clean it and try to learn as I watch, so that I can eventually take over the maintenance errand.
|
|
Old_Skewler
Member
|
# Posted: 24 Oct 2021 08:42am
Reply
Here are photos of the vent pipe inside the cabin: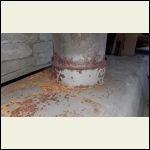
20211024_083658.jpg
| 
20211024_083718.jpg
| 
20211024_083742.jpg
|  |
|
|
Old_Skewler
Member
|
# Posted: 24 Oct 2021 08:44am
Reply
Quoting: snobdds It's not hard and invest in some decent cleaning tools for longevity. You should clean it sooner rather than later.
Thank you, very clear message.

|
|
Tim_Ohio
Member
|
# Posted: 24 Oct 2021 09:54am
Reply
Old_Skewler,
That’s looking pretty rough. I’m starting to think you might like to remove the inside piping and just replace it. The single wall piping is really cheap, except for the telescoping section. Although, you can paint it with high temp paint, you’ll have to wire brush it good and wipe it clean and free of dust.
If it were mine, I’d replace it. But then again, I like nice neat and new looking appearance.
Best of luck.
Tim_Ohio
|
|
Tim_Ohio
Member
|
# Posted: 24 Oct 2021 10:08am
Reply
I looked closer at your pics. I see what you mean. There does not appear to be any telescoping section. In that case, it looks like you will have to remove the rain cap on the roof and run a properly size round chimney brush down through it. Then clean out inside the stove what falls. Some people use sections of rod that screw together. Some will lower a rope down from the top into the stove, attach the brush and maybe a weight below (to get it to slide back down for an up and down action) and then pull it up through the chimney.
Tim
|
|
Aklogcabin
Member
|
# Posted: 24 Oct 2021 10:15am
Reply
Cleaning your chimney is not a big deal. You have already been on the roof. A brush of sorts is sold that screws on to extension rods. You just take the chimney cap off. Run the brush down it. You can inspect with a flashlight.
I don't take my stove pipes apart for cleaning. Your stove doesn't have a catalytic burner in it. The creosote will fall into the stove where you can scoop it out. Some stoves have a flame diverter in them. A steel plate in the top of the fire box you may have to clean the creosote from the top of it. But pretty easy.
Since you have a wood stove you may as well get to know it.
I don't use a torch for putting a chimney fire out. What I use is a bag of chemicals that you can open the door quickly n toss the bag in. Old school way was to throw a glass of water in it. And the steam would suffocate the flames.
That's a real nice old stove that should work great n last a lot longer. Your chimney pipe has some rust on it. That's not uncommon. But since you only have 3 pieces you may want to consider replacing them as they are not expensive. They also make a thermometer that you drill a 1/4" hole in your chimney stack and put the sensor in the stack. Or there are magnetic ones.
I like to take my poker tool n often bash the chimney pipe with it to remove the creosote.
Burning wood is not rocket science and you look to have a good setup. Don't be afraid of it
|
|
Nobadays
Member
|
# Posted: 24 Oct 2021 10:18am
Reply
All good advice.... looking at your newest pictures it really doesn't look like there is a slip joint, how the PO got the pipes connected without one is a mystery! The upper most pipe may slip up into the triple wall that goes through the roof, but that is a guess.
The joints are terribly rusty which would indicate either a leak from the top as Brett suggested.... which doesn't look likely, or high humidity and little use over a long period of time. It would also make me concerned about the integrity of the pipe, especially where it enters the stove... that looks really rusty. As you said like it is welded to the stove! Poke around it with a screwdriver to test how solid it is. If you poke through it or it feels like you could with little effort, it's time to replace it and do it right. Single wall stove pipe is fairly inexpensive, for under $200 or less you could replace the whole interior pipe, AND add a slip joint to make cleaning much easier. Unfortunately slip joints can be pricey. Nothing worse than fighting dirty chimney pipes... you get filthy and the cabin gets filthy!
One last thing, as was said better get it cleaned sooner rather than later... there is a lot of creosote build up on that chimney cap. If it's black and shiny it will burn! As a stop gap measure, look inside your stove, if you can see where the pipe goes out of the top.... no/little smoke shelf, get a fiber(not steel) chimney brush and rods, pop the cap and brush it out from the top letting the creosote fall into the stove. You won't get past that damper but it is unlikely there is any build up below it. Then, clean the cap and the stove.... reach in and clear the smoke shelf if there is one.
Replace the pipe when you can, do it right. The next time you clean it you will be glad you did!
|
|
NorthRick
Member
|
# Posted: 24 Oct 2021 12:08pm
Reply
Given your lack of experience, those photos and your questions, I'd say hire a chimney sweep. When he does his thing, ask lots of questions and watch what he does.
After that you can decide whether you want to do future cleanings on your own.
|
|
gcrank1
Member
|
# Posted: 24 Oct 2021 02:17pm - Edited by: gcrank1
Reply
That pipe in the pics is Ready To Fail in the area closest to the fire.
Replacement black (Never use 'silver' pipe!) stove pipe comes in a few different gauges, get the thickest you can.
If the stove does not have a top baffle so the crud will fall straight into it Id brush the chimney from the top (the brush on a rope with a weight, like a brick, run up/down several times) will let all the crud into the stove (have the stove draft control Closed). Then separate the piping and pull it all off. It will be pretty well cleaned out so far less messing than if you didnt.
If it has a top baffle that would need to be removed, possibly beyond your skill set at this point, so do Not dump the crud on top of the baffle! Discon the pipe at the 1st joint you can, or cut the junk pipe with a Sawzall, jack it aside and put a bag on it, then clean the stack.
Once the pipe is separated you may find that pipe to stove connection is just all rusted up and will come apart.
With that piping all off you will see how bad a condition it is in, my guess is you will be glad you didnt trust it.
Look online for a video that shows installation of a tele-section, one of those will make your re-install and periodic maintenance go easily.
|
|
| . 1 . 2 . >> |

