|
| Author |
Message |
bowilbury
Member
|
# Posted: 11 Mar 2020 04:17pm
Reply
Brand new to small cabins, so sorry for the newbie questions. I was thinking of a basic 160 sq ft cabin, made from stacking 6x6 timber for the walls with butt/pass. I feel like this would be the easiest way to go for a first time builder.
What's the best way to make sure the walls are strait while stacking up each piece of timber?
Do I need to seal the entire piece of timber before hand, or do I just seal the exterior after the build is complete?
|
|
ICC
Member
|
# Posted: 11 Mar 2020 05:29pm
Reply
What will the source of the timbers be? Pre-dried or green? It probably will cost a lot more than a conventional stick build and be harder to make draft-free. Stacked 6x6 means air/water sealing all the layers whereas a stick built is sheathed and wrapped and well sealed. Or you could house wrap the stacked 6x6 but that seems a waste of timbers.
You still have to deal with windows, at least one door, a foundation and a roof. A conventional stick build still has many advantages to my way of looking at a structure.
|
|
bowilbury
Member
|
# Posted: 11 Mar 2020 05:58pm - Edited by: bowilbury
Reply
Could I go pre-dried and apply a sealant to it? As for a foundation, I was thinking of grading out the building site for proper drainage, then laying down a line of gravel and pavestones and putting the timber blocks right on top. The reason I'm leaning towards timbers is because it seems the simplest to build, like life sized Lincoln logs. Doesn't it also transfer the load more evenly?
Location is Northern California, climate is stable, no snow in winter.
|
|
Nobadays
Member
|
# Posted: 11 Mar 2020 06:07pm
Reply
ICC is correct on cost for sure.... stick built would be cheaper. If you are looking g for the "log cabin" effect, stacked 6x6 are going to give you flat walls inside and out, just the ends will look like log style construction.
It is common to use what are referred to as "D" logs if you don't want to go to the expense to hire a log builder.... or don't want to learn how to build with logs yourself. The "D" logs are usually stacked one on top the other... but ans pass until reaching the desired height. A couple of beads of elastic caulking (designed for the purpose" are layed down before the next log is added. This seals for air intrusion. Many "D" logs have a a groove or two in the top and corresponding splines on the bottom. Upon completion the outside of the home is sealed with your choice of sealer just as a log home would be. The inside is up to you, most folks I know chose to leave them natural with no sealant.
Cost wise, I would venture would be similar, or not too much more to buying 6x6's and give you a better look. There are many kits out there but also small mills that can supply just the logs and you figure it out. There are two such mills near us in southern Colorado. My SIL bought a load of logs and made his own using an Alaska chainsaw mill.
Here is a link to a mill near me that has a handy calculator... not knowing where you are, you may have someone near you.
|
|
bowilbury
Member
|
# Posted: 11 Mar 2020 06:21pm - Edited by: bowilbury
Reply
I wouldn't mind the flat walls on the inside. On the whole, I'd like a simple design and as a novice, something that's easier to build. Here is an example, of a style I like.
|
|
Nobadays
Member
|
# Posted: 11 Mar 2020 06:49pm
Reply
"D" logs are flat on the inside.... the grooves make them easy to lay correctly and help seal air intrusion along with the caulk. Click on "a mill" in the above post and you will see what I mean.... the calculator on that site would help you know how many lineal feet of timbers you need be it D logs or 6x6.... you can compare prices.
In N California you undoubtedly have some small mills locally that can help you out. Ask at a local lumber yard... probably NOT HomeDepot... they likely won't know!
|
|
bowilbury
Member
|
# Posted: 11 Mar 2020 06:51pm
Reply
I like the idea of the D logs for sure. I'm just wondering if this is the simplest way to go about constructing it.
|
|
Nobadays
Member
|
# Posted: 11 Mar 2020 07:07pm
Reply
Yes and No.... if you are good with a chainsaw and can make good clean square cuts, it will go up fast.... after you have framed and built the floor. Which will require added strength to carry the weight of the logs.
The design you are looking at would lend itself far better to stick frame construction as ICC suggested. Cheaper, better insulated, easier to wire/plumb and would look great done in cedar as in the picture!
|
|
|
bowilbury
Member
|
# Posted: 11 Mar 2020 07:26pm
Reply
If someone were to do that timber. Can you put the first log right onto the ground, over some gravel and a concrete stone? Would that spread the load enough?
|
|
Nobadays
Member
|
# Posted: 11 Mar 2020 08:05pm
Reply
You would need pressure treated timbers near the ground.
|
|
bowilbury
Member
|
# Posted: 11 Mar 2020 08:06pm
Reply
I've looked at some of the pressure treated timber and didn't like the color. Would it work to have the first layer or two as the pressure treated lumber, then go to a pine with a sealant for the rest?
|
|
Nobadays
Member
|
# Posted: 11 Mar 2020 09:12pm
Reply
Just needs to be the first layer (round).
|
|
Brettny
Member
|
# Posted: 12 Mar 2020 08:13am
Reply
I would never put the first layer of a wood wall directly on the ground even if ground contact PT. It's going to rot.
The simplest way to built is not always the best. If you don't have the time, knowledge or skill to build something that's going to last than just buy a a prebuilt building. A 10x16ft building that is stick built on a block foundation will last and is about as simple as it gets.
|
|
Aklogcabin
Member
|
# Posted: 12 Mar 2020 08:59am
Reply
I have a 3 sided log cabin. Very easy to build. Use a straight 2-4 nailed to the wall vertically to keep stacking straight. And of course a good 4’ or longer level to stay plumb. There’s screws that are called timberlocks that are used to screw them together. You can use a water hose level. To stay level . And a good electric power planer. And my materials had to all be freighted in by snogo over several years.
Nobadays laid it out pretty correctly. There are jigs available the help you cut straight and seems you want to practice on something. On cost you don’t by insulation, sheetrock n such. Build the wall. Finish n caulk the outside n enjoy your log cabin.
Put a 2-6 green all weather wood board under your first log. And if you prefer. I do. An overhang that is more than 2’ . Mine is 3-1/2 feet. This will help keep water away.
Just my thoughts. If a 6-6 cabin is what you want . Than build that.
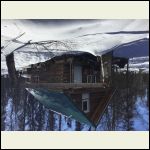
Easter Sunday couple years ago
| 
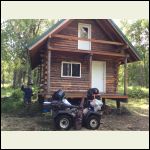
My hunting buddy
| 
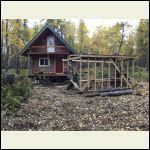
As of last fall
| 
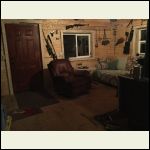
Wish I was in that lazyboy
|
|
|
Nobadays
Member
|
# Posted: 12 Mar 2020 10:01am
Reply
Brett is right.... you got to get up off the ground. Look at AKlogcabin's place. You can see he has beams on posts directly under his outer walls (I'm sure one down the middle as well) to support the weight.
Could you just spread some gravel, stack up a few concrete blocks and put down one round of PT and start building? Yes.... but it will have with the frost, likely settle here and there so doors and windows won't open or close, and as Brett points out... it will rot from the bottom up.
The foundation of a structure is the most important part of the build.... get it right the rest of the build goes smooth, and your building will stand the test of time. Unfortunately, if you skimp there you really will have wasted the money you spent to build the cabin.
I certainly don't want to discourage you from building but do want to encourage you to learn (as it appears you want to do) all you can about good building practices and erect a cabin you can enjoy for years! This site is a gold mine of information... use the search function and look around!
|
|
LittleDummerBoy
Member
|
# Posted: 12 Mar 2020 12:12pm
Reply
I had a local mill cut 6X6s and I stacked them (3 Timberlocks per) a week agter they were cut. They've dried pretty straight. Cost of timbers, delivered to my site was cheaper than stick-built. It was harder simply because of the weight of materials. It is immensly strong. Caulk takes care of the seams.
I used store-bought pressure-treated timbers for the bottom course.
|
|
Turtletownman
Member
|
# Posted: 13 Mar 2020 06:52am
Reply
Having built a small D log and planning another, I agree it may cost more than a framed out stud wall, but by the time the cabin is finished, the cost difference gets closer. The final appearance is what counts to me.
A friend sold cabins built with 4 X 10s quarter dove tail notched and chinked. He cut a groove in the timbers and inserted a metal strip and then chinked over it.
You do not want to put an untreated timber on the ground. Many log cabins which are still standing were done that way, but the bottom log was usually a hardwood and who knows what was done to prevent both rot and termites.
The big box stores sell 6 by posts pressure treated for fresh water immersion which would be better for the first run.
Borax is now used to treat logs to prevent insect damage, but it does not deter carpenter bees. The borax is sprayed with a garden sprayer and allowed to dry before sealing.
Bob
|
|
Turtletownman
Member
|
# Posted: 13 Mar 2020 07:55pm
Reply
Me again. At every butt joint, drill a hole or something so a dowel or even a square piece of wood can be inserted to close up the gap between the logs.
|
|
SpyingOnMyKeystrokes
Member
|
# Posted: 19 Mar 2020 03:17am
Reply
I'd also check to see if the box store 6x6s are going to shrink over time.
You might like this video of a traditional Finnish log cabin build to get some ideas about how difficult the process would be.
https://www.youtube.com/watch?v=HNTfLGt59qo
I've seen some projects using a technique that stacks 2x6's that have a routed groove, kinda like tongue and groove boards that would probably go up really quick, and could be milled off site and shipped in, for quick assembly. In N California that might be ideal and simple.
The common building process tends to have some type of foundation (can be simple blocks or poured concrete depending on the climate conditions where you're building), that raises the platform and wals, etc. up and away from the ground.
then a platform that makes up the floor, with beams resting on the foundation, joists in between or suspended (attached with metal hangers) to the beams and spaced at either 16" from one another or 24".
The subfloor is usually sheets of OSB or plywood, and that makes up the platform.
The walls are then stacked around the perimeter and attached to the platform, and they could be 2x stick framed or some other wall system, like 6x6's or whatever, so long as the platform can hold their weight wherever they are going to be. If you're stick framing, then you attached osb or plywood sheathing to the vertical 2x studs (usually 2x4 or 2x6). The exterior sheathing can then be something like the cedar planking in the pic you posted, and can be nailed, glued, etc. to the osb layer.
Roof is stacked atop the walls and attached, covered with another layer of osb or plywood, roofing material, etc.
There's usually some kind of waterproofing plastic layer on the outsides of the wall and roof sheathing underneat the finish cedar or shingles, or whatever material.
It's more complicated and also simpler than it sounds. If you have to meet a bunch of code it can get a bit more complicated. Look up videos on floor framing and wall framing to see the stick frame process.
Hope that is helpful.
|
|
|

