|
| Author |
Message |
harrymanimus
Member
|
# Posted: 17 Dec 2018 12:04pm - Edited by: harrymanimus
Reply
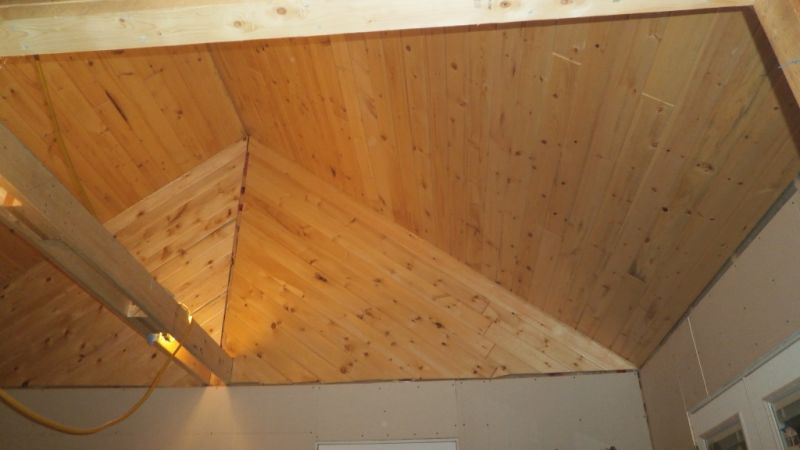
I have 1 x 6 x 8 T&G boards I want to put on a lofted barn type sloped ceiling for 12x30 portable building.
I was planning on buying a 16 ga 2 1/2 inch air nailer as it is the most cost effective, can get a nice Hitachi for $70 with some left over GC at Lowes.
Examples I see say to start at the bottom. I guess you are supposed to start at the bottom due to the nails going in against the pitch of the roof and the weight of the boards against the nail? This is with the nail being placed near the tongue at an angle to hide the nail head. I sort of wanted to start at the top so the peak look good with a full width board there. The bottom will not be visible and could have partial boards hidden.
Do you have to use construction adhesive? I just think about what a royal pain that would be if I ever wanted to remove some boards.
|
|
rockies
Member
|
# Posted: 17 Dec 2018 07:33pm
Reply
There's no point in installing t&g boards until you figure out what to do for an air and moisture barrier.
As to the spacing of the boards, you could measure along the slope from the ridge to the wall, divide that by the width of the board (don't include the tongue in the width since that will be hidden) and then cut the width of the first board at the bottom to leave you a full board at the top.
|
|
Wendigolake
Member
|
# Posted: 17 Dec 2018 07:46pm
Reply
What are you using for trim at the top and bottom? Trim obviously can be used to make your partial boards look proper.
I have always started at the bottom and worked up making sure the boards are all 100% level.
You do not have to use adhesive. Just the nails will hold your boards in position easily.
|
|
slatecreek
Member
|
# Posted: 17 Dec 2018 08:30pm
Reply
Tongue and groove is easy to install, we did our whole cabin ceiling and walls with it in knotty pine. Air nailer is the best way to put them down. We stained the ceiling boards before we put them up, did the walls later.
|
|
Borrego
Member
|
# Posted: 17 Dec 2018 08:44pm
Reply
I would start at the bottom, easier for you to install. No, you don't have to use adhesive, but I would. Just a dab every few feet.....and a tip: shoot the nails at an angle. makes them less likely to work their way out over the years....
|
|
slatecreek
Member
|
# Posted: 18 Dec 2018 08:57am
Reply
We used all full length pieces for everything. No splices but some of the long ones gave us a little trouble if bowed. I made a tool like the ones used to for bowed deck boards. I screw it to a stud and a little lever action to force the board into place and nail.
If you do piece it some will do a end trim in the pieces so the seam looks a little better. Here is a you tube showing how it's done on a miter saw. URL
|
|
Princelake
Member
|
# Posted: 18 Dec 2018 09:23am
Reply
I dont care who framed it the trusses aren't going to be 100% perfect. If you measure for the bottom to cut your piece perfect you'll get a couple warped boards that wont fit 100% perfect that might be out a 1/16" a couple of those and you'll be out a 1/4" at the top. If you want a perfect top start at the top. Or what most would do is start at the bottom and when they get to the top that would make a piece of trim at the top or make a fake beam if it's really out.
|
|
neckless
Member
|
# Posted: 18 Dec 2018 11:06am
Reply
one of the big
|
|
|
neckless
Member
|
# Posted: 18 Dec 2018 11:12am
Reply
one of the big mistakes that most installers make is they dont run a file on cut edge at a 30 degree angle just a swipe will do it this in time will pay for its self ...in time there will be a small amount of shrinkage that edge is not visabale and u dont notice it ...if not done that sharp edge will stand out like a sore thumb....lol
|
|
neckless
Member
|
# Posted: 18 Dec 2018 11:13am - Edited by: neckless
Reply
one of the big mistakes that most installers make is they dont run a file on cut edge at a 30 degree angle just a swipe will do it this in time will pay for its self ...in time there will be a small amount of shrinkage that edge is not visabale and u dont notice it ...if not done that sharp edge will stand out like a sore thumb....lol
|
|
harrymanimus
Member
|
# Posted: 18 Dec 2018 12:13pm - Edited by: harrymanimus
Reply
neckless - one of the big mistakes that most installers make is they dont run a file on cut edge at a 30 degree angle
Are you talking every board or just ones that I will end up cutting to fit? Are we talking the ends of the boards or lengthwise cuts or both? FYI, the boards I got have a rounded edges and bevels lengthwise.
https://www.lowes.com/pd/-ECB-WP4-5-375-in-x-8-ft-Brown-Pine-Wood-Tongue-and-Groove-W all-Plank/1000399231
Interesting note, I've gone to 4 diff lowes and picked out the best boards from each because stock is pretty limited on these.
|
|
neckless
Member
|
# Posted: 19 Dec 2018 04:30am
Reply
just the ends on every board.. i know it sounds like a lot of work but can make a big difference...
|
|
silverwaterlady
Member
|
# Posted: 19 Dec 2018 07:40am
Reply
It's easier to use a sander or router to do the angle.
|
|
neckless
Member
|
# Posted: 19 Dec 2018 03:06pm
Reply
hand tools only , like 2 swipes with a file . its not like u want to see a bevel its just to take the Sharpe edge off
|
|
Steve_S
Member
|
# Posted: 24 Dec 2018 02:28pm - Edited by: Steve_S
Reply
My place is all T&G Pine ceilings and my gable walls as I used typical 1x6 V-Notch which is actually 5/8's thick. Roof / Cathedral is 37 degrees cut so fairly steep.
Started at the top with the notch at the top, with the tongue down. Used a DeWalt Brad Nailler & 2" brads up through tongue to hide them... every 3rd board got also got face brads into the studs then hidden with filler stick.
Finishing trim between the slope of the ceilings and walls I used 11/16 Clear Pine Cove Moldings which brings it all nicely together.
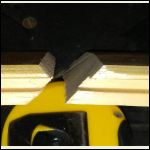
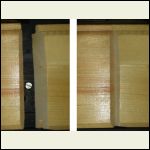
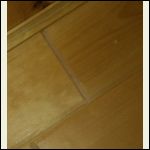
I used a mix of 8', 10' 12' lengths using full 12' every 3rd board (ones with face brads) to keep all the lines right and expansion & contraction in check. Where board ends meet, the "short edge" is a double cut 45° so it looks like this <=== and the "long edge" is a single 45° cut which looks like this ===\ so you can overlap the long edge with the double cut and have a nice V-Notch to match the rest of the planks.
Here is a picture which I posted in another post here which shows you the effect I got when I was doing it. 
I did not use any glues as that could be problematic for the wood movement and I would not want to see buckles. The meeting between V-Notch & Drywall (sadly I did have to use "some") I did a perimeter of rough cut 1x7 that meets up with the beam and more... in the living room. In the bedroom, kitchen & bath (flat ceilings below loft) I just milled my own 2" knotty pine transition mouldings.
Just a note... I used a mix of woods for different effects, including red & white pine, red & white cedar some ash & aspen as well... also it's mixed finishes like rough cut from my buddies mill or
to dressed furniture grades. This allowed me to play a lot of tricks in the finishing and as a very rustic off grid shack in the bush, it works LOL.
Hope it helps.
I check in here randomly these days, but I can post some pics. I will be doing a major update to my older thread in the new year when things settle down...
PS: Last Tip, start at the TOP and work down... much easier to adapt cut short if need be at the bottom than at the top. You will first have to decide how to address the top "point" or if you want a flat strip for lights etc... then go from there. BTDT and learned my lessons along with ample drunken sailor talk ! Always stagger joints & laps and allow for float as the wood will expand & contract somewhat when you heat, cool and seasons change.
|
|
Steve_S
Member
|
# Posted: 25 Dec 2018 02:21pm - Edited by: Steve_S
Reply
Here's a couple of pics which makes it much easier to explain. Note that this is with a bog standard V-Notch (45° bevel) which is pretty common, if you have bead boards of something different then this method of butting would need to be adjusted.
Hope this helps
Vjoint_bevel_cuts_f.jpg
| 
Vjoint_end_cut_deta.jpg
| 
Vjoint_end_insitu..jpg
|  |
|
|
neckless
Member
|
# Posted: 26 Dec 2018 08:37am
Reply
very nice
|
|
|

