| . 1 . 2 . >> |
| Author |
Message |
Princelake
Member
|
# Posted: 30 Sep 2018 08:43am
Reply
I have a cabin layout that I feel good about finally after many many drawings as of right now here is what i have.
The "w" are windows. It's a to scale drawing on grid paper. What's everyone's thoughts. And finally is there a decent easy to use free online lay out program or app. Thanks for looking
|
|
Nate R
Member
|
# Posted: 30 Sep 2018 09:47am
Reply
I like it! Well thought out. Kept the plumbing close together, nice little niche for the table/bench area, and it seems efficient.
I use floorplanner.com. I paid for extra designs, but you're able to do one for free, IIRC.
|
|
toyota_mdt_tech
Member
|
# Posted: 30 Sep 2018 10:15am
Reply
I'd get Rockies to sign off on it first, he may have some tweaks. 
|
|
Borrego
Member
|
# Posted: 30 Sep 2018 11:52am
Reply
Here are my first thoughts:
1) I would create a plumbing wall between the kitchen and bathroom so the sink/shower/toilet would be on the other side of the wall where the kitchen sink and stove would be. Saves time and money......
2) No window in bathroom? You might regret that even with a fan. I did....
3) If I'm seeing it right, the bedrooms are awfully small, 8 ft x 9ft. I think this will be a problem you'll wish you had done differently in a few years...
4)No living room/dining room....the bar, while a nice feature, takes up the room that could have a nice couch. It'll be cramped and you'll lose some space that I would rather have. I think you could reconfigure the layout a little better there.
5) 16 x 28' is an odd size....any reason for it? I would expand it to at least 20 x 28'...or go to 24 x 24....
Well that's all I got, take it for what it's worth.....no offense meant....
|
|
Princelake
Member
|
# Posted: 30 Sep 2018 12:29pm
Reply
Ya I could flip the bathroom lay out. My plumbing was going to run under the cabin and come straight. I left space between shower and the wall and put the counter cabinet there to put a small hot water heater there. I was also thinking a small window in the bathroom. I have a ton of windows else where wouldn't be a bad idea to put a small one in. The jut out is a breakfast nook area with windows all around. I found a dining room table with chairs takes up a ton of room. And the bar is pushed up to the couch.i figured a ton of space gets taken up from bedrooms and my travel trailer one is 8x8 and i get by with it. I've tried a hundred 24x24 lay outs none that I was crazy about. Where my property is located I have to atleast 65' back from the high water mark and property lay out a long skinnier cabin works good. And when driving by in a boat itll appear larger then it actually is
|
|
hattie
Member
|
# Posted: 30 Sep 2018 01:14pm - Edited by: hattie
Reply
I like this layout. It is very efficient. Great work.
Our bedroom (full time cabin) is about 9 X 11 with no closets. Our closets are in the laundry room. We have room for 1 night table and one dresser plus a queen size bed (with storage under it) in this size room.
We don't have a window in our bathroom and that has never been an issue. As long as you have a bathroom fan you should be good.
I agree with Borrego that you should flip the plumbing around in the bathroom to share the kitchen wall. A sliding pocket bathroom door might make things easier with the layout of the bathroom if you have to flip things around.
We have our small water heater under the kitchen cabinets. We run it really hot and never run out of hot water.
I really love that you have no wasted space in your design. Most designs that you buy have so much wasted space and hallways. You have done a really good job.
|
|
Borrego
Member
|
# Posted: 30 Sep 2018 01:24pm
Reply
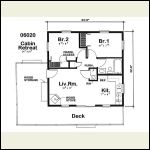
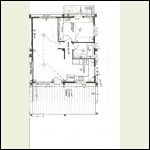
Princelake - Here are a couple of decent plans you could maybe look at, and the third is the one I used, except I deleted the 2nd BR to make a larger living room/dining room space.....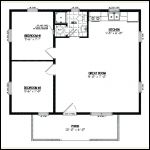
24x24houseplanssm.jpg
| 
380cf656395807312996.jpg
| 
floor_plan_1.jpeg
|  |
|
|
rockies
Member
|
# Posted: 30 Sep 2018 06:13pm
Reply
The main disadvantage to using graph paper is that sometimes you forget to deduct the thickness of walls in planning the layout and suddenly all your cabinetry won't fit.
As to a window in the bathroom, there should always be two ways of getting out of a room in case of fire.
You might consider Chief Architect (the trial version). That's what I use. The disadvantage of using the trial version is that once you close the program or shut off your computer you lose everything you've drawn and have to start over. To get around that I never turn the program off and just take screen shots of each drawing.
I'll try drawing out your plan and seeing if there are any issues.
|
|
|
Princelake
Member
|
# Posted: 30 Sep 2018 07:06pm - Edited by: Princelake
Reply
Sounds great! Theres the back door and a patio door for getting out in a fire. Also I'll make sure the window is large enough to jump out. Also I'm only going with 2x4 construction to save some costs just crank the wood stove.
|
|
Shadyacres
Member
|
# Posted: 1 Oct 2018 05:27am
Reply
Just me but I would go a little wider overall to get your doorways and halls a little wider. Even with 2x4 walls your doorways are less the 2 feet wide.
|
|
Ptomaine
Member
|
# Posted: 1 Oct 2018 11:07am
Reply
Rather than trying to squeeze two people and a full sized bed with only 18" of walking space into that guest bedroom, I would go for bunk beds against a wall. That increases the floor space to a point where you could actually move the wall to make the guest room a bit smaller and add to the size of your bedroom.
|
|
Cowracer
Member
|
# Posted: 1 Oct 2018 12:36pm
Reply
If you really want to get a feel for what it will look like, go to Homestyler.com and sketch it up in that. You can make 3d views to get an idea how it will really work.
This is the design I made for my cabin, WAAAY before the first shovel even went in the ground.

This is a couple of the 3d views. Homestyler is a little limited. I could not find exactly the right wall finishes, and they only had the one staircase, that is a bit to 'colonial' for me, but it gave me an idea what it would look like.


Compared with the actual final product


Overall, I thought it was pretty cool to see how close it got.
Tim
|
|
rockies
Member
|
# Posted: 1 Oct 2018 07:16pm
Reply
Having trouble copying your plan off the site for some reason.
Which side is north? What is your roof plan?
|
|
Princelake
Member
|
# Posted: 1 Oct 2018 09:16pm
Reply
I was going to make my interior doors 24" my rear entry door 34-36" and a 5' patio door on the front. And with the guest bedroom I wanted to find or build one of those bunks with the double on the bottom and single on the top.
I'll definitely check out that homestlyer.
The front of the cabin will be where the deck is. The cabin will be facing I believe north east. Heres a Google map of where my lot is. Itll be parallel with the shore line and the red arrow point north.
|
|
Princelake
Member
|
# Posted: 1 Oct 2018 09:22pm
Reply
Actually itll point a little more northward facing those islands. Heres a picture here
|
|
Princelake
Member
|
# Posted: 1 Oct 2018 09:24pm
Reply
Summer pic
|
|
rockies
Member
|
# Posted: 2 Oct 2018 06:08pm - Edited by: rockies
Reply
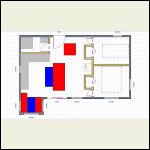
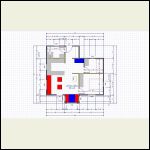
Hello. I drew out your cabin plans using my architectural software and discovered a few problems with your layout. Basically, once the thickness of the exterior and interior walls were included some of the rooms and the clearances around furniture became very tight. I started with an outer dimension of 16’ x 28’ for the main cabin and 4’ x 6’ for the dining booth extension and then used a standard 2x4 wall thickness for both exterior and interior walls (1/2†drywall or sheathing on both sides of a 3 1/2†wide stud). I then kept the smallest rooms (the bathroom and bedrooms) the same size as in your plans and then tried to fit the furniture and cabinets into the remaining spaces.
I soon discovered that one of the main problems is the design of the central interior wall between the bedrooms and the living room. Once the interior wall thicknesses are included (along with the framing needed for doorways) there is only enough room for 18†wide bedroom doors. Another major problem are the clearances around your wood stove. Building codes require at least 12†of clearance behind the stove (to a non-combustible surface) and about 18†of clearance on either side of the stove. However when the wood stove is surrounded by two closets you’re basically installing the wood stove in a “niche†so building codes require that the clearances be even greater. If I keep your stove niche at the 4’ width shown your two bedroom closets can only be 2’11†wide (because of the wall thicknesses).
The guest bedroom has just enough clearance to get around the bed (positioned as shown) but the master bedroom is not big enough to allow you to get around the end of the bed (there’s only 15†of clearance).
I kept the interior bathroom dimensions at 4’x7’ but your bathroom door is far too narrow (it’s only 2’ wide).
The dining booth nook is also too narrow. A dining table needs to be about 36†wide in order for people on both sides to have enough room for their dishes and glassware.
Needless to say, now that the wall thickness have been included the placement of furniture becomes really difficult. Trying to put the sofa, occasional chair and bar where you want them results in some very tight areas (most notably between the corner of the sofa and the fridge and between the end of the sofa and the sliding glass door.
You can’t really move the sofa closer to the stove because of clearance requirements to combustibles (usually 48" from the front of a stove) and the location of the occasional chair makes the space around the front door really tight (all the cabinets, furniture, beds, etc are per the sizes shown on your drawing).
However, the plan can be salvaged with a few changes.
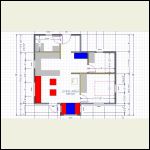
First, the cabin needs to be widened by 2’. This will give you enough clearance around the bed in the master bedroom and also extra space in the living room.
Second, increase the width of the dining booth nook and then slide it towards the bedroom in order to create a more private seating area in the living room.
The third change is to move the bathroom into a small lean-to addition on the north side of the cabin and combine it with a mudroom entry.
As to the interior furniture layout, because the bed is smaller in the guest room the space can be narrower than the master bedroom (how often will you use it)? The bed in the guest room should be turned sideways (maybe install a bunkbed with a double on the bottom and a single on top). In the master bedroom the bed should be turned so it is up against the east wall. Instead of walls enclosing closets I would suggest wardrobes from IKEA which will save you a bit of space.
In the main room the wood stove is now set against a long straight wall with proper clearances to combustibles on all sides (there is a small half wall on the north side of the stove to prevent people from accidentally bumping into it while it’s lit).
The dining booth nook can now seat 4 people comfortably around a wider table and instead of a space hogging sofa I would suggest using a narrower built-in sofa with storage under the seat along the west wall.
The kitchen is now “U†shaped with the fridge and stove against the bathroom wall (with at least 2’ of counter between them), the sink is on the west wall in front of the window and the peninsula can serve as a large prep area.
The bar is now located next to the guest bedroom (originally you may have placed it behind the sofa in order to use it as extra prep space by having a kitchen peninsula you can now use the bar just as a bar or for extra storage).
The bathroom is wider and longer than before. You didn’t show a toilet in your original drawing but there is space for one now (if you don't plan on having a toilet you have room to install a bigger vanity, more storage next to the shower or even a bigger shower stall).
You also didn’t mention your climate. Just in case you get a lot of rain or snow I added a small mudroom with a bench, shelves and coat hooks so you’ll have a place to get out of wet clothes without being right in the main space.
I enjoyed looking over your plans. Hopefully you'll like my ideas and best of luck with your build.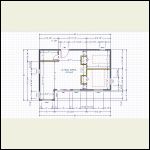
Original Floor Plan
| 
Original Furniture and Cabinet Layout
| 
Option 1 Floorplan
| 
Option 1 Furniture and Cabinet layout
|
|
|
Princelake
Member
|
# Posted: 2 Oct 2018 07:01pm
Reply
Rockies that's amazing that you've put this much time into this even though you dont even know me. I really appreciate you taking the time to do this!!!
For the bathroom I have an outhouse up already and have no plans to put a toilet in down the road. Composting toilets and other types are outrageously priced and none seem to be rated very well from what I've researched.
The dining area can easily be increased to a proper width for a 36" table with storage benches. I'm not 100% what the proper measurement should be with 2x4 walls included.
The bar/island can easily be removed to have the couch moved back a bit no?
Next the guest closet can be just removed and then move the master else where? Or even just put one closet along the back door wall and forget bedroom closets all together.
Also for the bedroom maybe do a small bump out like the dining area.
My climate is freaking cold!!my lot is half way between wawa and white river ontario and white river advertises itself as the coldest place in canada Google it lol.
My original plan was to do a small 16x20 cabin and soon realized what our needs were and the size has increased by a lot. My wife is freaking and only seeing $$$ signs going out the window. I dont think she'll let me go bigger for square footage then I have drawn now.
|
|
rockies
Member
|
# Posted: 2 Oct 2018 07:32pm - Edited by: rockies
Reply
Hi. Thanks for your appreciation. Besides the widths of the interior and exterior walls the main driver for the sizes and functions of your cabin is the location of the wood stove. The codes governing the placement and clearances to combustibles for a wood stove are very strictly enforced so it must be in an area where it is safe to use.
That said, a wood stove should not "dominate" a room. Half the year it won't even be used so why make it front and center and have it crowd the room?
The extra width to the cabin (going from 16' to 18' wide) isn't all that much when you calculate the lumber and sheathing and it definitely will give you rooms with better layouts.
The thing that really improves the function of the entire cabin is the addition of a small lean-to and moving the bathroom into that and adding the mudroom (you definitely need a mudroom if your climate is really cold).
If you take a felt marker and draw out the traffic routes through the rooms in my plan (from door to door or kitchen to dining nook) you'll see that you can easily get from one space to the next without crossing through the kitchen work triangle or having to squeeze past furniture.
The minimum exterior dimension for a dining nook bumpout should be no less than 7'.
In your original plan I would not back the sofa any farther into the kitchen work zone.
You need bedroom closets but consider wardrobe cabinets instead of taking up floor space with closet walls.
Keep the basic cabin shape simple. Too many bumpouts creates a lot of extra wall surface to insulate and makes the foundation and roof complex. Use a simple shed or gable roof over the main cabin and a shed roof over the lean-to.
As for your wife's concerns, if you're going to build a cabin you might as well build one that works for you. Shows her my suggestions and let her read through my rational for making the changes I did. Perhaps she will agree with them, perhaps not but at least she will be able to make an informed decision on the final cabin size and layout.
|
|
Princelake
Member
|
# Posted: 2 Oct 2018 08:02pm
Reply
Here locally I can get 20' trusses for a very good price. I was going to have a 4' over hang.
I went with 16' floor joists to save costs and time building and cutting.
I wanted a wood stove with glass doors to make it comfy for the wife and make it welcoming in the winter.
I want one roof line. I don't want an addashack it's just asking for problems.
I feel like a mudroom is a bit of wasted space and just an rubber backed carpet and coat hooks will be fine.
I might go back to the drawing board.
|
|
Princelake
Member
|
# Posted: 2 Oct 2018 08:08pm
Reply
Here locally I can get 20' trusses for a very good price. I was going to have a 4' over hang.
I went with 16' floor joists to save costs and time building and cutting.
I wanted a wood stove with glass doors to make it comfy for the wife and make it welcoming in the winter.
I want one roof line. I don't want an addashack it's just asking for problems.
I feel like a mudroom is a bit of wasted space and just an rubber backed carpet and coat hooks will be fine.
I might go back to the drawing board.
|
|
rockies
Member
|
# Posted: 2 Oct 2018 08:23pm - Edited by: rockies
Reply
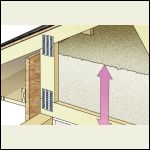
Since you are in a very cold area of Canada I take it you are going to use "high heel" trusses so you can pack in a lot of insulation and bring it right to the tops of the exterior walls? Are you doing flat ceilings throughout?
If you keep the cabin at 16' wide are you hoping to use 20' trusses and have them extend over the dining room nook bumpout and then continue them down the length of the cabin (thus creating the 4' overhang you mention)? Can a truss be extended 4' past the outer edge of the exterior wall? Usually they are sized to just extend from exterior wall to exterior wall (see image).
I can understand using a 20' wide truss over the bumpout and 16' trusses on the rest of the cabin. Both sizes of trusses would have a 2' eave overhang on them (max) but using two different lengths of trusses will give you two different roof heights and not the single roofline you want.
If you are in "the coldest place in Canada" why are you only using 2x4's for your exterior walls? They will not give you very much depth for insulation.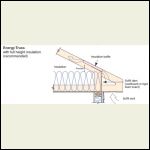
Typical High Heel Truss
| 
Insulation Levels
|  |  |
|
|
Princelake
Member
|
# Posted: 2 Oct 2018 08:55pm
Reply
The trusses are not raised heel. They are garage roof trusses a local building supplier stocks. The best I can probably get is a r36. This will not be a year around home just a cabin.i can get them for around $600. for raised heel was around $2500 and would have to be ordered from a truss plant. To building code and by today's standards for home construction yes 2x6 wall framing and ceiling insulation r55. I've been to lots of camps with less then that and they are warm and comfortable.
Ultimately it comes down to building costs and that it is just a recreational cabin.
|
|
rockies
Member
|
# Posted: 2 Oct 2018 09:16pm
Reply
OK, but how are you going to use the trusses on the roof? Are you using 20' wide trusses for the entire roof or just where you'll have the added width for the dining bumpout?
I don't think you can use a 20' truss over a 16' wide section of your cabin and just let it "overhang the deck" by 4'.
|
|
Princelake
Member
|
# Posted: 2 Oct 2018 09:25pm
Reply
I was just going to use 20' right across and over hang it. Why cant I use a 20' truss with 16' wide exterior walls? Snow loads? It was the building suppliers idea of doing that. They even tried talking me into doing it with 24' trusses so I can get a full 8' over hang so i can fit a table with 4 chairs and still eat outside while it rains.
|
|
rockies
Member
|
# Posted: 2 Oct 2018 09:49pm - Edited by: rockies
Reply
Usually trusses are engineered so that the ends rest on top of the exterior walls. That way point loads can transfer right down the walls and into the foundation. If the exterior wall falls somewhere else along the bottom chord of the truss then one of the cross braces making up the truss must come down onto the top of the exterior wall to transfer loads (otherwise you'll just have the 2x4 or 2x6 bottom chord of the truss transferring all the roof loads into the wall).
You'd best ask a structural engineer if you can overhang a truss that way.
|
|
Nate R
Member
|
# Posted: 2 Oct 2018 09:53pm
Reply
Like Rockies said, the truss needs to be designed for that specifically.
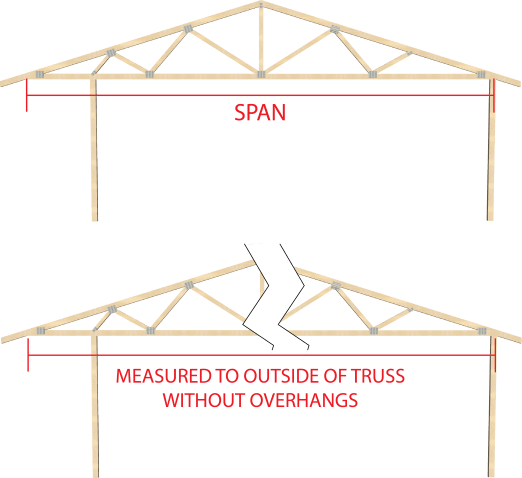
A cantilever truss can do the job, but there are limits on the overhang.....something like 25% of the span is the rule of thumb IIRC.
|
|
Princelake
Member
|
# Posted: 3 Oct 2018 05:43am
Reply
Ya I had looked at those style of trusses and basically all they do is add a 2x4 in where the wall will be. Very simple to be added in. I've also been throwing around the idea of building my own trusses at home and bringing them up there. The cheap trusses are a 4/12 pitch. I'm in an area where it gets a ton of snow. Being a cheap with the build will have me shoveling the roof a couple times a year. I might get a truss design with a larger pitch roof and just make my own.
It's difficult trying to add in all the things you want and stay within a certain budget.
|
|
rockies
Member
|
# Posted: 3 Oct 2018 06:11pm
Reply
Hello. After reading that you didn’t want to have the bathroom and mudroom in a small lean-to attached to the side of your cabin I went back and tried to include those rooms within the main shell of the building and came up with option 2.
In trying to fit everything in and still maintain proper clearances around the wood stove and between furniture some of the spaces had to change locations. I also changed the shape of the cabin so that the kitchen could be in the southeast corner and the living room could be in the southwest corner but you can turn the cabin to face any direction you want.
You still have a mudroom but it is now in the middle of the east wall. There’s room for a small bench and coat hooks and the room’s location offers easy access to the bedrooms and the main living space.
The kitchen cabinets are all along the southeast wall. I would suggest placing the fridge next to the wall by the mudroom, then a base cabinet, sink cabinet, base cabinet, stove and then another base cabinet. There’s also just enough room to include a bar table behind the sofa.
You still have good sized bedrooms with wardrobes (both rooms have sufficient clearances around the bed).
The main layout change is the location of the bathroom. There’s just no other place to put it and have all the other rooms function correctly. Since you won’t be having a toilet the best design for the space is to have a long narrow room (wide enough for a 3’ square shower stall and a 3’ wide vanity) and enter in the middle through a pocket door.
The wood stove is in an out of the way corner but yet still visible from the entire room. The dining nook is near to the kitchen for easy serving and next to it there is an outswing door onto a south or west facing deck.
No matter what you do the cabin will have to be at least 18’ wide. You need that width in order to have enough space in the bedrooms but if you plan on using 20’ trusses you should widen the cabin to 20’.
Hope this helps.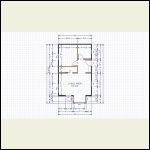
Option 2 Floorplan
| 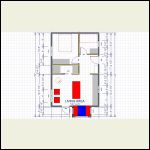
Option 2 Layout
|  |  |
|
|
rockies
Member
|
# Posted: 3 Oct 2018 07:02pm
Reply
I would be extremely hesitant about building your own trusses, especially in a high snow load area. The chances of getting the point load locations and cross bracing angles wrong are fairly high but it could be done as long as you study the building codes (I would still run your design past an engineer).
Still, it can be done.
https://dengarden.com/home-improvement/Build-Roof-Trusses
|
|
| . 1 . 2 . >> |

