| . 1 . 2 . >> |
| Author |
Message |
rockies
Member
|
# Posted: 28 Sep 2018 06:39pm
Reply
As many of you know, I've commented on several threads about the importance of designing a cabin with a well thought out layout, considering traffic flow patterns between rooms and around furniture, room layout, function and practicality. I've even posted some initial cabin designs I've considered building, only to reject them later on for different reasons (mostly to do with traffic flow problems like having to cross through one room to get to another).
Still, I have managed to zero in on a final plan, but instead of just posting it I thought it would be fun to take you through the design process and reveal what made it into the design and what didn't.
But before I begin, I wanted to ask what you would consider a realistic size for a year round cabin to be (built in the Rocky Mountains)? The kind of cabin that is lived in all year, out in the wilderness, in a cold snowy winter?
Once I get an idea of the range of sizes I'll show you what I decided on.
|
|
creeky
Member
|
# Posted: 28 Sep 2018 08:04pm
Reply
535 per occupant for F/T
|
|
Borrego
Member
|
# Posted: 28 Sep 2018 09:59pm
Reply
I chose a 24' x 24' layout which I maximized for ease of living there with my sweetie. might be a bit tight for full-time...except I added a front porch and screen porch on one side. It's fine, plenty roomy.....
With all due respect to Creeky, I don't believe you need that much room...depends on the people, the area, the weather, number of visitors etc, etc...
|
|
darz5150
Member
|
# Posted: 28 Sep 2018 10:34pm
Reply
My wife and I have lived full time in about 600 sq/ft since 2006. No major problems so far. ( Divorce, murder/suicide etc.)
But like Borrego said. Outdoor space is just as important, if not more important than inside space.
Whether you live there full or part time, I can guarantee that you won't be staying inside 24/7. We can do most everything outside, that we can do inside.
|
|
ILFE
Member
|
# Posted: 29 Sep 2018 12:58pm
Reply
We are currently living, full time, in a 20' sea container - 160 square feet. I am considering adding on to the front and back, before building our permanent residence.
Fortunately, we do have ~5 acres on which the container sets.
Like darz, we haven't killed each other yet. But, I suppose there is still time! :D
|
|
rockies
Member
|
# Posted: 29 Sep 2018 05:08pm - Edited by: rockies
Reply
Well, not as many responses as I'd hoped, but still some interest.
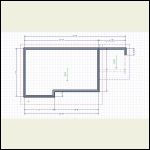
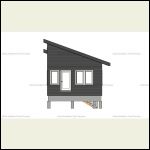
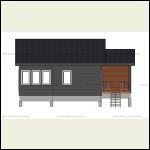
The size I ultimately decided on was a 16 x 27'6" rectangle with a 2' x 11' bumpout in the southwest corner. This gives me 462 sq' for the cabin. However, the cabin is designed to be built in stages so the final size will be 634 sq' (not including a small screen porch).
The roof will be a very simple shed roof angled up towards the north at an angle of 20 degrees. On the east side of the cabin there will be another lower roof (also at 20 degrees sloping up towards the north) that will cover the entry deck.
This drawing shows the shape for phase 1.
|
|
rockies
Member
|
# Posted: 29 Sep 2018 05:29pm
Reply
The spaces I want inside include:
1. An entry large enough for two people to comfortably take off wet coats, a seating bench, a drying rack for wet footwear, shelves for baskets to contain scarves, hats, gloves etc, and hanging hooks for wet coats. A small closet for extra coats would also be nice.
2. A full bathroom with vanity, sink, toilet and shower/tub combo (preferably close to the entry door).
3. A full kitchen with 24" propane stove, 24" electric fridge (5'6" high), large farmers sink, range hood, upper cabinets for dish storage and a large amount of countertop prep area. Also pot drawers and a recycling center.
4. Living room with built-in window seat (with storage underneath), occasional chairs, coffee and end tables, place for a flat screen TV and electronics and books, etc.
5. Dining area in the living area - seating for 2 but expandable to four people.
6. Bedroom area with queen size Murphy bed and clothes closets.
7. Storage cabinets, including a broom closet, pantry storage, linen storage and counter space for mail sorting, keys, etc.
8. Loft storage for large items.
9. Access to the future screen porch.
10. Seating bench on the front entry deck.
All this needs to be accommodated in a small cabin without resulting in cramped work areas, rooms that are too small to be functional and also allowing for easy movement through each space in order to get to other spaces.
|
|
rockies
Member
|
# Posted: 29 Sep 2018 07:28pm - Edited by: rockies
Reply
Now as to construction methods, the cabin is going to be built on 3' tall piers that will have 6x12 wooden perimeter beams on top of them. The beams will be underneath all the exterior walls as well as running across the center of the cabin to support the floor system.
The floor system is made up of 12 1/4" thick structural insulated panels (SIPs) and provide structure, insulation and vapor barrier all in one. The underside of the SIP floor panels will be protected by 1/4" thick fire resistant and insect resistant concrete panels from Hardie.
The exterior walls are built out of 2x6 standard framing lumber spaced 16" on center and all door and window openings are framed according to code. The exterior sheathing is 1/2" plywood and the walls are insulated with Roxul Comfotbatt. On the outside surface of the exterior sheathing a "painted on" layer of Stoguard air and moisture barrier will be applied followed by a 1 1/2" thick layer of Roxul Comfortboard rigid insulation, then 1x4 furring strips and then the finish siding.
Inside the exterior walls there will be a 7" deep false floor consisting of 2x6 framing lumber, 3/4" sheathing and 3/4" finish wood flooring. The false floor is necessary in order to have a place to run plumbing pipes since the plumbing can't be installed within the SIP floor panels.
The roof will also be built using 12 1/4" thick SIP panels with 30 lb builders felt on top of that, then 2x4 sleepers running vertically up the roof (spaced 16" apart on center) then another layer of plywood sheathing, Versashield fire resistant barrier and finally 7/8" corrugated metal panels thus creating a "cold roof".
Windows are triple paned, argon filled fixed or casement units with a fiberglass frame. Exterior doors are fiberglass units, a solid "inswing" unit for the front door and a glass windowed outswing unit to the future screen porch.
|
|
|
Just
Member
|
# Posted: 29 Sep 2018 09:36pm
Reply
we purchased a new 24 in fridge and stove at a premium price the stove we still have and like the fridge was gone in a year too small.I would recamend a seperate bedroom with a regular bed for anything more than 1 person, guest like a little priviesty .
|
|
ICC
Member
|
# Posted: 29 Sep 2018 09:41pm - Edited by: ICC
Reply
rockies, is that design for one person?
The bedroom will be an actual room of its own or?
Ditto question re the entry area?
Laundry?
What kind of heating? Cooling?
|
|
Princelake
Member
|
# Posted: 29 Sep 2018 10:27pm
Reply
Why have the roof facing north? Wouldn't it be better to have it face south if you ever plan on adding solar panels? And I also recommend walls for bedrooms unless you'll never have guests. And for your first question I feel with 2 ppl you can comfortably live in 600-700sqft once you add a laundry room and full closets and be fully functional with full size fridges and what not. The cabin I'm doing is a little under 500sqft but I'll never fully live in it.
|
|
darz5150
Member
|
# Posted: 29 Sep 2018 11:33pm - Edited by: darz5150
Reply
@rockies. If I were you I would do a life size layout. In a parking lot with tape. Or in your yard with string and stakes. Lay out all your furniture and appliances etc. That way you could actually walk thru your design. It might help to figure out your doors also. Left hand/right hand. Inswing or out. Even the swing of a door affects how use able a space would be. Think about it. A door swing eats up around 9 sq/ft of space. + or -. In a small cabin. That's a little bit of real estate that you can't use. Pocket doors for inside are an alternative.
Our bathroom is 48 sq/ft. Inside we have a vanity/sink top. Large medicine cabinet. Water heater. 12 volt water pump. Stand up shower. Rv flush toilet. Panda washing machine with spin dryer. Enough storage space for towels, all laundry detergents etc. A small cabinet next to the toilet that stores plenty of tp. And a 16 inch flat screen TV.
|
|
rockies
Member
|
# Posted: 30 Sep 2018 05:11pm
Reply
ICC: The cabin is designed for 2 people. Any guests will stay in a separate Bunkie. The cabin is designed to be built in stages but the future bedroom will be a separate room. The entry is a small space off the main room but not totally enclosed. The laundry will be in a separate utility building. There is no air conditioning but the heating and domestic hot water will be supplied by solar panels in the summer and an outdoor wood fired boiler in winter.
Princelake: The roof slopes up towards the north so it does face south, however I am not keen on fastening solar panels to the roof. I would rather have them closer to the ground.
|
|
rockies
Member
|
# Posted: 30 Sep 2018 05:20pm - Edited by: rockies
Reply
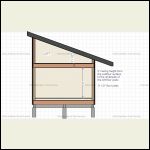
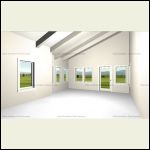
Here are a couple of sections showing wall heights. Throughout the cabin there is a 7" thick false floor in order to run plumbing pipes, waste pipes, venting and some electrical.
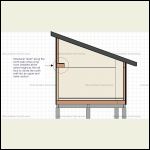
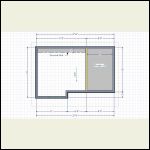
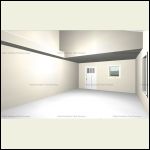
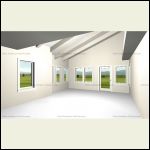
The height from the false floor's subfloor to the underside of the loft floor joists is 8'. The loft floor system allows me to divide the height of the east gable wall and the north east corner of the north wall in two and make framing much simpler.
Another thing I added was an 18" wide shelf along the north living room wall built at the same height and thickness as the loft floor. This "shelf" allows me to turn a very tall north wall into two separate walls (a regular height main floor wall and a shorter loft wall above the shelf).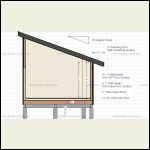
Roof Heights
| 
Loft Height
| 
Structural Shelf
| 
Loft Plan
|
|
|
rockies
Member
|
# Posted: 30 Sep 2018 05:23pm - Edited by: rockies
Reply
Here are some interior pictures showing the loft and structural shelf.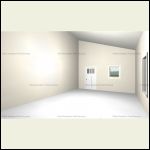
Interior East
| 
Interior West
| 
Interior East with Loft and Shelf
| 
Interior West with Loft and Shelf
|
|
|
rockies
Member
|
# Posted: 30 Sep 2018 05:29pm
Reply
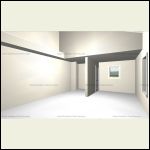
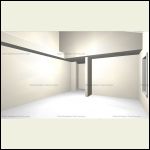
Now, as to the interior floor plan there are only three walls on the main floor. Two walls enclose the bathroom and a short stub wall divides the entry space from the main room.
The bathroom measures 5' 6" x 8' 6" and will have a vanity, sink, toilet, tub/shower combo and medicine cabinet.
The entry space will have a 4' long bench with a drying rack for wet shoes underneath it, hanging hooks for coats above and 2 shelves above the hooks for gloves, hats, scarves, etc.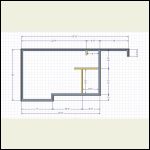
Phase 1 Interior Walls
| 
Phase 1 Interior East A
| 
Phase 1 Interior East B
|  |
|
|
rockies
Member
|
# Posted: 30 Sep 2018 05:38pm
Reply
The location and sizes of the doors and windows were influenced by the ceiling plan. Some people may have wondered why the cabin is a standard 16' wide but a non-standard 27' 6" long.
The reason for the odd length was the spacing of the ceiling beams in the main room. In order to support the SIP roof panels support beams needed to be installed. The beams are 6" wide and 12" tall spanning the main room. I spaced them 3' apart, leaving me room to install 30" wide windows between the beams.
The 2nd drawing shows the outlines of the main roof (red) and the lower entry roof (blue). The entry roof is partially supported by exterior beams and a post down to the entry deck.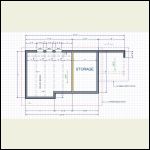
Loft Windows and Ceiling Beam Plan
| 
Phase 1 Roof Plan
|  |  |
|
|
rockies
Member
|
# Posted: 30 Sep 2018 05:45pm - Edited by: rockies
Reply
As with the loft plan, the north and south facing windows on the main floor are centered between the overhead ceiling beams. Point loads from the roof can now be easily transferred through the beams and into posts between the windows and then down into the floor and foundation system.
Door and window locations on the east and west walls were placed either for views or to accommodate furniture placement, bathroom fixtures or the future screen porch.
On the main floor's north wall you'll see three red "outlines". The far left one indicates the location of a future window, the two others indicate the locations of doorways into the future bedroom. All the framing for these openings will be included in the walls now in order to make the future addition easier to build.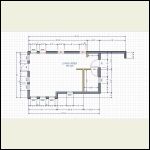
Phase 1 Main Floor Doors and Windows
|  |  |  |
|
|
rockies
Member
|
# Posted: 30 Sep 2018 05:53pm
Reply
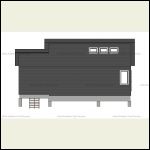
These are the exterior elevations showing phase 1 of the cabin.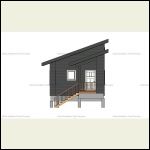
East Elev
| 
North Elev
| 
West Elev
| 
South Elev
|
|
|
Borrego
Member
|
# Posted: 30 Sep 2018 06:02pm
Reply
I think you've got an overall well thought out design! I only wonder why you don't a) go a little bit larger, and b) size it in increments of 4 ft so as to make building easier?
Of course you can build any size as we do in the real world, but i found it sure made it easier going with a 24' x 24' size.....
|
|
rockies
Member
|
# Posted: 30 Sep 2018 06:24pm - Edited by: rockies
Reply
Borrego: Well, 27' 6" is only 6" off from 28' so it's pretty close to standard framing dimensions but the main reason for the length is the spacing of the ceiling beams in the main space. I like things to line up and be evenly spaced and if things are "off center" or uneven it really bugs me.
For example, in sizing the bumpout in the southwest corner I went with an exterior width of 11' because of the placement of the beams and their spacing.
I don't think I need any more space in the cabin. The bathroom size is fine (I went with 5'6" for the width because I like a longer tub) and the overall width of the cabin is also fine. The only space that will really change the function and feel of the cabin interior will be the bedroom addition.
|
|
rockies
Member
|
# Posted: 1 Oct 2018 06:12pm - Edited by: rockies
Reply
Before getting into the layout I thought I should mention some of the things I don't want in a cabin.
One of them is a sleeping loft. It may conserve space on the main floor to sleep up in a loft but after you've climbed up and down that ladder 100 times you'll be pretty sick of it (especially if you're older). Plus, how do you hold onto the ladder when you're carrying sheets or blankets up and down, much less a cup of tea or a book?
The other thing I don't want inside the cabin is a wood stove. I went back and forth on this 100 times comparing different models, features and sizes before I realized that even with a wood stove indoors I still didn't have hot water. I also don't like the mess, the soot, the residual wood smoke and having to bring wet, moldy wood inside.
So I decided on an outdoor wood fired boiler that will have a water jacket surrounding the firebox. Underground pipes will bring hot water into a small utility building that is attached to the north side of the cabin. The water will be filtered and treated before being sent by pipes through the side wall of the cabin and either into radiant baseboards or to the sinks, toilet and tub. By not having an indoor wood stove I also free up a lot of floor space that would have been devoted to the stove and clearances around the stove (which wouldn't even be used 6 months out of the year).
I also don't want a dishwasher, microwave or dryer. They use way too much electricity and I don't want the extra expense of buying propane for a propane dryer). There will be an electric washing machine in the laundry (which is also part of the utility building) but it is the smallest unit possible using the least amount of electricity.
|
|
rockies
Member
|
# Posted: 1 Oct 2018 06:46pm - Edited by: rockies
Reply
Now to the layout.
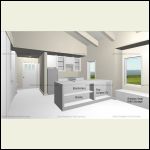
As you come in the front door from the covered deck there is a seating bench on the right with a drying rack for wet shoes underneath, coat hooks above the bench and 2 shelves for hats, etc above that.
On the left is the door to a full bathroom with vanity, sink, medicine cabinet, toilet and a tub/shower combo. The bathroom window is sized for emergency egress in case of a fire.
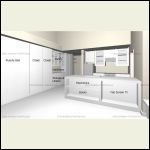
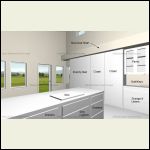
As you move from the front door towards the main room there is a small 18" wide closet for extra coats and next to that an 18" wide broom closet with cleaning supplies on the north cabin wall . Next to the broom closet are two 30" wide base cabinets (18" deep). The cabinet closest to the front door can be used for papers, bills, etc while the 2nd base cabinet can be used for linens and towels. The upper cabinets located here have frosted glass doors and will contain pantry items.
Next to these two base cabinets are two 30" wide clothes closets with double hanging rods inside (giving me a total of 10' of hanging rod).
Next to the clothes closets there is a 5'6" wide Murphy bed cabinet holding a queen sized mattress. There is a small "leftover" space between the Murphy bed cabinet and the window which could contain a desk.
In the center of the main living space there are two occasional chairs, a round coffee table and a small round end table.
Along the main room's south wall there is a 2' deep bumpout that has a 10' long built-in window seat with storage underneath. The dark grey shape (with the one rounded end) is a swivel dining table. I got the idea for this from a marine supply store. They sell table bases where you attach the table top to a post that is set into the floor. When you want to use the table for dining you turn it into the position as shown in the drawing, otherwise it is turned 90 degrees and runs along the west wall.
On the backside of the kitchen peninsula there are two 12" deep base cabinets. One is for electronics and books, the one closer to the built-in window seat has a flat screen TV.
The kitchen is 8'6" x 9'6" and has a 24" electric fridge, 24" propane stove, an 18" wide base cabinet used as a recycling center, a 24" base cabinet for pot storage next to the stove, three 24" wide base cabinets with storage drawers, a 30" wide sink cabinet, range hood, and upper storage cabinets. Altogether there is just over 9'6" of countertop prep area.
As you know from a previous post, there will be a bedroom added eventually on the other side of the north cabin wall. The red outlines shown in the north wall are future door and window openings but will be framed in now.
Once the bedroom is built the Murphy bed, two clothes closets, the small hall coat closet and the broom closet will all move into the bedroom space (the two 30" wide base cabinets and the upper pantry cabinets will remain). With the bed no longer in the main room that space will then contain a 54" round dining table and 4 chairs.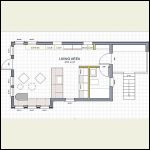
Layout Plan
| 
Main Room Northeast
| 
Main Room Southeast
|  |
|
|
rockies
Member
|
# Posted: 1 Oct 2018 06:55pm
Reply
Additional interior views.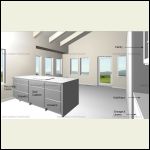
Main Room South West
| 
Main Room North West
|  |  |
|
|
Borrego
Member
|
# Posted: 1 Oct 2018 07:08pm
Reply
Nice, man, looks like it'll be a fun project and a great place to live when you're done. I'm glad mine is finished, but I'm kinda sad that we're done in a way, no more excitement from building......
|
|
rockies
Member
|
# Posted: 2 Oct 2018 07:00pm - Edited by: rockies
Reply
So far all the plans and photos show Phase 1 of the cabin. Phase 2 will be the addition of the west screen porch and deck. The screen porch is not very large (just big enough for 4 people to sit) but I think it's important to have an "outdoor" space that's protected from insects.
The screen porch roof is at the same height and slope as the front entry roof. I don't normally like skylights because of nighttime heat loss (especially in winter) but since the screen porch is unheated that isn't an issue so I put in two skylights.
I wanted the screen porch to feel like a "forest room" so it is clad inside and out with horizontal rough sawn cedar siding.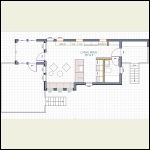
Phase 2 Screen Porch Plan
| 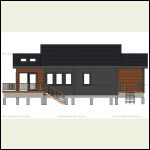
Phase 2 Screen Porch South Elevation
|  |  |
|
|
Nate R
Member
|
# Posted: 2 Oct 2018 07:49pm
Reply
Thanks for sharing this in this manner! Good to see the plan so far, and how you see it progressing, and to see how you drew some of your conclusions. 
|
|
rockies
Member
|
# Posted: 3 Oct 2018 06:16pm - Edited by: rockies
Reply
Phase 3 – the bedroom.
The final phase of the cabin will be the addition of the bedroom. I always knew the bedroom was going to be attached to the north side of the cabin but I wasn’t sure of where exactly or how deep and wide the bedroom would be. After much experimentation I decided that the final size of the bedroom addition would be 10’ deep by 17’6†wide under a lean-to style shed roof.
There are two doors into the bedroom, one from the main room and one from the front hall. The doorway from the main room is centered beneath one of the upper clerestory windows (which is itself centered between two ceiling beams) and the location of this door guided the design of the entire bedroom. Once I knew where this one door was going I centered a small 2’ wide window directly across from the door (on the north wall of the bedroom) and located the bedroom’s west wall 3’ to the left of the window. From the window’s right edge I measured over 6’6†and added another 2’ wide window. The bedroom’s east wall is located 3’ beyond this 2nd window’s right edge.
Originally I was going to have just one door into the bedroom but then I realized that if I was going to continue using the Murphy bed I could also use the room as a library or yoga space when the bed was up. By adding a 2nd bedroom door out into the main hall the bedroom feels more connected to the rest of the cabin and I can use this second door to have better access from the bedroom to the bathroom.
With the Murphy bed cabinet, the two 30†clothes closets, 18†broom closet and 18†coat closet now located on the bedroom’s north and west walls I decided to install a low built-in seating bench with storage drawers underneath the seat on the bedroom’s east wall. On both sides of the Murphy bed cabinet I added built-in 18†deep by 36†wide night stands. In the northwest corner of the bedroom I located a built-in bookcase next to the seating bench and in the bedroom’s northeast corner I installed a 30†deep “blind corner†closet (it is accessed from inside the clothes closet standing next to it).
Besides the two smaller windows centered over the night stands there are two large windows over the seating bench. Lastly I decided to add a dropped soffit over the seating bench, night stands and closets to focus attention on the center of the room and installed pocket doors to save space. The bedroom is not only a more private space for sleeping but it also has a lot more storage space – all contained within a 175 sq’ addition.
The area in the main room where the Murphy bed used to be will now become a dining space containing a 54†round table that can seat 4-6 people. The table will be centered in front of two north windows (the 2nd north window will be added once the Murphy bed has been removed).
The great thing about designing exactly where and how big this bedroom addition will be is that all of the framing for the doors, window openings and wall and roof connections can be installed right now inside the north cabin wall. When the time comes to build the addition it’s simply a matter of stripping off the north wall’s exterior siding, cutting away the sheathing over the openings, removing the infill studs and batt insulation and then attaching the bedroom’s walls and roof to the original cabin. No major structural reframing will be required.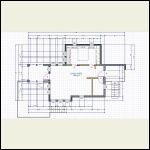
Phase 3 Bedroom Addition
| 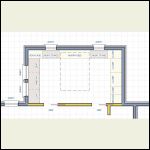
Phase 3 Bedroom Layout
|  |  |
|
|
rockies
Member
|
# Posted: 3 Oct 2018 06:17pm
Reply
Interior Bedroom photos.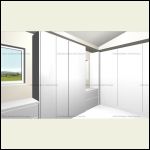
Bedroom Northeast
| 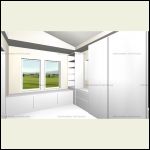
Bedroom Northwest
| 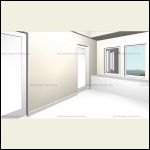
Bedroom Southwest
|  |
|
|
rockies
Member
|
# Posted: 4 Oct 2018 06:16pm
Reply
One of the most important parts of the cabin will be the utility shed. This is where the water from the well is going to be filtered, treated and stored before it comes into the cabin. Along with all the equipment needed to process the water the shed will also contain a laundry room, pantry and an Energy Star chest freezer.
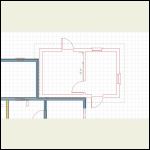
I decided to build the utility shed right up against the northeast corner of the cabin (the two building’s exterior walls will touch – see “Utility Layout Planâ€) on a monolithic concrete slab (like a typical garage slab). By using this type of foundation I solved one of the most critical problems most people have when trying to get water from an underground well into a cabin that’s built on piers – how do you protect the pipes from freezing between the ground surface and the underside of the cabin floor system in winter?
I’ve read about some of the methods other people have tried to keep water pipes from freezing such as building an insulated chase around the pipes where they come up out of the ground or wrapping the pipes with an electrical heat tape (which would use electricity 24/7 all winter long) but these ideas didn’t sound very practical. I realized that if I built the utility shed on a concrete slab right on the ground the well water could come straight up through the slab, be filtered, decontaminated and stored before being sent through the two adjoining walls and into the cabin’s false floor system (see “Water Supply†drawing).
The kitchen and bathroom waste lines would also run through the false floor system and then back out through the walls and into the utility building (before heading off underground to the septic field). With the utility shed built right on the ground no water or waste lines would ever be exposed to freezing outdoor air temperatures so there would be no chance of them freezing.
The next problem to solve is how to heat the water after you’ve filtered and decontaminated it? In the summer I’ll use solar panels to get domestic hot water for the kitchen and bathroom and in the winter I’ll use a wood fired boiler that will be installed on a concrete pad next to the utility shed (the boiler will also supply hot water to baseboard radiators via a separately piped route).
In the shed’s laundry room there will be a wash sink, an Energy Star washing machine, a tall cabinet for hanging clothes to dry (no dryer), base cabinets for storage, countertops for sorting and folding clothes and upper cabinets for soaps and cleaning supplies. On the wall opposite the sink there are built-in base cabinets with doors and open upper shelves for storing pantry items and a small chest style freezer will be located in the equipment room.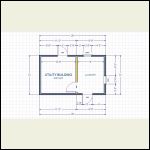
Utility Shed Floor Plan
| 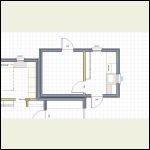
Utility Shed layout Plan
| 
Utility Shed Foundation Plan
| 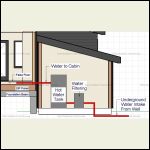
Water Supply Route
|
|
|
| . 1 . 2 . >> |

