|
| Author |
Message |
grover
Member
|
# Posted: 8 Dec 2016 07:28pm
Reply
We are getting ready to start on the interior wall covering which will be 8 inch wide t & g pine.
1. Does it matter if I do walls or ceiling first? It is a cathedral ceiling.
2. Do I need trim at the inside and outside corners? I would think I would need something to trim out the corners and cover any gaps. If not I think the outside corners would be sharp and splinter off if bumped even if mitered.
3. My wife wants to put the back side of the t & g out facing the room. This will give it a shiplap look. What is your feeling on using regular nails and let them show vs finishing nails in the tongues of the boards.
4. We are thinking it being winter and all the heat we have for now will be a woodburner we will need to leave a slight bit of room between boards for expansion when the humidity rises this spring and summer. How do you plan for that with a, for now, unheated cabin. The pine is kiln dried.
I may think of more but for now that's it.
Thanks
|
|
Salty Craig
Member
|
# Posted: 8 Dec 2016 10:23pm
Reply
1. I would do ceiling first. It minimizes the chance of wall damage if you drop something.
2. I would trim all around ceiling but not inside corners of you make a nice fit. I would trim outside corners to cover butt ends.
3. I prefer the smooth side over the beaded. The stuff we have has both sides as V groove on the edges. The one side is smooth in the center of board and opposite side has grooving down center. The smooth to me is less busy and more old school looking. Nails vs. hiden brads? Your preference. Do celing and walls different for a unique look.
4. Let the wood acclimate to your environment. Best not installed tight if bone dry. It will move because that's what wood does. Leave a gap at edges that trim covers so it will have some expansion room. Getting this right will be your biggest challenge. If put up wet, a wood stove will dry it enough to see the entire tongue. Sometimes even a gap. I like to put it up at mid moisture, so you have wiggle room both sides of the spectrum.
Good luck!!
|
|
DaveBell
Moderator
|
# Posted: 9 Dec 2016 07:20am
Reply
Can you post pics of the inside?
|
|
Steve_S
Member
|
# Posted: 9 Dec 2016 09:33am
Reply
I just recently did this on my Cathedral Ceiling & Gable wall end in the main room. I used 6"x5/8 Pine V-Notched T&G from a local mill. Before installing I put two good coats of Zinsser Shellac Clear on there... You really do not want to stain, shellac or whatever once it is up.
I trimmed the connection between ceiling & Gable wall with solid pine Cove Moulding which was the perfect solution to make it all clean & neat. That little bit of moulding ($9 for 12') of solid pine (not finger jointed) was certainly worth it !
I chose to use the V Cut side as opposed to the flat lap side because the lines blend better with expansion & contraction and are not as noticeable, plus the flat side was rougher (unsanded).
I used 2" Brads putting 3 per rafter and every 4th board also got 2" finishing nails (pre-drilled through the Pine to prevent cracking / splitting) and counter sunk them. The Brads went into the little "crook" by the tongue (tongue side down towards floor) so they remain invisible.
The joints between running lengths, I matched the V-Cut with my Sliding Compound Mitre Saw (VIP Tool ! for this task) by cutting the long-board as shown below on a 45deg angle and the short-board with a double 45deg allowing the short board to overlap the long board edge.
[===Long-Board===\ <===Short-Board===]
and then tacking two brads top & bottom.
Install "snug" but not tight and be really careful with the boards as they will be a bit warped and likely some will have a serious crown, any boards that are not straight enough (there is a
"little" flex) should be used for shorts & cut pieces...
Definitely let the wood acclimate to the cabin first for a good few days, you can add humidity (a bot) by keeping a big pot of water on the wood stove and try to get to roughly 40-50% which the wood will suck in and is the mid point.
Take your time and don't rush, start at the Top / Highest point and work your way down and it is "much easier" if the tongue is down & groove is up, not only for nailing / bradding but fitting everything together.
Below is a picture of my ceiling & end wall during the installation. There is a Pine Beam going up the centre of the Gable wall to match with the other beam (not yet clad in photo). As well the odd gap between the wall & pine is intentional as I am surface running all my wiring and hiding it under matched pine beams. The 8" "beams" raceways are going around the entire perimeter and boxing in living space, kind of hard to explain but that is irrelevant to your question.
Certainly do the Ceiling First and then the walls. Calculate that you will need a "Transition" between the ceiling & walls unless by some miracle everything is 100% perfectly straight, square, flush & even. Luckily I am using Pine Beam Raceways for my wiring & for esthetical appeal but there are many possibilities.
Last & Most important... LEAVE ROOM ! at least 1/8 - 3/16 in your corners so you do not have completely tight boards. They will buckle and some could crack or splinter later (that would be on the worst case)... so do keep in mind that these boards will expand & contract and so leave the wiggle room there for that.
Hope it helps & Good Luck.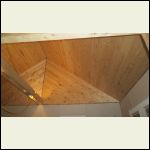
SE Ceiling & Gable
| 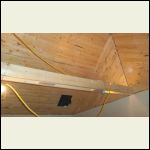
NE Ceiling & Gable with Chimney.
|  |  |
|
|
Steve_S
Member
|
# Posted: 9 Dec 2016 09:51am
Reply
I thought I should add this next photo to help clarify a bit....
I used 7-1/2" of PolyISO in my ceilings with rafter's at 24" oc. My walls, including gable ends have 5-1/2" HD EPS Foam with bonded fibre facing. Every nook, cranny (the few that are) are filled with spray foam, making it all quite tight ! This photo below is before the vapour barrier (somewhat redundant but required anyways).
BTW: that 2x8 Beam in the middle is not structural but will be a raceway for wiring, with LED lights embedded into the openings and will be clad in rough pine that will flow around the room as raceways for my wires etc.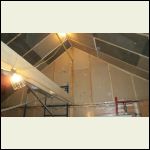
ISO in - Pre Vapour Barrier
|  |  |  |
|
|
Cowracer
Member
|
# Posted: 9 Dec 2016 10:01am
Reply
I did walls first then ceiling. But there is no reason you cant do the other way. I planned from the beginning to trim all corners as I wanted to simulate a "post and beam" look. That let me get 'sloppy' in the corners as I knew it would be covered up.
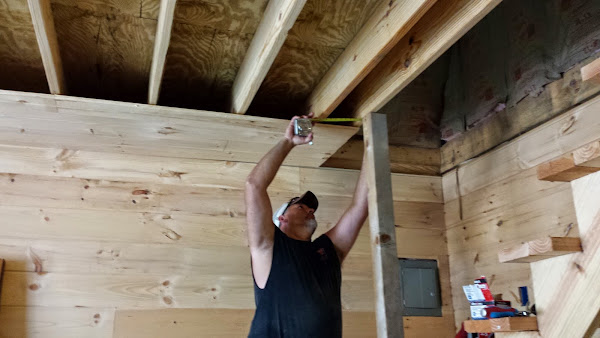
Check your level every couple rows, It can get away from you if you don't watch it.
Also, if you do walls and a raised ceiling like a cathederal or barn type, give up any idea of getting the rows to line up. It simply cannot be done. Trim board in that instance helps it look less obvious. Here's a picture of my upstairs with the barn roof. If you look closely at the corners, you can see the boards don't line up from side wall to front wall. The angle throws it off, and there is no way to keep them even.
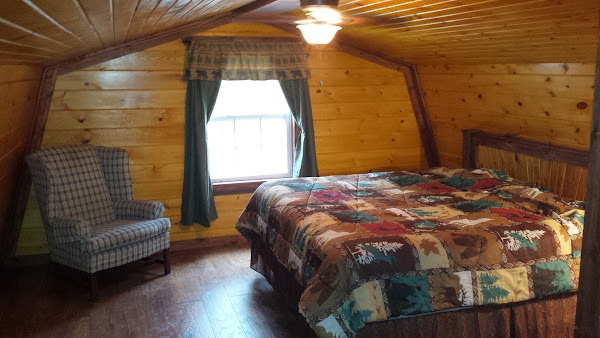
I found T&G to be very easy to work with. I am not a carpenter by any means, but once I was shown how to do it by my carpenter buddy, the wife and I did the whole upstairs by ourselves. And I love the look WAAAY more than drywall.\
Tim
|
|
Cpipitone
Member
|
# Posted: 8 Jan 2017 05:52am
Reply
How come every cabin I see with this type of TG paneling we all run it vertically instead of horizontally leaving expansion between the ceiling the rig and the wall and cover those areas with a piece of trim. Walls are 8' tall which would not require a butt joint and leaving a expansion at covered by base molding. Just throwing it out there.
|
|
|

