|
| Author |
Message |
Srollins
Member
|
# Posted: 27 Nov 2016 02:51pm
Reply
Hi all,
Now that my wall question was answered ( thank you ) it brings me to my next design / build question.
Having 25 acres of mainly white pine I really like the exposed roof rafters with a 1x roof sheathing idea so here are my questions below thanks in advance,
1. After researching it appears if I'm going to build next year I need to go fall the trees now , do I peel the bark now or wait until next year? After falling the trees I was planning on stacking them on treated 6x6's. Any other advice?
2. If I use trees from the property how can I develop a uniform plane topside when I'm laying 1x boards? Sure I can measure each tree and try to use roughly the same diameter , but what do other folks do to create bearing on all rafters if that makes sense? For example if I start off with a 12" diameter rafter and the next one is 11" what should I do? What is the procedure? Just mainly looking for as much of a uniform installation as possible.
|
|
Atlincabin
Member
|
# Posted: 27 Nov 2016 03:45pm
Reply
My suggestion is to cut, peel and stack the logs now so they will dry out a bit before next summer. You could wait until next year to peel them, but the greener they are, the better they peel, and the faster they will dry out. I would then use a chain saw (or if you have access to a mill, even better) to cut a slab off of one side of each log for the bearing surface just before you are ready to place them. The reason for waiting is that the logs are likely to twist or bow a bit over the winter while drying. If you cut them shortly before installation, that will help minimize the twisting/bending. I'm presuming you would run the logs across the gable ends of the house, so you could notch the larger ones as necessary to achieve a uniform thickness and keep each side of the roof in a single plane. There are a number of good log building books out there that will give you more details about all this stuff, and you would likely find some drawings and information that is more relevant to your specific rafter plan.
My two cents.
Best wishes for a good build.
|
|
Srollins
Member
|
# Posted: 27 Nov 2016 04:52pm
Reply
Thanks Atlancabin, I appreciate the advice I think I'm going to kick this can down the road a bit more, if I had more time I would build the whole cabin out of trees on the property however, time is not on my side . Using standard 2x from Home Depot would no doubt be faster and more precise but I just don't like the look from inside .
|
|
Steve_S
Member
|
# Posted: 27 Nov 2016 07:53pm
Reply
Pine like Cedar is best barked as soon as it is cut to get them clean and to remove the home & incentive for boring critters. Once dry on the outside the sap becomes a glue and tough to clean.
Lumber from a "Big Box" like Lowes or Home Depot can be pretty sketchy and you will have to sort through to find enough good, straight pieces. Seek alternative supplier's which are local to you / your build. Brackets and pieces like Rafter Ties, Joist Hangers & Hurricane Ties are all designed for 1-1/2" thick pieces. Simpsons does make brackets etc for 2" lumber but they are harder to find.
REF: https://www.strongtie.com/woodconnectors/landing
Check around your property area to see if there are any local mills that can mill your logs and/or supply you with cut lumber. NOTE that if your getting a building permit & subsequent inspections, many will not accept ungraded and non-dried lumber for anything considered "residential / habitable structure".
If you want exposed rafter's and planks on your ceilings you might consider doing something like a Texas Cool Roof which could be adapted to that configuration.
REF: http://www.houstoncoolmetalroofs.com/cool-roof-information/cool-roof-design-texas/
|
|
Malamute
Member
|
# Posted: 27 Nov 2016 10:56pm
Reply
Ive used a chain saw as a planer and Ive used an electric planer to make flats for roof material on logs. I like the planer best. Mine is a Dewalt. Get a couple extra belts and a good extension cord of proper gauge to hard wire into it to make less hassle with extension cords. Are you doing rafters or purlins?
Don't feel bed if you eat the cord with the planer. Ive done it many times.
I snapped two parallel lines on the log and planed down to them to make the flats. I set up on horses, blocked them solid, and used a level to be sure the flats were even all the way, and a laser level to shoot the length and be sure they were even that way also. Once flats are on them, you can figure how much notch or whatever to fit to your eave wall if rafters, or gable wall for purlins to get your surfaces to plane out correctly. If using purlins, notch the wall, not the purlin to fit, especially if there will be a cantilevered porch extension out one end, or much roof overhang and snow load. In other words, don't notch the structural member and weaken it, notch the wall to fit.
Just like lumber, don't forget to crown the logs when planning their layout and flat spots.
|
|
bldginsp
Member
|
# Posted: 27 Nov 2016 11:42pm
Reply
Peel immediately or the bugs will get in there and make all kinds of little tunnels in the cambium. After peeling, cover the logs as well as possible to prevent discoloration until assembly. I used a planer to make the initial flat like Malamute, but I didn't eat any cords (after 50 rafters- nya nya!)
The depth of your birdsmouth notch on each log will be different according to it's diameter- what must remain constant is the perpendicular distance from the flat surface above to the V crotch of the birdsmouth. The log bottoms run wild.
The International Log Builder's Association has standards for the use of logs as well as engineering span charts so you use the right diameter.
Keep your spokeshave sharp- you got a lot of work to do! Been there, done that! It's worth it in the long run.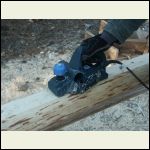
planing the flat
| 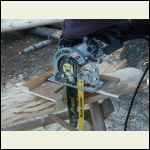
jigging the notch
| 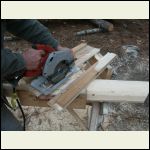
birdblock slots
| 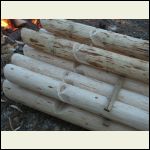
finished product, at 8 degrees F
|
|
|
bldginsp
Member
|
# Posted: 27 Nov 2016 11:51pm
Reply
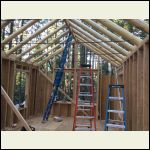
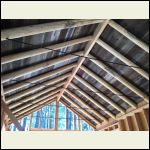
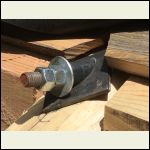
Few more: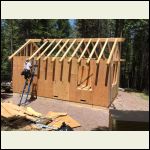
IMG_0118.JPG
| 
IMG_0149.JPG
| 
IMG_0153.JPG
| 
IMG_0157.JPG
|
|
|
toyota_mdt_tech
Member
|
# Posted: 28 Nov 2016 09:04am - Edited by: toyota_mdt_tech
Reply
Quoting: Srollins Hi all, Now that my wall question was answered ( thank you ) it brings me to my next design / build question. Having 25 acres of mainly white pine I really like the exposed roof rafters with a 1x roof sheathing idea so here are my questions below thanks in advance, 1. After researching it appears if I'm going to build next year I need to go fall the trees now , do I peel the bark now or wait until next year? After falling the trees I was planning on stacking them on treated 6x6's. Any other advice? 2. If I use trees from the property how can I develop a uniform plane topside when I'm laying 1x boards? Sure I can measure each tree and try to use roughly the same diameter , but what do other folks do to create bearing on all rafters if that makes sense? For example if I start off with a 12" diameter rafter and the next one is 11" what should I do? What is the procedure? Just mainly looking for as much of a uniform installation as possible.
Cut the trees in april or early may at the latest for ease of peeling. Using a bark spud will go quick and easy. Set your load bearing ridge beam or pole in place, then take 2 rafters, bolt them together at the top so it will swing like a hinge. Drag it over the ridge and let each side hang down and secure to top of wall. Do this every 4 feet using 8" logs. Then cover those with 2X6 tongue and groove boards (going same way as ridge). Then roof over top. Frame in spaces (think framing wallm, but thsi goes on top of your tongue and groove boards) with venting for insulation (vents under overhand at rafter tails, so this before insulation is installed into wells, then screen over). Will you want liveable space under it? Going to take 2X10 maybe to get R values? Depends on area and requirements
Home Depot had a nice narrow sod cutter tool for $16 that makes the perfect bark spud tool, the ones you buy all have short handles, this one is perfect.
|
|
|
bldginsp
Member
|
# Posted: 28 Nov 2016 01:51pm
Reply
Quoting: toyota_mdt_tech Cut the trees in april or early may at the latest for ease of peeling.
I've heard that while the bark will peel more easily in spring, there is more moisture in the sap wood at this time, so the cut and peeled logs stand a better chance of getting the mildew that causes sap stain. Winter cut wood has less moisture, so supposedly avoids this. Probably varies with species and region.
|
|
toyota_mdt_tech
Member
|
# Posted: 29 Nov 2016 04:47pm - Edited by: toyota_mdt_tech
Reply
Quoting: bldginsp I've heard that while the bark will peel more easily in spring, there is more moisture in the sap wood at this time, so the cut and peeled logs stand a better chance of getting the mildew that causes sap stain. Winter cut wood has less moisture, so supposedly avoids this. Probably varies with species and region.
Yes, but peeling becomes a huge task, the instructor at my log home class said he calls these "grumble" logs as that is what you did most of the time when peeling them. Cutting them in spring, peeling, then stacking off the dirt with air movement works great. There is way to clean them up if they stain a little too. But either way, one needs to work fast, cut only as needed. Don't stock up too far ahead. Its all planning ahead. You are right, once cut, peel bark or bugs appear ASAP.
Ideally, start is spring, peel logs, get a dried in shell by fall rains. 
|
|
bldginsp
Member
|
# Posted: 29 Nov 2016 06:54pm
Reply
I guess that is ideal, but in my case I couldn't possibly do it that fast. It took me years to accumulate the logs. So I guess I did it the hard way- cut the trees in winter when they are down on sap, peeled them by hand with a spokeshave because a spud didn't work, stacked them up and covered them to keep them clean, then assembled them a few years later. Worked for me. No sap stain in the logs, but my fingers are still cold from peeling logs in 8 degree F weather several winters ago...
|
|
shall
Member
|
# Posted: 1 Dec 2016 11:35am
Reply
bldginsp, your ceiling looks incredible. I really like that contrast of the log rafters and planks.
I think that may be my favorite pic of a cabin ceiling.
Is that barn wood or fence pickets?
|
|
|

