|
| Author |
Message |
boston2northwest
Member
|
# Posted: 14 Jul 2014 01:58am
Reply
Hi all,
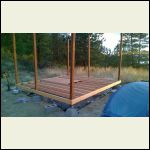
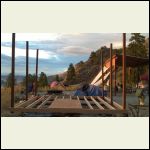
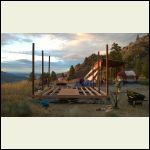
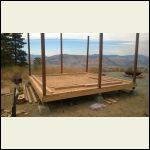
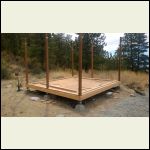
I have just begun my 14 x 14 post and beam style cabin. It is set on deck blocks with strong ties connector. Deck is built, however I noticed 2 posts are well out of level...maybe 4-5 inches. Will framing the walls and t1-11 the exterior suck it all in, or should I cut out the 2 posts and get them more level?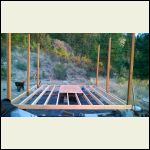
WP_20140705_001.jpg
| 
WP_20140705_002.jpg
| 
WP_20140705_005.jpg
| 
WP_20140705_006.jpg
|
|
|
Shadyacres
Member
|
# Posted: 14 Jul 2014 05:31am
Reply
You may have to shift your base blocks a little to level it up but now is the time to do that. You may well be able to pull it in and put some braces on the posts before you go any farther. Would also like to say it looks like you have a prime spot for your cabin with the views in the 3rd and 4th pictures. Enjoy your build.
|
|
OwenChristensen
Member
|
# Posted: 14 Jul 2014 06:34am
Reply
By all means, plumb them now. You should also run your plywood perpendicular to your floor joists.
|
|
boston2northwest
Member
|
# Posted: 19 Jul 2014 01:29am
Reply
Thanks Shady and Owen. I'm out there this weekend and will do. And you're definitely right....it's a wicked pissa of a spot. They don't make hills like this back east.
|
|
toyota_mdt_tech
Member
|
# Posted: 19 Jul 2014 05:29pm - Edited by: toyota_mdt_tech
Reply
My concern after leveling would be the floor weight, its all being transferred to the post, which is fine, but just through the nails in the corners? Will adding weight as you build shear that loose? I'd add a 2X6 treated chunk of wood under the rim joist right down to the cement block, do this in any area where there is a rim joist and a block under it. Then nail it to the 4X4 post. Then the weight will go through the wood to the foundation, not through the nails. After its all leveled of course. As for leveling, do it now while it can still eb done. How cold does your area get? Will it frost heave and move it up and/or down?
|
|
Don_P
Member
|
# Posted: 19 Jul 2014 10:45pm - Edited by: Don_P
Reply
Leaving the foundation aside. It's a bit deeper than just the connections at the girder rims. There is a 14' span between those posts, the rim is 14' long and the joists are tied into it. There is a girder midspan on the 14' joists so the joist span between mid girder and rim girder is 7'. Since the joists are continuous over the mid girder 3/16 of the 14x14 floor load is bearing on each girder rim and 5/8 of the total floor load is bearing on the midline girder.
At 14x14x50 pounds per square foot, total floor load = 9800 lbs
3/16 of that = 1838 lbs bearing uniformly on a single rim spanning 14'
This is assuming all other loads from above are not bearing on the rim.
A double 2x10 is the smallest end girder that would pass.
The midline girder is supporting 5/8 of the 9800lb design load, or 6125 lbs, there appears to be a mid support under that 6x6(?) girder so half of 6125=3062lbs on each 7' span. It's closer to passing but it really should be broken into 3 shorter spans, adding another pier if that is a 6x6.
From the photos I'm guessing the posts are not out of level but out of plumb. Plumb and brace them with diagonal braces.. A ring of bracing around the tops holding the free ends on dimension would also be a good idea.
|
|
bldginsp
Member
|
# Posted: 20 Jul 2014 11:05am
Reply
Just to clarify-
Posts are vertical and need to be plumb
Beams, girders and joists are horizontal and need to be level.
Toyota and Don are correct- all of your floor weight goes onto the nails holding the rim joist to the post. All the joists attached to that rim joist bear on the rim joist which is supported only by the nails in the posts. Not good. Along with the blocks Toyota suggests i'd thru bolt the joists to the posts.
And yes, now is the time to get it level and plumb, or you'll pay for not doing it every step along the line. Experienced builders really sweat square, plumb and level at framing for this reason.
Nice spot.
|
|
boston2northwest
Member
|
# Posted: 26 Jul 2014 12:38am
Reply
Thanks for the feedback. I plumbed and leveled all last weekend and slapped 3\4 inch t&g subfloor down. I will be supporting the decking better with 2x6 rim to block, and also adding a few more deck blocks and beams to the deck. Here are a few more pics of the progress, including a snake at the mouth of my tent upon waking.
WP_20140719_001.jpg
| 
WP_20140720_009.jpg
| 
WP_20140720_010.jpg
| 
WP_20140720_011.jpg
|
|
|
|
OwenChristensen
Member
|
# Posted: 26 Jul 2014 07:25am
Reply
Nice job and scary snake. Keep us posted.
Owen
|
|
boston2northwest
Member
|
# Posted: 3 Aug 2014 11:05pm
Reply
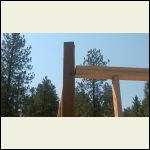
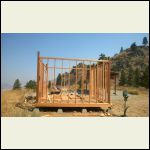
Weekend warrior to the max. Added 4 more posts, bolted em in, and the decking is solid as a rock. Framed the walls. One question I do have is I've just noticed after framing the walls that one post is very warped and twisted. How would this be corrected. Bolts?...T1-11 suck it in? Replace? Anyway, here are some pics....check out the view of Columbia river.
WP_20140802_013_1..jpg
| 
WP_20140803_006.jpg
| 
WP_20140803_010.jpg
|  |
|
|
bldginsp
Member
|
# Posted: 3 Aug 2014 11:29pm - Edited by: bldginsp
Reply
I'd definitely replace the twisted post now while you can.
Will your roof supports sit on top of the posts, or be attached to the sides like the floor? On top would be preferable
NICE location
|
|
boston2northwest
Member
|
# Posted: 3 Aug 2014 11:38pm
Reply
On top. So no other fix than cut out and replace with straight?
|
|
bldginsp
Member
|
# Posted: 4 Aug 2014 08:35am
Reply
No, you can't straighten a twisted board, and as it dries more it will just get worse
|
|
boston2northwest
Member
|
# Posted: 22 Aug 2014 10:25pm
Reply
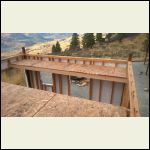
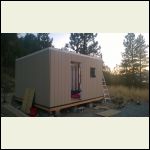
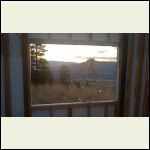
Busted my poor aching arse, and my wifes too. Here's what we accomplished in 4 days out to our beauty spot. House wrap, siding up, and double loft action. It actually is tightening up, starting to feel solid. The roof and finish work awaits on the outside.
I also evicted a Pack Rat which actually was pretty cute, but hopefully bullsnake dung by now.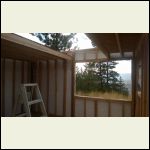
WP_20140821_005.jpg
| 
WP_20140821_001.jpg
| 
WP_20140820_006.jpg
| 
WP_20140820_003.jpg
|
|
|
boston2northwest
Member
|
# Posted: 22 Aug 2014 10:26pm
Reply
yup
|
|
neb
Member
|
# Posted: 22 Aug 2014 11:18pm
Reply
Looks good! What state is your build at?
|
|
boston2northwest
Member
|
# Posted: 22 Aug 2014 11:58pm
Reply
It's in Washington state overlooking the Columbia river and a mountain lake. Unbelievable to see small aircraft flying at lower altitude than my spot.
|
|
neb
Member
|
# Posted: 23 Aug 2014 12:28am
Reply
I really like the view. Thanks
|
|
toyota_mdt_tech
Member
|
# Posted: 23 Aug 2014 01:00am - Edited by: toyota_mdt_tech
Reply
Quoting: boston2northwest So no other fix than cut out and replace with straight?
Fairly easy to do with a sawzall and hacksaw blades, a lifesaver for removing a piece of lumber without disturbing anything else.
Its looking real nice now.
Washington, looks like eastern Wa terrain, I follow the Columbia for a while headed up to my cabin. We are semi neighbors.
|
|
boston2northwest
Member
|
# Posted: 10 Sep 2014 12:07pm
Reply
Hit it hard last weekend. Built the trusses...and slapped em up myself. Unwieldy to say the least...but I got all but 1 up.
I was wondering how to level the roof....will I be able to brace it level...and the sheathing of the roof will hold it level?
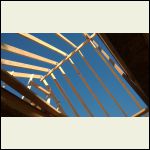
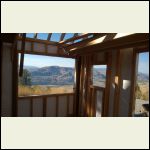
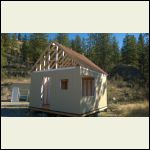
Oh yeah Toyota....we are definitely neighbors...I checked your post,....really cool cabin....I also am in the Ponderosa pines.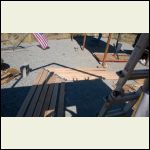
WP_20140906_004.jpg
| 
WP_20140907_006.jpg
| 
WP_20140907_009.jpg
| 
WP_20140907_010.jpg
|
|
|
boston2northwest
Member
|
# Posted: 10 Sep 2014 12:09pm
Reply
I reckon my question Is.... after I rack it level and brace it....will the plywood sheathing keep it level?
|
|
Don_P
Member
|
# Posted: 10 Sep 2014 10:37pm
Reply
Level would be in relation to the wall framing. If the top plate of the wall is straight, flat and level then the roof should be.
For rack bracing;
Sheets of plywood nailed to framing create roof and floor diaphragms and braced or shear walls. When properly nailed they create a semi rigid plate that resists in plane loads very well. The framing needs to be stout enough to take out of plane loads... rafters large enough to support the snow on the roof, joists for the party on the floor, walls studs sized for wind combined with vertical load.
I typically brace the end ridge support, cut and layout the ridge the same as the walls. Temporarily support it at least at the ends of each section of ridge. X brace between supports. Sn asngled brace across the underside of the rafters to hold layout and brace the roof before sheathing. Then detail out the overhangs and begin sheathing. I like to have it well braced as I'm working on it. We sat out in the yard when high winds hit on one job hoping our hastily nailed up bracing would hold.
|
|
boston2northwest
Member
|
# Posted: 15 Sep 2014 04:45pm
Reply
Thanks Don. Slapped the OSB up, and tar paper. It was level in relation to the top plate, and it seems to be very sturdy now. A few more weekends and I'm hoping to get her weathered in.
Also I never roofed a thing before this, and not knowing how physically demanding lugging plywood overhead was....I'm hoping that my helper, AKA, the wife doesn't opt for the divorce court.
|
|
boston2northwest
Member
|
# Posted: 29 Sep 2014 10:16pm
Reply
Getting closer to weather tightening it. Got the asphalt on the roof. Also saw some gorgeous western sunsets.
I was contemplating what to use for siding on the peak. My idea is to get 7/16 OSB, prime, paint, and use 1 x 2 pieces for a board and batten finish. Any thoughts as to whether the OSB would stand up to the elements?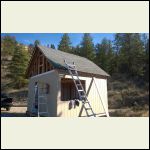
WP_20140928_001.jpg
| 
WP_20140927_004.jpg
| 
WP_20140927_003.jpg
|  |
|
|
Don_P
Member
|
# Posted: 30 Sep 2014 10:08pm
Reply
T1-11 would probably hold up longer and look better.
|
|
bldginsp
Member
|
# Posted: 30 Sep 2014 10:22pm - Edited by: bldginsp
Reply
OSB is really meant to be behind a water barrier. When it gets exposed to moisture the particles in it swell up. They are crushed and compressed in the process of making the stuff, and expand like a sponge when moistened. When they dry out they stay expanded. Maybe the primer and paint would seal it up, maybe not. I'd go with a product designed for exterior exposure, like T1-11 as DonP said. Or, cover the osb with paper and put the least expensive board and bat over it you can find. The paper protects what's under from water, and the board and bat protects the paper from sun.
But if you just want to use a single layer of sheath, paint and put bats on it, I'd use cdx plywood, or acx, which has one good side with no ugly knots.
|
|
boston2northwest
Member
|
# Posted: 1 Oct 2014 09:33pm
Reply
Thanks for the input. I'll definitely not chance it with the osb.
|
|
boston2northwest
Member
|
# Posted: 6 Oct 2014 05:19pm
Reply
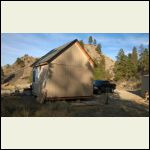
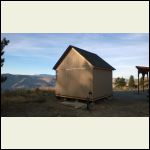
Lot done this past weekend. Finished the siding, partially closed the soffits, and threw in 2 windows and the door. It definitely is beginning to feel habitable now.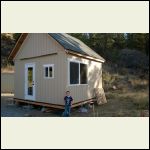
WP_20141005_004.jpg
| 
WP_20141005_009.jpg
| 
WP_20141005_012.jpg
|  |
|
|
bldginsp
Member
|
# Posted: 6 Oct 2014 05:24pm
Reply
Looking good! Looks like #3 is a happy camper.
|
|
|

