rebeccap
Member
|
# Posted: 21 Oct 2013 05:36pm - Edited by: rebeccap
Reply
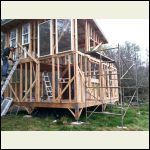
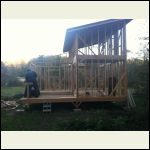
We just spent the weekend doing the let-in bracing on our place... Thought I'd share about the experience.
Background: We're making a 280sf sort of L-shaped tinyhome/cabin of sorts on our farm, basically a 10x18 rectangle with a single slope roof (so one 18' side is 15' high) with a nice tall loft in half of it, plus a 10x10 square off one the open end of the lower side with a separate roof. In the center square - i.e. the main part of the building without the loft - the wall's 15' high on one side with the adjacent wall 15 sloping to 12, - these are south and east sides which we've packed with windows in the upper part of it especially for lots of light. We also have one 8' exterior wall downstairs almost entirely taken up with some beautiful double doors that I got dirt cheap at a salvage place. All this adds up to lots of challenges to shear support AND in addition I'm trying to stick to entirely natural materials where possible, so we are not using any plywood or OSB sheathing.
So on the advice of architect friend we are maxing out let-in bracing (1x4s) everywhere we can possibly put them, plus in one especially vulnerable spot we've put a 4x8 wall with diagonal boards nailed very tight across both sides (in opposite directions).
For the let-ins, I did Ks from the corners everywhere that I could get 4 whole (talking width here) feet worth without running into a window, which is very few places actually, and everywhere else, singles as long as possible.
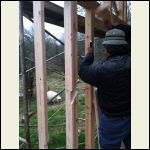
There HAS to be a much easier way to do the let-ins than we totally inexperienced innocents did it. We broke (BROKE!) two electrical tools and one hammer in the process... first tools of any kind I ever remember breaking. In the end an awful lot of time spent with hand chisels. There were some places where in retrospect we sure could have used a circular saw (oops) but an awful lot of it we couldn't have done that way anyway.
We started out doing all the bracing on the outside but quickly moved to the inside because the place starts more than 2 feet off the ground... it was a hard enough job as it was, having to do all of it from ladders would have been a real pain. It'll make insulation installation a little fussier in places but I don't really care.
After all's said and done we're VERY happy with the results. Next step planning some wood tongue-and-groove interior walls, nailed and glued, for additional stiffness... basically going to work our way backwards on the walls (inside out).
What very, very little I know about building I've learned in the last few months so feel free to tell me everything wrong with these ideas, LOL. Just wanted to share because before we got started, I had a really hard time finding any information on whether/how to build without sheet products as part of the structural support if you're using regular stud framing. If I could have, I would definitely have done post and beam instead but I had to limit myself to both what my budget could take and what my brother already had skills in.
IMG_1867.JPG
| 
IMG_1861.jpg
| 
IMG_1860.JPG
|  |
|
MtnDon
Member
|
# Posted: 21 Oct 2013 06:01pm
Reply
Information on comparing let in bracing to osb or plywood. When one has wall with large perforations (the patio doors) or many windows, especially with a couple large ones as pictured on the upper floor, it is a challenge to provide really good bracing / sear wall strength.
Sheet sheathing can be over 13 times as strong as let in 1x4's. Let-in bracing can be improved some by using more and by using wider boards.
Easy way, IMO, to do the let-in cuts is with a router. First hold the 1x in place, then mark and remove the 1x; then use the router.
Also easy to use are the metal straps that Simpson sells, though they only work in tension so must be used in pairs. They are L-shaped and install into a saw kerf.
|

