|
| Author |
Message |
Jeremy165
Member
|
# Posted: 17 Jan 2013 03:49am
Reply
Hi all. I hope you all had a nice new years and aren't frozen out of access to your cabin.
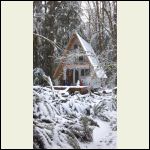
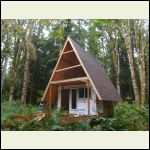
You maybe remember my 12x16 A-frame cabin. I finally got out to visit it for the first time in 9 months. Besides the 10" of snow and the branches across my trail, everything was just as I left it.
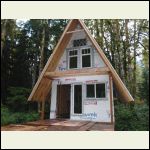
The walls are 8 feet high 2x6, 16" oc. There is a loft with 2x10s joists 16" oc. The roof rafters are 20 ft long 2x6, 16" oc at approximately 21:12 slope. Wall sheathing is ½" plywood with tyvek wrap, roof sheathing is 5/8" plywood. Comp roof with a ridge vent. Vertical walls are insulated with fiberglass. Heating is wood burning stove.
Since my loft is heated space and not an unheated attic, I was planning to insulate the inside of the loft with rigid insulation. I'm not sure the thickness of insulation yet and how I will later install t&g 1x6 for the finished walls on top of the 2", but I'll deal with insulation first. The rafter bays will allow for ventilation of exterior air up from the soffits and out through the ridge vent so that I will have a cold roof.
Question 1 – Is this the best method to insulate the roof for my heated loft?
My plan was to install the rigid insulation to the face of the rafters which will be much easier than cutting the rigid insulation and sticking it in each bay. It will also give a better thermal gap. But for when I later install the t&g, it would be much easier if the insulation was between the rafters and I installed the t&g to the rafter face.
Question 2 – Should I install the rigid insulation to the rafter faces OR cut the insulation and stick in each bay so that its flush with the rafter face, then spray foam the perimeter and then easily t&g on top?
Lastly, the way I created my A-frames trusses was again the long diagonal 2x6s with the 2x10 for the horizontal cross-tie. I bolted the 2x10 to the face of the 2x6s. Now when I look at where they meet, I have no idea how to insulate and bird block the area. I guess I could tack a 2x2 to the 2x6 at the same angle as the 2x6 and then block up against that.
Question 3 – What to do for bird-blocking so that my rafter bays will vent and so cold air will stay out of the main cabin space and the loft.
Thanks,
Jeremy
Last winter
| 
P9173824.JPG
| 
PA073909.JPG
|  Attached file: my sketch Attached file: my sketch
|
|
|
bldginsp
|
# Posted: 17 Jan 2013 04:37pm
Reply
Hi Jeremy
Read the thread
Need a straight answer (metal roof in southern Indiana)
in this forum category. There is a whole bunch in there on how/why to ventilate where you insulate.
|
|
bldginsp
|
# Posted: 17 Jan 2013 09:54pm
Reply
Hi Jeremy-
Sounds like you are on the right track. I'd put the insulation inside the studs, it's not that hard (table saw helps). But the most important thing is to provide at least a one inch air space above the insulation to cold roof, AND cross ventilation in that space. Ridge vent and eave vent at the bottom, so air can move through the space.
Can't visualize your bird block issue, can't answer
|
|
Jeremy165
Member
|
# Posted: 18 Jan 2013 02:22am
Reply
hmmm. For cross ventilation do you mean venting across all the rafter bays? Should I drill holes in my rafters? I won't be having gable vents since the attic is heated space.
|
|
ShabinNo5
Member
|
# Posted: 18 Jan 2013 05:43am
Reply
Jeremy,
We used the same approach that bldginsp has suggested. Hopefully the drawing attaches properly.
We attached 1x2 lumber to the rafters with finish nails, keeping them tight to the plywood of the roof. Then I cut the foam board to fit between the rafters and tight to the 1x2 lumber. This creates an air space under the plywood that will run the full lengh of the rafter bay. I used 2" foam board cutting with a handsaw (easier to cut 4 foot sections). We then filled the space under the foam board with fiberglass bat insulation and attached poly for a vabor barrier before installing the T&G ceiling.
For the birds mouth area you will need to notch the foam around the joists and run it at least even with the outside of you wall plate. If you intend to cover your rafter tails the foam can extend beyond the wall plate. If the space between the bottom of the foam board and the top of the wall plate is close enough, you can fill the gap with spray foam.
Finally for all of this to work you need to install a full length ridge vent at the peak of your roof and also vent each rafter bay from the soffit. This will allow air flow in the air space created above the foam board.
Steve
|
|
bldginsp
|
# Posted: 18 Jan 2013 11:50am
Reply
Air must be able to get in at the bottom, flow through each bay, and exit at the top. The minimum size of any air hole should be 1/150th of the square footage of the space it ventilates.
The only way to get accumulated condensed moisture out is to have air passing through. When the roof heats from sun, the warm air in the stud bays goes up and needs a way to get out. There must be holes in the bottom so it has a way to get in. If it doesn't have both, it wont move, the moisture stays, mold starts.
|
|
Jeremy165
Member
|
# Posted: 18 Jan 2013 01:19pm
Reply
Thanks guys.
Steve, you were able to pack a lot in insulation in there. Do you feel the 2" channel is enough? I was thinking I could sacrifice some of the fiberglass and increase the channel size to 4", but with a 2x6 rafter that isn't an option.
The 1/150th rule seems decent. The whole cabin is 200 sq ft and all together the screened holes will be several sq ft of venting.
|
|
bldginsp
|
# Posted: 18 Jan 2013 02:04pm
Reply
1" channel is enough so long as air can cross ventilate. When stuffing fiberglass into a bay, even if the loft of the fiberglass is less than the bay, it's easy to stuff the stuff up into the air space, impeding air movement. So they make these plastic pan things that go up there to hold the fiberglass back. But Shabin's design provides a positive dimension for the air space so air movement is not impeded at all.
|
|
|
Jeremy165
Member
|
# Posted: 18 Jan 2013 02:11pm
Reply
Also would it be better to use something besides wood as a spacer or is it fine since there will be ventilation?
|
|
bldginsp
|
# Posted: 18 Jan 2013 10:01pm
Reply
Yes, it's fine because ventilated. No moisture, no mold, no worries.
I have seen several situations with no ventilation where the fiberglass batts got wet and moldy and let me tell you, it is one ugly mess. VERY unhealthy too, so they tell me. Yuck.
|
|
ShabinNo5
Member
|
# Posted: 19 Jan 2013 07:27am
Reply
Jeremy,
Our design resulted in an actual 1.5 inch air space (recall that 1x2 lumber is actually .75x1.5 actual dimension). The choice of the 1x2 had more to do with using std dimensional lumber than minimizing the required space. Our rafters are 2X8. 1.5" airspace, 2" rigid foam, 3.5" fiberglass, combined these dimensions fill the actual 7.25" depth of a 2x8.
As bldginsp mentioned the key is having the un-obstucted air space with venting allowing air flow from the soffits up through the peak of the roof.
Other variations of this approach would be:
* rip 1x4 lumber into 1" stips
* use 1/4" plywood instead of the 2" rigid foam
* fill remaining 3" of exposed 2x6 rafter with 3.5" fiberglass
Or you could fit in two layers of rigid form 2" then 1"
Or you could fill the remaining space with spray foam
* install the plastic pans that bldginsp suggested then use 5 1/2 bat insulation to fill the remaining void. There will be slight compression of the fiberglass, but I would think that this would maximize the "R" value without using rigid foam. (just make sure that the compression does not collapse the plastic pans blocking the air channel).
In all methods you could also install 4x8 sheets of 3/4" rigid form for more installation and a bit of a thermo break.
|
|
bldginsp
|
# Posted: 19 Jan 2013 09:33am
Reply
All fiberglass insulation is designed to work correctly at a certain loft, or thickness. When you pull it out of the compressed package it expands. R-13 is made for 2x4 walls at 3.5 inches, R-19 for 2x6 at 5.5 inches, R-30 has a loft of 8-1/2 inches so will work in a 2x10 rafter with a 1 inch air space, if you don't cram it up in there. It's important not to compress the insulation to a lesser thickness. Shabin's design works fine with the R-13. I've never seen fiberglass used in conjunction with rigid foam but I don't see why not. You get more R value per inch thickness with foam, but it costs more per square foot.
|
|
MtnDon
Member
|
# Posted: 19 Jan 2013 10:55am
Reply
Quoting: bldginsp R-19 for 2x6 at 5.5 inches,
Be careful on that one. Check the specs. You will find lots of R19 that states its full thickness is 6 1/4, even 6 1/2. That becomes R18 in a 2x6 wall
see Lowes
se HD
But if you look you can find R21 and R23 that fit in a 5 1/2 inch space. No, not a misprint. Check it out further on Johns Manville, Owens Corning and Roxul websites.
|
|
bldginsp
|
# Posted: 19 Jan 2013 04:17pm
Reply
The R21 or 22 or 23 for 2x6 walls is a denser fiberglass that gives the greater value. Costs more, but it's what I plan to use.
|
|
ShabinNo5
Member
|
# Posted: 20 Jan 2013 09:05am
Reply
bldginsp and MtnDon both make excellent points. Anytime you compress bat insulation you wil lose R-Value. I should have pointed that out.
In my case I am a firm believer in having air flow above the insulation. My first home was built in 1930 and had 2x4 rafters. It was a story an a half design where four feet of the rafter section served as the interior wall. This section was insulated with 3.5 inch bat fiberglass. Every winter I had the most amazing ice column cascading off of the roof. I gutted the upper level and applied 1x2 per my illustation above and then filled the remainer with 2"foam board. I then sheathed the interior with another 3/4 foam board before installing the sheetrock. In the end the R-Value was the same. However I never had another ice dam or even icycles.
Note: I did add vents to the soffits and insured that the attic cavity was fully vented.
|
|
|

