|
| Author |
Message |
bhebby
Member
|
# Posted: 8 Aug 2012 07:23pm
Reply
ok I had no idea how difficult stove installation would be or maybe I am just being overly concerned about it.
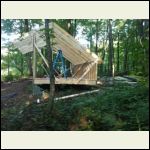
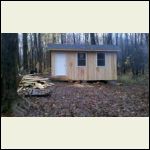
The cabin style is different and I am putting the stove along the back or the short wall in the corner. my front roof is at a 6/12 and the back is at a 8/12 maybe 9/12. The part that I can seem to grasp is the chimney upon exit has to be 2' higher than any portion of the building within 10'. I know this is going to cost me an arm in a leg but I just didnt enjoy the propane heat last season. Any help would be helpful. I have a union carpenter helping me with everything so I confident it will be done correctly but I just want to make sure its safe and there is no chance of a down draft.thanks in advance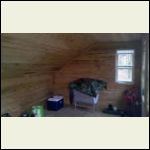
cabin_stove1.jpg
| 
cabin_stove_2.jpg
| 
cabin_stove_3.jpg
|  |
|
|
JoshG
Member
|
# Posted: 8 Aug 2012 07:49pm
Reply
Not sure where you are located, but if you have a Menards close by, they carry double wall stove pipe, and have very detailed installation instructions for various types of applications. I have installed four different stoves, each one a different type of application, and found their instructions very helpful. Not so much instruction, but information regarding all the different peices needed and where they go.
|
|
larry
Member
|
# Posted: 8 Aug 2012 10:29pm
Reply
i'm not sure what you're asking. but no matter what you do you should not go with less flue length than manufacturer spec. also check out www.woodheat.org . lots o' good info in there. i belive they even talk about roof pitch and flue lenght.
|
|
trollbridge
Member
|
# Posted: 8 Aug 2012 10:47pm
Reply
Good luck with your installation----you will be glad when it is done 
Like JoshG says Menards was very helpful for us too. We bought our piping and parts there. For outside pipe you will want to go with the stainless steel and follow guidelines closely. It was an expense for sure but you will be so pleased with the wood heat-especially since you have already experienced the propane heat. You could save $$ by going through the wall if you have the room. Just something you could consider and run past your installer.
How is your cabin doing? Were you able to finally dry out the interior wood? Any lasting effects from the high humidity? Hope not!
|
|
bldginspector
|
# Posted: 17 Aug 2012 10:48pm
Reply
Look up Simpson Dura Vent products on Google, and look over the brochures they have on woodstove installation. They have some excellent diagrams that show you all the parts required.
There are two main components- the chimney and the stovepipe. The chimney is the expensive double or triple wall pipe that goes through any ceiling, floor, and or roof. The stovepipe is the connector pipe that connects the stove to the chimney in the same room. Stovepipe should never pass through a wall or ceiling.
Chimney is specially insulated so it has 2" clearance to combustibles. Always make sure no wood or insulation or anything burnable is within 2". Single wall stove pipe has 18" clearance to combustibles, so you must space your stove from the wall accordingly. Double wall stove pipe has 6 inch clearance, but costs a lot more.
The stove itself will also have clearance to combustibles, which can be reduced by placing certain materials on the wall like a brick surround. Also be aware of hearth requirements so you don't roast the floor beneath the stove while you are snoozing.
good luck
|
|
OwenChristensen
Member
|
# Posted: 18 Aug 2012 01:48pm - Edited by: OwenChristensen
Reply
I wouldn't go out a wall and then up. If most of your chimney is outside it will get cold easy. A cold chimney will cause a downdraft that when you try a light a fire it will cause quite a problem. Also a cold chimney creosotes up bad too.
I use the Selkirk system from Menards for all my saunas and cabins. If possible I do not have a joint in an attic. That would be their weakest point. Do not go with an 8'' chimney if a 6'' is called for. The extra space again will cause a possible downdraft. I use the cathedral box support and trim the roof angle on the top. Fit it to a 12 1/8'' x 12 1/8'' frame then drill holes for mounting screws. In many cases you don't need the recomended outside chimney hieght, but if you want more draft, all you need to do is add another section of pipe on top. Don't waste your money on any sections less than 4', they're cheaper per foot.
Owen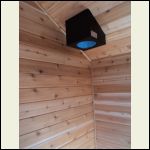
support box
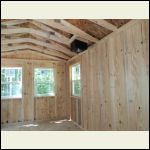
| 
fit to roof not cieling
| 
outside
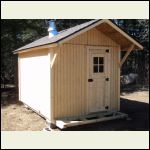
|  |
|
|
turkeyhunter
Member
|
# Posted: 18 Aug 2012 07:36pm
Reply
i just bought a Metalbestos stove pipe kit a yard sale for $50......i like it because it is stainless...hope to get it installed before the fall.
|
|
OwenChristensen
Member
|
# Posted: 18 Aug 2012 09:04pm
Reply
That's a $250 find.
Owen
|
|
|
larry
Member
|
# Posted: 18 Aug 2012 10:15pm
Reply
great find
|
|
|

