|
| Author |
Message |
warrenp
Member
|
# Posted: 12 Jul 2024 01:45am
Reply
Hi folks,
I've managed to purchase at a low price 20foot and 16 foot lengths of planks. Both Douglas fir, and radiata pine.
These are:
10 x 20 foot lengths of 10x2 inch radiata
9 x 20 foot lengths of 12x2 inch radiata
14 x 16 foot lengths of 12x2 Doug fir.
To turn these into a rectangular cabin approx 13 x 7 foot with a front deck and sloping roof, my idea is:
Chop most the 20 foot lengths into 13 foot (floor boards, deck boards, rear wall) and 7 foot lengths for side walls (arranged vertically). 8 of the 16 foot lengths (fir) in half for 8 foot roof "beams" for a flat sloping roof with a small overhang. Corrugated iron on top of the beams for the roof.
So in general long walls will have planks arranged horizontally and shorter side walls planks arranged vertically, with door and window on the front long wall. The internal frame will be minimal 5x2 inch (halved planks) and just along corners, floor, and roof edges since the walls themselves will be such strong planks that the frame isn't going to be particularly load-bearing, rather just to make the shape for planks to be positioned and nailed onto.
Planks would be skew-nailed together. Exterior joins between planks silicone sealed and painted over.
6 x 5x5 inch piles for the cabin and another three for the deck. Three double 5x2 inch (so 5x4inch) bearers and the 13 foot planks functioning both as floorboards/deck boards and also as joists. I.e skipping joists altogether.
Does anyone have any thoughts? A solid enough cabin?
Is these much difference between Douglas fir and radiata (Monterey) pine in terms of where to best use each timber?
Look forward to any opinions of my idea.
|
|
ICC
Member
|
# Posted: 12 Jul 2024 03:35am
Reply
Quoting: warrenp Does anyone have any thoughts?
Why?
Why such an unconventional unproven method?
Quoting: warrenp silicone sealed and painted over.
Paint and other finishes do not adhere to silicone sealants or caulk. Have you priced it lately?
I have trouble conceiving of a good reason to not use conventional framing for a cabin, but then I may be blinded by my construction background.
|
|
ICC
Member
|
# Posted: 12 Jul 2024 03:38am - Edited by: ICC
Reply
Ah! Your location, NZ, explains why radiata pine.... In the US and Canada it is uncommon as a general construction wood.
|
|
warrenp
Member
|
# Posted: 12 Jul 2024 09:05pm
Reply
Thanks for your thoughts.
The "why" is due to availability of the planks at a price I can afford. I do not have availability of wood for a more conventional framed and built cabin. Untested it may be, but structurally I (myself) see no reason it would be less robust and rigid than ply or gib over a 4x2 inch stud and dwang frame. The timber is thicker and stronger than ply and would essentially be a solid 2 inch thick frame (with some framing in addition). I have a small metal shed that has a 2x2 inch wooden frame and thin metal cladding and it handles the wind here fine.
But perhaps I'm missing something which is why I'm asking. Could the weight of it be an issue? Solid 2 inch walls makes a lot of weight for a small cabin. Might I need more than 6 5x5 inch piles along the walls to hold the weight up? Something else I'm not thinking of? Is my lack of joists likely to be a problem causing floorboard sag?
I have recently built another (conventional) small build that used a paintable modified silicone sealant (joining both wood and Magnum board). So far the paint (and sealant to wood) is adhering well after about a year.
|
|
ICC
Member
|
# Posted: 12 Jul 2024 10:13pm
Reply
Quoting: warrenp Is my lack of joists likely to be a problem causing floorboard sag?
If you have the lumber at hand, perhaps do a mockup test. Place spme timbers or something on the ground and lay planks across them to emulate the floor. Then walk on it. You wouldn't need to cut the planks, just space the support timbers/blocks or whatever appropriately. Planks laid flat will have some sag when weight is applied. This would show if there is any noticable rolling wave as one walks as well as showing how much sag produced vertical variation would occur with point loads here and there.
|
|
ICC
Member
|
# Posted: 12 Jul 2024 10:14pm
Reply
Off hand I am not sure about the wall weight and foundation requirements.
|
|
warrenp
Member
|
# Posted: 12 Jul 2024 11:40pm
Reply
Thanks. I tested a plank as you recommended, with a 6.5 foot gap between supports there is no noticeable sag with my 100kg. Also the Saghulator suggests a 0.14 cm total sag over a span that distance with 45mm thick 290cm wide planks. I'm okay with that issue. https://woodbin.com/calcs/sagulator/
Now I've just read this website about log cabin and wood expansion/contraction issues. https://timmersol.co.uk/avoiding-log-cabin-problems/
While not exactly a log cabin, I think I can imagine that my biggest problem will be this width-wise expansion and contraction of the planks, due to relative humidity changes. This makes me think I would be better to arrange all the planks horizontally on all four walls, so any expansion is up and down, rather than have the walls fight against each other.
|
|
razmichael
Member
|
# Posted: 13 Jul 2024 12:13am
Reply
Stony’s method: You might want to go through this thread https://www.small-cabin.com/forum/2_599_0.html as it may be applicable especially if you have a lot of planks available. I’ve always thought it was an interesting approach but can’t personally provide any details never having tried it.
|
|
|
paulz
Member
|
# Posted: 13 Jul 2024 02:41am - Edited by: paulz
Reply
 Good call Good call
|
|
gcrank1
Member
|
# Posted: 13 Jul 2024 02:44am
Reply
A fellow hereabouts built a shed rather nicely with what looks to be 2xsomething cutoff ends of lumber layed flat upon each other and likely spiked. Ive speculated that he may have been involved in carpentry so he could salvage the cut-offs from the dumpster.
I think that some kind of material must be sandwiched between the layers.
It has been in place now for at least a decade and seems to be holding up well.
|
|
warrenp
Member
|
# Posted: 13 Jul 2024 05:10am
Reply
Stony's method looks great. But I lack wood to layer up my walls 6 inches thick. Plus this is such a small cabin to heat with a tiny woodburner I don't feel the need for thick walls.
I'm considering doing it similarly to how this small cabin is made from planks: https://youtu.be/wfBJaE1IWH4
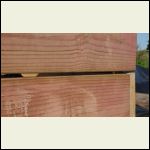
But as per my pic I'm wondering if instead of notching the ends of the planks and interlocking them just staggering them with a tiny half inch overlap and Coach Screw bolting the face end of one plank squarely into the end of the other. This saves a lot of fancy wood work (and wood) and would it not also hold planks together equally for 100 years? Would less overlap at the edges also possibly allow the sun to keep the area drier (less shadows) and so last longer?
So far as I can imagine such a design will allow the entire wall to gradually rise with moisture expansion, and drop with contraction. The trick would be to mount the door and window in such a way that this won't create gaps and drafts.
|
|
gcrank1
Member
|
# Posted: 13 Jul 2024 12:33pm
Reply
Ime, expansion/contraction and checking will sooner or later result in gaps for air and insects on a single thickness structure. And those boards aren't going to all be straight. Ive built several decks with 5/4" deck boards on 16" centers (think a 'wall' laying flat) and quite a few of those boards needed to be forced into position; and some returned as unsuitable.
Im sure there is a product to put between, no idea of cost.
Maybe do more of a 'board and batten' wall style?
|
|
Aklogcabin
Member
|
# Posted: 13 Jul 2024 03:38pm
Reply
Great to hear about another cabineer. You may want to consider using wood biscuits or dowels between the planks to help keep them lined up. Possibly consider rotating the annular ring growth to help counteract warping issues.
Id say give it a try. I have bought caulk that is paint able. Use galvanized nails so that they don't rust. Good luck n have fun
|
|
warrenp
Member
|
# Posted: 14 Jul 2024 12:20am
Reply
Thanks. I was thinking of putting a vertical dowel (about 1/2" x 6") near each end between the planks so that each "level" of planks cannot slide round on top of the one beneath it. So drilling vertical holes into the positioned lower level plank, inserting the dowels, chalking the end of each then lining the next plank on top, drill hole where the chalk marked the next plank then tap planks together after applying a layer of something like a paintable caulk (Permachink?) as you say between the planks to hopefully create a lasting seal.
https://www.permachink.com/resources/how-to-choose-the-right-log-home-sealant
I've seen a bit of mention of PermaChink on here. Is this generally considered the benchmark product for small gaps?
My planks are currently rain wet (which means no-doubt VERY wet) and I was wanting to build this winter (it will be wet for some weeks/months yet). If I build it now, then by February if we have a dry summer I imagine there will be gaps everywhere. So I wonder if I ought to build it without the PermaChink, then squeeze the permachink into the gaps when they show themselves, or would I be best to put a layer in between the planks now while they are still in their expanded wet state?
Pic of planks attached.
|
|
warrenp
Member
|
# Posted: 27 Oct 2024 07:22pm - Edited by: warrenp
Reply
Progress Update.
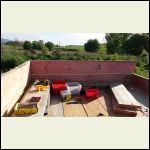
So far most is going as above planned. One alteration was that after placing the 12x2 floor planks on the three bearers we noticed more bounce than we were hoping for, so I placed 4x4 recycled NZ native timber beams between each row of piles (6 in total) and then a 6x2 plank over the top, which floorboard planks are also screwed into. The floor feels about as solid as you'd expect for a small cabin now. Very nice to walk on.
In terms of the dowels I discovered that a dowel locator is a great way to position the dowels between planks. There are 5 between levels on each short wall, and 8 on each 12 foot long wall.
I'm alternating the natural twist of the wood on each level and the long walls are surprisingly straight and solid at this stage.
The flat rear sloping iron roof will have two horizontal steel strip braces over the 4x2 purlins, and along with the beams (4 x recycled 4x4 NZ native timber lengths) I have a good hunch this will make the entire cabin strong and very wind-proof, without any need of further bracing over or between the plank "logs".
I'm painting as I go up because I want the wood to stay dry when it rains, since it's now nice and dry.
I'm driving 4 x 10 inch screws 45 degrees diagonally from each new plank layer into the layer beneath from the ends. I hope this will provide enough anchoring between levels. Also, the door/window (was $100 on used market) is providing some anchoring between horizontal levels.
If anyone has any questions, please ask. A very enjoyable project. Has already bought the kids a lot of joy.
Total budget with roofing iron, strip braces, screws, Dap filler, and some additional wood, 9 x 20kg bags of cement, is now fast approaching $1,200 US.
Two tubes of 10 ounce Dap alex fast dry per level in 2mm gap between planks. Tap in place leaving gap, sqeeze from outside a long worm in the gap, then tap down to about 2mm gap and wipe with tissue paper. Smear all excess caulk over plank ends and fill all holes. https://www.dap.com/products-projects/product-categories/caulks-sealants/latex/alex-f ast-dry/
|
|
warrenp
Member
|
# Posted: 27 Oct 2024 07:30pm
Reply
Here are some pics:
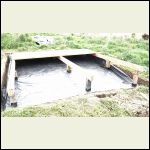
first thee piles
| 
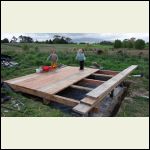
foundation pre middle supports
| 
mid supports and floorboards down
| 
dowels visible between plank "logs"
|
|
|
warrenp
Member
|
# Posted: 27 Oct 2024 07:37pm
Reply
And some more pics.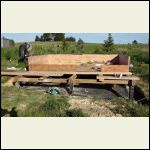
walls going up
| 
closeup of join before closure
| 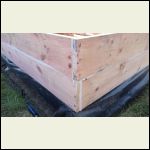
corner detail
| 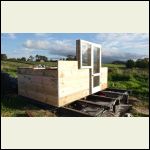
about half of wall completed
|
|
|
warrenp
Member
|
# Posted: 27 Oct 2024 07:39pm
Reply
Last pics.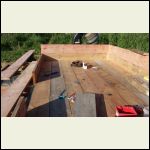
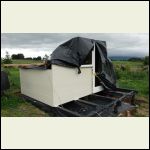
Floorboards with gaps to fill eventually
| 
Painted and rain ready
|  |  |
|
|
gcrank1
Member
|
# Posted: 27 Oct 2024 09:26pm
Reply
What a great use of some nice materials 
|
|
warrenp
Member
|
# Posted: 13 Nov 2024 05:14am
Reply
Roof nearly up..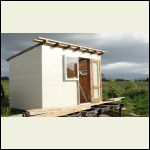
pre purlins and roofing iron
| 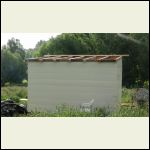
3 x 100x100mm redwood and 4x100x80mm NZ native beams
|  |  |
|
|
toyota_mdt_tech
Member
|
# Posted: 15 Nov 2024 01:20pm
Reply
A metric cabin.  
|
|
warrenp
Member
|
# Posted: 29 Dec 2024 04:20pm - Edited by: warrenp
Reply
Yes, mostly metric, though the acrylic latex caulk came in 10.1 OZ tubes..
Just steps and roof barge and peak trim to go now.
In the interior pic you can see I've left the gaps between planks on the internal side while the gaps are acrylic latex caulk sealed and painted over on the exterior side. I did this so that if ANY wet gets through from the exterior (none yet after heavy rain) then I will see it instantly and be able to re-seal the exterior where the water is getting in.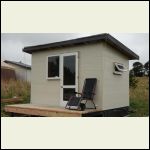
Roof trim and stairs to go
| 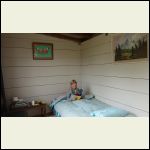
Interior note gaps between planks NOT joined on internal side so any damp clearly visible
|  |  |
|
|
gcrank1
Member
|
# Posted: 29 Dec 2024 07:18pm
Reply
You've come a long way
|
|
|

